Page 97 of 140
8-18
8
EBU23386Final gear oil The final gear case must be checked for oil leak-
age before each ride. If any leakage is found, have
a Yamaha dealer check and repair the ATV. In ad-
dition, the final gear oil level must be checked and
the oil changed as follows at the intervals specified
in the periodic maintenance and lubrication chart.
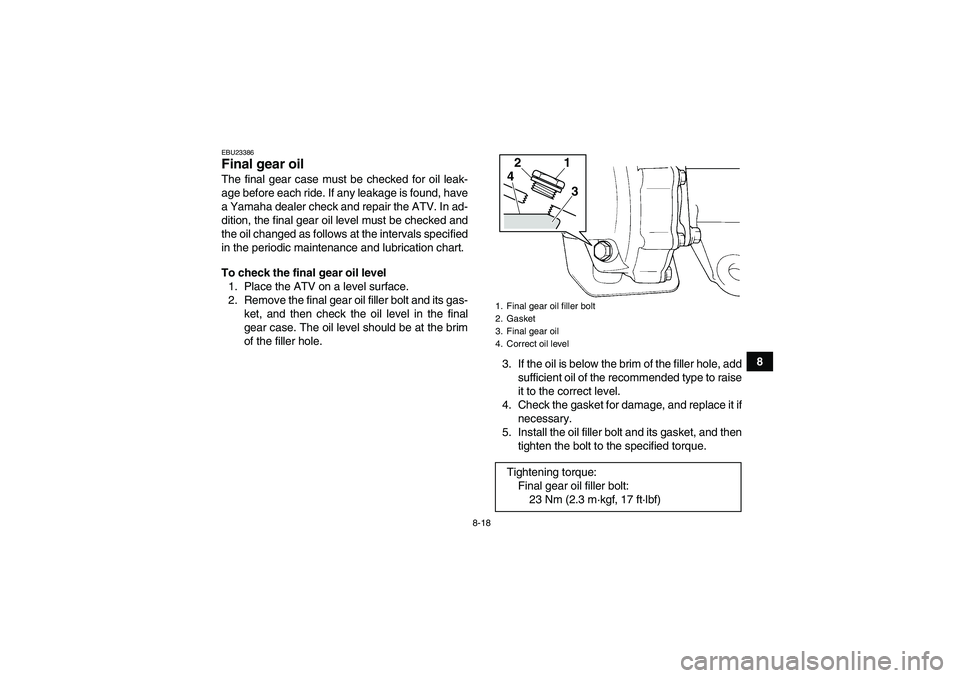
To check the final gear oil level
1. Place the ATV on a level surface.
2. Remove the final gear oil filler bolt and its gas-
ket, and then check the oil level in the final
gear case. The oil level should be at the brim
of the filler hole.
3. If the oil is below the brim of the filler hole, add
sufficient oil of the recommended type to raise
it to the correct level.
4. Check the gasket for damage, and replace it if
necessary.
5. Install the oil filler bolt and its gasket, and then
tighten the bolt to the specified torque.
1. Final gear oil filler bolt
2. Gasket
3. Final gear oil
4. Correct oil levelTightening torque:
Final gear oil filler bolt:
23 Nm (2.3 m·kgf, 17 ft·lbf)
1
2
4
3
U1P066E0.book Page 18 Thursday, August 5, 2010 4:15 PM
Page 99 of 140
8-20
8
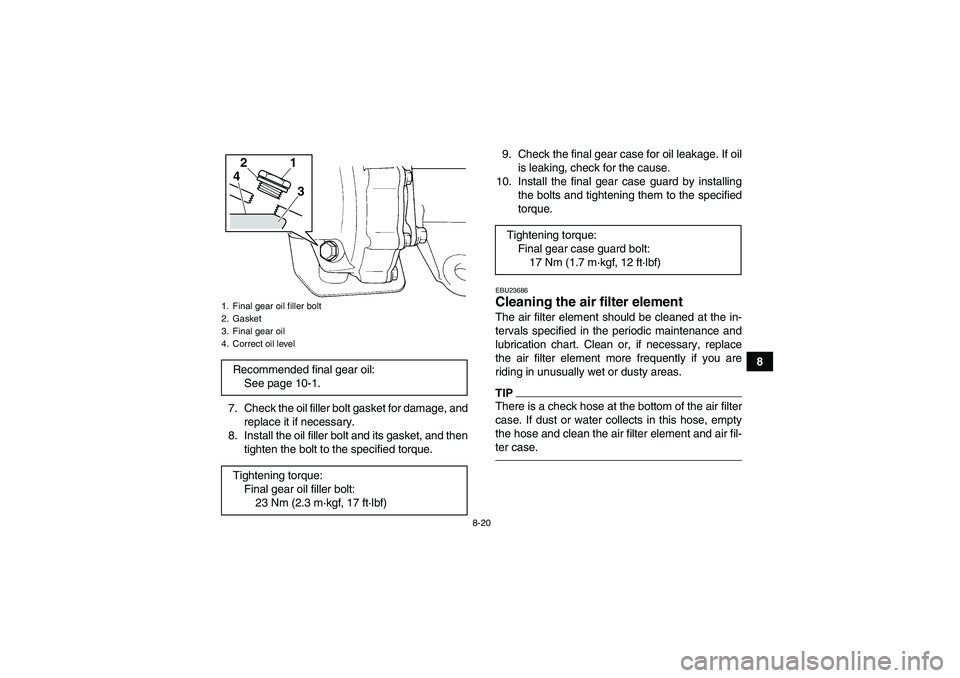
7. Check the oil filler bolt gasket for damage, and
replace it if necessary.
8. Install the oil filler bolt and its gasket, and then
tighten the bolt to the specified torque.9. Check the final gear case for oil leakage. If oil
is leaking, check for the cause.
10. Install the final gear case guard by installing
the bolts and tightening them to the specified
torque.
EBU23686Cleaning the air filter element The air filter element should be cleaned at the in-
tervals specified in the periodic maintenance and
lubrication chart. Clean or, if necessary, replace
the air filter element more frequently if you are
riding in unusually wet or dusty areas.TIPThere is a check hose at the bottom of the air filter
case. If dust or water collects in this hose, empty
the hose and clean the air filter element and air fil-
ter case.
1. Final gear oil filler bolt
2. Gasket
3. Final gear oil
4. Correct oil levelRecommended final gear oil:
See page 10-1.
Tightening torque:
Final gear oil filler bolt:
23 Nm (2.3 m·kgf, 17 ft·lbf)
1
2
4
3
Tightening torque:
Final gear case guard bolt:
17 Nm (1.7 m·kgf, 12 ft·lbf)
U1P066E0.book Page 20 Thursday, August 5, 2010 4:15 PM
Page 103 of 140
8-24
8 12. Install the seat.
TIPThe air filter element should be cleaned every 20–
40 hours. It should be cleaned more often if the
ATV is operated in extremely dusty areas. Each
time the air filter element maintenance is per-
formed, check the air inlet of the air filter case for
obstructions. Check the air filter case rubber joint
to the carburetor fittings and the rubber joint mani-
fold fittings for an air-tight seal. Tighten all fittings
securely to avoid the possibility of unfiltered air en-
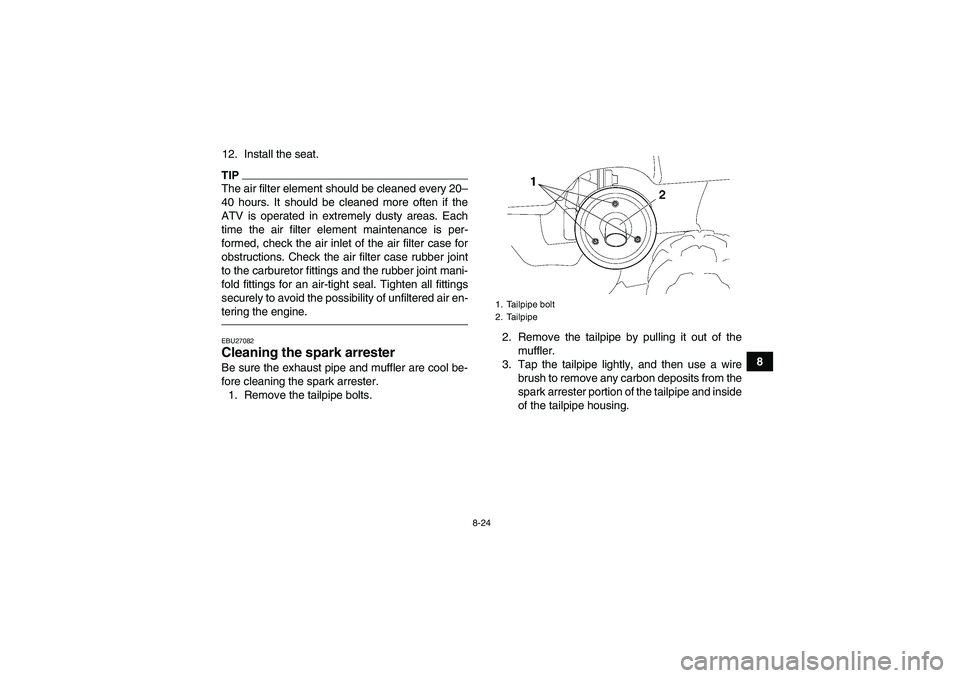
tering the engine.EBU27082Cleaning the spark arrester Be sure the exhaust pipe and muffler are cool be-
fore cleaning the spark arrester.
1. Remove the tailpipe bolts.2. Remove the tailpipe by pulling it out of the
muffler.
3. Tap the tailpipe lightly, and then use a wire
brush to remove any carbon deposits from the
spark arrester portion of the tailpipe and inside
of the tailpipe housing.
1. Tailpipe bolt
2. Tailpipe
U1P066E0.book Page 24 Thursday, August 5, 2010 4:15 PM
Page 104 of 140
8-25
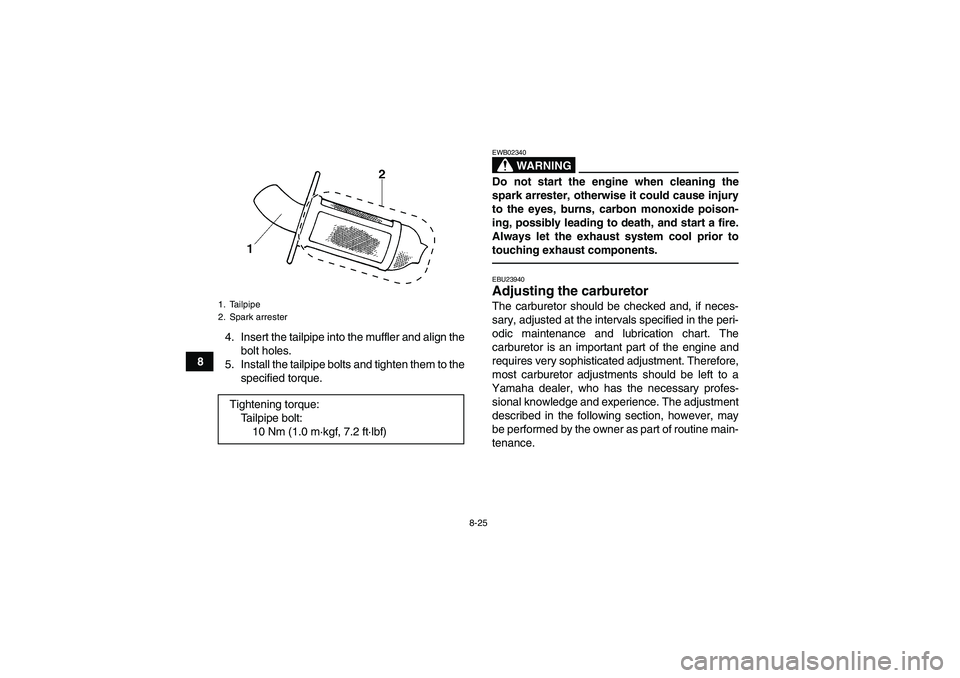
84. Insert the tailpipe into the muffler and align the
bolt holes.
5. Install the tailpipe bolts and tighten them to the
specified torque.
WARNING
EWB02340Do not start the engine when cleaning the
spark arrester, otherwise it could cause injury
to the eyes, burns, carbon monoxide poison-
ing, possibly leading to death, and start a fire.
Always let the exhaust system cool prior to
touching exhaust components.EBU23940Adjusting the carburetor The carburetor should be checked and, if neces-
sary, adjusted at the intervals specified in the peri-
odic maintenance and lubrication chart. The
carburetor is an important part of the engine and
requires very sophisticated adjustment. Therefore,
most carburetor adjustments should be left to a
Yamaha dealer, who has the necessary profes-
sional knowledge and experience. The adjustment
described in the following section, however, may
be performed by the owner as part of routine main-
tenance.
1. Tailpipe
2. Spark arresterTightening torque:
Tailpipe bolt:
10 Nm (1.0 m·kgf, 7.2 ft·lbf)
U1P066E0.book Page 25 Thursday, August 5, 2010 4:15 PM
Page 105 of 140
8-26
8
NOTICEECB00480The carburetor has been set and extensively
tested at the Yamaha factory. Changing these
settings without sufficient technical knowl-
edge may result in poor performance of or
damage to the engine.EBU24000Adjusting the engine idling speed The engine idling speed must be checked and, if
necessary, adjusted as follows at the intervals
specified in the periodic maintenance and lubrica-
tion chart.TIPA diagnostic tachometer is needed to make this
adjustment.1. Start the engine and warm it up.TIPThe engine is warm when it quickly responds to the
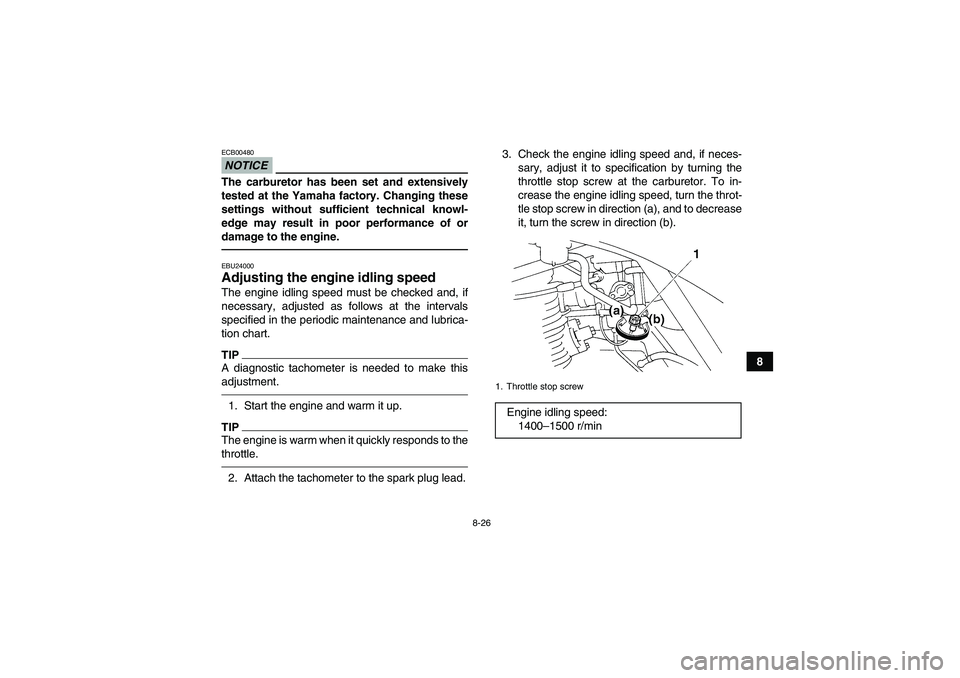
throttle.2. Attach the tachometer to the spark plug lead.3. Check the engine idling speed and, if neces-
sary, adjust it to specification by turning the
throttle stop screw at the carburetor. To in-
crease the engine idling speed, turn the throt-
tle stop screw in direction (a), and to decrease
it, turn the screw in direction (b).
1. Throttle stop screwEngine idling speed:
1400–1500 r/min
U1P066E0.book Page 26 Thursday, August 5, 2010 4:15 PM
Page 106 of 140
8-27
8
TIPIf the specified idling speed cannot be obtained as
described above, have a Yamaha dealer make the
adjustment.EBU24047Adjusting the throttle lever free play The throttle lever free play should be checked and,
if necessary, adjusted at the intervals specified in
the periodic maintenance and lubrication chart.
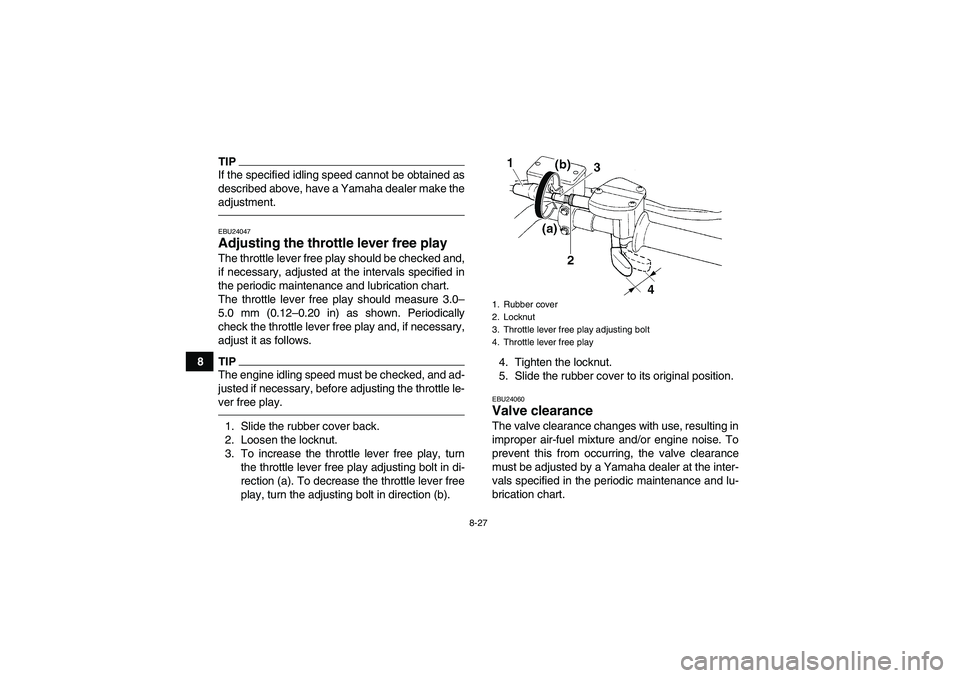
The throttle lever free play should measure 3.0–
5.0 mm (0.12–0.20 in) as shown. Periodically
check the throttle lever free play and, if necessary,
adjust it as follows.TIPThe engine idling speed must be checked, and ad-
justed if necessary, before adjusting the throttle le-
ver free play.1. Slide the rubber cover back.
2. Loosen the locknut.
3. To increase the throttle lever free play, turn
the throttle lever free play adjusting bolt in di-
rection (a). To decrease the throttle lever free
play, turn the adjusting bolt in direction (b).4. Tighten the locknut.
5. Slide the rubber cover to its original position.
EBU24060Valve clearance The valve clearance changes with use, resulting in
improper air-fuel mixture and/or engine noise. To
prevent this from occurring, the valve clearance
must be adjusted by a Yamaha dealer at the inter-
vals specified in the periodic maintenance and lu-
brication chart.1. Rubber cover
2. Locknut
3. Throttle lever free play adjusting bolt
4. Throttle lever free play
U1P066E0.book Page 27 Thursday, August 5, 2010 4:15 PM
Page 107 of 140
8-28
8
EBU24071Adjusting the drive select lever safety
system cable The drive select lever safety system cable stretch-
es with use, which can result in improper function.
Therefore, the safety system cable should be
checked and adjusted by a Yamaha dealer at the
intervals specified in the periodic maintenance and
lubrication chart.EBU29601Brakes Replacement of brake components requires pro-
fessional knowledge. Brake service should be per-
formed by a Yamaha dealer.
WARNING
EWB02571Operating with improperly serviced or adjust-
ed brakes could lead to a loss in braking ability
and an accident.EBU24120Checking the front brake pads and rear
brake shoes The front brake pads and the rear brake shoes
must be checked for wear at the intervals specified
in the periodic maintenance and lubrication chart.
EBU24171Front brake pads
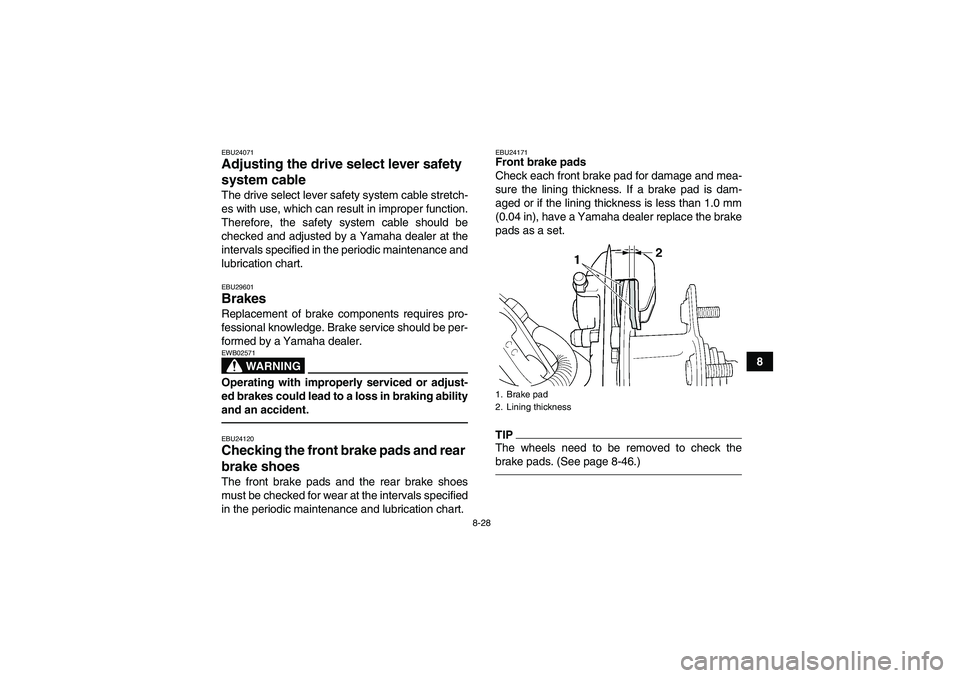
Check each front brake pad for damage and mea-
sure the lining thickness. If a brake pad is dam-
aged or if the lining thickness is less than 1.0 mm
(0.04 in), have a Yamaha dealer replace the brake
pads as a set.TIPThe wheels need to be removed to check the
brake pads. (See page 8-46.)1. Brake pad
2. Lining thickness
U1P066E0.book Page 28 Thursday, August 5, 2010 4:15 PM
Page 109 of 140
8-30
8
�Use only the recommended quality brake fluid,
otherwise the rubber seals may deteriorate,
causing leakage and poor braking performance.�Refill with the same type of brake fluid. Mixing
fluids may result in a harmful chemical reaction
and lead to poor braking performance.�Be careful that water does not enter the brake
fluid reservoir when refilling. Water will signifi-
cantly lower the boiling point of the fluid and may
result in vapor lock.�Brake fluid may deteriorate painted surfaces or
plastic parts. Always clean up spilled fluid imme-
diately.�As the brake pads wear, it is normal for the brake
fluid level to gradually go down. However, if the
brake fluid level goes down suddenly, have a
Yamaha dealer check the cause.EBU24281Changing the brake fluid Have a Yamaha dealer change the brake fluid at
the intervals specified in the TIP after the periodic
maintenance and lubrication chart. In addition,have the oil seals of the brake master cylinder and
calipers as well as the brake hoses replaced at the
intervals listed below or whenever they are dam-
aged or leaking.
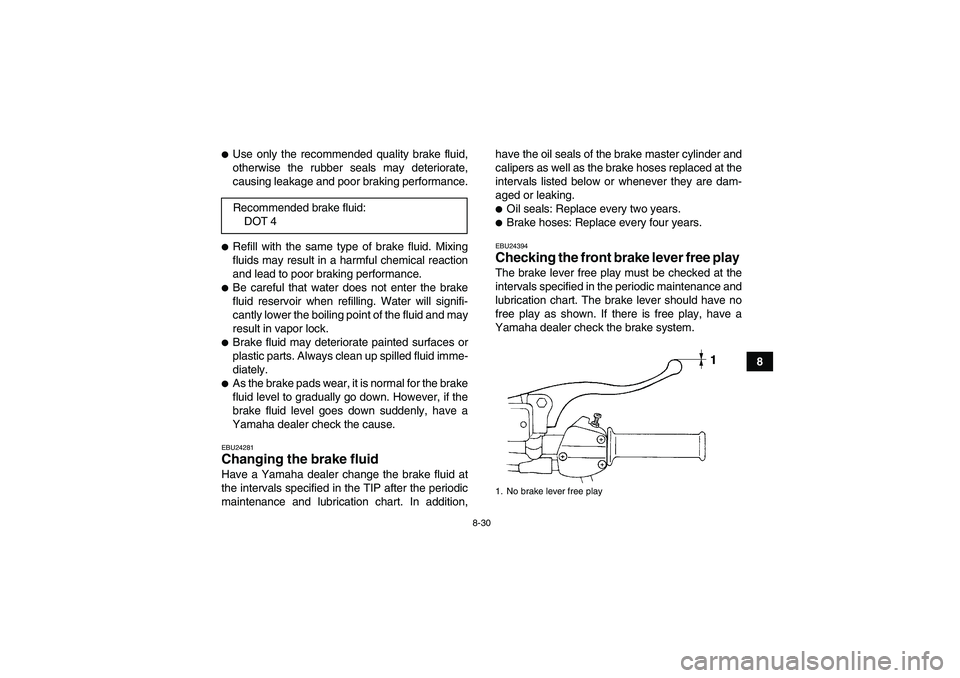
�Oil seals: Replace every two years.�Brake hoses: Replace every four years.EBU24394Checking the front brake lever free play The brake lever free play must be checked at the
intervals specified in the periodic maintenance and
lubrication chart. The brake lever should have no
free play as shown. If there is free play, have a
Yamaha dealer check the brake system. Recommended brake fluid:
DOT 41. No brake lever free play
U1P066E0.book Page 30 Thursday, August 5, 2010 4:15 PM