Page 70 of 104
PERIODIC MAINTENANCE AND ADJUSTMENT
6-21
6
EAU37913
Checking the brake lever free
play There should be no free play at the
brake lever end. If there is free play,
have a Yamaha dealer inspect the
brake system.
WARNING
EWA14211
A soft or spongy feeling in the brake
lever can indicate the presence of air
in the hydraulic system. If there is air
in the hydraulic system, have a
Yamaha dealer bleed the system be-
fore operating the vehicle. Air in the
hydraulic system will diminish thebraking performance, which may re-
sult in loss of control and an acci-
dent.
EAU50750
Brake light switches (for ABS
models) The brake light, which is activated by
the brake pedal and brake lever, should
come on just before braking takes ef-
fect. If necessary, have a Yamaha deal-
er adjust the brake light switches.
1. No brake lever free play
1
U1ECE0E0.book Page 21 Friday, August 20, 2010 9:35 AM
Page 71 of 104

PERIODIC MAINTENANCE AND ADJUSTMENT
6-22
6
EAU50760
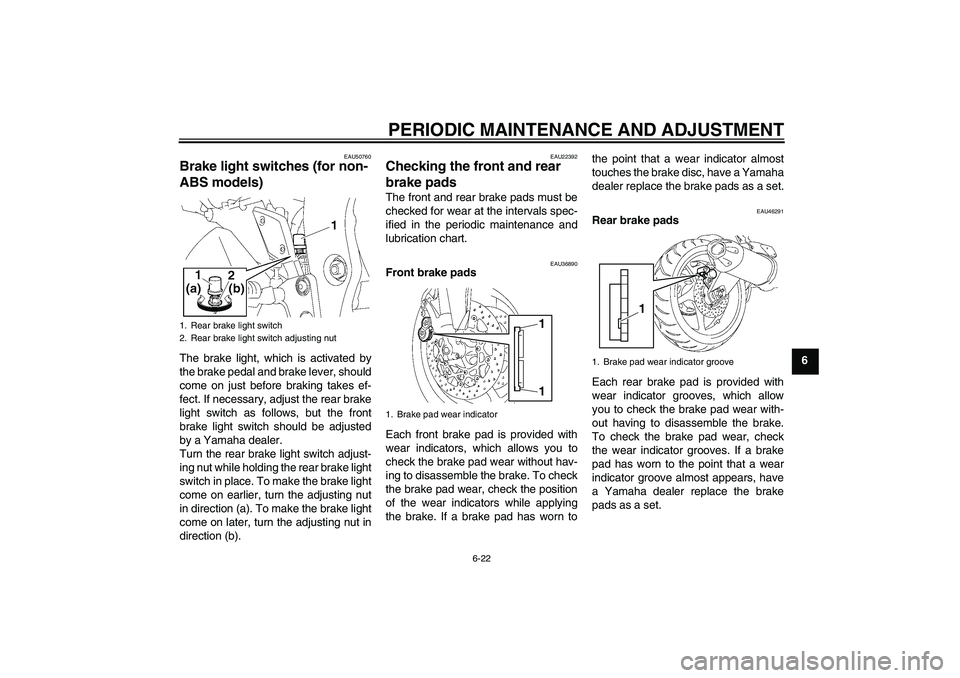
Brake light switches (for non-
ABS models) The brake light, which is activated by
the brake pedal and brake lever, should
come on just before braking takes ef-
fect. If necessary, adjust the rear brake
light switch as follows, but the front
brake light switch should be adjusted
by a Yamaha dealer.
Turn the rear brake light switch adjust-
ing nut while holding the rear brake light
switch in place. To make the brake light
come on earlier, turn the adjusting nut
in direction (a). To make the brake light
come on later, turn the adjusting nut in
direction (b).
EAU22392
Checking the front and rear
brake pads The front and rear brake pads must be
checked for wear at the intervals spec-
ified in the periodic maintenance and
lubrication chart.
EAU36890
Front brake pads
Each front brake pad is provided with
wear indicators, which allows you to
check the brake pad wear without hav-
ing to disassemble the brake. To check
the brake pad wear, check the position
of the wear indicators while applying
the brake. If a brake pad has worn tothe point that a wear indicator almost
touches the brake disc, have a Yamaha
dealer replace the brake pads as a set.
EAU46291
Rear brake pads
Each rear brake pad is provided with
wear indicator grooves, which allow
you to check the brake pad wear with-
out having to disassemble the brake.
To check the brake pad wear, check
the wear indicator grooves. If a brake
pad has worn to the point that a wear
indicator groove almost appears, have
a Yamaha dealer replace the brake
pads as a set.
1. Rear brake light switch
2. Rear brake light switch adjusting nut
1. Brake pad wear indicator
11
1. Brake pad wear indicator groove
1
U1ECE0E0.book Page 22 Friday, August 20, 2010 9:35 AM
Page 81 of 104
PERIODIC MAINTENANCE AND ADJUSTMENT
6-32
6 FZ1-N FZ1-NA FZ1-NA
If a fuse is blown, replace it as follows.
TIPInclude steps 2, 3, 7 and 8 only for the
fuel injection system fuse.1. Turn the key to “OFF” and turn off
the electrical circuit in question.
1. Fuse box
2. Ignition fuse
3. Signaling system fuse
4. Taillight fuse
5. Backup fuse (for clock and immobilizer sys-
tem)
6. Right radiator fan fuse
7. Left radiator fan fuse
8. Headlight fuse
9. Spare fuse
1. Main fuse
2. Fuse box
3. Fuel injection system fuse
4. Fuel injection system spare fuse
1. Ignition fuse
2. Signaling system fuse
3. Taillight fuse
4. Backup fuse (for clock and immobilizer sys-
tem)
5. Right radiator fan fuse
6. Left radiator fan fuse
7. Spare fuse
8. ABS motor spare fuse
9. ABS control unit fuse
10.Headlight fuse
11.ABS motor fuse
U1ECE0E0.book Page 32 Friday, August 20, 2010 9:35 AM
Page 82 of 104

PERIODIC MAINTENANCE AND ADJUSTMENT
6-33
62. Unhook the battery band, and then
remove the battery cover.
3. Remove the starter relay cover by
pulling it upward.4. Remove the blown fuse, and then
install a new fuse of the specified
amperage. WARNING! Do not
use a fuse of a higher amperage
rating than recommended to
avoid causing extensive dam-
age to the electrical system and
possibly a fire.
[EWA15131]
5. Turn the key to “ON” and turn on
the electrical circuit in question to
check if the device operates.
6. If the fuse immediately blows
again, have a Yamaha dealer
check the electrical system.
7. Install the starter relay cover.
8. Install the battery cover, and then
hook the battery band onto the
holder.
1. Battery band
2. Battery cover
1. Starter relay cover
2. Fuel injection system fuse
3. Fuel injection system spare fuse
2
1
3
Specified fuses:
Main fuse:
50.0 A
Headlight fuse:
15.0 A
Signaling system fuse:
10.0 A
Ignition fuse:
15.0 A
Fuel injection system fuse:
15.0 A
Taillight fuse:
10.0 A
Radiator fan fuse:
10.0 A × 2
Backup fuse:
10.0 A
ABS control unit fuse:
FZ1-NA 10.0 A
ABS motor fuse:
FZ1-NA 30.0 A
U1ECE0E0.book Page 33 Friday, August 20, 2010 9:35 AM
Page 83 of 104

PERIODIC MAINTENANCE AND ADJUSTMENT
6-34
6
EAU34385
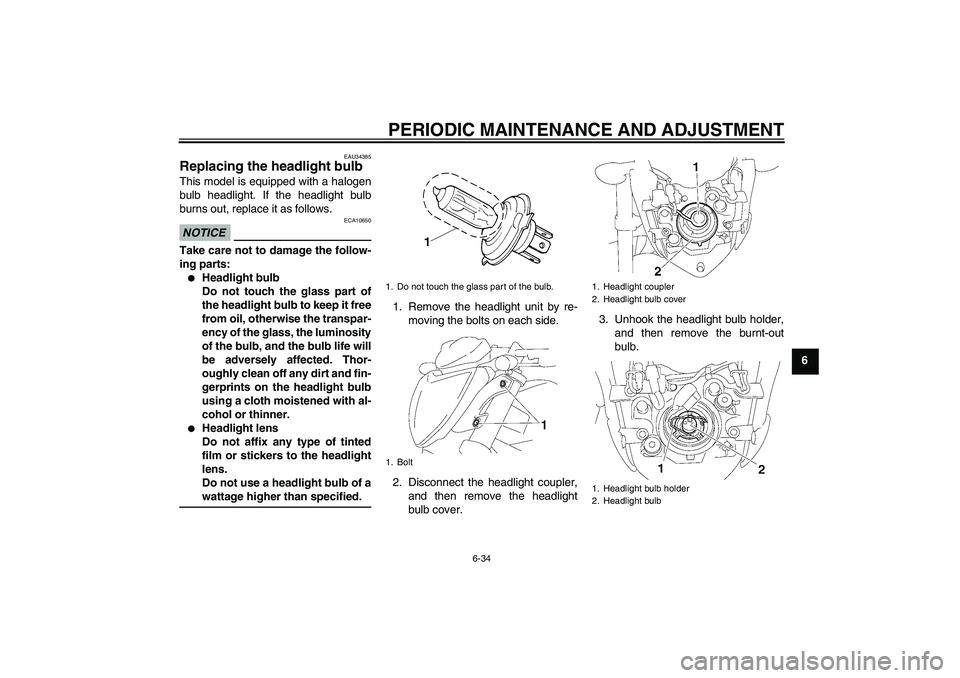
Replacing the headlight bulb This model is equipped with a halogen
bulb headlight. If the headlight bulb
burns out, replace it as follows.NOTICE
ECA10650
Take care not to damage the follow-
ing parts:�
Headlight bulb
Do not touch the glass part of
the headlight bulb to keep it free
from oil, otherwise the transpar-
ency of the glass, the luminosity
of the bulb, and the bulb life will
be adversely affected. Thor-
oughly clean off any dirt and fin-
gerprints on the headlight bulb
using a cloth moistened with al-
cohol or thinner.
�
Headlight lens
Do not affix any type of tinted
film or stickers to the headlight
lens.
Do not use a headlight bulb of a
wattage higher than specified.
1. Remove the headlight unit by re-
moving the bolts on each side.
2. Disconnect the headlight coupler,
and then remove the headlight
bulb cover.3. Unhook the headlight bulb holder,
and then remove the burnt-out
bulb.1. Do not touch the glass part of the bulb.
1. Bolt
1. Headlight coupler
2. Headlight bulb cover
1. Headlight bulb holder
2. Headlight bulb
U1ECE0E0.book Page 34 Friday, August 20, 2010 9:35 AM
Page 84 of 104

PERIODIC MAINTENANCE AND ADJUSTMENT
6-35
64. Place a new headlight bulb into po-
sition, and then secure it with the
bulb holder.
5. Install the headlight bulb cover,
and then connect the coupler.
6. Install the headlight unit by install-
ing the bolts.
7. Have a Yamaha dealer adjust the
headlight beam if necessary.
EAU24115
Replacing the tail/brake light
bulb 1. Remove the passenger seat. (See
page 3-19.)
2. Remove the tail/brake light bulb
socket (together with the bulb) by
turning it counterclockwise.
3. Remove the burnt-out bulb by
pushing it in and turning it counter-
clockwise.
4. Insert a new bulb into the socket,
push it in, and then turn it clock-
wise until it stops.
5. Install the socket (together with the
bulb) by turning it clockwise.
6. Install the passenger seat.
EAU24204
Replacing a turn signal light
bulb 1. Remove the turn signal light lens
by removing the screw.
2. Remove the burnt-out bulb by
pushing it in and turning it counter-
clockwise.
3. Insert a new bulb into the socket,
push it in, and then turn it clock-
wise until it stops.
4. Install the lens by installing the
screw. NOTICE: Do not over-
tighten the screw, otherwise the
lens may break.
[ECA11191]
1. Tail/brake light bulb socket
1. Turn signal light lens
2. Screw
U1ECE0E0.book Page 35 Friday, August 20, 2010 9:35 AM
Page 85 of 104
PERIODIC MAINTENANCE AND ADJUSTMENT
6-36
6
EAU24313
Replacing the license plate
light bulb 1. Remove the license plate light unit
by removing the screws.
2. Remove the license plate light bulb
socket (together with the bulb) by
pulling it out.3. Remove the burnt-out bulb by pull-
ing it out.
4. Insert a new bulb into the socket.
5. Install the socket (together with the
bulb) by pushing it in.
6. Install the license plate light unit by
installing the screws.
EAU39384
Replacing an auxiliary light
bulb This model is equipped with two auxil-
iary lights. If an auxiliary light bulb burns
out, replace it as follows.
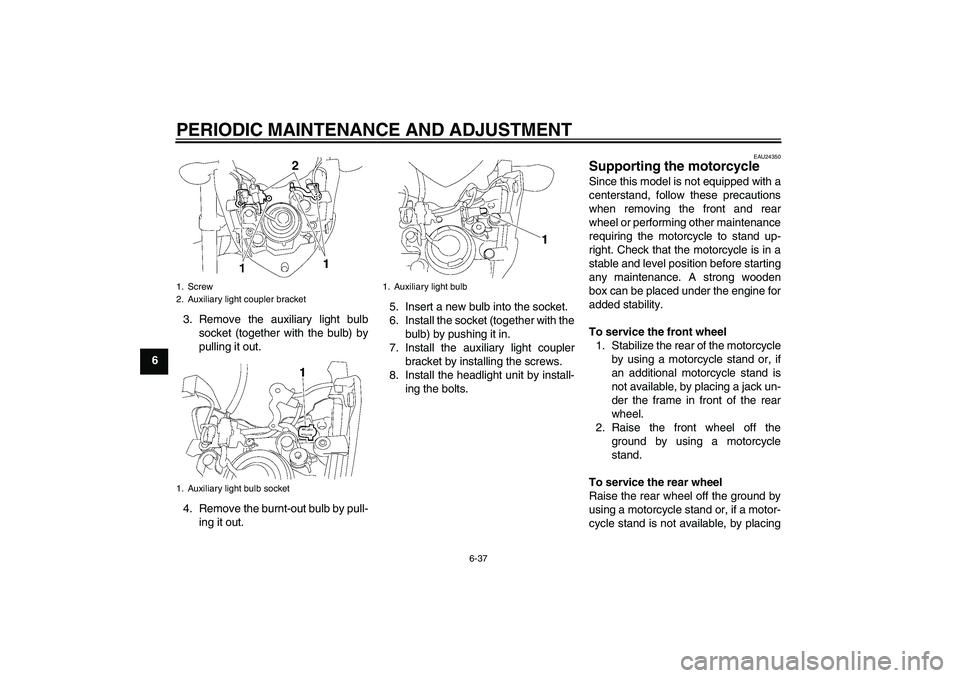
1. Remove the headlight unit by re-
moving the bolts on each side.
2. Remove the auxiliary light coupler
bracket by removing the screws.
1. Screw
2. License plate light unit
1. License plate light bulb
2. License plate light bulb socket
1
2
1. Bolt
U1ECE0E0.book Page 36 Friday, August 20, 2010 9:35 AM
Page 86 of 104

PERIODIC MAINTENANCE AND ADJUSTMENT
6-37
63. Remove the auxiliary light bulb
socket (together with the bulb) by
pulling it out.
4. Remove the burnt-out bulb by pull-
ing it out.5. Insert a new bulb into the socket.
6. Install the socket (together with the
bulb) by pushing it in.
7. Install the auxiliary light coupler
bracket by installing the screws.
8. Install the headlight unit by install-
ing the bolts.
EAU24350
Supporting the motorcycle Since this model is not equipped with a
centerstand, follow these precautions
when removing the front and rear
wheel or performing other maintenance
requiring the motorcycle to stand up-
right. Check that the motorcycle is in a
stable and level position before starting
any maintenance. A strong wooden
box can be placed under the engine for
added stability.
To service the front wheel
1. Stabilize the rear of the motorcycle
by using a motorcycle stand or, if
an additional motorcycle stand is
not available, by placing a jack un-
der the frame in front of the rear
wheel.
2. Raise the front wheel off the
ground by using a motorcycle
stand.
To service the rear wheel
Raise the rear wheel off the ground by
using a motorcycle stand or, if a motor-
cycle stand is not available, by placing
1. Screw
2. Auxiliary light coupler bracket
1. Auxiliary light bulb socket
1. Auxiliary light bulb
U1ECE0E0.book Page 37 Friday, August 20, 2010 9:35 AM