2011 YAMAHA EC-03 warning
[x] Cancel search: warningPage 42 of 78

CHARGING THE BATTERY
6-8
1
2
3
4
56
7
8
95. Close the seat, and push down on
the back to lock it in position.
TIP
Before closing the seat, make sure
that nothing is left under the seat.
Make sure that the seat is securelylocked before riding.
6. Remove the key.WARNING
EWA15900
When not in use, do not leave the
charging plug plugged into an out-
let. Dust or foreign objects could
build up and cause a fire. Be sure to
unplug the charging plug from theoutlet after use.
EAU50402
Charging time Normal charging
Charging time varies depending on the
riding conditions before charging, re-
maining battery level, and ambient tem-
perature. It takes approximately seven
hours to charge the battery from a 0%
charged level in the optimum ambient
temperature range of 15 C – 25 C.TIPWhen the charging process is complet-
ed, the power from the built-in batterycharger is cut off automatically.
Waiting mode for charging
The vehicle enters a waiting mode if thetemperature is not suitable for charging
as follows:
The battery may be above the
maximum 50 C immediately after
riding. In this case, the charger en-
ters a waiting mode and “HEAT”
flashes until the battery and bat-
tery charger reach the specified
temperature.
If ambient temperature is below
–5 C, “COOL” flashes until the
battery and battery charger reach
the specified temperature.
When the temperature is suitable for
charging, charging starts automatically.
100
50
0
2.0 4.0 7.0
Charging time (hours) Battery
level (%)
1CB-9-E0.book 8 ページ 2010年10月15日 金曜日 午前10時19分
Page 45 of 78

7-1
2
3
4
5
678
9
OPERATION AND IMPORTANT RIDING POINTS
EAU15951
Read the Owner’s Manual carefully to
become familiar with all controls. If
there is a control or function you do not
understand, ask your Yamaha dealer.
WARNING
EWA10271
Failure to familiarize yourself with
the controls can lead to loss of con-
trol, which could cause an accidentor injury.
EAU50092
Preparations for starting off TIPMake sure the accelerator grip is
closed before starting off. An error
could occur if the accelerator grip isturned.
1. Stand on the left side of the vehi-
cle.
2. While pulling the rear brake lever
with your left hand and holding the
grab bar with your right hand, push
the vehicle off the centerstand.
WARNING
EWA15660
Before placing the vehicle on or
pushing it off the centerstand or sit-
ting on the seat, be sure the key is
“OFF”. Otherwise, the vehicle couldstart moving unexpectedly if the ac-
celerator grip is turned accidentally.
3. Put your right foot on the footrest,
and sit on the seat. At the same
time support the vehicle with your
left foot so that the vehicle does
not fall over.
4. Squeeze the rear brake with your
left hand to prevent the vehicle
from moving.
1CB-9-E0.book 1 ページ 2010年10月15日 金曜日 午前10時19分
Page 49 of 78

OPERATION AND IMPORTANT RIDING POINTS
7-5
2
3
4
5
678
9
EAU50961
Braking
WARNING
EWA10300
Avoid braking hard or suddenly
(especially when leaning over to
one side), otherwise the scooter
may skid or overturn.
Railroad crossings, streetcar
rails, iron plates on road con-
struction sites, and manhole
covers become extremely slip-
pery when wet. Therefore, slow
down when approaching such
areas and cross them with cau-
tion.
Keep in mind that braking on a
wet road is much more difficult.
Ride slowly down a hill, as brak-
ing downhill can be very diffi-cult.
1. Close the accelerator grip com-
pletely.
2. Apply both front and rear brakes
simultaneously while gradually in-
creasing the pressure.Front
Rear
EAU50122
Parking To prevent theft, be sure to lock the
steering and remove the key when
parking. It is recommended to addition-
ally use a chain lock or other type of
motorcycle lock.
WARNING
EWA15580
Do not park on a slope or on soft
ground, otherwise the vehicle mayoverturn.TIP
If the vehicle is parked in an ex-
tremely hot or cold place, the tem-
perature protection function may
be activated when the key is
turned to “ON”. If this is activated,
“HEAT” or “COOL” flashes on the
tripmeter/odometer display. (See
page 4-4 “Temperature warning
display” for more information about
the temperature protection func-
tion.)
It is recommended to lock the se-
curity lock when parking. (See
page 4-10 for more informationabout locking the security lock.)
1CB-9-E0.book 5 ページ 2010年10月15日 金曜日 午前10時19分
Page 50 of 78

8-1
1
2
3
4
5
6
78
9
PERIODIC MAINTENANCE AND ADJUSTMENT
EAU50130
Periodic inspection, adjustment, and lu-
brication will keep your vehicle in the
safest and most efficient condition pos-
sible. Safety is an obligation of the vehi-
cle owner/operator. The most important
points of vehicle inspection, adjust-
ment, and lubrication are explained on
the following pages.
The intervals given in the periodic
maintenance charts should be simply
considered as a general guide under
normal riding conditions. However, de-
pending on the weather, terrain, geo-
graphical location, and individual use,
the maintenance intervals may need to
be shortened.
WARNING
EWA10321
Failure to properly maintain the ve-
hicle or performing maintenance ac-
tivities incorrectly may increase
your risk of injury or death during
service or while using the vehicle. If
you are not familiar with vehicle ser-
vice, have a Yamaha dealer performservice.
WARNING
EWA15840
Turn the key to “OFF” when per-
forming maintenance unless other-
wise specified. A running motor has
moving parts that can catch on body
parts or clothing and electrical partsthat can cause shocks or fires.
WARNING
EWA15830
This scooter is designed for use onpaved roads only.
WARNING
EWA15460
Brake discs, calipers, drums, and
linings can become very hot during
use. To avoid possible burns, let
brake components cool beforetouching them.
1CB-9-E0.book 1 ページ 2010年10月15日 金曜日 午前10時19分
Page 53 of 78

PERIODIC MAINTENANCE AND ADJUSTMENT
8-4
2
3
4
5
6
789
EAU50143
Checking for irregular motor
sounds Check the motor for irregular sounds.TIPThe motor cannot be revved beyond a
certain motor speed by turning the ac-
celerator grip when the vehicle is on thecenterstand.
EAU50154
Checking the accelerator grip Before checking the accelerator grip,
check the following points.
Make sure that the key is in the
“OFF” position. Turn the accelera-
tor grip slowly and check that it
moves smoothly, and returns
smoothly when released.
Check for any signs of deteriora-
tion or damage around the accel-
erator grip. Also check the
accelerator grip holder mounting
bolts for tightness.
When washing the vehicle, avoid
spraying the area around the ac-
celerator grip with water. If the
area around the accelerator grip is
particularly dirty, use a well-wrung
damp cloth to clean.
WARNING
EWA15671
If a problem is found in accelerator
grip operation, do not operate the
vehicle. Have the vehicle inspected
by a Yamaha dealer. Continuing to
use the vehicle with a problem in-
creases the possibility of an acci-dent or equipment damage.
1. Squeeze the rear brake lever with
your left hand.
2. Turn the key to “ON”.
3. Cancel the standby mode by
pressing one of the control but-
tons. (See page 4-3.)
4. Make sure that the operating sta-
tus indicator “RUN” is displayed,
and that the vehicle is in the riding
mode. (See page 7-1 for more in-
formation about “Preparations for
starting off” and “Starting off”.)
5. Check that the accelerator grip
and motor operate smoothly when
the vehicle is accelerated by grad-
ually turning the accelerator grip
while riding the vehicle. If there is a
problem, have a Yamaha dealer
check the vehicle.
1CB-9-E0.book 4 ページ 2010年10月15日 金曜日 午前10時19分
Page 54 of 78

PERIODIC MAINTENANCE AND ADJUSTMENT
8-5
1
2
3
4
5
6
78
9
EAU50673
Tires To maximize the performance, durabil-
ity, and safe operation of your vehicle,
note the following points regarding the
specified tires.
Tire air pressure
The tire air pressure should be checked
and, if necessary, adjusted before each
ride.
WARNING
EWA10511
Never overload your vehicle. Opera-
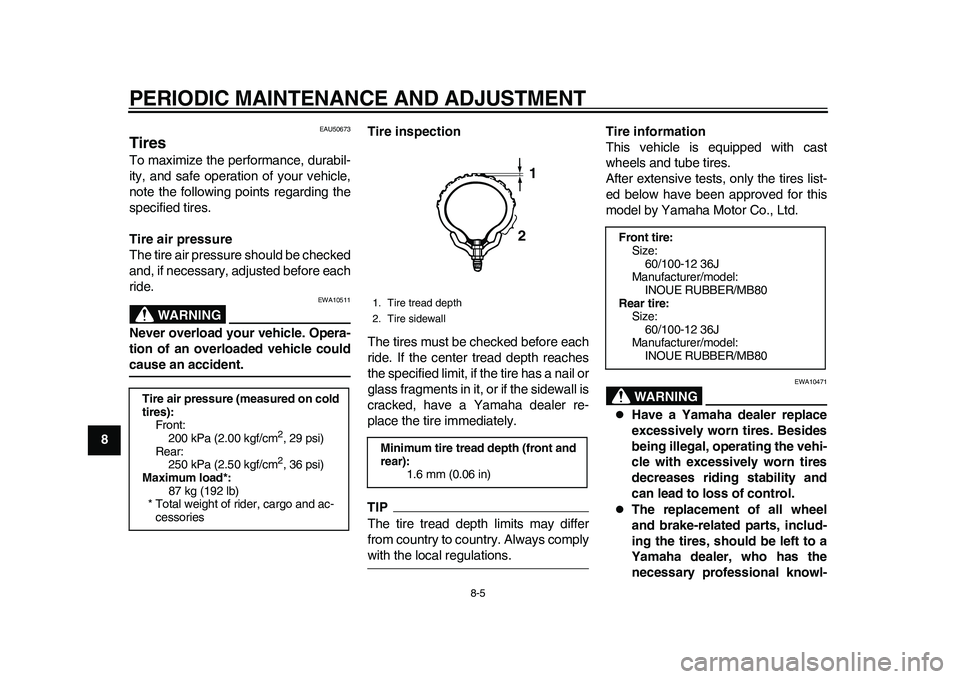
tion of an overloaded vehicle couldcause an accident.Tire inspection
The tires must be checked before each
ride. If the center tread depth reaches
the specified limit, if the tire has a nail or
glass fragments in it, or if the sidewall is
cracked, have a Yamaha dealer re-
place the tire immediately.
TIPThe tire tread depth limits may differ
from country to country. Always complywith the local regulations.Tire information
This vehicle is equipped with cast
wheels and tube tires.
After extensive tests, only the tires list-
ed below have been approved for this
model by Yamaha Motor Co., Ltd.
WARNING
EWA10471
Have a Yamaha dealer replace
excessively worn tires. Besides
being illegal, operating the vehi-
cle with excessively worn tires
decreases riding stability and
can lead to loss of control.
The replacement of all wheel
and brake-related parts, includ-
ing the tires, should be left to a
Yamaha dealer, who has the
necessary professional knowl-
Tire air pressure (measured on cold
tires):
Front:
200 kPa (2.00 kgf/cm
2, 29 psi)
Rear:
250 kPa (2.50 kgf/cm2, 36 psi)
Maximum load*:
87 kg (192 lb)
* Total weight of rider, cargo and ac-
cessories
1. Tire tread depth
2. Tire sidewallMinimum tire tread depth (front and
rear):
1.6 mm (0.06 in)
12
Front tire:
Size:
60/100-12 36J
Manufacturer/model:
INOUE RUBBER/MB80
Rear tire:
Size:
60/100-12 36J
Manufacturer/model:
INOUE RUBBER/MB80
1CB-9-E0.book 5 ページ 2010年10月15日 金曜日 午前10時19分
Page 55 of 78

PERIODIC MAINTENANCE AND ADJUSTMENT
8-6
2
3
4
5
6
789 edge and experience to do so.
Ride at moderate speeds after
changing a tire since the tire
surface must first be “broken
in” for it to develop its optimalcharacteristics.
EAU22002
Cast wheels
WARNING
EWA10610
The wheels on this model are not de-
signed for use with tubeless tires.
Do not attempt to use tubeless tireson this model.
To maximize the performance, durabil-
ity, and safe operation of your vehicle,
note the following points regarding the
specified wheels.
The wheel rims should be checked
for cracks, bends, warpage or
damage before each ride. If any
damage is found, have a Yamaha
dealer replace the wheel. Do not
attempt even the smallest repair to
the wheel. A deformed or cracked
wheel must be replaced.
The wheel should be balanced
whenever either the tire or wheel
has been changed or replaced. An
unbalanced wheel can result in
poor performance, adverse han-
dling characteristics, and a short-
ened tire life.
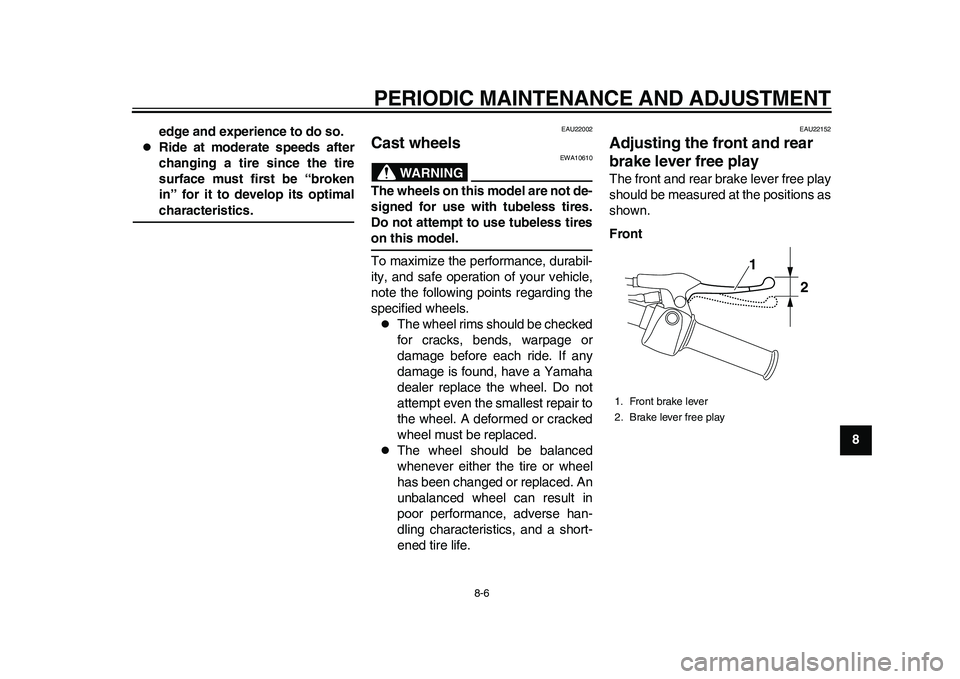
EAU22152
Adjusting the front and rear
brake lever free play The front and rear brake lever free play
should be measured at the positions as
shown.
Front1. Front brake lever
2. Brake lever free play
1
2
1CB-9-E0.book 6 ページ 2010年10月15日 金曜日 午前10時19分
Page 56 of 78

PERIODIC MAINTENANCE AND ADJUSTMENT
8-7
1
2
3
4
5
6
78
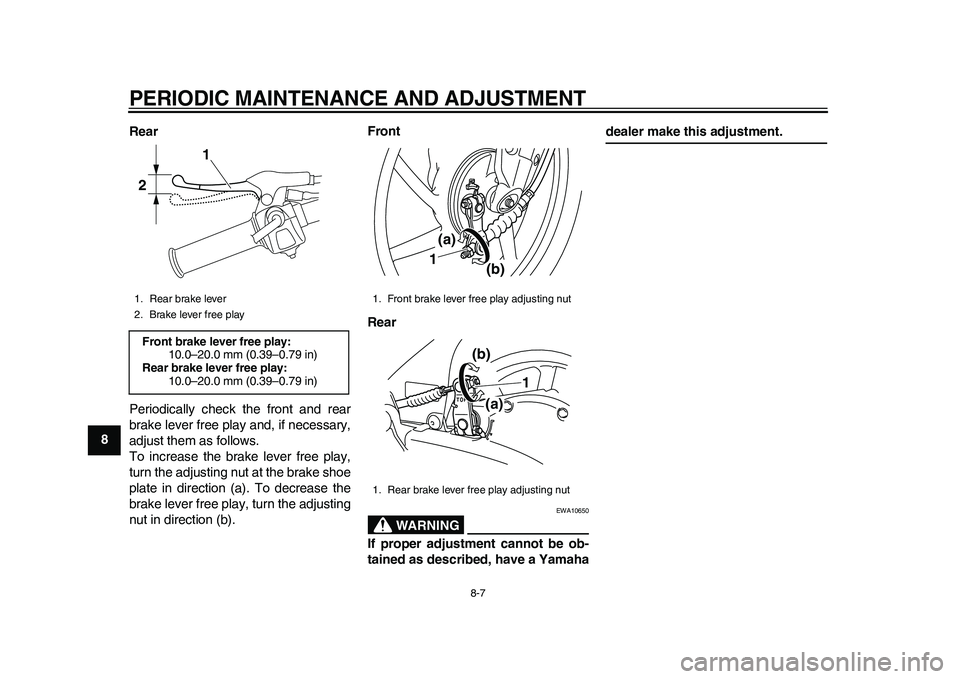
9Rear
Periodically check the front and rear
brake lever free play and, if necessary,
adjust them as follows.
To increase the brake lever free play,
turn the adjusting nut at the brake shoe
plate in direction (a). To decrease the
brake lever free play, turn the adjusting
nut in direction (b).Front
Rear
WARNING
EWA10650
If proper adjustment cannot be ob-
tained as described, have a Yamaha
dealer make this adjustment.
1. Rear brake lever
2. Brake lever free playFront brake lever free play:
10.0–20.0 mm (0.39–0.79 in)
Rear brake lever free play:
10.0–20.0 mm (0.39–0.79 in)
1
2
1. Front brake lever free play adjusting nut
1. Rear brake lever free play adjusting nut
(a)
(b) 1
1
(a) (b)
1CB-9-E0.book 7 ページ 2010年10月15日 金曜日 午前10時19分