2011 SUBARU TRIBECA warning
[x] Cancel search: warningPage 89 of 422
1-62Seat, seatbelt and SRS airbags
WARNING
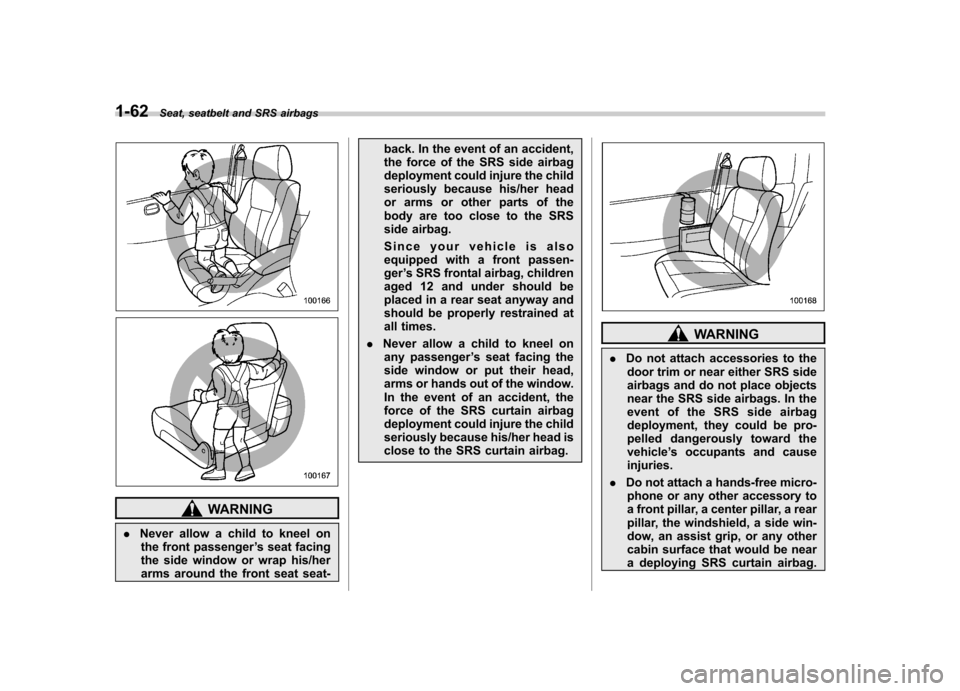
. Never allow a child to kneel on
the front passenger ’s seat facing
the side window or wrap his/her
arms around the front seat seat- back. In the event of an accident,
the force of the SRS side airbag
deployment could injure the child
seriously because his/her head
or arms or other parts of the
body are too close to the SRS
side airbag.
Since your vehicle is also
equipped with a front passen-ger
’s SRS frontal airbag, children
aged 12 and under should be
placed in a rear seat anyway and
should be properly restrained at
all times.
. Never allow a child to kneel on
any passenger ’s seat facing the
side window or put their head,
arms or hands out of the window.
In the event of an accident, the
force of the SRS curtain airbag
deployment could injure the child
seriously because his/her head is
close to the SRS curtain airbag.
WARNING
. Do not attach accessories to the
door trim or near either SRS side
airbags and do not place objects
near the SRS side airbags. In the
event of the SRS side airbag
deployment, they could be pro-
pelled dangerously toward thevehicle ’s occupants and cause
injuries.
. Do not attach a hands-free micro-
phone or any other accessory to
a front pillar, a center pillar, a rear
pillar, the windshield, a side win-
dow, an assist grip, or any other
cabin surface that would be near
a deploying SRS curtain airbag.
Page 90 of 422
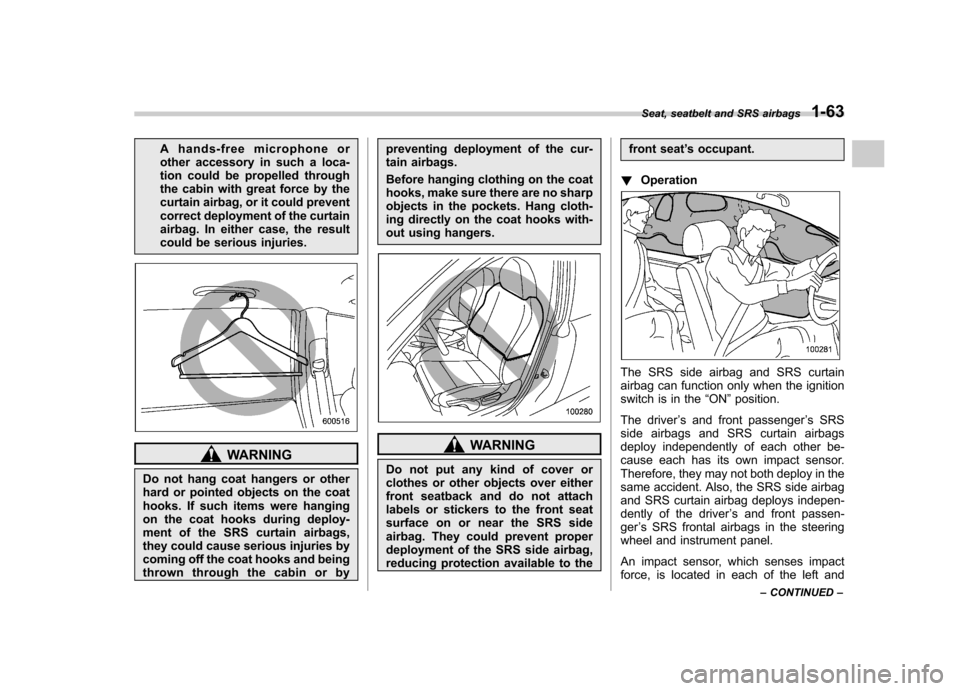
A hands-free microphone or
other accessory in such a loca-
tion could be propelled through
the cabin with great force by the
curtain airbag, or it could prevent
correct deployment of the curtain
airbag. In either case, the result
could be serious injuries.
WARNING
Do not hang coat hangers or other
hard or pointed objects on the coat
hooks. If such items were hanging
on the coat hooks during deploy-
ment of the SRS curtain airbags,
they could cause serious injuries by
coming off the coat hooks and being
thrown through the cabin or by preventing deployment of the cur-
tain airbags.
Before hanging clothing on the coat
hooks, make sure there are no sharp
objects in the pockets. Hang cloth-
ing directly on the coat hooks with-
out using hangers.WARNING
Do not put any kind of cover or
clothes or other objects over either
front seatback and do not attach
labels or stickers to the front seat
surface on or near the SRS side
airbag. They could prevent proper
deployment of the SRS side airbag,
reducing protection available to the front seat
’s occupant.
! Operation
The SRS side airbag and SRS curtain
airbag can function only when the ignition
switch is in the “ON ”position.
The driver ’s and front passenger ’s SRS
side airbags and SRS curtain airbags
deploy independently of each other be-
cause each has its own impact sensor.
Therefore, they may not both deploy in the
same accident. Also, the SRS side airbag
and SRS curtain airbag deploys indepen-
dently of the driver ’s and front passen-
ger ’s SRS frontal airbags in the steering
wheel and instrument panel.
An impact sensor, which senses impact
force, is located in each of the left and Seat, seatbelt and SRS airbags
1-63
– CONTINUED –
Page 98 of 422
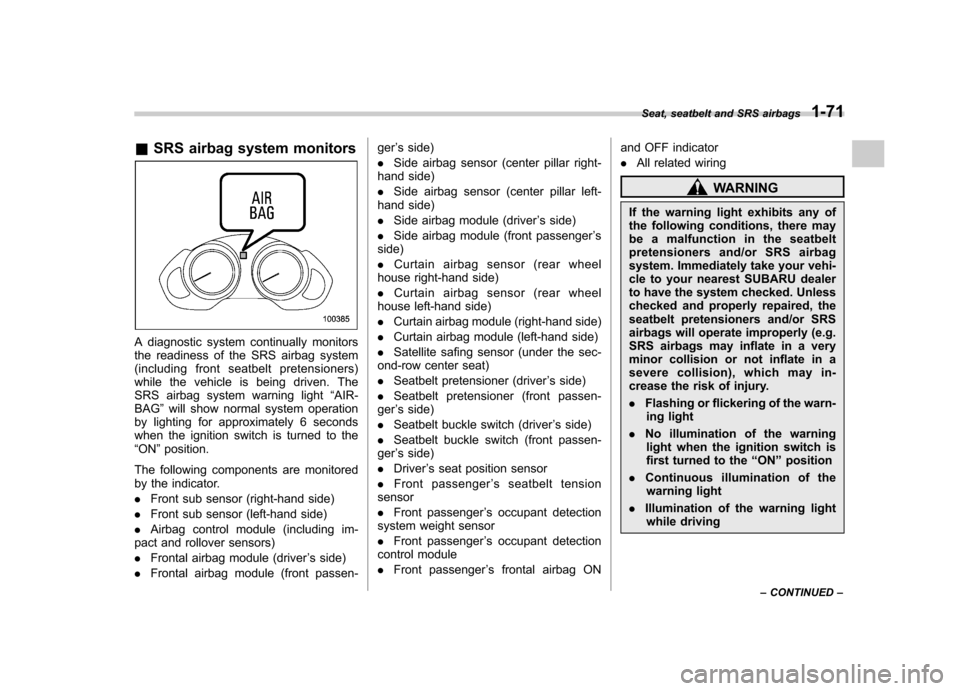
&SRS airbag system monitors
A diagnostic system continually monitors
the readiness of the SRS airbag system
(including front seatbelt pretensioners)
while the vehicle is being driven. The
SRS airbag system warning light “AIR-
BAG ”will show normal system operation
by lighting for approximately 6 seconds
when the ignition switch is turned to the“ ON ”position.
The following components are monitored
by the indicator. . Front sub sensor (right-hand side)
. Front sub sensor (left-hand side)
. Airbag control module (including im-
pact and rollover sensors). Frontal airbag module (driver ’s side)
. Frontal airbag module (front passen- ger
’s side)
. Side airbag sensor (center pillar right-
hand side). Side airbag sensor (center pillar left-
hand side). Side airbag module (driver ’s side)
. Side airbag module (front passenger ’s
side). Curtain airbag sensor (rear wheel
house right-hand side). Curtain airbag sensor (rear wheel
house left-hand side). Curtain airbag module (right-hand side)
. Curtain airbag module (left-hand side)
. Satellite safing sensor (under the sec-
ond-row center seat) . Seatbelt pretensioner (driver ’s side)
. Seatbelt pretensioner (front passen-
ger ’s side)
. Seatbelt buckle switch (driver ’s side)
. Seatbelt buckle switch (front passen-
ger ’s side)
. Driver ’s seat position sensor
. Front passenger ’s seatbelt tension
sensor . Front passenger ’s occupant detection
system weight sensor. Front passenger ’s occupant detection
control module. Front passenger ’s frontal airbag ON and OFF indicator.
All related wiring
WARNING
If the warning light exhibits any of
the following conditions, there may
be a malfunction in the seatbelt
pretensioners and/or SRS airbag
system. Immediately take your vehi-
cle to your nearest SUBARU dealer
to have the system checked. Unless
checked and properly repaired, the
seatbelt pretensioners and/or SRS
airbags will operate improperly (e.g.
SRS airbags may inflate in a very
minor collision or not inflate in a
severe collision), which may in-
crease the risk of injury. . Flashing or flickering of the warn-
ing light
. No illumination of the warning
light when the ignition switch is
first turned to the “ON ”position
. Continuous illumination of the
warning light
. Illumination of the warning light
while driving
Seat, seatbelt and SRS airbags
1-71
– CONTINUED –
Page 99 of 422
1-72Seat, seatbelt and SRS airbags
&SRS airbag system servicing
WARNING
. When discarding an airbag mod-
ule or scrapping the entire vehi-
cle damaged by a collision, con-
sult your SUBARU dealer.
. The SRS airbag has no user-
serviceable parts. Do not use
electrical test equipment on any
circuit related to the SRS airbag
system. For required servicing of
the SRS airbag, consult your
nearest SUBARU dealer. Tamper-
ing with or disconnecting the system ’s wiring could result in
accidental inflation of the SRS
airbag or could make the system
inoperative, which may result in
serious injury.
CAUTION
If you need service or repair in areas
indicated in the following list, have
the work performed by an author-
ized SUBARU dealer. The SRS air-
bag control module, impact sensors
and airbag modules are stored in
these areas. .
Under the center console
. Inside each front fender
. Steering wheel and column and
nearby areas
. Top of the dashboard on front
passenger ’s side and nearby
areas
. Each front seat and nearby area
. Inside each center pillar
. In each roof side (from the front
pillar to a point over the rear seat)
. Between the rear seat cushion
and rear wheel house on eachside
. Under the second-row center
seat
In the event that the SRS airbag is
deployed, replacement of the system
should be performed only by an author-
ized SUBARU dealer. When the compo-
nents of the SRS airbag system are
replaced, use only genuine SUBARUparts. NOTE
In the following cases, contact your
SUBARU dealer as soon as possible. . The front part of the vehicle was
involved in an accident in which only the driver
’s SRS frontal airbag or both
driver ’s and front passenger ’sSRS
frontal airbags did not deploy. . The pad of the steering wheel, the
cover over the front passenger ’s SRS
frontal airbag, or either roof side (from
the front pillar to a point over the rear
seat) is scratched, cracked, or other-
wise damaged.. Center pillar, rear wheel house or
rear floor pan, or an area near these
parts, was involved in an accident in
which the SRS side airbag and SRS
curtain airbag did not deploy.. The fabric or leather of either front
seatback is cut, frayed, or otherwise damaged. . The rear part of the vehicle was
involved in an accident in which no
SRS airbag was deployed.
& Precautions against vehicle modification
WARNING
To avoid accidental activation of the
system or rendering the system
inoperative, which may result in
serious injury, no modifications
should be made to any components
or wiring of the SRS airbag system.
Page 104 of 422
Immobilizer
CAUTION
FCC WARNING
Changes or modifications not ex-
pressly approved by the party re-
sponsible for compliance could void
the user ’s authority to operate the
equipment.
The immobilizer system is designed to
prevent an unauthorized person from
starting the engine. Only keys registered
with your vehicle ’s immobilizer system can
be used to operate your vehicle. Even if
an unregistered key fits into the ignition
switch and can be turned to the “START ”
position, the engine will automatically stop
after several seconds.
Each immobilizer key contains a trans-
ponder in which the key ’s ID code is
stored. When a key is inserted into the
ignition switch and turned to the “ON ”
position, the transponder transmits thekey ’s ID code to the immobilizer system ’s
receiver. If the transmitted ID code
matches the ID code registered in the
immobilizer system, the system allows the
engine to be started. Since the ID code is
transmitted and acted upon almost in- stantly, the immobilizer system does not
impede normal starting of the engine.
If the engine does not start, pull out the
key once before trying again. Refer to“
Ignition switch ”F 3-3.
This device complies with Part 15 of
the FCC Rules and RSS-Gen of IC
Rules. Operation is subject to the
following two conditions: (1) this de-
vice may not cause harmful interfer-
ence, and (2) this device must accept
any interference received, including
interference that may cause undesiredoperation.
CAUTION
. Do not place the key under direct
sunlight or anywhere it may
become hot.
. Do not get the key wet. If the key
gets wet, wipe it dry with a cloth
immediately.
NOTE
To protect your vehicle from theft,
please pay close attention to the fol-
lowing security precautions. . Never leave your vehicle unattended
with its keys inside. . Before leaving your vehicle, close all windows and lock the doors and reargate..
Do not leave spare keys or any
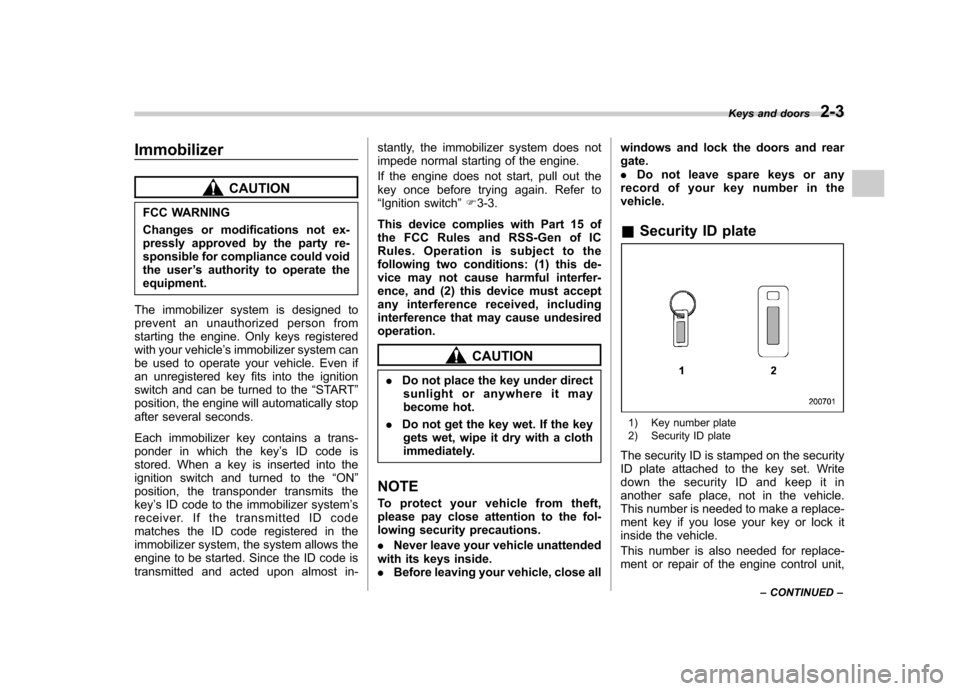
record of your key number in thevehicle. & Security ID plate
1) Key number plate
2) Security ID plate
The security ID is stamped on the security
ID plate attached to the key set. Write
down the security ID and keep it in
another safe place, not in the vehicle.
This number is needed to make a replace-
ment key if you lose your key or lock it
inside the vehicle.
This number is also needed for replace-
ment or repair of the engine control unit, Keys and doors
2-3
– CONTINUED –
Page 106 of 422
Door locks &Locking and unlocking from
the outside
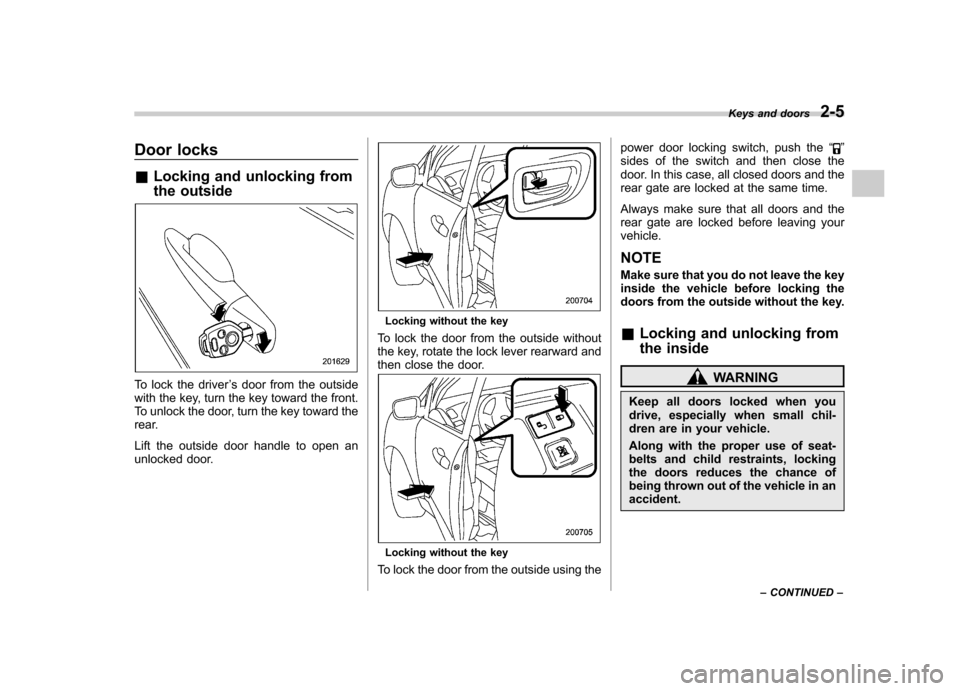
To lock the driver ’s door from the outside
with the key, turn the key toward the front.
To unlock the door, turn the key toward the
rear.
Lift the outside door handle to open an
unlocked door.
Locking without the key
To lock the door from the outside without
the key, rotate the lock lever rearward and
then close the door.
Locking without the key
To lock the door from the outside using the power door locking switch, push the
“
”
sides of the switch and then close the
door. In this case, all closed doors and the
rear gate are locked at the same time.
Always make sure that all doors and the
rear gate are locked before leaving your vehicle.
NOTE
Make sure that you do not leave the key
inside the vehicle before locking the
doors from the outside without the key. & Locking and unlocking from
the inside
WARNING
Keep all doors locked when you
drive, especially when small chil-
dren are in your vehicle.
Along with the proper use of seat-
belts and child restraints, locking
the doors reduces the chance of
being thrown out of the vehicle in anaccident. Keys and doors
2-5
– CONTINUED –
Page 122 of 422
Child safety locks
WARNING
Always use the child safety lock
whenever a child rides in the rear.
Serious injury could result if a child
accidentally opened the door and
fell out.
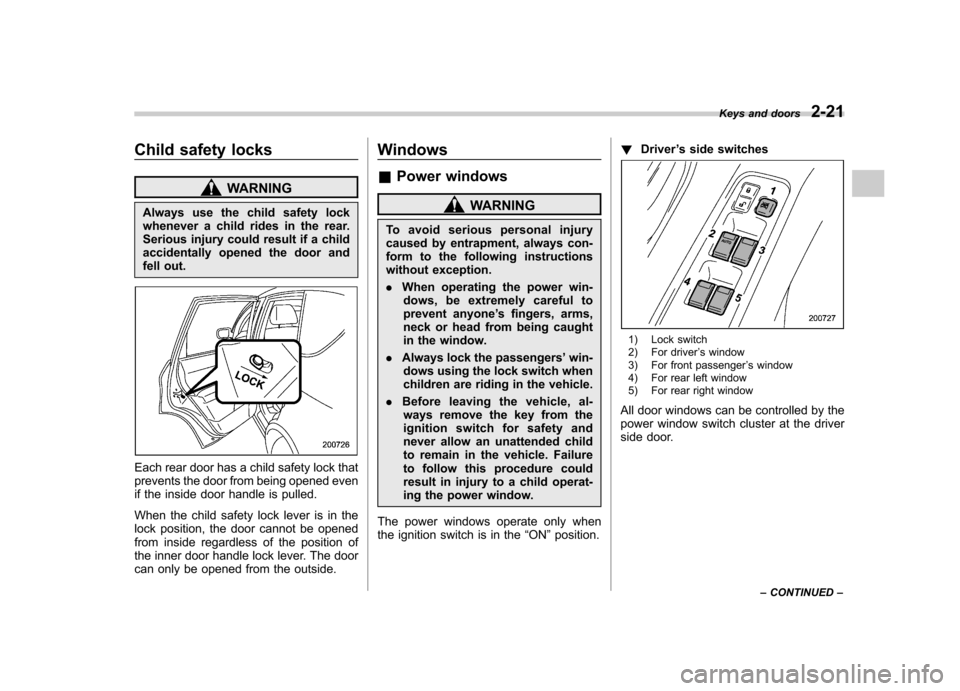
Each rear door has a child safety lock that
prevents the door from being opened even
if the inside door handle is pulled.
When the child safety lock lever is in the
lock position, the door cannot be opened
from inside regardless of the position of
the inner door handle lock lever. The door
can only be opened from the outside. Windows &
Power windows
WARNING
To avoid serious personal injury
caused by entrapment, always con-
form to the following instructions
without exception. . When operating the power win-
dows, be extremely careful to
prevent anyone ’s fingers, arms,
neck or head from being caught
in the window.
. Always lock the passengers ’win-
dows using the lock switch when
children are riding in the vehicle.
. Before leaving the vehicle, al-
ways remove the key from the
ignition switch for safety and
never allow an unattended child
to remain in the vehicle. Failure
to follow this procedure could
result in injury to a child operat-
ing the power window.
The power windows operate only when
the ignition switch is in the “ON ”position. !
Driver ’s side switches
1) Lock switch
2) For driver ’s window
3) For front passenger ’s window
4) For rear left window
5) For rear right window
All door windows can be controlled by the
power window switch cluster at the driver
side door. Keys and doors
2-21
– CONTINUED –
Page 125 of 422
2-24Keys and doors
Rear gate
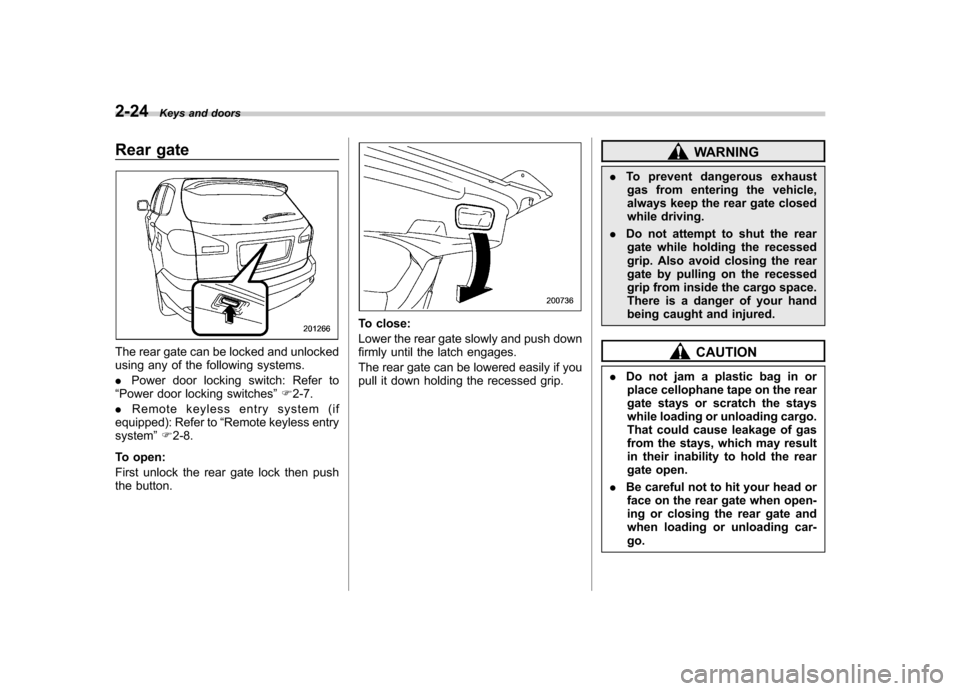
The rear gate can be locked and unlocked
using any of the following systems. .Power door locking switch: Refer to
“ Power door locking switches ”F 2-7.
. Remote keyless entry system (if
equipped): Refer to “Remote keyless entry
system ”F 2-8.
To open:
First unlock the rear gate lock then push
the button.
To close:
Lower the rear gate slowly and push down
firmly until the latch engages.
The rear gate can be lowered easily if you
pull it down holding the recessed grip.
WARNING
. To prevent dangerous exhaust
gas from entering the vehicle,
always keep the rear gate closed
while driving.
. Do not attempt to shut the rear
gate while holding the recessed
grip. Also avoid closing the rear
gate by pulling on the recessed
grip from inside the cargo space.
There is a danger of your hand
being caught and injured.
CAUTION
. Do not jam a plastic bag in or
place cellophane tape on the rear
gate stays or scratch the stays
while loading or unloading cargo.
That could cause leakage of gas
from the stays, which may result
in their inability to hold the rear
gate open.
. Be careful not to hit your head or
face on the rear gate when open-
ing or closing the rear gate and
when loading or unloading car-go.