2011 SUBARU TRIBECA service indicator
[x] Cancel search: service indicatorPage 248 of 422

NOTE
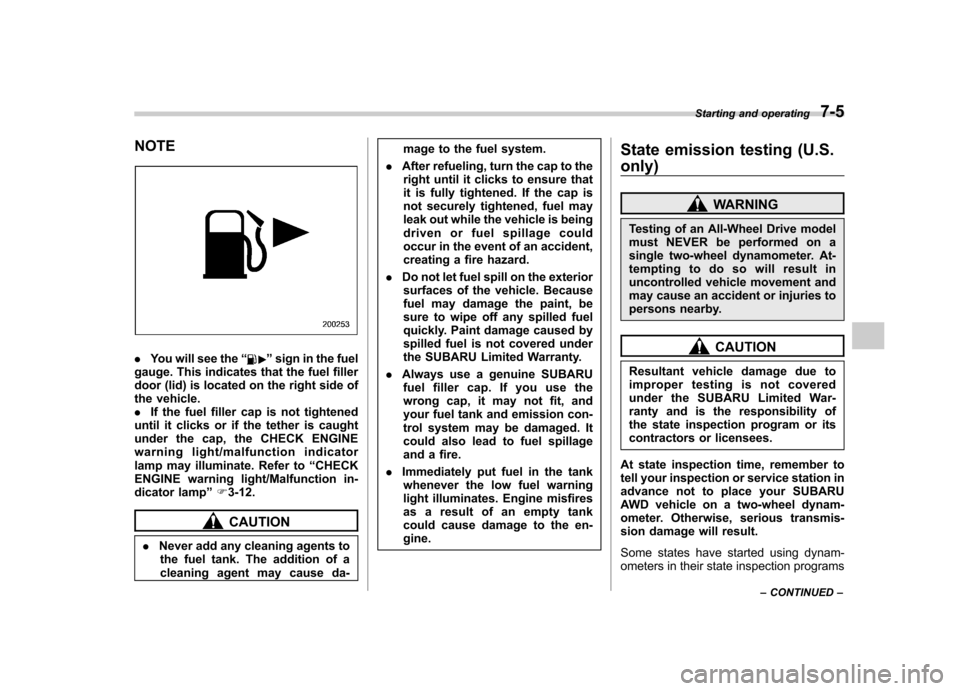
.You will see the “”sign in the fuel
gauge. This indicates that the fuel filler
door (lid) is located on the right side of
the vehicle.. If the fuel filler cap is not tightened
until it clicks or if the tether is caught
under the cap, the CHECK ENGINE
warning light/malfunction indicator
lamp may illuminate. Refer to “CHECK
ENGINE warning light/Malfunction in-
dicator lamp ”F 3-12.
CAUTION
. Never add any cleaning agents to
the fuel tank. The addition of a
cleaning agent may cause da- mage to the fuel system.
. After refueling, turn the cap to the
right until it clicks to ensure that
it is fully tightened. If the cap is
not securely tightened, fuel may
leak out while the vehicle is being
driven or fuel spillage could
occur in the event of an accident,
creating a fire hazard.
. Do not let fuel spill on the exterior
surfaces of the vehicle. Because
fuel may damage the paint, be
sure to wipe off any spilled fuel
quickly. Paint damage caused by
spilled fuel is not covered under
the SUBARU Limited Warranty.
. Always use a genuine SUBARU
fuel filler cap. If you use the
wrong cap, it may not fit, and
your fuel tank and emission con-
trol system may be damaged. It
could also lead to fuel spillage
and a fire.
. Immediately put fuel in the tank
whenever the low fuel warning
light illuminates. Engine misfires
as a result of an empty tank
could cause damage to the en-gine. State emission testing (U.S. only)
WARNING
Testing of an All-Wheel Drive model
must NEVER be performed on a
single two-wheel dynamometer. At-
tempting to do so will result in
uncontrolled vehicle movement and
may cause an accident or injuries to
persons nearby.
CAUTION
Resultant vehicle damage due to
improper testing is not covered
under the SUBARU Limited War-
ranty and is the responsibility of
the state inspection program or its
contractors or licensees.
At state inspection time, remember to
tell your inspection or service station in
advance not to place your SUBARU
AWD vehicle on a two-wheel dynam-
ometer. Otherwise, serious transmis-
sion damage will result.
Some states have started using dynam-
ometers in their state inspection programs Starting and operating
7-5
– CONTINUED –
Page 249 of 422

7-6Starting and operating
in order to meet their obligation under
federal law to implement stricter vehicle
emission standards to reduce air pollution
from vehicles. A dynamometer is a tread-
mill or roller-like testing device that allows
your vehicle ’s wheels to turn while the
vehicle remains in one place. Depending
on the severity of a state ’s air pollution
problems, the states must adopt either a“ basic ”or “enhanced ”vehicle emission
inspection test. Normally, a portion of the
basic emission test consists of an emis-
sion inspector inserting an analyzer probe
into the exhaust pipe of an idling vehicle
for a short period of time. States with more
severe air pollution problems are required
to adopt an enhanced vehicle emission
test. This test simulates actual driving
conditions on a dynamometer and permits
more accurate measurement of tailpipe
emitted pollution than the basic emissiontest.
The U.S. Environmental Protection
Agency (EPA) and states using two-wheel
dynamometers in their emission testing
programs have EXEMPTEDSUBARU
AWD vehicles from the portion of the
testing program that involves a two-wheel
dynamometer.
There are some states that use four-wheel
dynamometers in their testing programs.
When properly used, that equipment will not damage a SUBARU AWD vehicle.
Under no circumstances should the rear
wheels be jacked off the ground, nor
should the driveshaft be disconnected for
state emission testing.
The EPA has issued regulations for
inspecting the On-Board Diagnostic
(OBD) system as part of the state emis-
sions inspection. The OBD system is
designed to detect engine and transmis-
sion problems that might cause vehicle
emissions to exceed allowable limits.
These inspections apply to all 1996 model
year and newer passenger cars and light
trucks. Over 30 states plus the District of
Columbia have implemented the OBD
system inspection. .
The inspection of the OBD system
consists of a visual operational check of the “CHECK ENGINE ”warning light/
malfunction indicator lamp (MIL) and an
examination of the OBD system with an
electronic scan tool while the engine isrunning. . Avehicle
passes the OBD system
inspection if proper the “CHECK EN-
GINE ”warning light/MIL illumination is
observed, there is nostored diagnostic
trouble codes, and the OBD system
readiness monitors are complete. . A vehicle
fails the OBD inspection if the “
CHECK ENGINE ”warning light/MIL is
not properly operating or there is one or
more diagnostic trouble codes stored in
vehicle ’s computer with the “CHECK
ENGINE ”warning light/MIL illuminated.
. A state emission inspection may reject
(not pass or fail) a vehicle if the number of
OBD system readiness monitors “Not
Ready ”is greater than one. Under this
condition, the vehicle operator should be
instructed to drive his/her vehicle for a few
days to set the monitors and return for an
emission re-inspection. . Owners of rejected or failing vehicles
should contact their SUBARU Dealer for service.
Page 332 of 422

Maintenance schedule....................................... 11-3
Maintenance precautions ................................... 11-3
Before checking or servicing in the engine compartment .................................................... 11-4
When you do checking or servicing in the engine compartment while the engine is running .......... 11-4
Engine hood ....................................................... 11-4
Engine compartment overview .......................... 11-6
Engine oil ............................................................ 11-7
Checking the oil level ......................................... 11-7
Changing the oil and oil filter .............................. 11-8
Recommended grade and viscosity .................... 11-9
Synthetic oil ....................................................... 11-9
Cooling system ................................................ 11-10
Hose and connections ...................................... 11-10
Engine coolant ................................................. 11-10
Air cleaner element .......................................... 11-13
Replacing the air cleaner element ..................... 11-13
Spark plugs ...................................................... 11-14
Recommended spark plugs .............................. 11-14
Drive belts ........................................................ 11-14
Automatic transmission fluid .......................... 11-15
Checking the fluid level .................................... 11-15
Recommended fluid ......................................... 11-16
Front differential gear oil ................................. 11-16
Checking the oil level ....................................... 11-16
Recommended grade and viscosity .................. 11-17
Rear differential gear oil .................................. 11-17
Recommended grade and viscosity .................. 11-17Power steering fluid
........................................ 11-17
Checking the fluid level .................................... 11-17
Recommended fluid ......................................... 11-18
Brake fluid ........................................................ 11-18
Checking the fluid level .................................... 11-18
Recommended brake fluid ............................... 11-19
Brake booster .................................................. 11-19
Brake pedal ...................................................... 11-20
Checking the brake pedal free play .................. 11-20
Checking the brake pedal reserve distance....... 11-20
Replacement of brake pad and lining ............ 11-20
Breaking-in of new brake pads and linings ....... 11-21
Parking brake stroke ....................................... 11-21
Tires and wheels .............................................. 11-22
Types of tires ................................................... 11-22
Tire pressure monitoring system (TPMS) .......... 11-22
Tire inspection ................................................. 11-23
Tire pressures and wear .................................. 11-24
Wheel balance ................................................. 11-26
Wear indicators ............................................... 11-26
Tire rotation direction mark .............................. 11-26
Tire rotation ..................................................... 11-27
Tire replacement .............................................. 11-27
Wheel replacement .......................................... 11-28
Aluminum wheels ............................................ 11-28
Windshield washer fluid .................................. 11-29
Replacement of wiper blades ......................... 11-30
Windshield wiper blade assembly ..................... 11-31
Windshield wiper blade rubber . ........................ 11-31
Rear window wiper blade assembly .................. 11-32
Maintenance and service
11
Page 351 of 422

11-20Maintenance and service
Brake pedal
Check the brake pedal free play and
reserve distance according to the main-
tenance schedule in the “Warranty and
Maintenance Booklet ”.
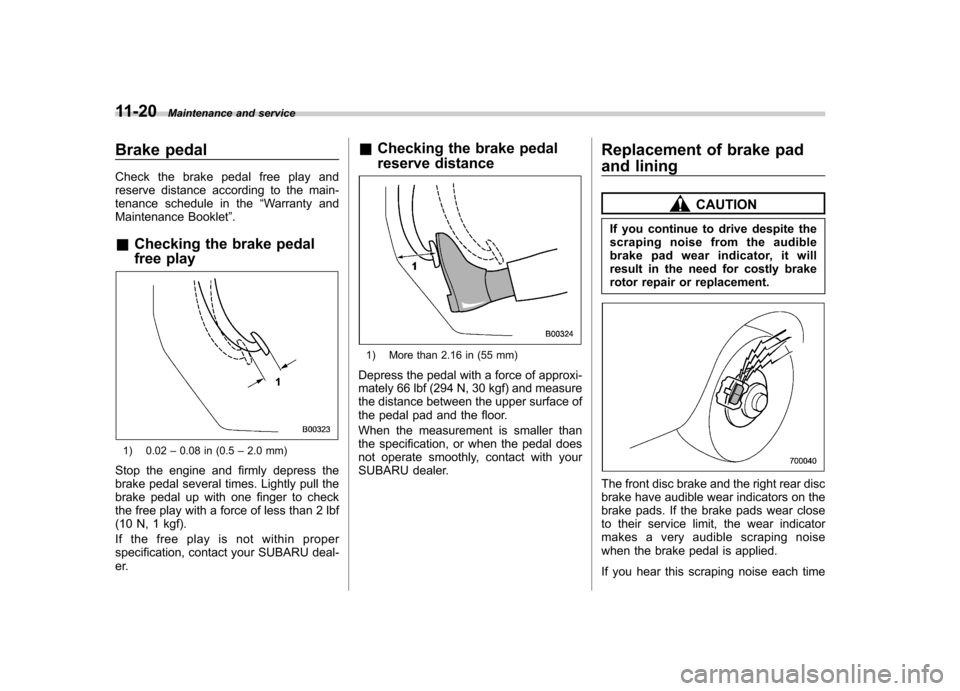
& Checking the brake pedal
free play
1) 0.02 –0.08 in (0.5 –2.0 mm)
Stop the engine and firmly depress the
brake pedal several times. Lightly pull the
brake pedal up with one finger to check
the free play with a force of less than 2 lbf
(10 N, 1 kgf).
If the free play is not within proper
specification, contact your SUBARU deal-
er. &
Checking the brake pedal
reserve distance
1) More than 2.16 in (55 mm)
Depress the pedal with a force of approxi-
mately 66 lbf (294 N, 30 kgf) and measure
the distance between the upper surface of
the pedal pad and the floor.
When the measurement is smaller than
the specification, or when the pedal does
not operate smoothly, contact with your
SUBARU dealer. Replacement of brake pad
and lining
CAUTION
If you continue to drive despite the
scraping noise from the audible
brake pad wear indicator, it will
result in the need for costly brake
rotor repair or replacement.
The front disc brake and the right rear disc
brake have audible wear indicators on the
brake pads. If the brake pads wear close
to their service limit, the wear indicator
makes a very audible scraping noise
when the brake pedal is applied.
If you hear this scraping noise each time
Page 357 of 422

11-26Maintenance and service
&Wheel balance
Each wheel was correctly balanced when
your vehicle was new, but the wheels will
become unbalanced as the tires become
worn during use. Wheel imbalance causes
the steering wheel to vibrate slightly at
certain vehicle speeds and detracts from
the vehicle ’s straight-line stability. It can
also cause steering and suspension sys-
tem problems and abnormal tire wear. If
you suspect that the wheels are not
correctly balanced, have them checked
and adjusted by your SUBARU dealer.
Also have them adjusted after tire repairs
and after tire rotation. NOTE
Loss of correct wheel alignment*
causes the tires to wear on one side
and reduces the vehicle ’s running
stability. Contact your SUBARU dealer
if you notice abnormal tire wear.
*: The suspension system is designed to hold
each wheel at a certain alignment (relative to
the other wheels and to the road) for optimum
straight-line stability and cornering perfor- mance. &
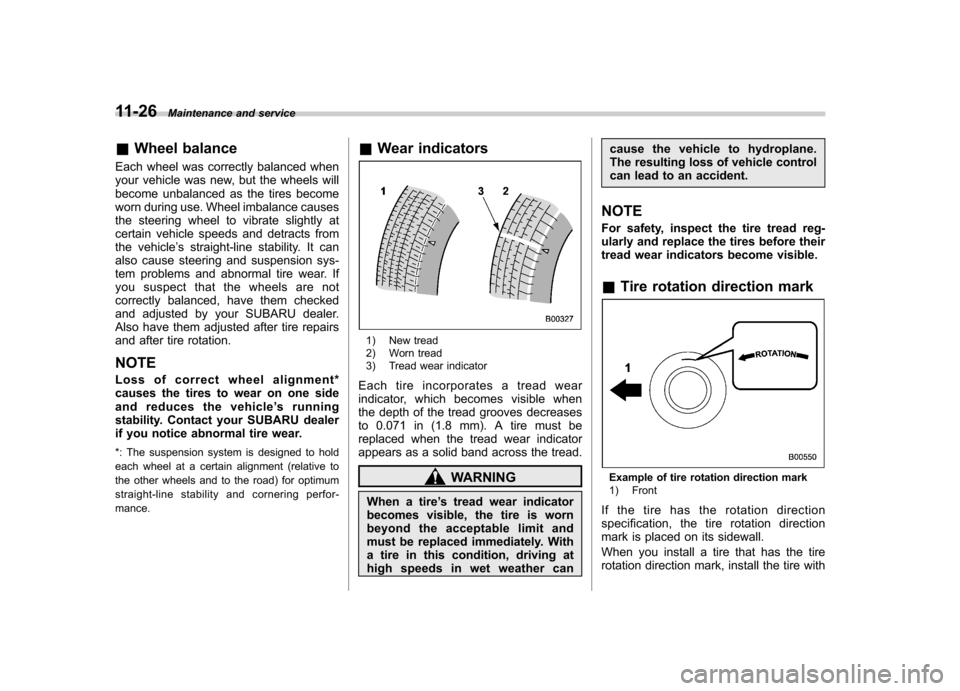
Wear indicators
1) New tread
2) Worn tread
3) Tread wear indicator
Each tire incorporates a tread wear
indicator, which becomes visible when
the depth of the tread grooves decreases
to 0.071 in (1.8 mm). A tire must be
replaced when the tread wear indicator
appears as a solid band across the tread.
WARNING
When a tire ’s tread wear indicator
becomes visible, the tire is worn
beyond the acceptable limit and
must be replaced immediately. With
a tire in this condition, driving at
high speeds in wet weather can cause the vehicle to hydroplane.
The resulting loss of vehicle control
can lead to an accident.
NOTE
For safety, inspect the tire tread reg-
ularly and replace the tires before their
tread wear indicators become visible. & Tire rotation direction markExample of tire rotation direction mark
1) Front
If the tire has the rotation direction
specification, the tire rotation direction
mark is placed on its sidewall.
When you install a tire that has the tire
rotation direction mark, install the tire with