2011 SUBARU IMPREZA WRX buttons
[x] Cancel search: buttonsPage 229 of 458

5-42Audio
counterclockwise, the displayed category
changes in the opposite sequence.
To select the category, press the “TUNE/
TRACK/CH ”dial. To close the iPod®
menu, press the “LIST ”button for more
than 1.5 seconds. To return to the pre-
vious screen, briefly press the “LIST ”
button. & Display selection
Refer to “Display selection ”F 5-30.
! Page scroll
Refer to “Page (track/folder title) scroll ”
F 5-31.
& Folder selection (only when
connecting USB storage de- vice)
Refer to “Folder selection ”F 5-31. NOTE
When an iPod
®is connected, you
cannot select a folder. & When “CHECK DEVICE ”is
displayed
This message is displayed under the
following conditions. . When there is a short in the USB bus
. When a non-corresponding device (for
example a USB mouse) is connected. When a non-corresponding iPod
®is
connected . When a connected iPod
®is frozen
. When a transmission malfunction oc-
curs . When an iPod
®confirmation malfunc-
tion occurs. When a HUB class USB storage
device is connected
Disconnect the USB storage device/iPod
®
and check it. Audio control buttons (if
equipped)
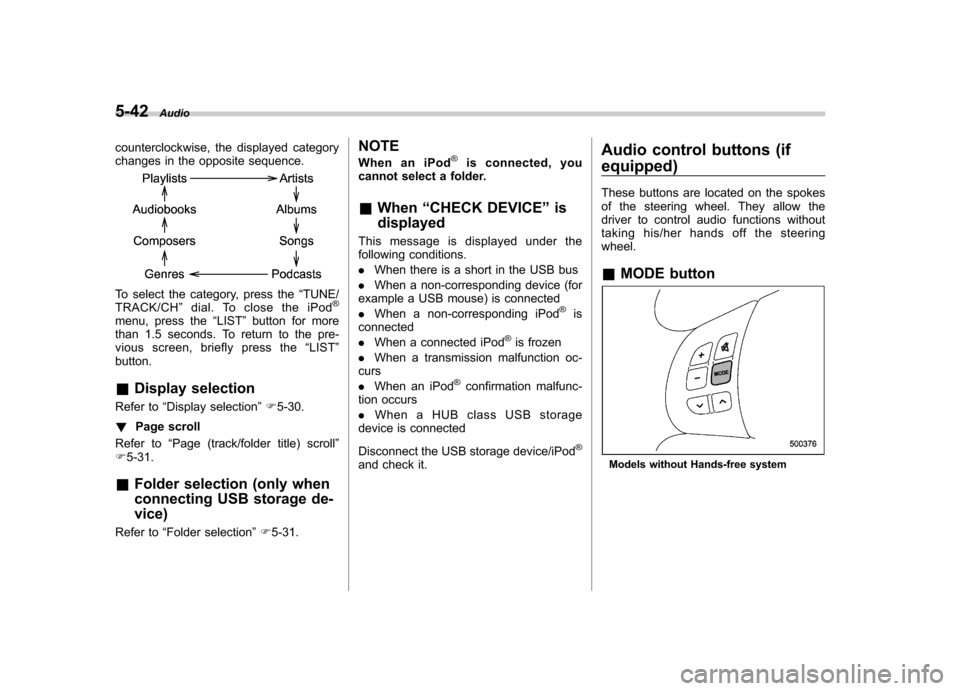
These buttons are located on the spokes
of the steering wheel. They allow the
driver to control audio functions without
taking his/her hands off the steeringwheel. &
MODE buttonModels without Hands-free system
Page 230 of 458

Models with Hands-free system
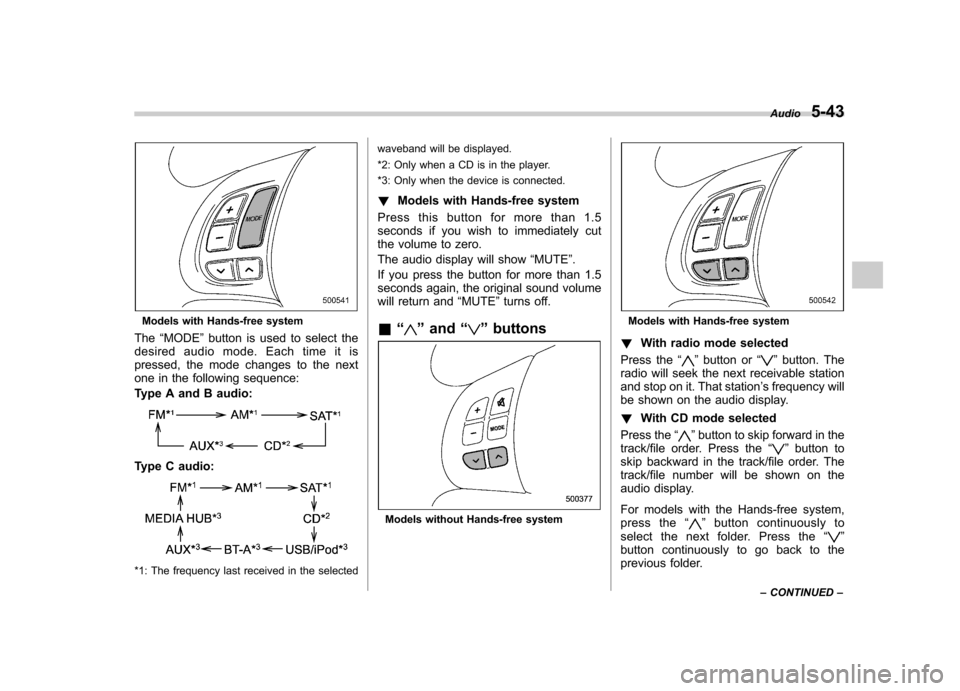
The “MODE ”button is used to select the
desiredaudiomode.Eachtimeitis
pressed, the mode changes to the next
one in the following sequence:
Type A and B audio:
Type C audio:
*1: The frequency last received in the selected waveband will be displayed.
*2: Only when a CD is in the player.
*3: Only when the device is connected.
! Models with Hands-free system
Press this button for more than 1.5
seconds if you wish to immediately cut
the volume to zero.
The audio display will show “MUTE ”.
If you press the button for more than 1.5
seconds again, the original sound volume
will return and “MUTE ”turns off.
& “
”and “”buttons
Models without Hands-free system
Models with Hands-free system
! With radio mode selected
Press the “
”button or “”button. The
radio will seek the next receivable station
and stop on it. That station ’s frequency will
be shown on the audio display. ! With CD mode selected
Press the “
”button to skip forward in the
track/file order. Press the “”button to
skip backward in the track/file order. The
track/file number will be shown on the
audio display.
For models with the Hands-free system,
press the “
”button continuously to
select the next folder. Press the “”
button continuously to go back to the
previous folder. Audio
5-43
– CONTINUED –
Page 231 of 458

5-44Audio
! With SAT mode selected
Press the “
”button to skip forward in the
channel order. Press the “”button to
skip backward in the channel order.
The channel will be shown on the audio
display.
& Volume control buttons
Models without Hands-free system
Models with Hands-free system
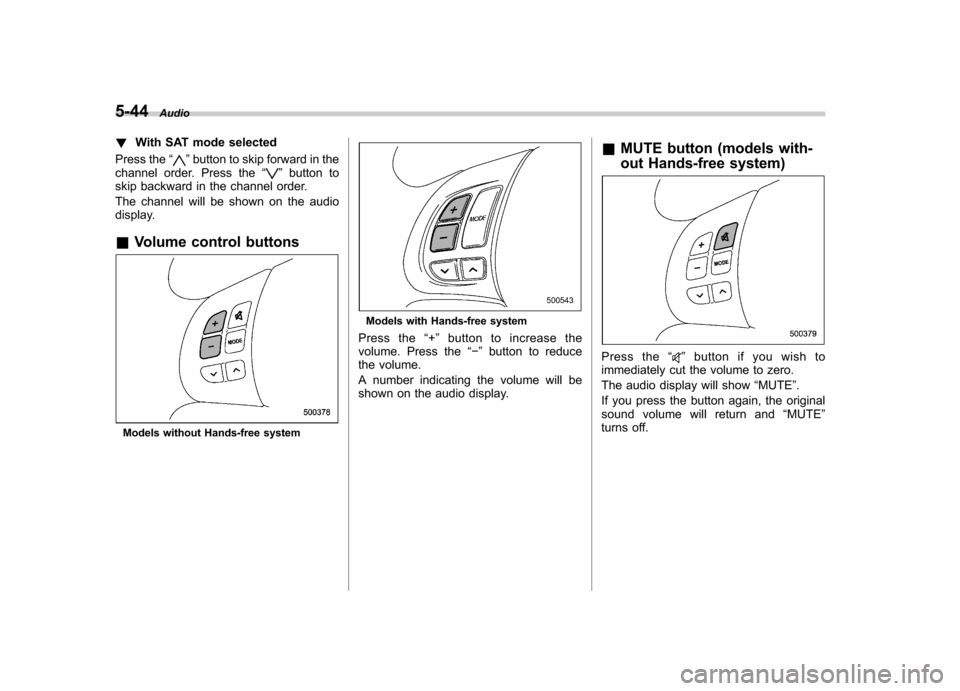
Press the “+ ” button to increase the
volume. Press the “� ” button to reduce
the volume.
A number indicating the volume will be
shown on the audio display. &
MUTE button (models with-
out Hands-free system)
Press the “”buttonifyouwishto
immediately cut the volume to zero.
The audio display will show “MUTE ”.
If you press the button again, the original
sound volume will return and “MUTE ”
turns off.
Page 238 of 458

NOTE
While inputting the phone numbers, if “GO BACK ”is chosen using the
“ TUNE/TRACK/CH ”dial, the character
that was input last is deleted. ! Registering from call history
1. Select the “PHONE BOOK ”menu.
2. Select the “ADD ENTRY ”menu.
3. Select the “CALL HISTORY ”menu.
4. Select “OUTGOING ”or “INCOMING ”
by operating the “TUNE/TRACK/CH ”dial.
5. Select the phone number by operating the “TUNE/TRACK/CH ”dial.
6. Select the “RECORD NAME ”menu by
operating the “TUNE/TRACK/CH ”dial or
press the talk switch
.
7. Say the name (voice tag) to be registered.
8. Select the “CONFIRM ”menu. Then
“ STORED ”is displayed and the mode
changes to the registering speed dial
mode. Refer to “Registering speed dial ”
F 5-51.
! Registering from redial
1. Select the “REDIAL ”menu.
2. Select the phone number by operatingthe “TUNE/TRACK/CH ”dial.
3. Select the “STORE ”menu. 4. Select the
“CONFIRM ”menu.
5. Select the “RECORD NAME ”menu by
operating the “TUNE/TRACK/CH ”dial or
press the talk switch
.
6. Say the name (voice tag) to be registered.
7. Select the “CONFIRM ”menu. Then
“ STORED ”is displayed and the mode
changes to the registering speed dial
mode. Refer to “Registering speed dial ”
F 5-51.
! Registering from call back
1. Select the “CALL BACK ”menu.
2. Select the phone number by operatingthe “TUNE/TRACK/CH ”dial.
3. Select the “STORE ”menu.
4. Select the “CONFIRM ”menu.
5. Select the “RECORD NAME ”menu by
operating the “TUNE/TRACK/CH ”dial or
press the talk switch
.
6. Say the name (voice tag) to be registered.
7. Select the “CONFIRM ”menu. Then
“ STORED ”is displayed and the mode
changes to the registering speed dial
mode. Refer to “Registering speed dial ”
F 5-51. !
Registering speed dial
1. After registering phonebook data, se-
lect the “SPEED DIAL ”menu.
Preset buttons
2. Press the preset button in which you
want to register the phone number. NOTE
If the number to be used is already
registered in speed dial, “OVER-
WRITE? ”will be displayed.
! List names function
The voice tags registered in the phone-
book are spoken by using the list names
function. To use the list names function,
perform the following procedure.
1. Select the “PHONE BOOK ”menu.
Audio
5-51
– CONTINUED –
Page 239 of 458

5-52Audio
2. Select the “LIST NAMES ”menu.
3. Choose the registered data by press-
ing the talk switch
or by operating the
“ TUNE/TRACK/CH ”dial. Then “SE-
LECTED ”is displayed. You can choose
the following menus. . “DIAL ”to make a phone call
. “CHANGE NAME ”to change the name
(voice tag) . “SET SPD DIAL ”/“ SET SPEED DIAL ”
to set the speed dial. “DELETE ENTRY ”to delete the name
(voice tag) from the phonebook. “GO BACK ”to go back to the menu
mode
NOTE . After “LIST NAMES ”is selected, if
the OFF hook switch
is pushed, the
selected number is called. . After “LIST NAMES ”is selected, if
no operation is performed, the mem-
ories are displayed and voice tags arespoken. ! Changing voice tag
1. Select the “PHONE BOOK ”menu.
2. Select the “CHANGE NAME ”menu.
3. Select the phone number by operating the “TUNE/TRACK/CH ”dial/by pressing
the talk switch
and saying the voice tag.
4. Select the
“CONFIRM ”menu. Then
the selected phone number/name is dis- played.
5. Press the talk switch
.
6. Say the new voice tag.
7. Select the “CONFIRM ”menu. Then
“ CHANGED ”is displayed.
! Set speed dial
1. Select the “PHONE BOOK ”menu.
2. Select “SET SPD DIAL ”by operating
the “TUNE/TRACK/CH ”dial or select
“ SET SPEED DIAL ”by using the voice
command system.
3. Select the phone number by operating the “TUNE/TRACK/CH ”dial/by pressing
the talk switch
and saying the voice
tag.
4. Select the “CONFIRM ”menu.
Preset buttons
5. Press the preset button in which you
want to register the phone number. NOTE
If the number to be used is already
registered in speed dial, “OVER-
WRITE? ”will be displayed.
! Deleting the phonebook data
1. Select the “PHONE BOOK ”menu.
2. Select the “DELETE ENTRY ”menu.
3. Select the phone number by operatingthe “TUNE/TRACK/CH ”dial/by pressing
the talk switch
and saying the voice
tag.
4. Select the “CONFIRM ”menu. Then
“ DELETED ”is displayed and the selected
Page 240 of 458

phonebook data is deleted. !Deleting the speed dial
1. Select the “PHONE BOOK ”menu.
2. Select “DEL SPD DIAL ”by operating
the “TUNE/TRACK/CH ”dial or select
“ DELETE SPEED DIAL ”by using the
voice command system.
Preset buttons
3. Press the preset button in which you
want to delete the speed dial.
4. Select the “CONFIRM ”menu. Then
“ DELETED ”is displayed and the selected
speed dial is deleted. ! Deleting the redial data
1. Select the “REDIAL ”menu.
2. Select the phone number by operating the
“TUNE/TRACK/CH ”dial.
3. Select the “DELETE ”menu.
4. Select the “CONFIRM ”menu. Then
“ DELETED ”is displayed and the selected
redial data is deleted.! Deleting the callback data
1. Select the “CALLBACK ”menu.
2. Select the phone number by operating the “TUNE/TRACK/CH ”dial.
3. Select the “DELETE ”menu.
4. Select the “CONFIRM ”menu. Then
“ DELETED ”is displayed and the selected
callback data is deleted. ! Making a phone call
! Making a phone call by saying name
1. Press the talk switch
.
2. Say “DIAL BY NAME ”.
3. Press the talk switch
again.
4. Say the desired name (voice tag) to be called.
5. Select the “DIAL ”menu or press the
OFF hook switch
.
! Making a phone call by saying number
1. Press the talk switch
.
2. Say “DIAL BY NUMBER ”. 3. Press the talk switch
again.
4. Say the desired phone number to be called.
5. Select the “DIAL ”menu or press the
OFF hook switch
.
! Making a phone call from speed dial
It is possible to select a phone number
from speed dial registered with the in-
vehicle equipment to make a phone call.
Preset buttons
1. Press the preset button in which the
desired number is registered.
2. Press the OFF hook switch
.
NOTE
When a preset button for which num-
bers are not registered is pressed, an Audio
5-53
– CONTINUED –
Page 241 of 458

5-54Audio
error message is indicated on the audio screen. !Redial
1. Select the “REDIAL ”menu.
2. Select the desired number by operat-
ing the “TUNE/TRACK/CH ”dial.
3. Select the “DIAL ”menu or press the
OFF hook switch
.
! Callback
1. Select the “CALL BACK ”menu.
2. Select the desired number by operat-
ing the “TUNE/TRACK/CH ”dial.
3. Select the “DIAL ”menu or press the
OFF hook switch
.
! Making a phone call from list name
It is possible to select a phone number
from the list name registered with the in-
vehicle equipment to make a phone call.
1. Select the “LIST NAMES ”menu.
2. Select the desired number by operat-
ing the “TUNE/TRACK/CH ”dial.
3. Select the “DIAL ”menu or press the
OFF hook switch
.
! Top redial
1. Press the OFF hook switch
and
load the outgoing call history.
2. Select the “DIAL ”menu or press the
OFF hook switch
.
! Taking a phone call and declining
an incoming call
To take a phone call: Press the OFF
hook switch
.
To put an incoming call on hold: Press
the ON hook switch
briefly. To decline an incoming call:
Press the
ON hook switch
for more than 1.5
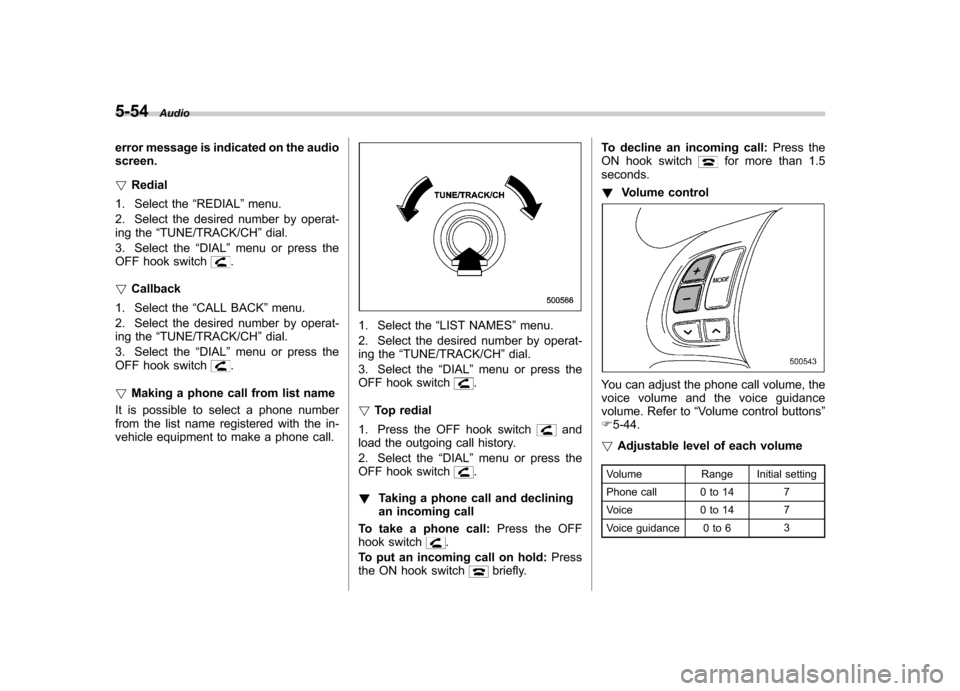
seconds. ! Volume control
You can adjust the phone call volume, the
voice volume and the voice guidance
volume. Refer to “Volume control buttons ”
F 5-44.
! Adjustable level of each volume
Volume Range Initial setting
Phone call 0 to 14 7
Voice 0 to 14 7
Voice guidance 0 to 6 3