2011 SUBARU IMPREZA WRX roof
[x] Cancel search: roofPage 92 of 458
stantly, the immobilizer system does not
impede normal starting of the engine.
If the engine fails to start, pull out the key
once before trying again. Refer to“Ignition
switch ”F 3-3.
This device complies with Part 15 of
the FCC Rules and RSS-Gen of IC
Rules. Operation is subject to the
following two conditions: (1) this de-
vice may not cause harmful interfer-
ence, and (2) this device must accept
any interference received, including
interference that may cause undesiredoperation.
CAUTION
. Do not place the key under direct
sunlight or anywhere it may
become hot.
. Do not get the key wet. If the key
gets wet, wipe it dry with a cloth
immediately.
NOTE
To protect your vehicle from theft,
please pay close attention to the fol-
lowing security precautions: . Never leave your vehicle unattended
with its keys inside. . Before leaving your vehicle, close all windows and the moonroof, and lock
the doors and rear gate..
Do not leave spare keys or any
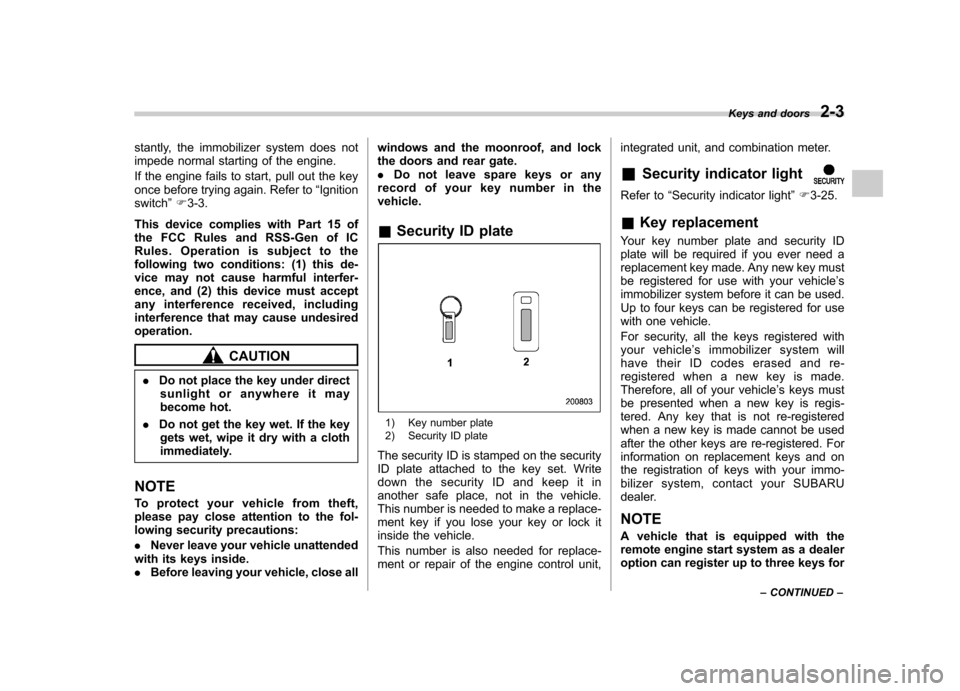
record of your key number in thevehicle. & Security ID plate
1) Key number plate
2) Security ID plate
The security ID is stamped on the security
ID plate attached to the key set. Write
down the security ID and keep it in
another safe place, not in the vehicle.
This number is needed to make a replace-
ment key if you lose your key or lock it
inside the vehicle.
This number is also needed for replace-
ment or repair of the engine control unit, integrated unit, and combination meter. &
Security indicator light
Refer to “Security indicator light ”F 3-25.
& Key replacement
Your key number plate and security ID
plate will be required if you ever need a
replacement key made. Any new key must
be registered for use with your vehicle ’s
immobilizer system before it can be used.
Up to four keys can be registered for use
with one vehicle.
For security, all the keys registered with
your vehicle ’s immobilizer system will
have their ID codes erased and re-
registered when a new key is made.
Therefore, all of your vehicle ’s keys must
be presented when a new key is regis-
tered. Any key that is not re-registered
when a new key is made cannot be used
after the other keys are re-registered. For
information on replacement keys and on
the registration of keys with your immo-
bilizer system, co ntact your SUBARU
dealer.
NOTE
A vehicle that is equipped with the
remote engine start system as a dealer
option can register up to three keys for Keys and doors
2-3
– CONTINUED –
Page 95 of 458

2-6Keys and doors
Item Switch
position Automatically turning
off
Map lights
*1OFF*1Approximately 30 seconds later
Dome light DOOR Approximately 20
minutes later
Ignition
switch light —Approximately 20
minutes later
Door steplights —
None
*2
Cargo arealightDOOR
None*2
*1: The battery drainage prevention function
affects only the map lights on models with the
moonroof, and only when the map light
switches are in the OFF position. The map
lights on models without the moonroof do not
turn off automatically, so push the light switches
manually to turn them off.
*2: The door step lights and the cargo area light
are not affected by the battery drainage
prevention function, so the lights do not turn
off automatically. To turn off the lights, it is
necessary that each door and the rear gate (5-
door) are completely closed.
The operational/non-operational setting of
this function can be changed by a
SUBARU dealer. Contact your SUBARU
dealer to change the setting. NOTE .
The factory setting (default setting)
for this function is set as “operational ”.
. When leaving the vehicle, please
make sure that all doors and the rear
gate (5-door) are completely closed.. The battery drainage prevention
function does not operate while the
key is in the ignition switch. Power door locking switches
Type A
Type B
1) Lock
2) Unlock
Page 105 of 458

2-16Keys and doors
Alarm system
The alarm system helps to protect your
vehicle and valuables from theft. The horn
sounds and the turn signal lights flash if
someone attempts to break into your
vehicle. The starter motor is also inter-
rupted to prevent starting the vehicle
without a key.
The system can be armed and disarmed
with the remote transmitter.
The system does not operate when the
key is inserted into the ignition switch.
Your vehicle ’s alarm system has been set
for activation at the time of shipment from
the factory. You can set the system for
deactivation yourself or have it done by
your SUBARU dealer. & System operation
The alarm system will sound the following
alarms when triggered. . The vehicle ’s horn will sound for 30
seconds.. The turn signal lights will flash for 30
seconds.
If any of the doors or the rear gate/trunk lid
remains open after the 30-second period,
the horn will continue to sound for a
maximum of 3 minutes. If the door or the rear gate/trunk lid is closed while the horn
is sounding, the horn will stop sounding
with a delay of up to 30 seconds.
The alarm is triggered by: .
Opening any of the doors, the rear gate
or trunk lid. Physical impact to the vehicle, such as
forced entry (only models with shock
sensors (dealer option))
NOTE
The alarm system can be set to trigger
the illumination of the following interiorlights. . Dome light (illuminates only when
the dome light switch is in the “DOOR ”
position) . Map lights (models with moonroof)
The notifications regarding the dome
light and the map lights are deactivated
as the factory setting. A SUBARU
dealer can activate the system. Contact
your SUBARU dealer for details. & Activating and deactivating
the alarm system
To change the setting of your vehicle ’s
alarm system for activation or deactiva-
tion, do the following.
1. Disarm the alarm system. Refer to “
Disarming the system ”F 2-19.
2. Sit in the driver ’s seat and shut all
doors (and the rear gate if your vehicle is a 5-door).
3. Turn the ignition switch to the “ON ”
position.
4. Hold down the REAR (UNLOCK) side
of the driver ’s power door locking switch,
open the driver ’s door within the following
1 second, and wait 10 seconds without
releasing the switch. The setting will then
be changed as follows.
If the system was previously activated:
The odometer/trip meter screen displays “ AL oF ”and the horn sounds twice,
indicating that the system is now deacti-vated.
If the system was previously deacti- vated:
The odometer/trip meter screen displays “ AL on ”and the horn sounds once,
indicating that the system is now acti-vated.
NOTE
You may have the above setting
change done by your SUBARU dealer.
Page 118 of 458
Moonroof (if equipped)
WARNING
Never let anyone ’shands,arms,
head or any objects protrude from
the moonroof. A person could be
seriously injured if the vehicle stops
suddenly or turns sharply or if the
vehicle is involved in an accident.
To avoid serious personal injury
caused by entrapment, always con-
form to the following instructions
without exception. . Before closing the moonroof,
make sure that no one ’s hands,
arms, head or other objects will
be accidentally caught in themoonroof.
. Before leaving the vehicle, al-
ways remove the key from the
ignition switch for safety and
never allow an unattended child
to remain in the vehicle. Failure
to follow this procedure could
result in injury to a child operat-
ing the moonroof. .
Never try to check the anti-en-
trapment function by deliberately
placing part of your body in themoonroof.
CAUTION
. Do not sit on the edge of the open
moonroof.
. Do not operate the moonroof if
falling snow or extremely cold
conditions have caused it to
freeze shut.
. The anti-entrapment function
does not operate when the moon-
roof is being tilted down. Be sure
to confirm that it is safe to do so
before tilting the moonroof down.
The moonroof has both tilting and slidingfunctions.
The moonroof operates only when the
ignition switch is in the “ON ”position. &
Moonroof switches
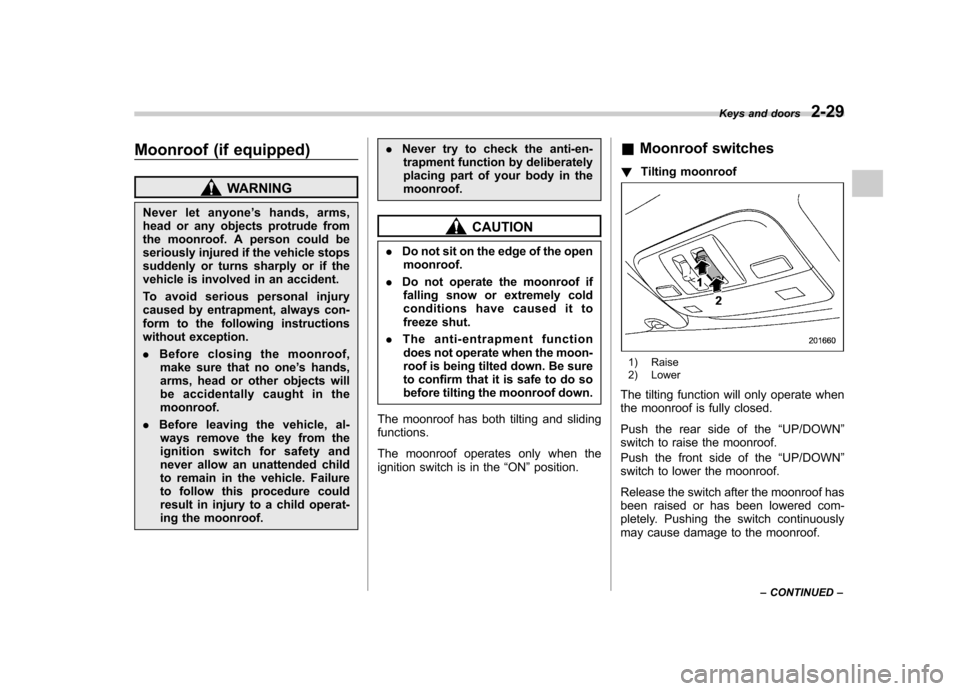
! Tilting moonroof
1) Raise
2) Lower
The tilting function will only operate when
the moonroof is fully closed.
Push the rear side of the “UP/DOWN ”
switch to raise the moonroof.
Push the front side of the “UP/DOWN ”
switch to lower the moonroof.
Release the switch after the moonroof has
been raised or has been lowered com-
pletely. Pushing the switch continuously
may cause damage to the moonroof. Keys and doors
2-29
– CONTINUED –
Page 119 of 458
2-30Keys and doors
NOTE
One-touch operation does not take
place when the moonroof is lowered.
Push the switch continuously to raise
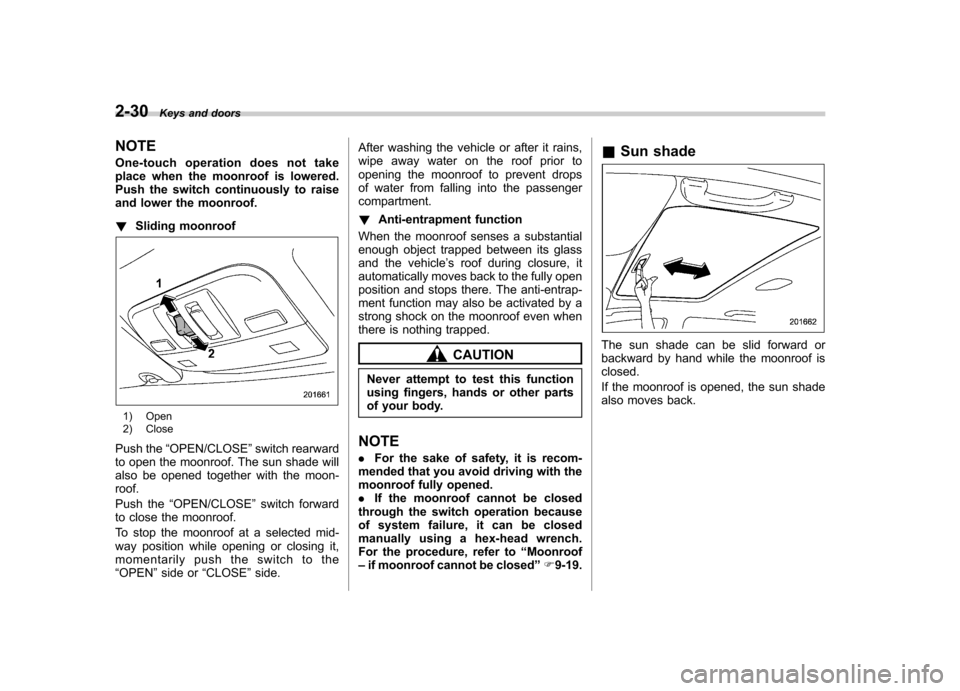
and lower the moonroof. !Sliding moonroof
1) Open
2) Close
Push the “OPEN/CLOSE ”switch rearward
to open the moonroof. The sun shade will
also be opened together with the moon-roof.
Push the “OPEN/CLOSE ”switch forward
to close the moonroof.
To stop the moonroof at a selected mid-
way position while opening or closing it,
momentarily push the switch to the“ OPEN ”side or “CLOSE ”side. After washing the vehicle or after it rains,
wipe away water on the roof prior to
opening the moonroof to prevent drops
of water from falling into the passengercompartment. !
Anti-entrapment function
When the moonroof senses a substantial
enough object trapped between its glass
and the vehicle ’s roof during closure, it
automatically moves back to the fully open
position and stops there. The anti-entrap-
ment function may also be activated by a
strong shock on the moonroof even when
there is nothing trapped.
CAUTION
Never attempt to test this function
using fingers, hands or other parts
of your body.
NOTE . For the sake of safety, it is recom-
mended that you avoid driving with the
moonroof fully opened.. If the moonroof cannot be closed
through the switch operation because
of system failure, it can be closed
manually using a hex-head wrench.
For the procedure, refer to “Moonroof
– if moonroof cannot be closed ”F 9-19. &
Sun shadeThe sun shade can be slid forward or
backward by hand while the moonroof isclosed.
If the moonroof is opened, the sun shade
also moves back.
Page 122 of 458
Ignition switch
WARNING
. Never turn the ignition switch to
“ LOCK ”while the vehicle is
being driven or towed because
that will lock the steering wheel,
preventing steering control. And
when the engine is turned off, it
takes a much greater effort than
usual to steer.
. Before leaving the vehicle, al-
ways remove the key from the
ignition switch for safety and
never allow an unattended child
to remain in the vehicle. Failure
to follow this procedure could
result in injury to a child or
others. Children could operate
the power windows, the moon-
roof or other controls or even
make the vehicle move.
CAUTION
Do not attach a large key holder or
key case to either key. If it banged
against your knees or hands while
you are driving, it could turn the
ignition switch from the “ON ”posi- tion to the
“Acc ”or “LOCK ”posi-
tion, thereby stopping the engine.
Also, if the key is attached to a
keyholder or to a large bunch of
other keys, centrifugal force may act
on it as the vehicle moves, resulting
in unwanted turning of the ignitionswitch.
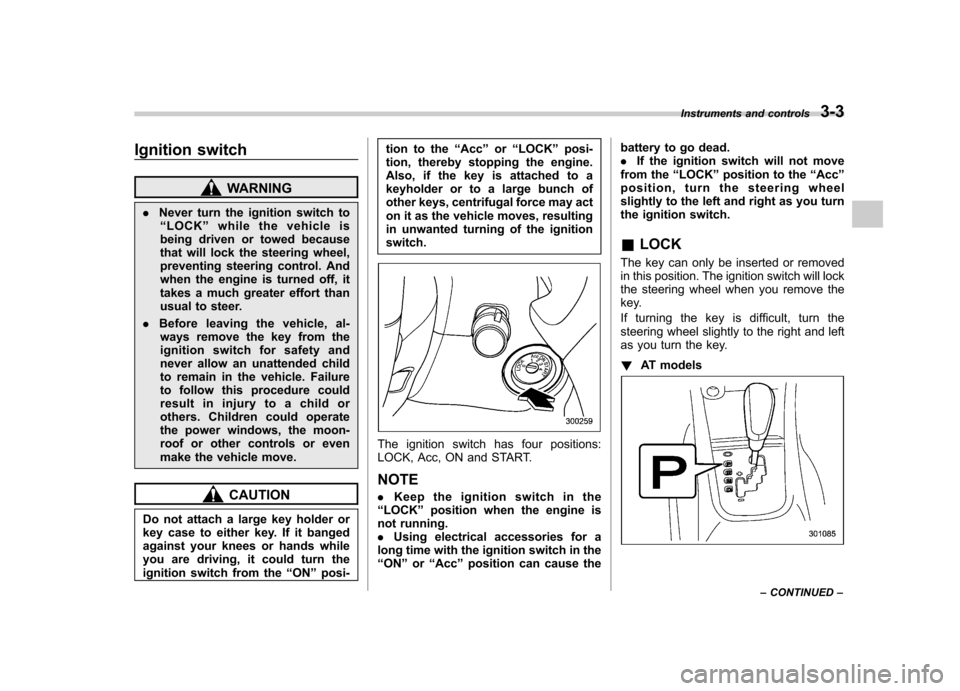
The ignition switch has four positions:
LOCK, Acc, ON and START. NOTE . Keep the ignition switch in the
“ LOCK ”position when the engine is
not running. . Using electrical accessories for a
long time with the ignition switch in the“ ON ”or “Acc ”position can cause the battery to go dead..
If the ignition switch will not move
from the “LOCK ”position to the “Acc ”
position, turn the steering wheel
slightly to the left and right as you turn
the ignition switch. & LOCK
The key can only be inserted or removed
in this position. The ignition switch will lock
the steering wheel when you remove the
key.
If turning the key is difficult, turn the
steering wheel slightly to the right and left
as you turn the key. ! AT models
Instruments and controls 3-3
– CONTINUED –
Page 188 of 458
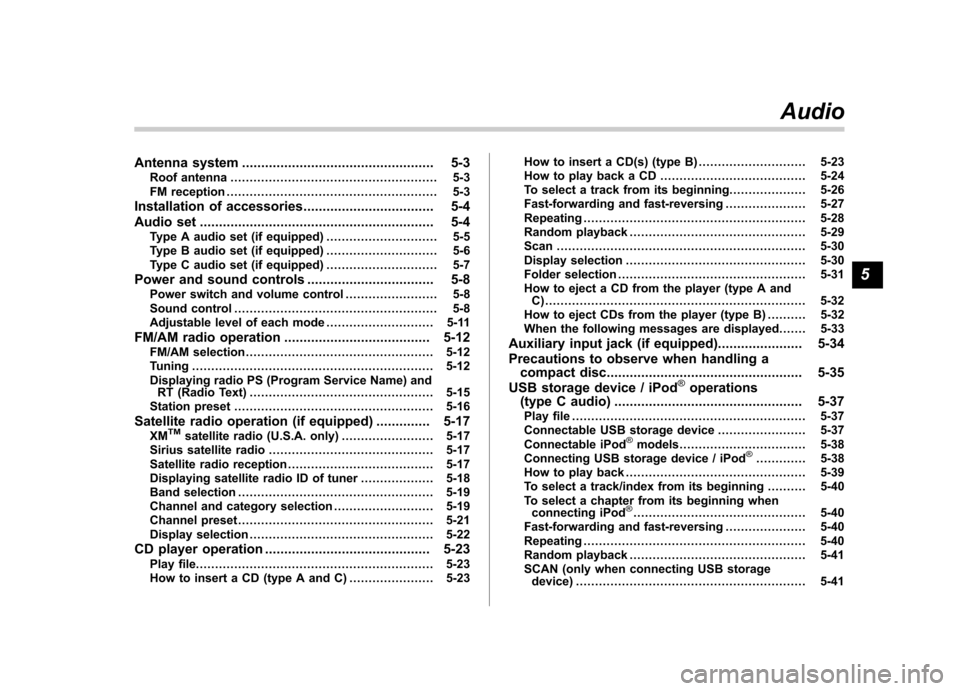
Antenna system.................................................. 5-3
Roof antenna ...................................................... 5-3
FM reception ....................................................... 5-3
Installation of accessories .................................. 5-4
Audio set ............................................................. 5-4
Type A audio set (if equipped) ............................. 5-5
Type B audio set (if equipped) ............................. 5-6
Type C audio set (if equipped) ............................. 5-7
Power and sound controls ................................. 5-8
Power switch and volume control ........................ 5-8
Sound control ..................................................... 5-8
Adjustable level of each mode ............................ 5-11
FM/AM radio operation ...................................... 5-12
FM/AM selection ................................................. 5-12
Tuning ............................................................... 5-12
Displaying radio PS (Program Service Name) and RT (Radio Text) ................................................ 5-15
Station preset .................................................... 5-16
Satellite radio operation (if equipped) .............. 5-17
XM
TMsatellite radio (U.S.A. only) ........................ 5-17
Sirius satellite radio ........................................... 5-17
Satellite radio reception ...................................... 5-17
Displaying satellite radio ID of tuner ................... 5-18
Band selection ................................................... 5-19
Channel and category selection .......................... 5-19
Channel preset ................................................... 5-21
Display selection ................................................ 5-22
CD player operation ........................................... 5-23
Play file. ............................................................. 5-23
How to insert a CD (type A and C) ...................... 5-23How to insert a CD(s) (type B) ..
.......................... 5-23
How to play back a CD ...................................... 5-24
To select a track from its beginning. ................... 5-26
Fast-forwarding and fast-reversing ..................... 5-27
Repeating .......................................................... 5-28
Random playback .............................................. 5-29
Scan ................................................................. 5-30
Display selection ............................................... 5-30
Folder selection ................................................. 5-31
How to eject a CD from the player (type A and C).................................................................... 5-32
How to eject CDs from the player (type B) ..... ..... 5-32
When the following messages are displayed. . ..... 5-33
Auxiliary input jack (if equipped). ..................... 5-34
Precautions to observe when handling a compact disc ................................................... 5-35
USB storage device / iPod
®operations
(type C audio) ................................................. 5-37
Play file ............................................................. 5-37
Connectable USB storage device ....................... 5-37
Connectable iPod
®models ................................. 5-38
Connecting USB storage device / iPod®............. 5-38
How to play back ............................................... 5-39
To select a track/index from its beginning ..... ..... 5-40
To select a chapter from its beginning when connecting iPod
®............................................. 5-40
Fast-forwarding and fast-reversing ..................... 5-40
Repeating .......................................................... 5-40
Random playback .............................................. 5-41
SCAN (only when connecting USB storage device) ............................................................ 5-41 Audio
5
Page 190 of 458

Antenna system &Roof antenna
CAUTION
. Be sure to lower the antenna rod
before entering garages, parking
towers and other locations with
low ceilings.
. Remove the antenna rod before
washing your car at a car wash. If
the antenna rod is left attached, it
may scratch the roof.
. When reinstalling the removed
antenna rod, be sure to fully
tighten it.
1) Unscrew
2) Remove
The roof antenna is installed in the center
at the rear part of the roof.
It is possible to remove the antenna rod by
unscrewing it from its base. &
FM reception
Although FM is normally static free,
reception can be affected by the surround-
ing area, atmospheric conditions, station
strength and transmitter distance. Build-
ings or other obstructions may cause
momentary static, flutter or station inter-
ference. If reception continues to be
unsatisfactory, switch to a stronger station. Audio
5-3