2011 SUBARU IMPREZA WRX traction control
[x] Cancel search: traction controlPage 27 of 458

24
&Warning and indicator lights
Mark Name Page
Seatbelt warning light 3-14
Front passenger ’s
seatbelt warning light 3-14
SRS airbag system
warning light3-15
/Front passenger
’s
frontal airbag ON indi- cator 3-16
/Front passenger
’s
frontal airbag OFF in- dicator 3-16
CHECK ENGINE
warning light/Malfunc-
tion indicator lamp3-16
Coolant temperature
low indicator light
(non-turbo models)/
Coolant temperature
high warning light
(non-turbo models)3-17
Charge warning light 3-18
Oil pressure warning light
3-18Mark Name Page
AT OIL TEMP warning
light (AT models)
3-18
Rear differential oil
temperature warning
light (STI)3-19
ABS warning light 3-21
Brake system warning light
3-21
Door open warning light3-23
AWD warning light
(AT models)3-23
Hill start assist warn-
ing light (if equipped)/
Hill start assist OFF
indicator light (STI)3-22
Vehicle Dynamics
Control operation indi-
cator light
3-23
Vehicle Dynamics
Control warning light/
Vehicle Dynamics
Control OFF indicator
light/Traction Control
OFF indicator light (STI)3-23
Turn signal indicator lights
3-26Mark Name Page
High beam indicator light
3-26
Front fog light indicator
light (if equipped)3-27
Security indicator light 3-25
Headlight indicator
light (if equipped)
3-27
Cruise control indica-
tor light
3-26
Cruise control set in-
dicator light3-27
Low fuel warning light 3-22
Low tire pressure
warning light
(U.S.-spec. models)3-19
SPORT mode indica-
tor light (AT models)
3-25
Shift-up indicator light (STI)
3-26
Driver
’s control center
differential auto indi-
cator light (STI) 3-27
Page 120 of 458

Ignition switch..................................................... 3-3
LOCK .................................................................. 3-3
Acc..................................................................... 3-4
ON...................................................................... 3-4
START ................................................................ 3-4
Key reminder chime ............................................ 3-5
Ignition switch light ............................................. 3-5
Hazard warning flasher ....................................... 3-5
Meters and gauges. ............................................. 3-6
Combination meter illumination ........................... 3-6
Canceling the function for meter/gauge needle movement upon turning on the ignition switch ............................................................... 3-6
Meter/Gauge needle illumination setting (turbo models except STI) ............................................ 3-7
Speedometer ....................................................... 3-8
Odometer/Trip meter ............................................ 3-8
Tachometer ......................................................... 3-9
Fuel gauge ......................................................... 3-10
Temperature gauge (turbo models) ..................... 3-11
REV indicator light and buzzer (STI). ................ 3-11
Setting the alarm-level engine speed ................... 3-12
Deactivating the REV alarm system ..................... 3-13
Warning and indicator lights ............................. 3-13
Seatbelt warning light and chime ........................ 3-14
SRS airbag system warning light ........................ 3-15
Front passenger ’s frontal airbag ON and OFF
indicators ......................................................... 3-16
CHECK ENGINE warning light/Malfunction indicator lamp .................................................. 3-16 Coolant temperature low indicator light (non-
turbo models)/Coolant temperature high
warning light (non-turbo models) ...................... 3-17
Charge warning light .......................................... 3-18
Oil pressure warning light .................................. 3-18
AT OIL TEMP warning light (AT models) .............. 3-18
Rear differential oil temperature warning light (STI) ................................................................ 3-19
Low tire pressure warning light (U.S.-spec. models) ........................................................... 3-19
ABS warning light .............................................. 3-21
Brake system warning light ................................ 3-21
Low fuel warning light ....................................... 3-22
Hill start assist warning light (MT models –if
equipped)/Hill start assist OFF indicator light (STI) ................................................................ 3-22
Door open warning light .................................... 3-23
All-Wheel Drive warning light (AT models) ..... ..... 3-23
Vehicle Dynamics Control operation indicator light ................................................................ 3-23
Vehicle Dynamics Control warning light/Vehicle Dynamics Control OFF indicator light/Traction
Control OFF indicator light (STI) ....................... 3-23
Security indicator light ....................................... 3-25
SPORT mode indicator light (AT models) ............ 3-25
SI-DRIVE indicator light (STI) .............................. 3-26
Shift-up indicator light (STI) ............................... 3-26
Select lever/gear position indicator (AT models) ..................................................... 3-26
Turn signal indicator lights ................................. 3-26
High beam indicator light ................................... 3-26
Cruise control indicator light .............................. 3-26
Instruments and controls
3
Page 132 of 458

to OFF, OFF to ON, or the vehicle starts
moving before the setting procedure isfinished..Setting the speed is impossible
when the vehicle is moving.. The set engine speed may differ
from the engine speed shown by the
tachometer. Use the engine speed
shown by the tachometer as a roughguide.. If the setting operation is performed
with the engine switch turned off, the
REV indicator light turns off and the
setting operation is aborted when you
have stopped the setting operation for
approximately 10 seconds. . If the setting operation is performed
with the engine switch turned off, the
REV indicator light turns off and the
setting operation is aborted when you
open and close the driver ’s door.
& Deactivating the REV alarm system
To deactivate the REV indicator light and
buzzer functions of the REV alarm system,
set the thousands place of the alarm-level
engine speed to “–”. Warning and indicator lights
Several of the warning and indicator lights
illuminate momentarily and then turn off
when the ignition switch is initially turned
to the
“ON ”position. This permits check-
ing the operation of the bulbs.
Apply the parking brake and turn the
ignition switch to the “ON ”position. For
the system check, the following lights
illuminate and turn off after several sec-
onds or after the engine has started:
: Seatbelt warning light (The seatbelt warning light turns off
only when the driver fastens theseatbelt.)
: Front passenger ’s seatbelt warning
light
(The seatbelt warning light turns off
only when the front seat passenger
fastens the seatbelt.)
: SRS airbag system warning light
ON /
: Front passenger ’s frontal airbag
ON indicator light
/: Front passenger ’s frontal airbag
OFF indicator light
: CHECK ENGINE warning light/Mal- function indicator lamp
: Coolant temperature high warning light(non-turbo models)
: Charge warning light
: Oil pressure warning light
: AT OIL TEMP warning light (AT models)
: Rear differential oil temperature warn-ing light (STI)
: Low tire pressure warning light (U.S.- spec. models)
/: ABS warning light
/: Brake system warning light
: Low fuel warning light
: Hill start assist warning light (MT models –if equipped)/Hill start assist
OFF indicator light (STI)
: Door open warning light
: AWD warning light (AT models)
: Vehicle Dynamics Control operation
indicator light
: Vehicle Dynamics Control warning light/Vehicle Dynamics Control OFF
indicator light/Traction Control OFF
indicator light (STI) Instruments and controls
3-13
– CONTINUED –
Page 142 of 458

light illuminates, have the vehicle
inspected at an authorized SUBARU
dealer.
! Hill start assist OFF indicator light(STI)
While the Hill start assist system is
deactivated, the Hill start assist OFF
indicator light illuminates continuously to
inform the driver that the Hill start assist
system is not operational. & Door open warning light
The door open warning light illuminates if
any door or the rear gate is not fullyclosed.
Always make sure this light is not illumi-
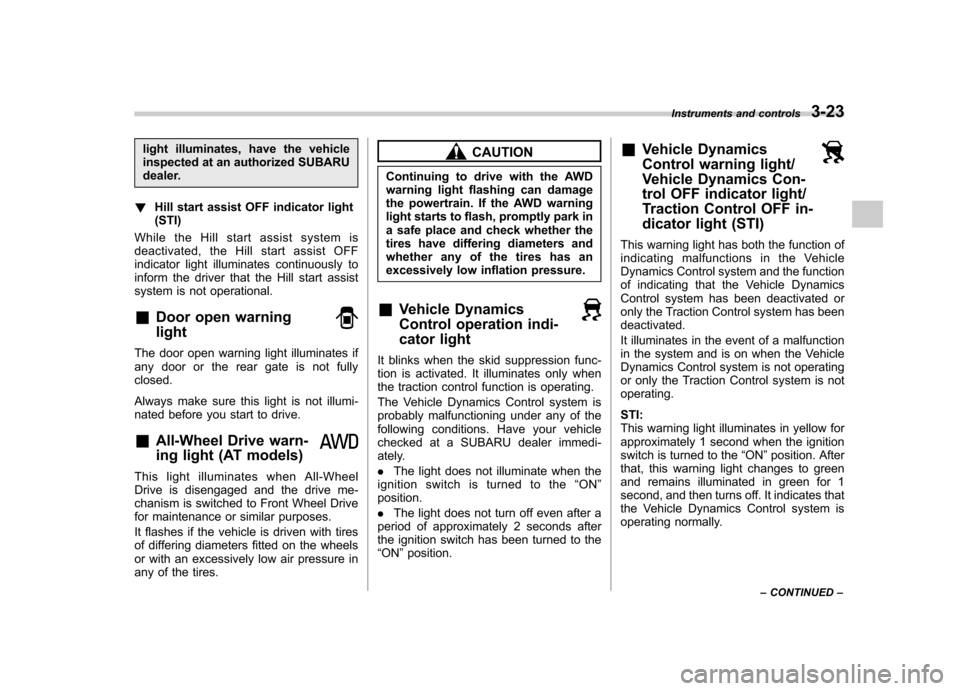
nated before you start to drive. &All-Wheel Drive warn-
ing light (AT models)
This light illuminates when All-Wheel
Drive is disengaged and the drive me-
chanism is switched to Front Wheel Drive
for maintenance or similar purposes.
It flashes if the vehicle is driven with tires
of differing diameters fitted on the wheels
or with an excessively low air pressure in
any of the tires.
CAUTION
Continuing to drive with the AWD
warning light flashing can damage
the powertrain. If the AWD warning
light starts to flash, promptly park in
a safe place and check whether the
tires have differing diameters and
whether any of the tires has an
excessively low inflation pressure.
& Vehicle Dynamics
Control operation indi-
cator light
It blinks when the skid suppression func-
tion is activated. It illuminates only when
the traction control function is operating.
The Vehicle Dynamics Control system is
probably malfunctioning under any of the
following conditions. Have your vehicle
checked at a SUBARU dealer immedi-
ately. .The light does not illuminate when the
ignition switch is turned to the “ON ”
position.. The light does not turn off even after a
period of approximately 2 seconds after
the ignition switch has been turned to the“ ON ”position. &
Vehicle Dynamics
Control warning light/
Vehicle Dynamics Con-
trol OFF indicator light/
Traction Control OFF in-
dicator light (STI)
This warning light has both the function of
indicating malfunctions in the Vehicle
Dynamics Control system and the function
of indicating that the Vehicle Dynamics
Control system has been deactivated or
only the Traction Control system has beendeactivated.
It illuminates in the event of a malfunction
in the system and is on when the Vehicle
Dynamics Control system is not operating
or only the Traction Control system is notoperating. STI:
This warning light illuminates in yellow for
approximately 1 second when the ignition
switch is turned to the “ON ”position. After
that, this warning light changes to green
and remains illuminated in green for 1
second, and then turns off. It indicates that
the Vehicle Dynamics Control system is
operating normally. Instruments and controls
3-23
– CONTINUED –
Page 144 of 458

!Traction Control OFF indicator light (green –STI)
The light illuminates when the Vehicle
Dynamics Control mode switch is pressed
briefly. For details, refer to “Traction mode ”
F 7-36.
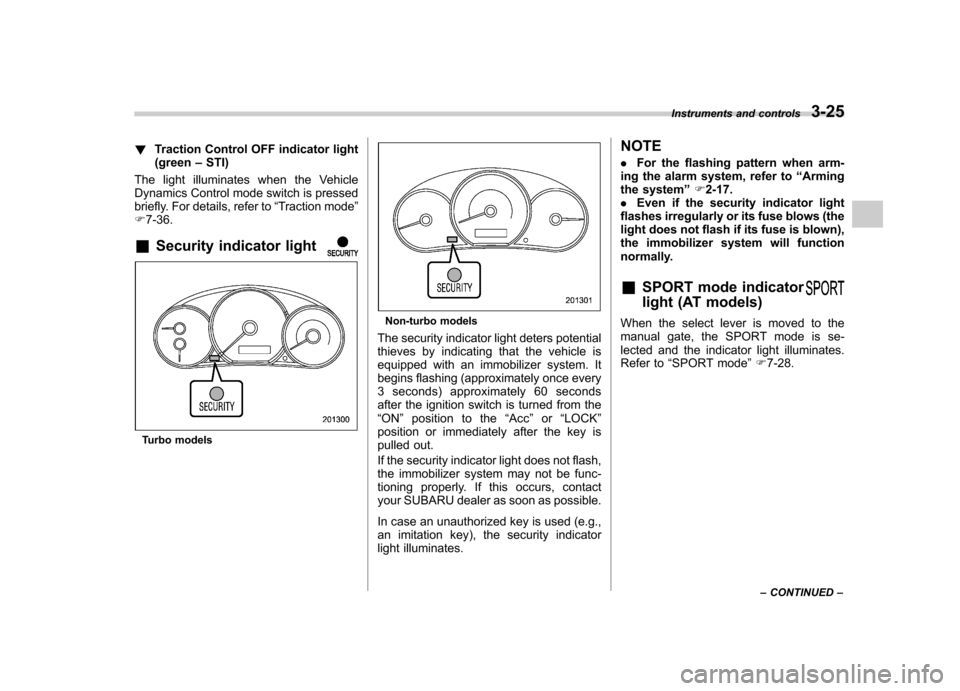
& Security indicator light
Turbo models
Non-turbo models
The security indicator light deters potential
thieves by indicating that the vehicle is
equipped with an immobilizer system. It
begins flashing (approximately once every
3 seconds) approximately 60 seconds
after the ignition switch is turned from the“ ON ”position to the “Acc ”or “LOCK ”
position or immediately after the key is
pulled out.
If the security indicator light does not flash,
the immobilizer system may not be func-
tioning properly. If this occurs, contact
your SUBARU dealer as soon as possible.
In case an unauthorized key is used (e.g.,
an imitation key), the security indicator
light illuminates. NOTE .
For the flashing pattern when arm-
ing the alarm system, refer to “Arming
the system ”F 2-17.
. Even if the security indicator light
flashes irregularly or its fuse blows (the
light does not flash if its fuse is blown),
the immobilizer system will function
normally.
& SPORT mode indicator
light (AT models)When the select lever is moved to the
manual gate, the SPORT mode is se-
lected and the indicator light illuminates.
Refer to “SPORT mode ”F 7-28.
Instruments and controls
3-25
– CONTINUED –
Page 282 of 458

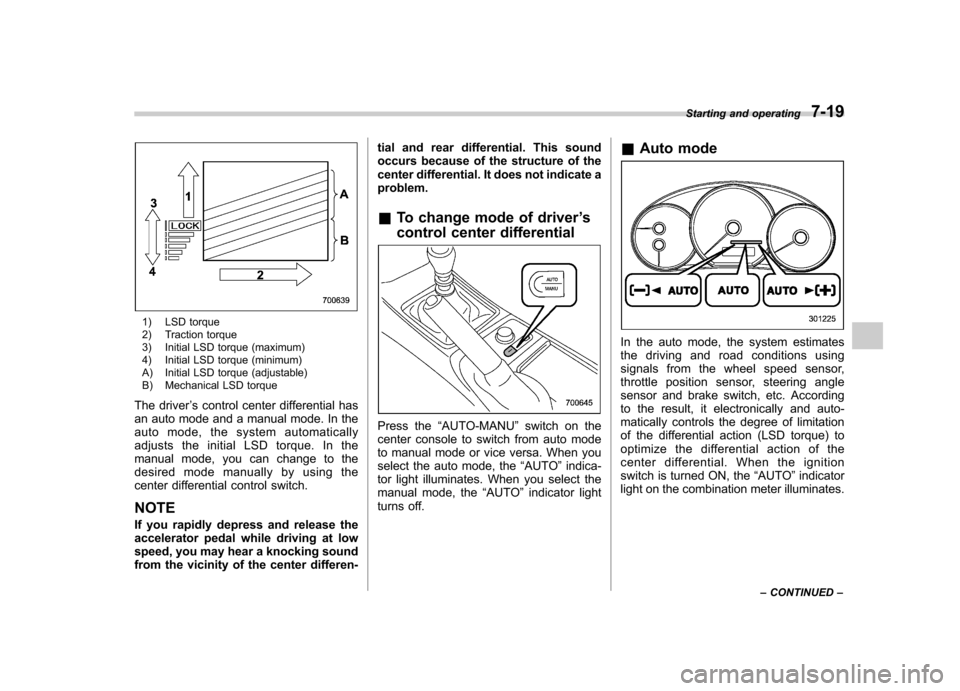
1) LSD torque
2) Traction torque
3) Initial LSD torque (maximum)
4) Initial LSD torque (minimum)
A) Initial LSD torque (adjustable)
B) Mechanical LSD torque
The driver ’s control center differential has
an auto mode and a manual mode. In the
auto mode, the system automatically
adjusts the initial LSD torque. In the
manual mode, you can change to the
desired mode manually by using the
center differential control switch. NOTE
If you rapidly depress and release the
accelerator pedal while driving at low
speed, you may hear a knocking sound
from the vicinity of the center differen- tial and rear differential. This sound
occurs because of the structure of the
center differential. It does not indicate aproblem.
& To change mode of driver ’s
control center differential
Press the “AUTO-MANU ”switch on the
center console to switch from auto mode
to manual mode or vice versa. When you
select the auto mode, the “AUTO ”indica-
tor light illuminates. When you select the
manual mode, the “AUTO ”indicator light
turns off. &
Auto mode
In the auto mode, the system estimates
the driving and road conditions using
signals from the wheel speed sensor,
throttle position sensor, steering angle
sensor and brake switch, etc. According
to the result, it electronically and auto-
matically controls the degree of limitation
of the differential action (LSD torque) to
optimize the differential action of the
center differential. When the ignition
switch is turned ON, the “AUTO ”indicator
light on the combination meter illuminates. Starting and operating
7-19
– CONTINUED –
Page 283 of 458
![SUBARU IMPREZA WRX 2011 4.G Owners Manual 7-20Starting and operating
The auto mode has 3 modes as follows.
Mode Operation
AUTO [+] This mode emphasizes traction control and strengthens the
limitation of differential action
that is suitable SUBARU IMPREZA WRX 2011 4.G Owners Manual 7-20Starting and operating
The auto mode has 3 modes as follows.
Mode Operation
AUTO [+] This mode emphasizes traction control and strengthens the
limitation of differential action
that is suitable](/manual-img/17/7260/w960_7260-282.png)
7-20Starting and operating
The auto mode has 3 modes as follows.
Mode Operation
AUTO [+] This mode emphasizes traction control and strengthens the
limitation of differential action
that is suitable for driving on
slippery roads for vehicle stabi-
lity.
AUTO This mode is suitable for most driving situations.
AUTO [ �] This mode is suitable when you
seek quick response from the
steering wheel and smooth
driving.
! Mode setting method
In most situations, it is recommended that the “AUTO ”mode is selected.
Push the control switch forward to select the
“AUTO [+] ”mode. After setting the
mode, “
”on the combination meter
illuminates.
Pull the control switch rearward to select the “AUTO [ �]” mode. After setting the
mode, “
”on the combination meter
illuminates.
When the “AUTO [+] ”mode is selected,
pull the control switch rearward to change
to the “AUTO ”mode. When the “AUTO
[ � ]” mode is set, push the control switch
forward to change to the “AUTO ”mode. &
Manual mode
In the manual mode, you can use the
center differential control switch to adjust
the initial LSD torque as desired. When
this mode is selected, the “AUTO ”indica-
tor light on the combination meter turnsoff.
Page 285 of 458

7-22Starting and operating
.When a temporary spare tire is
installed
. When your vehicle is towed
. When the vehicle is stopped
with the manual mode se- lected
NOTE . A higher initial LSD torque setting
gives the vehicle greater traction when
driving straight ahead but makes cor-
nering more difficult. Remember this
when adjusting the initial LSD torque.
In general, higher initial LSD torque
settings assist driving on slippery
roads and lower settings for non-slip-
pery roads. When the vehicle is stuck
in snow or mud, setting the initial LSD
torque to the maximum will help to free
the vehicle.. The setting of the initial LSD torque
will remain even when the auto mode is
selected or the ignition switch is turned
to the “OFF ”position. However, the
initial LSD torque will be minimized
when the battery is disconnected andreconnected.. During cornering or when making
turns (especially when going into the
garage), the rotational difference be-
tween the front and rear wheels may cause a braking effect accompanied by
vibration and noise. This does not
indicate a problem. The phenomenon
will disappear when setting the initial
LSD torque to the minimum.
In the auto mode, it controls the initial
LSD torque automatically. While in the
auto mode, this phenomenon some-
times occurs depending on the driving
condition, however, it does not indicate
a problem..
Use the center differential indicator
light only as a rough indication of the
initial LSD torque.. If you operate the center differential
control switch while quickly accelerat-
ing or turning a tight corner, you may
feel slight shocks. This is due to
differential action by the center differ-
ential and does not indicate a problem.
& Temporary release
When the driver stops the vehicle and
pulls the parking brake lever after manu-
ally setting the initial LSD torque, the LSD
torque is temporarily minimized. However
the indicator on the combination meter
continues to show the driver ’s selected
initial LSD torque. When the driver re-
leases the parking brake lever, the initial
LSD torque set by the driver is restored. Automatic transmission
The automatic transmission is electroni-
cally controlled and provides 4 forward
speeds and 1 reverse speed. Also, it has a
manual mode and a SPORT mode.
WARNING
Do not shift from the “P ” or “N ”
position into the “D ” or “R ” position
while depressing the accelerator
pedal. This may cause the vehicle
to jump forward or backward.
CAUTION
. Shift into the “P ” or “R ” position
only after the vehicle is comple-
tely stopped. Shifting while the
vehicle is moving may cause
damage to the transmission.
. Do not race the engine for more
than 5 seconds in any position
except the “N ” or “P ” position
when the brake is set or when
chocks are used in the wheels.
This may cause the automatic
transmission fluid to overheat.
. Avoid shifting from one of the
forward driving positions into the