2011 SKODA OCTAVIA navigation system
[x] Cancel search: navigation systemPage 130 of 248

Voice control
Dialogue On vehicles which are factory-fitted with the navigation system Co-
lumbus, it is only possible to operate the voice control via this de-
vice, see the operating instructions for Columbus.
The period of time in which the system is ready to receive voice commands and to
carry them out is called a dialogue. The system gives audible feedback and guides
you if necessary through the relevant functions.
Optimum understanding of the commands depends on several factors:
● Speak with a normal tone of voice without intonation and excessive pauses.
● Avoid a bad pronunciation.
● Close the doors, windows and sliding roof, in order to reduce or stop disturbing
exterior noise.
● It is recommended to speak louder at higher speeds, so that the tone of your
voice is louder than the increased surrounding noise.
● During the dialogue limit additional noise in the vehicle, e.g. simultaneously
talking occupants.
● Do not speak, if the system makes an announcement.
● The microphone for voice control is inserted in the moulded headliner and di-
rected to the driver and front passenger. Therefore the driver and the front pas-
senger can operate the equipment.
Switch on voice control (dialogue)
You can start the dialogue at any time by pressing the 1 button on the multi-
function steering wheel ⇒ page 125.
If the system does not recognise your command, it repeats the first part of the aid
and thus a new entry is possible. After the 2nd error the system repeats the sec-
ond part of the aid. After the 3rd error the answer
“Procedure cancelled ” is given
and the dialogue is ended.
Switching off voice control (dialogue)
If the system is currently playing a message, you will need to end the message
currently being played by pressing the 1 button on the multi-function steering
wheel. If the system expects a voice command, you can end the dialogue yourself:
●
Do some with the CANCEL voice command;
● by pressing the 1 button on the multi-function steering wheel.
Note
The dialogue of an incoming call is immediately interrupted.
Voice commands Basic voice commands for operating the telephone control unit
Voice command Action
HELP After this command the system repeats all possible
commands.
CALL NAME After this command a name can be entered which es-
tablishes a connection to the requested partner. DIAL NUMBER After this command a phone number can be entered
which establishes a connection to the requested par-
ty.
REDIAL The last selected telephone number is selected.
READ ADDRESSBOOK The system reads the contacts in the telephone
book.
READ MESSAGES The system reads the messages which were received
while the telephone was connected with the hands-
free system. SHORT DIALOGUE Help is clearly reduced (good operating knowledge
provided).
LONG DIALOGUE Help is not reduced (suitable for beginners).
CANCEL The dialogue is ended.
Store voice recording of a contact
If automatic name recognition does not work reliably for some contacts, you will
can choose to save your own voice entry for the contact in the menu point
Phone
book - Voice Tag - Record.
You can also store your own voice entry using voice control in the menu FURTHER
OPTIONS . 128
Communication
Page 131 of 248

Internet connection
An Internet connection can be established via a PC or PDA.
The control unit on the hands-free system supports the GPRS, EDGE and UMTS/3G
technologies.
An Internet is only possible via a telephone which is connected via the rSAP pro-
file.
The procedure for connecting to the Internet can vary depending on the type and
version of the operating system as well as the type of the device to be connected.
Successfully connecting to the internet requires appropriate knowledge of the op-
erating system for connecting the device .
Process of connection
– Connect the mobile phone with the hands-free system.
– Set the access point (depending on the operator, usually the “Internet”) in the
menu Phone - Settings - Data .
– Switch on the visibility of the hands-free system for the other devices in the
menu Phone - Bluetooth
- Visibility.
– Have the device to be connected search for available Bluetooth ®
devices.
– From the list of found devices, choose the hands-free system (“SKODA_BT” by
default).
– On the device to be connected, enter the password and follow any instructions
given on this device or in the information display.
– Enter the required Internet address in the browser. The operating system re-
quests the entry of the telephone number for the internet access (depending
on the operator, usually
“*99#”).
Music playback via Bluetooth ®The universal telephone preinstallation GSM IIl makes it possible to play back mu-
sic via Bluetooth ®
from the devices such as MP3 player, mobile phone or note-
book.
In order to enable the music playback via Bluetooth ®
, it is necessary to first con-
nect the device to be connected with the hands-free system in the menu Phone -
Bluetooth - Media player . The music playback process is performed on the connected device. Note
● The device to be connected must support the Bluetooth ®
profile A2DP, see
Owner's manual of the device to be coupled.
● This function is not available in vehicles fitted with the car radio Blues.
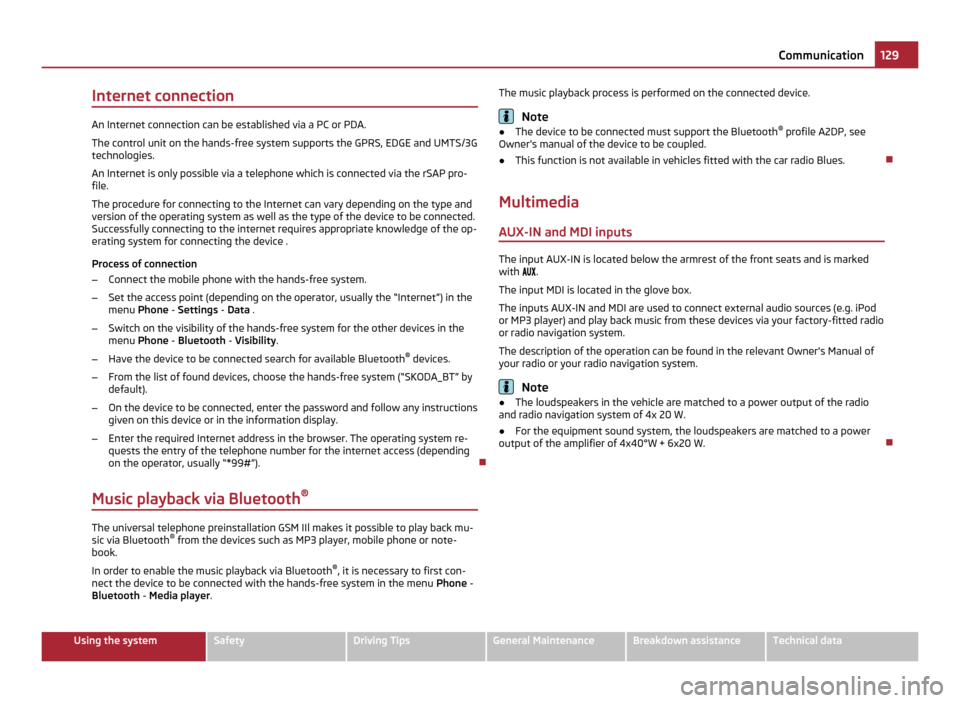
Multimedia AUX-IN and MDI inputs The input AUX-IN is located below the armrest of the front seats and is marked
with .
The input MDI is located in the glove box.
The inputs AUX-IN and MDI are used to connect external audio sources (e.g. iPod
or MP3 player) and play back music from these devices via your factory-fitted radio
or radio navigation system.
The description of the operation can be found in the relevant Owner's Manual of
your radio or your radio navigation system. Note
● The loudspeakers in the vehicle are matched to a power output of the radio
and radio navigation system of 4x 20 W.
● For the equipment sound system, the loudspeakers are matched to a power
output of the amplifier of 4x40°W + 6x20
W. 129
Communication Using the system Safety Driving Tips General Maintenance Breakdown assistance Technical data
Page 132 of 248

CD changer
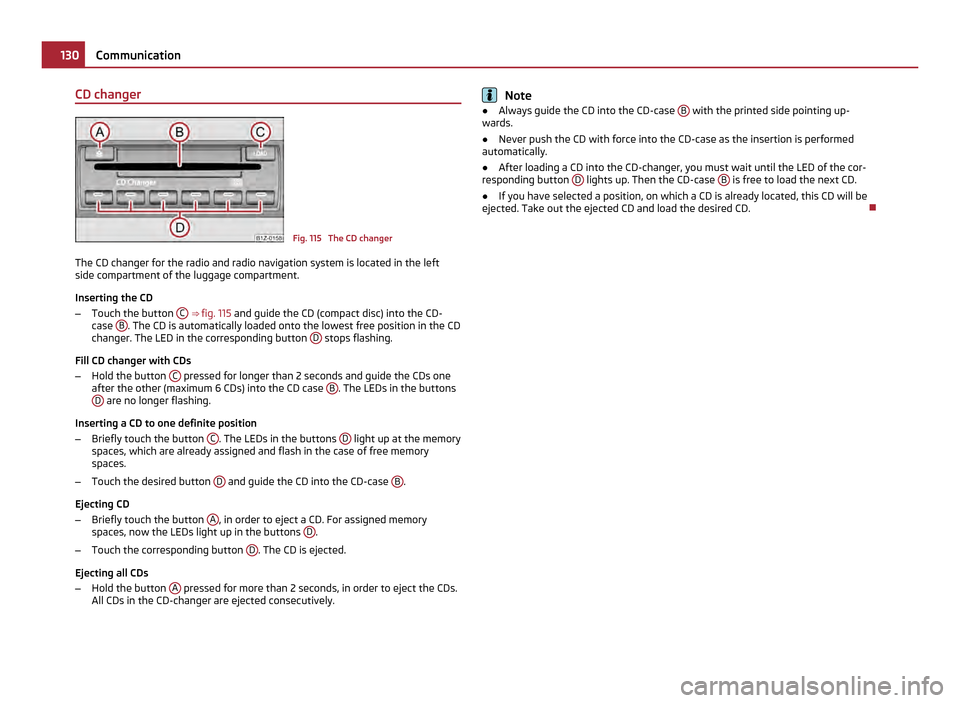
Fig. 115 The CD changer
The CD changer for the radio and radio navigation system is located in the left
side compartment of the luggage compartment.
Inserting the CD
– Touch the button C
⇒ fig. 115 and guide the CD (compact disc) into the CD-
case B . The CD is automatically loaded onto the lowest free position in the CD
changer. The LED in the corresponding button D stops flashing.
Fill CD changer with CDs
– Hold the button C pressed for longer than 2 seconds and guide the CDs one
after the other (maximum 6
CDs) into the CD case B . The LEDs in the buttons
D are no longer flashing.
Inserting a CD to one definite position
– Briefly touch the button C . The LEDs in the buttons
D light up at the memory
spaces, which are already assigned and flash in the case of free memory
spaces.
– Touch the desired button D and guide the CD into the CD-case
B .
Ejecting CD
– Briefly touch the button A , in order to eject a CD. For assigned memory
spaces, now the LEDs light up in the buttons D .
– Touch the corresponding button D . The CD is ejected.
Ejecting all CDs
– Hold the button A pressed for more than 2 seconds, in order to eject the CDs.
All CDs in the CD-changer are ejected consecutively. Note
● Always guide the CD into the CD-case B with the printed side pointing up-
wards.
● Never push the CD with force into the CD-case as the insertion is performed
automatically.
● After loading a CD into the CD-changer, you must wait until the LED of the cor-
responding button D lights up. Then the CD-case
B is free to load the next CD.
● If you have selected a position, on which a CD is already located, this CD will be
ejected. Take out the ejected CD and load the desired CD. 130
Communication
Page 192 of 248

WARNING
● Never charge a frozen or thawed battery - risk of explosion and caustic
burns. Replace a frozen battery.
● Never charge a battery which has a too low electrolyte level - risk of explo-
sion and caustic burns. CAUTION
On vehicles with the “START/STOP” system, the pole terminal of the charger must
not be connected directly to the negative terminal of the vehicle battery, but only
to the engine earth ⇒ fig. 172.
Disconnecting and reconnecting the battery On disconnecting and reconnecting the battery the following functions are initially
deactivated or are no longer able to operate fault-free.
Operation Operating measure
Electrical power window (operational faults) ⇒ page 41
Enter the car stereo/radio navigation system
code number see operating instructions for the
car stereo/radio navigation sys-
tem
Setting the clock ⇒ page 13
Data in the multi-functional indicator are de-
leted. ⇒ page 14
We recommend having the vehicle checked by an authorised ŠKODA Service Part-
ner to ensure full functionality of all electrical systems.
Replacing the battery When replacing a battery, the new new battery must have the same capacity,
voltage (12
V), amperage and be the same size. Suitable types of vehicle battery
are available from an authorised ŠKODA Service Partner.
We recommend you have a battery change carried out by an authorised ŠKODA
Service Partner, who will properly install the new battery and dispose of the origi-
nal one. CAUTION
Vehicles with a “START-STOP” system are fitted with a special battery type which
allows the battery control unit to check the energy level for recurring engine start.
This battery must only be replaced by a battery of the same type. For the sake of the environment
Batteries contain poisonous substances such as sulphuric acid and lead. For this
reason, it must be disposed of properly. Under no circumstances must it be dis-
posed of in the communal rubbish.
Automatic consumer shut-off Under heavy load on the vehicle battery, the vehicle electrical system manage-
ment automatically takes various measures to avoid draining the vehicle battery.
●
The idling speed is raised to allow the generator to deliver more electricity to
the electrical system.
● If necessary, some electrical consumers are limited in their performance or are
temporarily switched off completely. Note
Despite such intervention by the vehicle electric system management, the vehicle
battery may be drained. For example, when the ignition is switched on a long time
with the engine turned off or the side or parking lights are turned on during lon-
ger parking.
Windshield washer system Fig. 156 Engine compartment: Wind-
shield washer fluid reservoir
£190
Inspecting and Replenishing