2011 Seat Ibiza SC check engine light
[x] Cancel search: check engine lightPage 74 of 278
72Cockpit
Emission control system*
This warning lamp monitors the exhaust system.
Warning lamp flashes:
When there is misfiring that can damage the catalytic converter. Reduce
speed and drive carefully to the nearest specialised workshop to have the
engine checked.
Warning lamp is lit:
If a fault has developed during driving which has reduced the quality of the
exhaust gas (e.g. lambda probe fault). Reduce speed and drive carefully to
the nearest specialised workshop to have the engine checked.
Coolant level* / temperature
The warning lamp lights up if the coolant temperature is too
high or if the coolant level is too low.
There is a fault if:
● The warning symbol does not go out again after a few seconds.
● The warning lamp lights up or flashes while the vehicle is moving, and
three acoustic warning signals ⇒
are emitted.
This means that either the coolant level is too low or the coolant tempera-
ture is too high.
Coolant temperature too high
If the warning light comes on, stop the vehicle, switch off the engine and
wait for it to cool down. Check the coolant level.
If the coolant level is correct, the overheating may be caused by a malfunc-
tion of the radiator fan. Check the radiator fan fuse and have it replaced if
necessary ⇒ page 223. If the warning lamp lights up again after driving on for a short distance,
stop the vehicle and switch the engine off
. Contact an Authorised Service
Centre or a specialised workshop.
Coolant level too low
If the warning light comes on, stop the vehicle, switch off the engine and
wait for it to cool down . First check the coolant level. If the level of the cool-
ant is below the “MIN” mark, top up with coolant liquid ⇒
.
WARNING
● If your vehicle is immobilised for technical reasons, move it to a safe
distance from traffic. Turn the engine off, turn the hazard lights on and
place the warning triangle.
● Never open the bonnet if you can see or hear steam or coolant escap-
ing from the engine compartment. Risk of scalding. Wait until you can no
longer see or hear escaping steam or coolant.
● The engine compartment is a dangerous area! Before carrying out any
work in the engine compartment, switch off the engine and allow it to
cool down. Always note the corresponding warnings ⇒ page 193.
Alternator
This warning lamp signals a fault in the alternator.
The warning lamp lights up when the ignition is switched on. It should
go out when the engine has started running.
If the warning lamp lights up while driving, the alternator is no longer
charging the battery. You should immediately drive to the nearest special-
ised workshop.
You should avoid using electrical equipment that is not absolutely necessa-
ry because this will drain the battery.
Page 132 of 278
130Air conditioning
● The engine is stationary.
● The fan blower is switched off.
● The outside temperature is below +3 ℃.
● The cooling system compressor has been temporarily switched off be-
cause of an increased engine coolant temperature.
● The air conditioner fuse is faulty.
● Another fault in the vehicle. Have the air conditioning checked by a
qualified workshop.
Air recirculation
Air recirculation mode prevents fumes or unpleasant smells
from coming from the outside.
When air recirculation mode is switched on (button ⇒ fig. 94
with warn-
ing lamp) strong odours in the outside air do not enter the vehicle interior,
for example when passing through a tunnel or in a traffic jam.
When the outside temperature is low, air recirculation mode improves heat-
ing performance by heating air from the interior instead of cold air from the
outside.
When the outside temperature is high, air recirculation mode improves cool-
ing performance by cooling air from the interior instead of warm air from
outside.
For safety reasons, the air recirculation should not be switched on when the
air distribution control is set to the windscreen setting .
WARNING
In air recirculation mode, no cold air from the outside enters the vehicle
interior. If the air conditioner is switched off, the windows can quickly
mist over. Therefore, never leave the air recirculation mode switched on
for a long time (risk of accident).
Note
● When engaging reverse gear, the air recirculation is connected automat-
ically to prevent the entrance of exhaust fumes in the vehicle on travelling
backwards. The warning lamp on the button
does not light up.
● If the temperature control is turned to the coldest setting (blue point)
and the switch AC
is activated, the “Air recirculation” function is automati-
cally activated in order to cool the vehicle rapidly using less energy; its
function indicator will light.
● If the function is not deactivated by pressing the button, this will deacti-
vate after approx. 20 min.
Economic use of the air conditioning
When the air conditioning is switched on, the compressor consumes engine
power and has influence on fuel consumption. Consider the following
points in order to have the system operating in the minimum possible time.
● If the vehicle interior has overheated due to an excessive solar radiation,
it is best to open the windows or doors to allow the hot air to escape.
● While in motion, the air conditioning should not be switched on if the
windows or the sunroof are open.*
Page 140 of 278
138Driving
Starting and stopping the engine
Starting petrol engines
The engine can only be started using a genuine SEAT key
with its correct code.
– Move the gear lever to the neutral position and depress the
clutch pedal thoroughly and hold it in this position for the start-
er to turn the engine on.
– Turn the ignition key to the starting position ⇒ page 136.
– Let go of the ignition key as soon as the engine starts; the start-
er motor must not run on with the engine.
After starting a very hot engine, you may need to slightly press down the ac-
celerator.
When starting a very cold engine, it may be a little noisy for the first few sec-
onds until oil pressure has built up in the hydraulic valve compensators.
This is quite normal, and no cause for concern.
If the engine does not start immediately, switch the starter off after 10 sec-
onds and try again after half a minute. If the engine still does not start, the
fuel pump fuse should be checked ⇒ page 223, Fuses.
WARNING
● Never start or run the engine in unventilated or closed rooms. The ex-
haust fumes contain carbon monoxide, an odourless and colourless poi-
sonous gas. Risk of fatal accidents. Carbon monoxide can cause loss of
consciousness. It can also cause death.
● Never leave the vehicle unattended if the engine is running.
● Never use “cold start sprays”, they could explode or cause the engine
to run at high revs. Risk of injury.
CAUTION
● When the engine is cold, you should avoid high engine speeds, driving
at full throttle and over-loading the engine. Risk of engine damage.
● The vehicle should not be pushed or towed more than 50 metres to start
the engine. Unburnt fuel could enter the catalytic converter and damage it.
● Before attempting to push-start or tow a vehicle in order to start it, you
should first try to start it using the battery of another vehicle. Note and fol-
low the instructions in ⇒ page 240, Jump-starting.
For the sake of the environment
Do not warm-up the engine by running the engine with the vehicle station-
ary. Start off immediately, driving gently. This helps the engine reach oper-
ating temperature faster and reduces emissions.
Page 171 of 278

169
Driving and the environment
Drive anticipating the traffic situation
A vehicle uses most fuel when accelerating. When you anticipate the situa-
tion, you have to brake less often and, thus, accelerate less. If it is possible,
let the vehicle roll with a gear engaged, for example, if you see a red light
ahead. The braking effect achieved in this way helps to reduce the wear of
brakes and tyres; emissions and fuel consumption are reduced to zero (dis-
connection due to inertia).
Change gear early to save energy
An effective way of saving fuel is to change up quickly through the gears.
Running the engine at high rpm in the lower gears uses an unnecessary
amount of fuel.
Manual gearbox: Change from first to second gear as quickly as possible.
We recommend that, whenever possible, you change to a higher gear upon
reaching 2000 rpm. Follow the “recommended gear” indication that ap-
pears on the instrument panel ⇒ page 56.
Avoid driving at high speed
We advise you not to drive at the top speed permitted by the vehicle. Fuel
consumption, exhaust emissions and noise levels all increase very rapidly
at higher speeds. Driving at moderate speeds will help to save fuel.
Avoid idling
It is worthwhile switching off the engine when waiting in a traffic jam, at lev-
el crossings or at traffic lights with a long red phase. The fuel saved after
only 30 - 40 seconds is greater than the amount of fuel needed to restart
the engine.
The engine takes a long time to warm up when it is idling. Mechanical wear
and pollutant emissions are also especially high during this initial warm-up
phase. It is therefore best to drive off immediately after starting the engine.
Avoid running the engine at high speed.
Periodic maintenance
Periodic maintenance work guarantees that, before beginning a journey,
you will not consume more than the required amount of fuel. A well-serviced engine gives you the benefit of
improved fuel efficiency as well as maxi-
mum reliability and an enhanced resale value.
A badly serviced engine can consume up to 10% more fuel than necessary.
Avoid short journeys
To reduce the consumption and emission of polluting gases, the engine and
the exhaust filtration systems should reach the optimum service tempera-
ture.
With the engine cold, fuel consumption is proportionally higher. The engine
does not warm up and fuel consumption does not normalise until having
driven approximately four kilometres. This is why we recommend avoiding
short trips whenever possible.
Maintain the correct tyre pressures
Bear in mind that keeping the tyres at an adequate pressure saves fuel. If
the tyre pressure is just one bar too low, fuel consumption can increase by
as much as 5%. Due to the greater rolling resistance, under-inflation also
increases tyre wear and impairs handling.
The tyre pressures should always be checked when the tyres are cold.
Do not use winter tyres all year round as they increase fuel consumption by
up to 10%.
Avoid unnecessary weight
Every kilo of extra weight will put up the fuel consumption, so it is worth
checking the luggage compartment occasionally to make sure that no un-
necessary loads are being transported.
A roof rack is often left in place for the sake of convenience, even when it is
no longer needed. At a speed of 100-120 km/h your vehicle will use about
12% more fuel as a result of the extra wind resistance caused by the roof
rack even when it is not in use.
Safety FirstOperating InstructionsPractical TipsTechnical Specifications
Page 197 of 278

195
Checking and refilling levels
Opening the bonnet
The bonnet is released from inside the vehicle.
Fig. 122 Bonnet opening
lever
Fig. 123 Bonnet support
rod
Before opening the bonnet ensure that the windscreen wipers are
in rest position. –
To release the bonnet, pull the lever under the dash panel
⇒ fig. 122 in the direction indicated (arrow). The bonnet will be
released by a spring action ⇒
.
– Lift the bonnet using the release lever (arrow) and open the
bonnet.
– Release the bonnet stay and secure it in fixture designed for
this in the bonnet.
WARNING
Hot coolant can scald!
● Never open the bonnet if you see steam, smoke or coolant escaping
from the engine compartment.
● Wait until no more steam, smoke or coolant is emitted from the bon-
net, then carefully open the bonnet.
● When working in the engine compartment, always observe the safety
warnings ⇒ page 193.
Closing the bonnet
– Slightly raise the bonnet
– Release the bonnet stay and replace it in its support.
– At a height of about 30 cm let it fall so it is locked.
If the bonnet does not close, do not press downwards. Open it once more
and let it fall as before.
Safety FirstOperating InstructionsPractical TipsTechnical Specifications
Page 204 of 278
202Checking and refilling levels
Washer fluid and windscreen wiper blades
Topping up washer fluid
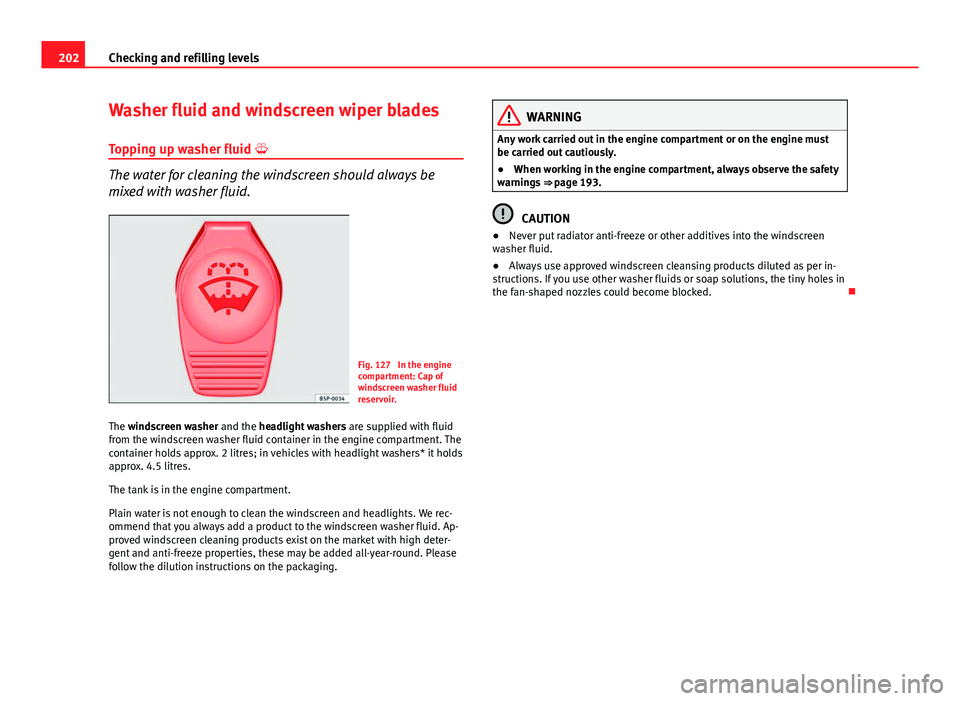
The water for cleaning the windscreen should always be
mixed with washer fluid.
Fig. 127 In the engine
compartment: Cap of
windscreen washer fluid
reservoir.
The windscreen washer and the headlight washers are supplied with fluid
from the windscreen washer fluid container in the engine compartment. The
container holds approx. 2 litres; in vehicles with headlight washers* it holds
approx. 4.5 litres.
The tank is in the engine compartment.
Plain water is not enough to clean the windscreen and headlights. We rec-
ommend that you always add a product to the windscreen washer fluid. Ap-
proved windscreen cleaning products exist on the market with high deter-
gent and anti-freeze properties, these may be added all-year-round. Please
follow the dilution instructions on the packaging.
WARNING
Any work carried out in the engine compartment or on the engine must
be carried out cautiously.
● When working in the engine compartment, always observe the safety
warnings ⇒ page 193.
CAUTION
● Never put radiator anti-freeze or other additives into the windscreen
washer fluid.
● Always use approved windscreen cleansing products diluted as per in-
structions. If you use other washer fluids or soap solutions, the tiny holes in
the fan-shaped nozzles could become blocked.
Page 207 of 278

205
Checking and refilling levels
Removing the wiper blade
– Lift the wiper arm away from the glass ⇒ fig. 130.
– Slide the blade adapter in the direction of the arrow and remove
the blade ⇒ fig. 130.
Fitting the wiper blade
– With one hand, hold the top end of the wiper arm.
– Place the blade as shown in the ⇒ fig. 131 and slide the adapt-
er along until it engages.
Check the condition of the wiper blade regularly. Change as required.
If the windscreen wiper scrapes, it should be replaced if damaged, or
cleaned if soiled.
If this is not sufficient, refer to a specialised workshop.
WARNING
Do not drive unless you have good visibility through all windows!
● Clean the windscreen wiper blades and all windows regularly.
● The wiper blades should be changed once or twice a year.
CAUTION
● A damaged or dirty window wiper could scratch the rear window.
● Never use fuel, nail varnish remover, paint thinner or similar products to
clean the window.
● Never move the windscreen wiper by hand. This could cause damage. Brake fluid
Checking the brake fluid level
The brake fluid is checked at the intervals given in the serv-
ice schedule.
Fig. 132 In the engine
compartment: Brake fluid
reservoir cover
– Read off the fluid level at the transparent brake fluid reservoir. It
should always be between the “MIN” and “MAX” marks.
The position of the brake fluid reservoir is shown in the corresponding en-
gine compartment illustration ⇒ page 250. The brake fluid reservoir has a
black and yellow cap.
The brake fluid level drops slightly when the vehicle is being used as the
brake pads are automatically adjusted as they wear.
However, if the level goes down noticeably in a short time, or drops below
the “MIN” mark, there may be a leak in the brake system. A display on the
instrument panel will warn you if the brake fluid level is too low ⇒ page 61.
Safety FirstOperating InstructionsPractical TipsTechnical Specifications
Page 210 of 278
208Checking and refilling levels
CAUTION
● Never disconnect the battery if the ignition is switched on or if the en-
gine is running. This could damage the electrical system or electronic com-
ponents.
● Do not expose the battery to direct sunlight over a long period of time,
as the intense ultraviolet radiation can damage the battery housing.
● If the vehicle is left standing in cold conditions for a long period, protect
the battery from freezing. If it freezes it will be damaged.
Checking the electrolyte level
The electrolyte level should be checked regularly in high-
mileage vehicles, in hot countries and in older batteries. – Open the engine bonnet and the battery cover ⇒
in Safety in-
structions on working in the engine compartment on page 194
⇒
in Warnings on handling the battery on page 207. For vehi-
cles with the battery under the spare wheel, open the tailgate
and lift the floor covering. The battery is located next to the
spare wheel.
– Check the colour display in the "magic eye" on the top of the
battery.
– If there are air bubbles in the window, tap the window gently
until they disperse.
The position of the battery is shown in the corresponding engine compart-
ment diagram ⇒ page 250. The location of the battery in the luggage com-
partment can be seen in ⇒ fig. 175.
The “magic eye” indicator, located on the top of the battery changes colour,
depending on the charge state and electrolyte level of the battery. There are two different colours:
●
Black: correct charge status.
● Transparent/clear yellow: the battery must be replaced. Contact a spe-
cialist workshop.
Charging and changing the vehicle battery
The battery is maintenance-free and is checked during the
inspection service. All work on the vehicle battery requires
specialist knowledge.
If you often drive short distances or if the vehicle is not driven for long peri-
ods, the battery should be checked by a specialised workshop between the
scheduled services.
If the battery has discharged and you have problems starting the vehicle,
the battery might be damaged. If this happens, we recommend you have
the vehicle battery checked by an Authorised Service Centre where it will be
re-charged or replaced.
Charging the battery
The vehicle battery should be charged by a specialised workshop only, as
batteries using special technology have been installed and they must be
charged in a controlled environment.
Replacing a vehicle battery
The battery has been developed to suit the conditions of its location and
has special safety features.
Genuine SEAT batteries fulfil the maintenance, performance and safety
specifications of your vehicle.