Page 28 of 248
1INSTRUMENTS and CONTROLS
26
Battery
charge
fi xed. The battery charging circuit
has a fault (dirty or loose
terminals, slack or cut
alternator belt, ...). The warning lamp should go off when the engine
is started.
If it does not go off, contact a PEUGEOT dealer
or a qualifi ed workshop.
Door(s) open
fi xed if the
speed is
below 6 mph
(10 km/h).
A door or the boot is still
open. Close the door or boot.
fi xed and
accompanied
by an audible
signal if the
speed is
above 6 mph
(10 km/h).
Warning lamp
is on
Cause
Action/Observations
Airbags
temporarily. This lamp comes on for a
few seconds when you turn
on the ignition, then goes
off. This lamp should go off when the engine is
started.
If it does not go off, contact a PEUGEOT dealer
or a qualifi ed workshop.
fi xed. One of the airbag or seat
belt pretensioner systems
has a fault. Have it checked by a PEUGEOT dealer or a
qualifi ed workshop.
Page 30 of 248

1INSTRUMENTS and CONTROLS
28
Service indicator
System which informs the driver when
the next service is due, in accordance
with the manufacturer's servicing
schedule.
The point at which the service is due is cal-
culated from the last indicator zero reset. It
is determined by two parameters:
- the distance travelled,
- the time elapsed since the last ser-
vice.
More than 1 000 km remain before
the next service is due
For 5 seconds after the ignition is
switched on, the spanner symbolising
the service operations comes on. The
distance recorder display line indicates
the distance remaining before the next
service is due.
Example:
4800 km remain before the
next service is due.
For 5 seconds after the ignition is
switched on, the display indicates:
5 seconds after the ignition is switched
on, the spanner
goes
off
; the distance
recorder resumes its normal operation.
The display then indicates the total and
trip distances.
Less than 1 000 km remain before
the next service is due
Example
:
900 km remain before the
next service is due.
For 5 seconds after the ignition is
switched on, the display indicates:
5 seconds after the ignition is switched
on, the distance recorder resumes its
normal operation. The spanner re-
mains on
to indicate that a service
must be carried out soon.
Page 31 of 248

1
i
i
INSTRUMENTS and CONTROLS
29
The distance remaining may be
weighted by the time factor, de-
pending on the driver's driving
habits.
Therefore, the spanner may also
come on if you have exceeded the
two year service interval.
Service overdue
For 5 seconds after the ignition is
switched on, the spanner fl ashes
to
indicate that the service must be carried
out as soon as possible.
Example:
the service is overdue by
300 km.
For 5 seconds after the ignition is
switched on, the display indicates:
5 seconds after the ignition is switched
on, the distance recorder resumes its
normal operation. The spanner re-
mains
on
.
Service indicator zero reset
After each service, the service indicator
must be reset to zero.
The procedure for resetting to zero is as
follows:
�)
switch off the ignition,
�)
press and hold the trip distance re-
corder zero reset button,
�)
switch on the ignition; the distance
recorder display begins a count-
down,
�)
when the display indicates "=0"
, release
the button; the spanner disappears.
Following this operation, if you
wish to disconnect the battery,
lock the vehicle and wait at least
fi ve minutes for the zero reset to
be taken into account.
Page 32 of 248

1
i
INSTRUMENTS and CONTROLS
30
The level shown will only be cor-
rect if the vehicle is on level ground
and the engine has been off for
more than 30 minutes.
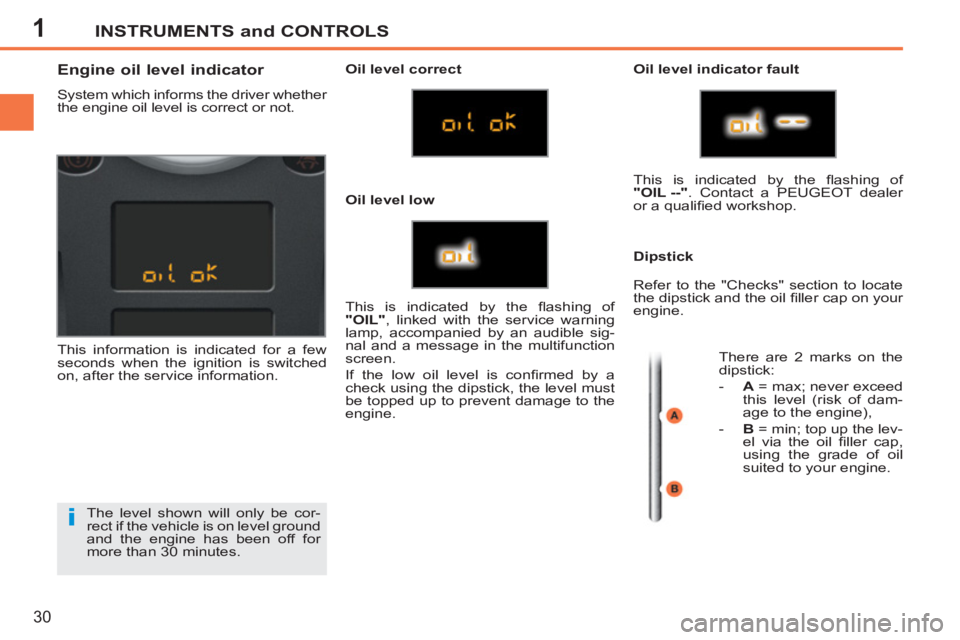
Engine oil level indicator
System which informs the driver whether
the engine oil level is correct or not.
This information is indicated for a few
seconds when the ignition is switched
on, after the service information.
Oil level correct
Oil level indicator fault
Dipstick
This is indicated by the fl ashing of
"OIL"
, linked with the service warning
lamp, accompanied by an audible sig-
nal and a message in the multifunction
screen.
If the low oil level is confi rmed by a
check using the dipstick, the level must
be topped up to prevent damage to the
engine. This is indicated by the fl ashing of
"OIL --"
. Contact a PEUGEOT dealer
or a qualifi ed workshop.
Refer to the "Checks" section to locate
the dipstick and the oil fi ller cap on your
engine.
There are 2 marks on the
dipstick:
- A
= max; never exceed
this level (risk of dam-
age to the engine),
- B
= min; top up the lev-
el via the oil fi ller cap,
using the grade of oil
suited to your engine.
Oil level low
Page 34 of 248

1INSTRUMENTS and CONTROLS
32
Total distance recorder
System which measures the total dis-
tance travelled by the vehicle during its
life.
Lighting dimmer
Permits manual adjustment of the bright-
ness of the instruments and controls to suit
the ambient light level. Only operates when
the vehicle lighting is on, with the exception
of the daytime running lamps.
The total and trip distances are displayed
for thirty seconds when the ignition is
switched off, when the driver's door is
opened and when the vehicle is locked
or unlocked.
Trip distance recorder
System which measures a distance
travelled during a day or other period
since it was reset to zero by the driver.
�)
With the ignition on, press the button
until zeros appear.
Activation
�)
Press the button to change the
brightness of the instruments and
controls.
�)
When the lighting reaches the mini-
mum setting, release the button,
then press again to increase it.
or
�)
When the lighting reaches the maxi-
mum setting, release the button,
then press again to reduce it.
�)
When the lighting reaches the level of
brightness required, release the button.
Deactivation
When the vehicle lighting is off, or in
day mode on vehicles fi tted with day-
time running lamps, pressing the button
does not have any effect.
Page 46 of 248

1
i
i
!
INSTRUMENTS and CONTROLS
44
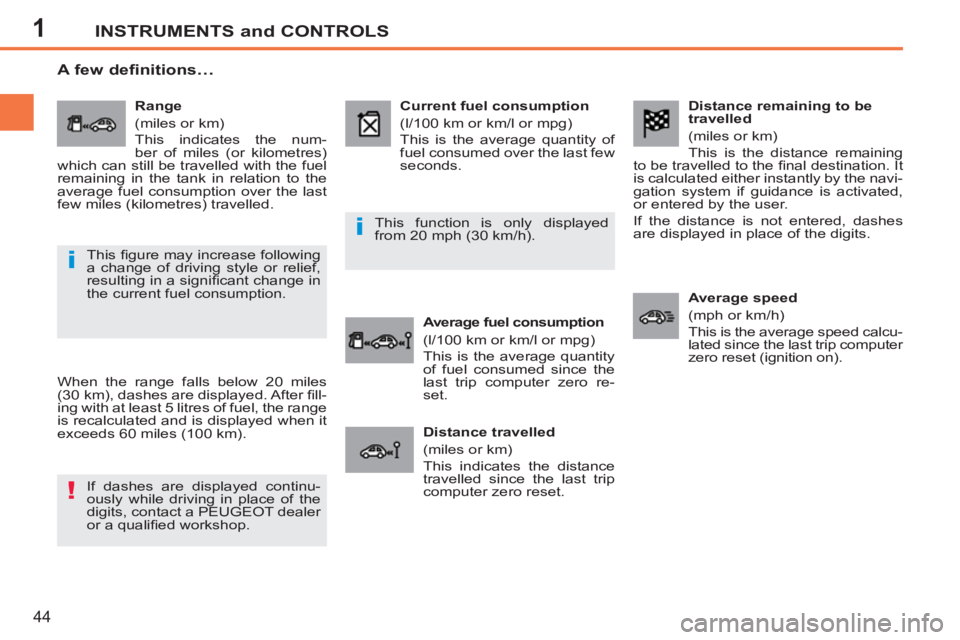
Distance remaining to be
travelled
(miles or km)
This is the distance remaining
to be travelled to the fi nal destination. It
is calculated either instantly by the navi-
gation system if guidance is activated,
or entered by the user.
If the distance is not entered, dashes
are displayed in place of the digits.
Average speed
(mph or km/h)
This is the average speed calcu-
lated since the last trip computer
zero reset (ignition on).
Range
(miles or km)
This indicates the num-
ber of miles (or kilometres)
which can still be travelled with the fuel
remaining in the tank in relation to the
average fuel consumption over the last
few miles (kilometres) travelled.
Current fuel consumption
(l/100 km or km/l or mpg)
This is the average quantity of
fuel consumed over the last few
seconds.
Average fuel consumption
(l/100 km or km/l or mpg)
This is the average quantity
of fuel consumed since the
last trip computer zero re-
set.
Distance travelled
(miles or km)
This indicates the distance
travelled since the last trip
computer zero reset.
A few definitions…
When the range falls below 20 miles
(30 km), dashes are displayed. After fi ll-
ing with at least 5 litres of fuel, the range
is recalculated and is displayed when it
exceeds 60 miles (100 km).
If dashes are displayed continu-
ously while driving in place of the
digits, contact a PEUGEOT dealer
or a qualifi ed workshop. This function is only displayed
from 20 mph (30 km/h).
This fi gure may increase following
a change of driving style or relief,
resulting in a signifi cant change in
the current fuel consumption.
Page 56 of 248

2
!
i
COMFORT
54
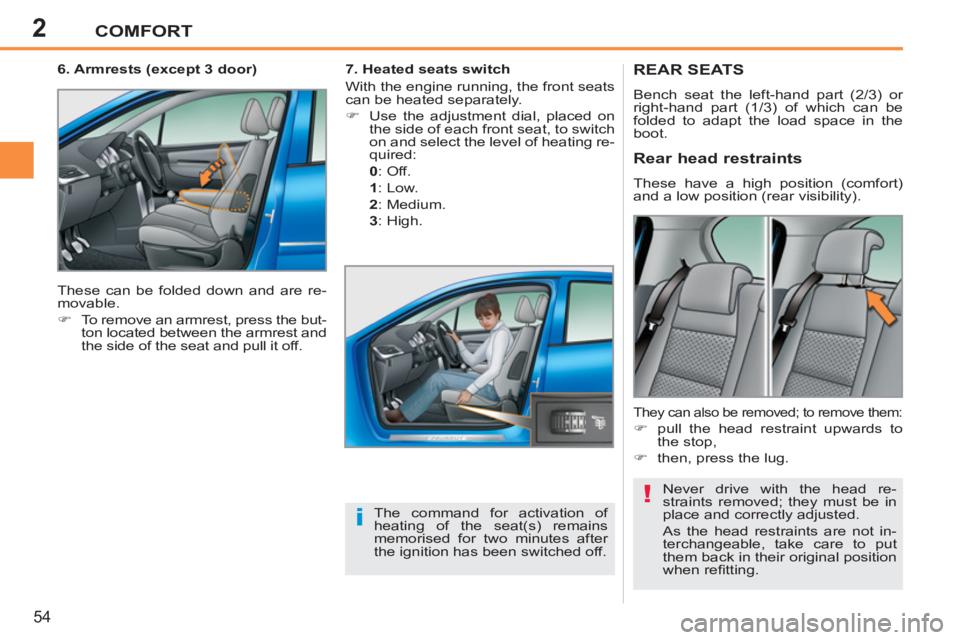
REAR SEATS
Bench seat the left-hand part (2/3) or
right-hand part (1/3) of which can be
folded to adapt the load space in the
boot.
Never drive with the head re-
straints removed; they must be in
place and correctly adjusted.
As the head restraints are not in-
terchangeable, take care to put
them back in their original position
when refi tting.
Rear head restraints
These have a high position (comfort)
and a low position (rear visibility).
The command for activation of
heating of the seat(s) remains
memorised for two minutes after
the ignition has been switched off.
7. Heated seats switch
With the engine running, the front seats
can be heated separately.
�)
Use the adjustment dial, placed on
the side of each front seat, to switch
on and select the level of heating re-
quired:
0
:
Off.
1
:
Low.
2
:
Medium.
3
:
High.
They can also be removed; to remove them:
�)
pull the head restraint upwards to
the stop,
�)
then, press the lug.
6. Armrests (except 3 door)
These can be folded down and are re-
movable.
�)
To remove an armrest, press the but-
ton located between the armrest and
the side of the seat and pull it off.
Page 59 of 248

2
!
i
COMFORT
57
MIRRORS
Door mirrors
Adjustable mirror providing the lateral
rearward vision necessary for overtak-
ing or parking.
Folding
�)
from outside: lock the vehicle using
the remote control or the key.
�)
from inside: with the ignition on, pull
switch A
rearwards.
Manual model
Adjustment
�)
Move the lever in all four directions
to adjust the mirror.
The folding and unfolding of the
door mirrors can be deactivated
by a PEUGEOT dealer or a quali-
fi ed workshop.
Folding
�)
When parked, fold the mirror manu-
ally to protect it.
Unfolding
�)
Before starting, unfold the mirror.
Electric model
Adjustment
�)
Slide switch A
to the right or to the left
to select the corresponding mirror.
�)
Move knob B
in all four directions to
adjust.
�)
Return switch A
to the centre position.
Unfolding
�)
from outside: unlock the vehicle us-
ing the remote control or the key.
�)
from inside: with the ignition on, pull
switch A
rearwards.
The objects observed are, in reality,
closer than they appear.
Take this into account to correctly
judge the distance of vehicles ap-
proaching from behind.