Page 125 of 407
Position the arm on the adjustable cup holder so
that the cup is held securely.To open the 2nd row cup holders (rear of front
console) , lower the lid. To close, raise the lid.
Page 161 of 407
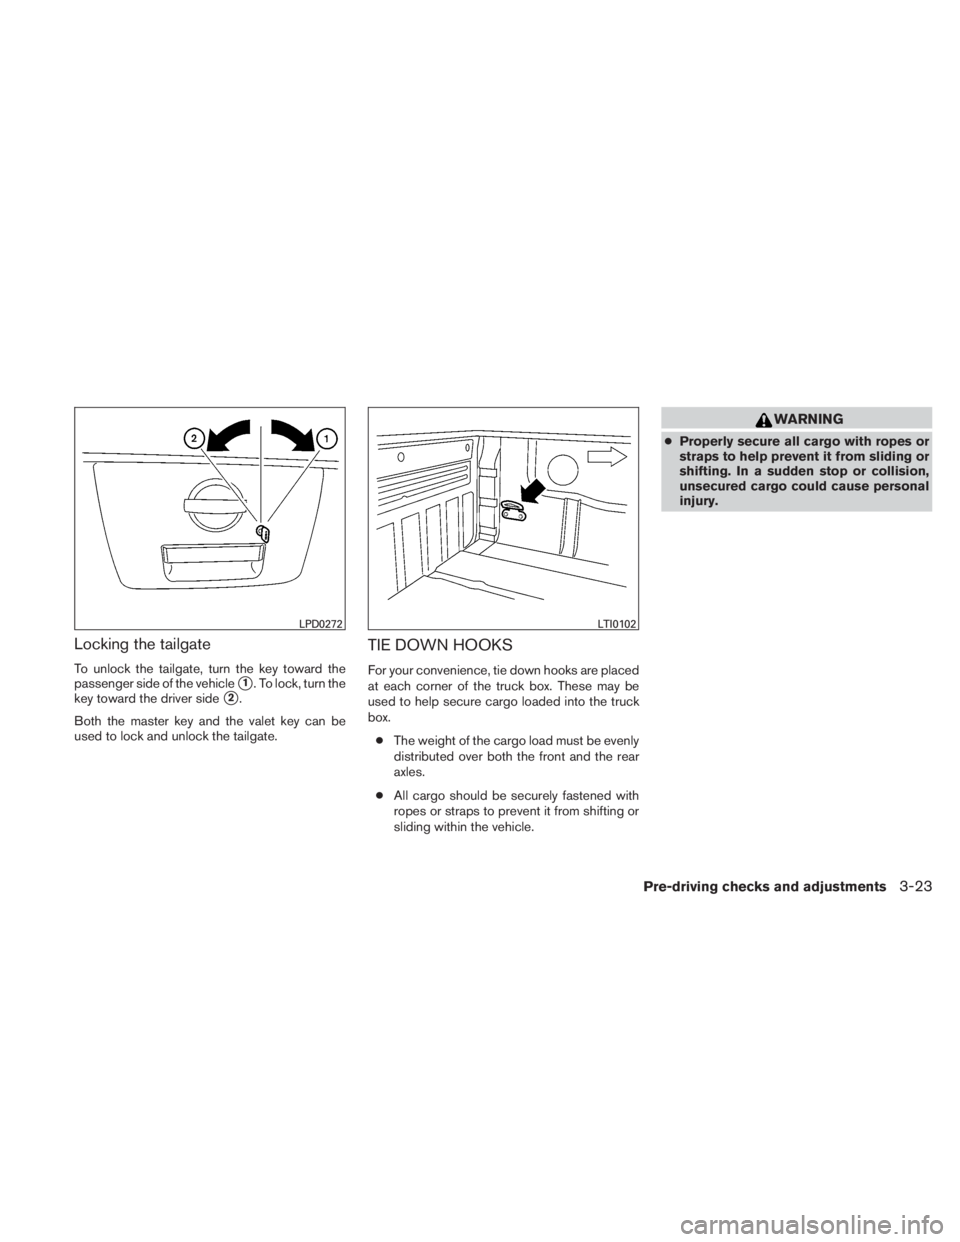
Locking the tailgate
To unlock the tailgate, turn the key toward the
passenger side of the vehicle
�1. To lock, turn the
key toward the driver side
�2.
Both the master key and the valet key can be
used to lock and unlock the tailgate.
TIE DOWN HOOKS
For your convenience, tie down hooks are placed
at each corner of the truck box. These may be
used to help secure cargo loaded into the truck
box.
● The weight of the cargo load must be evenly
distributed over both the front and the rear
axles.
● All cargo should be securely fastened with
ropes or straps to prevent it from shifting or
sliding within the vehicle.
Page 225 of 407
●The screen rotates down to view and up
into the housing to store when not in
use. Ensure that the screen is latched
securely into the housing when stored.
Headphones
Power ON/OFF:
Press the power button to turn the headphones
on or off.
Volume control:
Turn the volume control knob to adjust the vol-
ume.
The headphones will automatically be turned off
in 30 seconds if there is no sound during that
period. To prevent the battery from being dis-
charged, keep the power supply turned off when
not in use. NOTE:
For optimum infrared headphone perfor-
mance, increase the volume on the rear
seat controller to the maximum level and
adjust the infrared headphone volume us-
ing the volume control on the headphones.
Using a lower volume setting on the rear
seat controller can cause static noise in the
infrared headphones.
Page 250 of 407
WARNING
●Do not leave children or adults who
would normally require the assistance
of others alone in your vehicle. Pets
should also not be left alone. They
could accidentally injure themselves or
others through inadvertent operation of
the vehicle. Also, on hot, sunny days,
temperatures in a closed vehicle could
quickly become high enough to cause
severe or possibly fatal injuries to
people or animals.
● Properly secure all cargo with ropes or
straps to help prevent it from sliding or
shifting. Do not place cargo higher than
the seatbacks. In a sudden stop or col-
lision, unsecured cargo could cause
personal injury.
EXHAUST GAS (carbon monoxide)
Page 256 of 407

●Many hills are too steep for any vehicle.
If you drive up them, you may stall. If
you drive down them, you may not be
able to control your speed. If you drive
across them, you may roll over.
● Do not shift gears while driving on
downhill grades as this could cause
loss of control of the vehicle.
● Stay alert when driving to the top of a
hill. At the top there could be a drop-off
or other hazard that could cause an
accident.
● If your engine stalls or you cannot make
it to the top of a steep hill, never at-
tempt to turn around. Your vehicle
could tip or roll over. Always back
straight down in R (Reverse) gear and
apply brakes to control your speed.
● Heavy braking going down a hill could
cause your brakes to overheat and fade,
resulting in loss of control and an acci-
dent. Apply brakes lightly and use a low
gear to control your speed.
● Unsecured cargo can be thrown around
when driving over rough terrain. Prop-
erly secure all cargo so it will not be
thrown forward and cause injury to you
or your passengers. ●
To avoid raising the center of gravity
excessively, do not exceed the rated
capacity of the roof rack (if so
equipped) and evenly distribute the
load. Secure heavy loads in the cargo
area as far forward and as low as pos-
sible. Do not equip the vehicle with tires
larger than specified in this manual.
This could cause your vehicle to roll
over.
● Do not grip the inside or spokes of the
steering wheel when driving off-road.
The steering wheel could move sud-
denly and injure your hands. Instead
drive with your fingers and thumbs on
the outside of the rim.
● Before operating the vehicle, ensure
that the driver and all passengers have
their seat belts fastened.
● Lower your speed when encountering
strong crosswinds. With a higher center
of gravity, your NISSAN is more af-
fected by strong side winds. Slower
speeds ensure better vehicle control.
● Do not drive beyond the performance
capability of the tires, even with 4WD
engaged. ●
For 4WD equipped vehicles, do not at-
tempt to raise two wheels off the
ground and shift the transmission to
any drive or reverse position with the
engine running. Doing so may result in
drivetrain damage or unexpected ve-
hicle movement which could result in
serious vehicle damage or personal
injury.
● Do not attempt to test a 4WD equipped
vehicle on a 2-wheel dynamometer
(such as the dynamometers used by
some states for emissions testing) , or
similar equipment even if the other two
wheels are raised off the ground. Make
sure you inform test facility personnel
that your vehicle is equipped with 4WD
before it is placed on a dynamometer.
Using the wrong test equipment may
result in drivetrain damage or unex-
pected vehicle movement which could
result in serious vehicle damage or per-
sonal injury.
● Accelerating quickly, sharp steering
maneuvers or sudden braking may
cause loss of control.
5-8Starting and driving
Page 289 of 407
WARNING
●Make sure the parking brake is securely
applied and the automatic transmission
is shifted into P (Park) .
● Never change tires when the vehicle is
on a slope, ice or slippery areas. This is
hazardous.
● Never change tires if oncoming traffic is
close to your vehicle. Wait for profes-
sional road assistance.
Blocking wheels
Place suitable blocks�1at both the front and
back of the wheel diagonally opposite the flat tire
�2to prevent the vehicle from moving when it is
jacked up.
Page 292 of 407
2. Place the jack directly under the jack-uppoint as illustrated so the top of the jack
contacts the vehicle at the jack-up point. The
jack-up points are indicated by stamped ar-
rows on the side of the frame. The jack should be used on firm and
level ground.
3. Install the assembled jack rod into the jack
as shown.
4. To lift the vehicle, securely hold the jack lever and rod. Carefully raise the vehicle until the
tire clears the ground.
Page 293 of 407
5. Remove the wheel nuts and then remove thetire.
Installing the spare tire
The spare tire is designed for emergency
use. See specific instructions under the
heading “Wheels and tires” in the “Mainte-
nance and do-it-yourself” section of this
manual.
1. Clean any mud or dirt from the surface be- tween the wheel and hub.
2. Carefully put the spare tire on and tighten the wheel nuts finger tight.
3. With the wheel nut wrench, tighten wheel nuts alternately and evenly as illustrated until
they are tight. 4. Lower the vehicle slowly until the tire
touches the ground. Then, with the wheel
nut wrench, tighten the wheel nuts securely
in the sequence illustrated. Lower the ve-
hicle completely.
 , lower the lid. To close, raise the lid.")


 .
● Never change tires when the vehicle is
on a slope, ice or slippery areas. This")

