2011 NISSAN NOTE brake
[x] Cancel search: brakePage 155 of 235
NOTE
The ESP system cannot be switched off when
the ESP system is operating and the “SLIP” indi-
cator light (
) is blinking.
Push the ESP OFF switch again, or restart the en-
gine, to turn the system ON. See “Electronic Stabil-
ity Programme (ESP) system (where fitted)” earlier
in this section for operational details.
WARNING
•Whatever the conditions, drive with caution.
Accelerate and decelerate with great care. If
accelerating or decelerating too fast, the drive
wheels will lose even more traction.
•Allow more stopping distance in cold weather
driving. Braking should be started sooner than
on dry surfaces.
•Keep at a greater distance from the vehicle in
front of you on slippery roads.
•Wet ice (0°C, 32°F and freezing rain), very cold
snow and ice can be slick and very difficult to
drive on. The vehicle will have a lot less trac-
tion or grip under these conditions. Try to
avoid driving on wet ice until the road is salted
or sanded.
•Watch for slippery spots (black ice). These
may appear on an otherwise clear road in
shaded areas. If a patch of ice is seen ahead,
brake before driving on it. Try not to brake
while actually on the ice and avoid any sud-
den steering manoeuvres.
•Snow can trap dangerous exhaust gas under
your vehicle. Keep snow clear of the exhaust
pipe and from around your vehicle.
BATTERY
If the battery is not fully charged during extremely
cold weather conditions, the battery fluid may freeze
and damage the battery. To maintain maximum effi-ciency, the battery should be checked regularly. For
details, see “Battery” in the “8. Maintenance and
do-it-yourself” section.
ENGINE COOLANT
If the vehicle is to be left outside without anti-freeze,
drain the cooling system. Refill before operating the
vehicle. For details, see “Engine cooling system” in
the “8. Maintenance and do-it-yourself” section.
TYRE EQUIPMENT
1) The SUMMER tyres are of a tread design to pro-
vide superior performance on dry surfaces. How-
ever, the performance of these tyres will be sub-
stantially reduced in snowy and icy conditions. If
you operate your vehicle on snowy or icy roads,
NISSAN recommends the use of MUD & SNOW
or ALL SEASON tyres on all four wheels. Please
consult a NISSAN dealer or qualified workshop
for tyre type, size, speed rating and availability
information.
2) For additional traction on icy roads, studded
tyres may be used. However, some countries,
provinces and states prohibit their use. Check
applicable laws before installing studded tyres.
CAUTION
Skid and traction capabilities of studded snow
tyres on wet or dry surfaces may be poorer
than that of non-studded snow tyres.
3) Snow chains may be used, if desired. But the
use of snow chains may be prohibited in some
areas. Therefore, check the local laws before
COLD WEATHER DRIVING
Starting and driving5-31
Page 156 of 235
installing snow chains. When installing snow
chains, make sure they are of proper size for the
tyres on your vehicle and are installed according
to the snow chain manufacturer’s instructions.
Use chain tensioners when recommended by the
snow chain manufacturer to ensure a tight fit.
Loose end links of the snow chain must be se-
cured or removed to prevent the possibility of
whipping action damage to the wings or under-
carriage. In addition, drive at a reduced speed,
otherwise, your vehicle may be damaged and/or
vehicle handling and performance may be ad-
versely affected.
SPECIAL WINTER EQUIPMENT
It is recommended to carry the following items in the
vehicle during winter:
•A scraper and stiff-bristled brush to remove ice
and snow from the windows.
•A sturdy, flat board to be placed under the jack
to give it firm support.
•A shovel to dig the vehicle out of snowdrifts.
•Extra windscreen washer fluid to refill the reser-
voir tank.
CORROSION PROTECTION
Chemicals used for road surface de-icing are ex-
tremely corrosive and will accelerate corrosion and
the deterioration of underbody components such as
the exhaust system, fuel and brake lines, brake
cables, floor pan, and wings.
In the winter, the underbody must be cleanedperiodically. For additional information, see “Cor-
rosion protection” in the “7. Appearance and
care” section.
For additional protection against rust and corrosion,
which may be required in some areas, consult a
NISSAN dealer or qualified workshop.
5-32Starting and driving
Page 159 of 235
In case of a flat tyre, follow the instructions as de-
scribed below:
STOPPING THE VEHICLE
WARNING
•Make sure that the handbrake is securely ap-
plied.
•For Manual Transmission (MT) models: Make
sure the gear lever is in the R (Reverse) posi-
tion.
For Automatic Transmission (AT) models:
Make sure that the selector lever is in the P
(Park) position.
•Never change tyres when the vehicle is on a
slope, ice or a slippery area. This is hazard-
ous.
•Never change tyres if oncoming traffic is close
to your vehicle. Wait for professional road as-
sistance.
1. Safely move the vehicle off the road, away from
traffic.
2. Switch on the hazard warning flashers.
3. Park on a level surface.
4. Apply the handbrake.
5. Shift the gear lever (MT models) into the R (Re-
verse) position [AT models, move the selector
lever to the P (Park) position].
6. Turn off the engine.7. Open the bonnet (for details, see “Bonnet
release” in the “3. Pre-driving checks and
adjustments” section) in order to:
•Warn other traffic.
•Signal to professional road assistance that
you require assistance.
8. Have all passengers exit the vehicle and stand in
a safe place, away from traffic and clear of the
vehicle.
CHANGING FLAT TYRE (Models with
spare wheel, where fitted)
Blocking the wheels
WARNING
Make sure to block the appropriate wheel to pre-
vent the vehicle from moving, which may cause
personal injury.
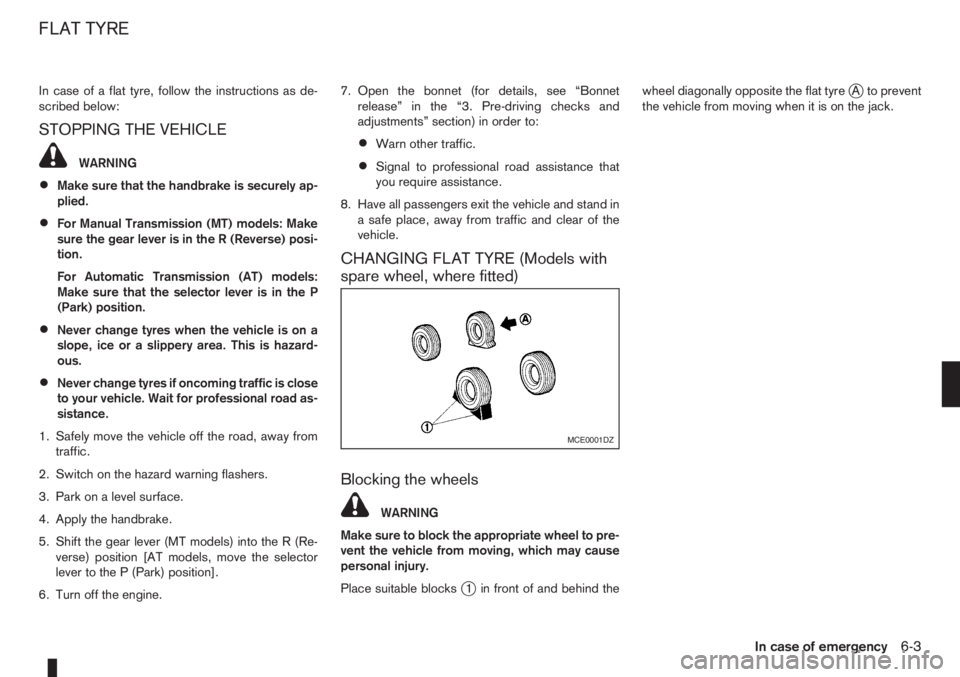
Place suitable blocks
j1 in front of and behind thewheel diagonally opposite the flat tyre
jA to prevent
the vehicle from moving when it is on the jack.
MCE0001DZ
FLAT TYRE
In case of emergency6-3
Page 166 of 235
•Never lean over the battery while jump-start-
ing.
•Never allow battery fluid to come into contact
with eyes, skin, clothes or the vehicle’s
painted surfaces. Battery fluid is a corrosive
sulphuric acid which can cause severe burns.
If the fluid comes into contact with anything,
immediately flush the contacted area with
plenty of water.
•Keep the battery out of the reach of children.
•The booster battery must be rated at 12 volts.
Use of an incorrectly rated battery will dam-
age your vehicle.
•Never attempt to jump-start a frozen battery.
It could explode and cause serious injury.
1. Prepare vehicle
jA with the booster battery for
the vehiclejB being jump-started.
CAUTION
Do not allow the two vehicles to touch.
2. Apply the handbrake.
3. Shift the gear lever (MT models) into the N (Neu-
tral) position [AT models, move the selector lever
to the P (Park) position].
4. Switch off all unnecessary electrical systems
(headlights, hazard lights etc,).
5. Ensure that the ignition switch of the vehicle be-
ing jump-started is in the LOCK position.6. Open the bonnet. For details, see “Bonnet
release” in the “3. Pre-driving checks and
adjustments” section.
7. Remove the vent caps (where fitted) on the bat-
tery and cover the battery with an old cloth.
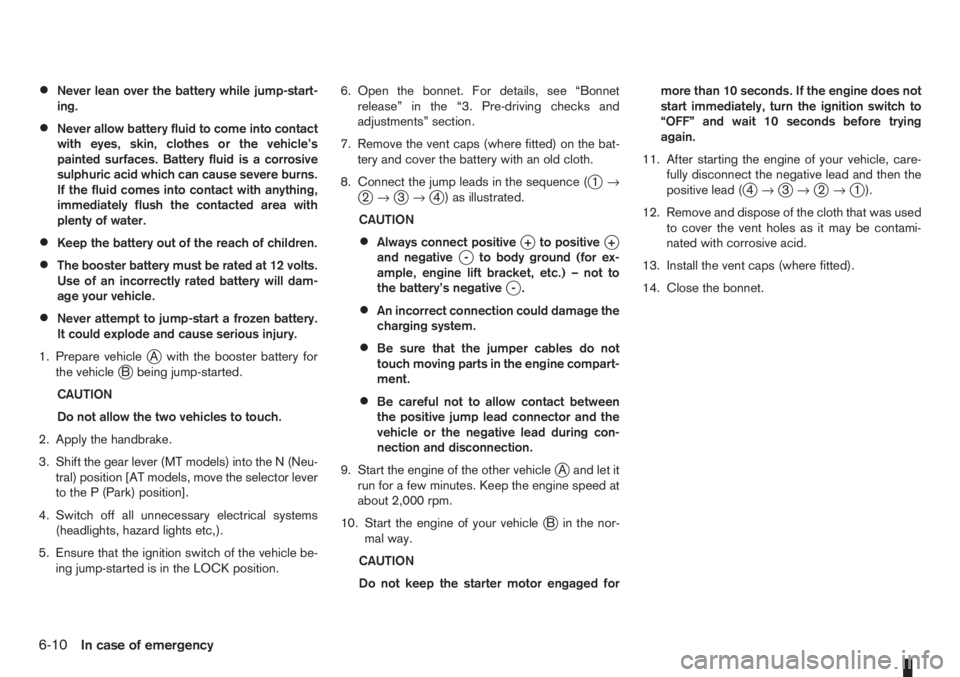
8. Connect the jump leads in the sequence (
j1→j2→j3→j4 ) as illustrated.
CAUTION
•Always connect positivej+ to positivej+
and negativej- to body ground (for ex-
ample, engine lift bracket, etc.) – not to
the battery’s negative
j-.
•An incorrect connection could damage the
charging system.
•Be sure that the jumper cables do not
touch moving parts in the engine compart-
ment.
•Be careful not to allow contact between
the positive jump lead connector and the
vehicle or the negative lead during con-
nection and disconnection.
9. Start the engine of the other vehicle
jA and let it
run for a few minutes. Keep the engine speed at
about 2,000 rpm.
10. Start the engine of your vehicle
jB in the nor-
mal way.
CAUTION
Do not keep the starter motor engaged formore than 10 seconds. If the engine does not
start immediately, turn the ignition switch to
“OFF” and wait 10 seconds before trying
again.
11. After starting the engine of your vehicle, care-
fully disconnect the negative lead and then the
positive lead (
j4→j3→j2→j1).
12. Remove and dispose of the cloth that was used
to cover the vent holes as it may be contami-
nated with corrosive acid.
13. Install the vent caps (where fitted).
14. Close the bonnet.
6-10In case of emergency
Page 167 of 235
CAUTION
•Three-way catalyst equipped models should
not be started by pushing the vehicle as the
three-way catalyst may be damaged.
•Automatic transmission (AT) models cannot
be started by pushing the vehicle. This may
cause transmission damage.
•Never try to start the vehicle by towing it; when
the engine starts, the forward surge could
cause the vehicle to collide with the tow ve-
hicle.
WARNING
•Never continue driving if the engine of your
vehicle overheats. Doing so could cause a ve-
hicle fire.
•Never open the bonnet if steam is coming
out.
•Never remove the radiator cap (where fitted)
or engine coolant reservoir cap when the en-
gine is hot. If the radiator cap (where fitted) or
engine coolant reservoir cap is removed while
the engine is hot, pressurised hot water will
spurt out and possibly cause burning, scald-
ing or serious injury.
•If steam or coolant is coming out of the en-
gine, stand clear of the vehicle to prevent get-
ting injured.
•The engine cooling fan will start whenever the
coolant temperature exceeds preset degrees.
•Be careful not to allow your hands, hair, jewel-
lery or clothing to come into contact with, or
get caught in, the cooling fan or drive belts.
If the engine of your vehicle is overheating (indi-
cated by the engine coolant temperature warning
light (red)) or if you feel a lack of engine power,
detect an unusual noise, etc., proceed as follows:
1. Move and park the vehicle safely off the road and
away from traffic.
2. Turn on the hazard warning flasher lights.
3. Apply the handbrake.4. Shift the gear lever (M/T models) into the N (Neu-
tral) position [AT models, move the selector lever
to the P (Park) position].
DO NOT STOP THE ENGINE.
5. Open all windows.
6. Switch off the air conditioner system (where fit-
ted).
7. Set the heater or air conditioner temperature
control to maximum “HOT” and fan speed con-
trol to maximum speed.
8. Exit the vehicle.
9. Visually inspect and listen for steam or coolant
escaping from the radiator before opening the
bonnet. Wait until no steam or coolant can be
seen before proceeding.
10. Open the bonnet. For details, see “Bonnet
release” in the “3. Pre-driving checks and
adjustments” section.
11. Visually check if the cooling fan is running.
12. Visually check the radiator and radiator hoses
for leakage.
WARNING
If coolant is leaking, the cooling fan belt is
missing or loose or the cooling fan is not run-
ning, stop the engine.
PUSH-STARTING ENGINE OVERHEAT
In case of emergency6-11
Page 168 of 235
13. After the engine cools down, check the coolant
level in the engine coolant reservoir with the
engine running.Do not open the radiator cap
(where fitted).
14. If the level is low, remove the engine coolant
reservoir cap and add coolant slowly into the
reservoir. After refilling the reservoir to the MAX
level, install the reservoir cap.
WARNING
Before removing the engine coolant reservoir
cap and to avoid the danger of being scalded,
cover the reservoir cap with a rag and loosen
the reservoir cap to the first notch to allow the
steam to escape.
15. Close the bonnet.
Have your vehicle inspected or repaired by a
NISSAN dealer or qualified workshop.When towing your vehicle, local regulations for tow-
ing must be followed. Incorrect towing equipment
could damage your vehicle. To assure proper tow-
ing and to prevent accidental damage to your ve-
hicle, NISSAN recommends that you have a service
operator tow your vehicle. It is advisable to have the
service operator carefully read the following precau-
tions.WARNING
•Do not allow any occupants in the vehicle that
is being towed.
•Never get under your vehicle after it has been
lifted by a tow truck.
TOWING PRECAUTIONS
•When towing:Make sure that the transmission,
axles, steering system and power train are in
working condition. If any unit is damaged, the
vehicle must be towed using a dolly or be placed
on a flat bed lorry.
•Release the handbrake and shift the manual
transmission (MT), or automatic transmission
(AT) into the N (Neutral) position before starting
to tow the vehicle.
•When towing manual transmission models
with the front wheels on the ground:Move the
gear lever to the N (Neutral) position and turn the
ignition switch to the “OFF” position then secure
the steering wheel in a straight ahead position
using a rope or similar device.Never place theignition switch in the LOCK position.This will
result in damage to the steering lock mecha-
nism.
•When towing with the rear wheels on the
ground, release the handbrake.
•Always attach safety chains before towing.
TOW TRUCK TOWING
6-12In case of emergency
Page 175 of 235
Corrosion will also accelerate in areas where the
temperatures stay above freezing.
Air pollution
Industrial pollution, the presence of salt in the air in
coastal areas, or heavy road salt use will accelerate
the corrosion process. Road salt will also acceler-
ate the disintegration of paint surfaces.
TO PROTECT YOUR VEHICLE FROM
CORROSION
•Wash and wax your vehicle often to keep the
vehicle clean.
•Always check for minor damage to the paint sur-
face and if any exists, repair it as soon as pos-
sible.
•Keep the drain holes at the bottom of the doors
and back door opened to avoid water accumula-
tion.
•Check the vehicle underbody for accumulation
of sand, dirt or salt. If present, wash with water
as soon as possible.
CAUTION
•Never remove dirt, sand or other debris from
the passenger compartment by washing it out
with a hose. Remove dirt with a vacuum
cleaner or broom.
•Never allow water or other liquids to come in
contact with electronic components inside the
vehicle as this may damage them.
Chemicals used for road surface de-icing are ex-tremely corrosive. They accelerate corrosion and
deterioration of underbody components such as the
exhaust system, fuel and brake lines, brake cables,
floor pan and fenders.
In the winter, the underbody must be cleaned
periodically.
For additional protection against rust and corrosion,
which may be required in some areas, consult a
NISSAN dealer or qualified workshop.
Appearance and care7-5
Page 176 of 235
8Maintenance and do-it-yourselfMaintenance and do-it-yourself
Maintenance requirements ....................................... 8-2
Scheduled maintenance...................................... 8-2
General maintenance .......................................... 8-2
Where to go for service ...................................... 8-2
General maintenance ............................................... 8-2
Explanation of general maintenance items ........... 8-2
Maintenance precautions ......................................... 8-4
Engine compartment ................................................ 8-5
Engine cooling system ............................................. 8-6
Checking engine coolant level............................. 8-6
Changing engine coolant .................................... 8-6
Engine oil................................................................. 8-8
Checking engine oil level .................................... 8-9
Changing engine oil ............................................ 8-9
Changing engine oil filter .................................... 8-11
Protect the environment ...................................... 8-12
Fuel filter (Diesel engine models) ............................. 8-12
Bleeding the fuel system ..................................... 8-12
Automatic transmission fluid (ATF) ........................... 8-13
Brakes ..................................................................... 8-13
Checking brake pedal......................................... 8-13
Checking handbrake........................................... 8-13
Brake and clutch fluid .............................................. 8-13
Window washer fluid/headlight cleaner fluid
(where fitted) ........................................................... 8-14
Battery..................................................................... 8-15
Vehicle battery .................................................... 8-15
Reinitialisation procedure after battery
reconnection....................................................... 8-16
Jump-starting ...................................................... 8-16Integrated Keyfob/Intelligent Key battery
replacement........................................................ 8-17
Drive belts ............................................................... 8-18
Spark plugs (Petrol engine models).......................... 8-18
Air cleaner filter........................................................ 8-19
Viscous paper type ............................................. 8-19
Dry paper type (where fitted) .............................. 8-19
Wiper blades ........................................................... 8-19
Cleaning ............................................................. 8-19
Front window wiper replacement ........................ 8-20
Back door window wiper replacement ................ 8-20
Windscreen washer nozzle ................................. 8-20
Fuses ...................................................................... 8-21
Passenger compartment ..................................... 8-21
Engine compartment ........................................... 8-22
Lights ...................................................................... 8-23
Headlights .......................................................... 8-23
Exterior lights ...................................................... 8-24
Interior lights....................................................... 8-24
Light locations .................................................... 8-25
Wheels and tyres ..................................................... 8-29
Tyre inflation pressure......................................... 8-29
Types of tyres ..................................................... 8-29
Snow chains....................................................... 8-30
Tyre rotation ....................................................... 8-30
Tyre wear and damage ....................................... 8-30
Tyre age ............................................................. 8-31
Changing tyres and wheels ................................. 8-31
Wheel balance.................................................... 8-31
Spare tyre .......................................................... 8-31