2011 NISSAN CUBE buttons
[x] Cancel search: buttonsPage 138 of 345
Black plate (136,1)
Model "Z12-D" EDITED: 2010/ 9/ 27
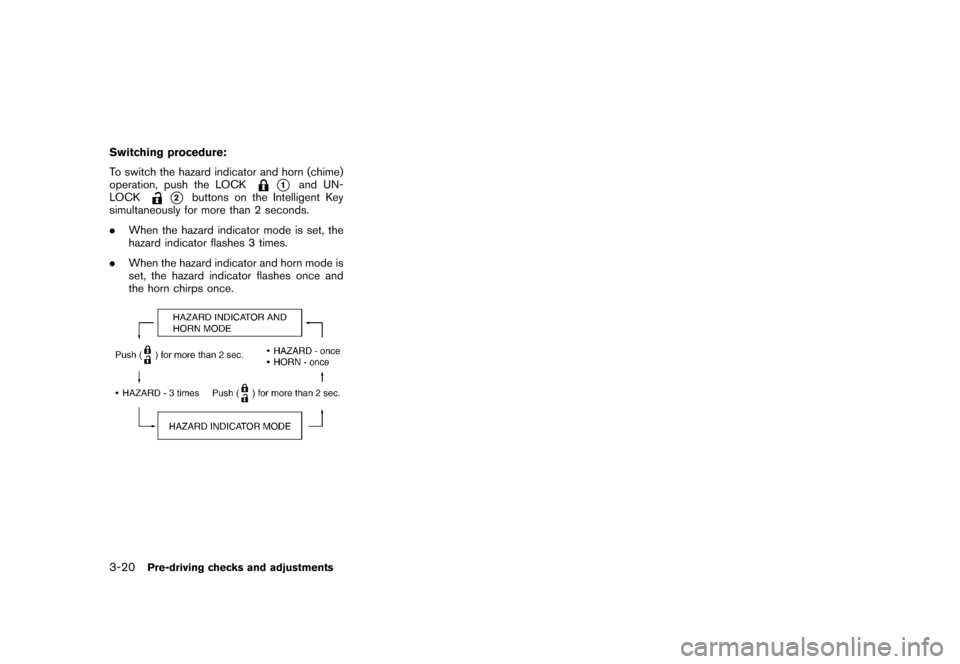
Switching procedure:
To switch the hazard indicator and horn (chime)
operation, push the LOCK
*1
and UN-
LOCK
*2
buttons on the Intelligent Key
simultaneously for more than 2 seconds.
. When the hazard indicator mode is set, the
hazard indicator flashes 3 times.
. When the hazard indicator and horn mode is
set, the hazard indicator flashes once and
the horn chirps once.
3-20
Pre-driving checks and adjustments
Page 149 of 345
Black plate (13,1)
4 Heater, air conditioner, audio and phonesystems
Model "Z12-D" EDITED: 2010/ 9/ 27
Safety note ....................................................... 4-2
Control panel buttons — color screen with
navigation system (if so equipped) ......................... 4-2
How to use touch screen ................................. 4-3
How to use the BACK button ........................... 4-5
How to use brightness control and display ON/
OFF button ................................................... 4-5
How to use the setup button ............................ 4-5
RearView monitor (if so equipped) ......................... 4-9
How to read the displayed lines ......................... 4-9
Difference between predicted and actual
distances ................................................... 4-10
How to adjust the screen ............................... 4-12
Operating tips ............................................. 4-12
Ventilators ...................................................... 4-13
Center ventilators ......................................... 4-13
Side ventilators ............................................ 4-13
Heater and air conditioner .................................. 4-13
Manual air conditioner ................................... 4-14
Automatic air conditioner (if so equipped) .......... 4-17
Operating tips ............................................. 4-19
In-cabin microfilter ........................................ 4-19
Servicing air conditioner ................................ 4-20 Audio system
.................................................. 4-20
Audio operation precautions ........................... 4-20
FM-AM radio with Compact Disc (CD) player
(Type A)..................................................... 4-34
FM-AM radio with Compact Disc (CD) player
(Type B)..................................................... 4-38
FM-AM-SAT radio with Compact Disc (CD)
player (Type C) ............................................ 4-45
CD care and cleaning ................................... 4-52
Steering wheel switch for audio control
(if so equipped) ........................................... 4-53
Antenna ..................................................... 4-54
Car phone or CB radio ...................................... 4-54
Bluetooth
®Hands-Free Phone System
(if so equipped) ............................................... 4-55
Regulatory information ................................... 4-57
Using the system ......................................... 4-57
Control buttons ........................................... 4-59
Getting started ............................................ 4-60
List of voice commands ................................. 4-61
Speaker Adaptation (SA) mode ....................... 4-65
Troubleshooting guide ................................... 4-67
Page 150 of 345
Black plate (148,1)
Model "Z12-D" EDITED: 2010/ 9/ 27
WARNING
.Do not disassemble or modify this
system. If you do, it may result in
accidents, fire, or electric shock.
. In case you notice any foreign
object in the system hardware, spill
liquid on it, or notice smoke or smell
coming from it, stop using the
system immediately and contact
your nearest NISSAN dealer. Ignor-
ing such conditions may lead to
accidents, fire, or electric shock.
CAUTION
Do not use this system if you notice any
abnormality, such as a frozen screen or
lack of sound. Continued use of the
system may result in an accident, fire or
electric shock.
Do not attempt to operate the system in
extreme temperature conditions [below
� 48F( �208 C) and above 158 8F(70 8C)].
Operating this system under these condi-
tions may result in system malfunctions.
SAA3377
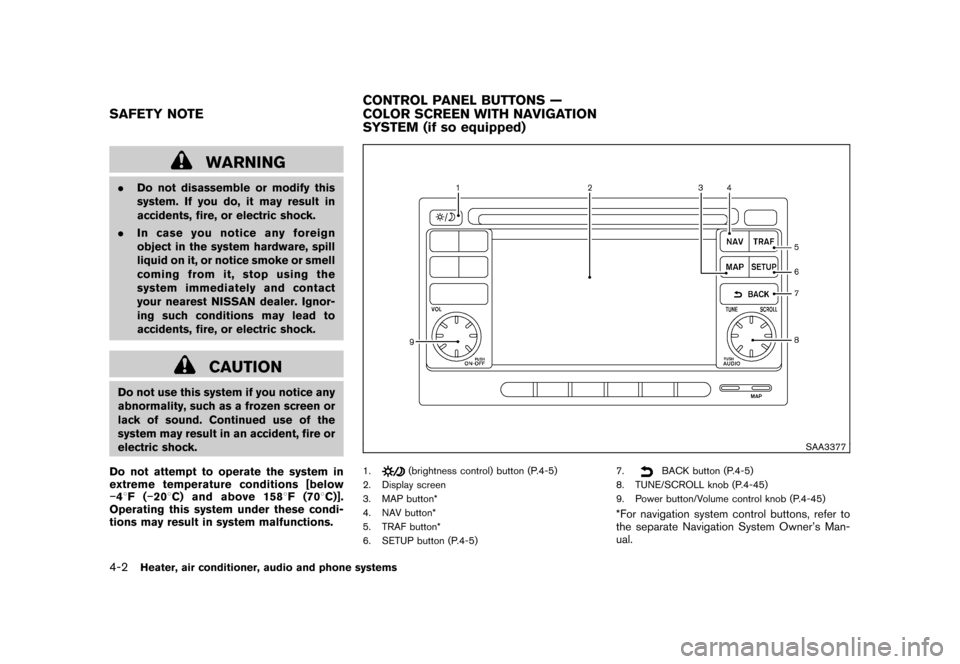
1.
(brightness control) button (P.4-5)
2. Display screen
3. MAP button*
4. NAV button*
5. TRAF button*
6. SETUP button (P.4-5) 7.
BACK button (P.4-5)
8. TUNE/SCROLL knob (P.4-45)
9. Power button/Volume control knob (P.4-45)
*For navigation system control buttons, refer to
the separate Navigation System Owner’s Man-
ual.
SAFETY NOTE CONTROL PANEL BUTTONS —
COLOR SCREEN WITH NAVIGATION
SYSTEM (if so equipped)4-2
Heater, air conditioner, audio and phone systems
Page 182 of 345
Black plate (180,1)
Model "Z12-D" EDITED: 2010/ 9/ 27
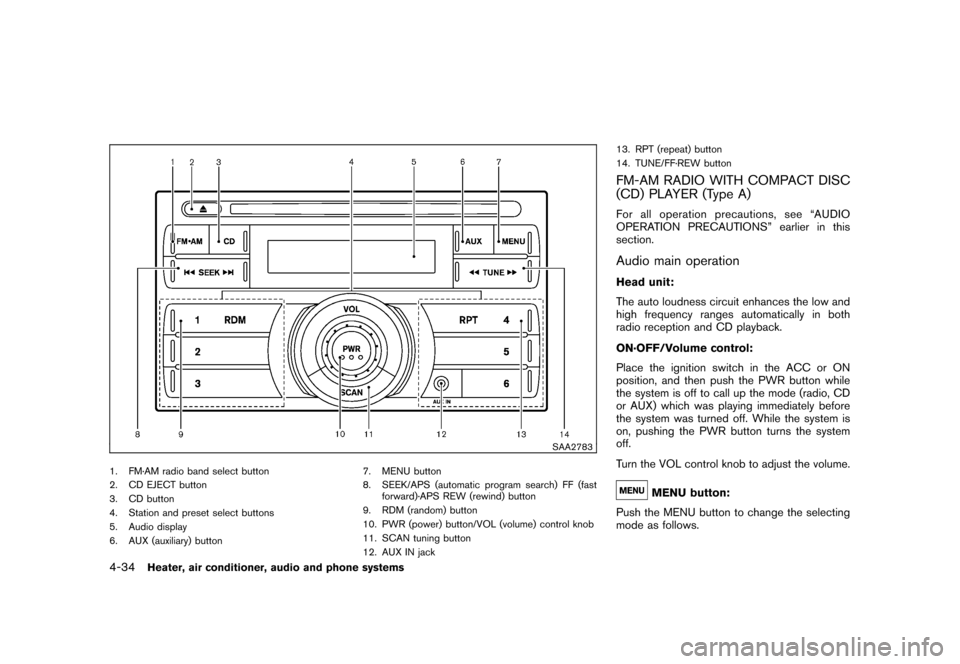
SAA2783
1. FM·AM radio band select button
2. CD EJECT button
3. CD button
4. Station and preset select buttons
5. Audio display
6. AUX (auxiliary) button7. MENU button
8. SEEK/APS (automatic program search) FF (fast
forward)·APS REW (rewind) button
9. RDM (random) button
10. PWR (power) button/VOL (volume) control knob
11. SCAN tuning button
12. AUX IN jack 13. RPT (repeat) button
14. TUNE/FF·REW button
FM-AM RADIO WITH COMPACT DISC
(CD) PLAYER (Type A)For all operation precautions, see “AUDIO
OPERATION PRECAUTIONS” earlier in this
section.Audio main operationHead unit:
The auto loudness circuit enhances the low and
high frequency ranges automatically in both
radio reception and CD playback.
ON·OFF/Volume control:
Place the ignition switch in the ACC or ON
position, and then push the PWR button while
the system is off to call up the mode (radio, CD
or AUX) which was playing immediately before
the system was turned off. While the system is
on, pushing the PWR button turns the system
off.
Turn the VOL control knob to adjust the volume.
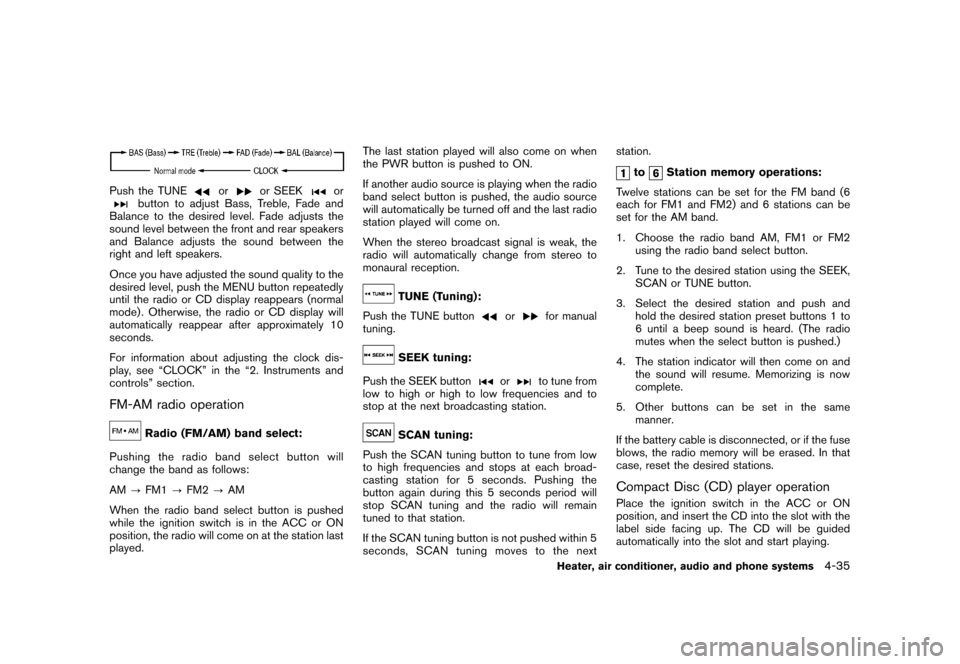
MENU button:
Push the MENU button to change the selecting
mode as follows.
4-34
Heater, air conditioner, audio and phone systems
Page 183 of 345
Black plate (181,1)
Model "Z12-D" EDITED: 2010/ 9/ 27
Push the TUNE
or
or SEEK
or
button to adjust Bass, Treble, Fade and
Balance to the desired level. Fade adjusts the
sound level between the front and rear speakers
and Balance adjusts the sound between the
right and left speakers.
Once you have adjusted the sound quality to the
desired level, push the MENU button repeatedly
until the radio or CD display reappears (normal
mode) . Otherwise, the radio or CD display will
automatically reappear after approximately 10
seconds.
For information about adjusting the clock dis-
play, see “CLOCK” in the “2. Instruments and
controls” section.
FM-AM radio operation
Radio (FM/AM) band select:
Pushing the radio band select button will
change the band as follows:
AM ?FM1 ?FM2 ?AM
When the radio band select button is pushed
while the ignition switch is in the ACC or ON
position, the radio will come on at the station last
played. The last station played will also come on when
the PWR button is pushed to ON.
If another audio source is playing when the radio
band select button is pushed, the audio source
will automatically be turned off and the last radio
station played will come on.
When the stereo broadcast signal is weak, the
radio will automatically change from stereo to
monaural reception.
TUNE (Tuning):
Push the TUNE button
or
for manual
tuning.
SEEK tuning:
Push the SEEK button
or
to tune from
low to high or high to low frequencies and to
stop at the next broadcasting station.
SCAN tuning:
Push the SCAN tuning button to tune from low
to high frequencies and stops at each broad-
casting station for 5 seconds. Pushing the
button again during this 5 seconds period will
stop SCAN tuning and the radio will remain
tuned to that station.
If the SCAN tuning button is not pushed within 5
seconds, SCAN tuning moves to the next station.
to
Station memory operations:
Twelve stations can be set for the FM band (6
each for FM1 and FM2) and 6 stations can be
set for the AM band.
1. Choose the radio band AM, FM1 or FM2 using the radio band select button.
2. Tune to the desired station using the SEEK, SCAN or TUNE button.
3. Select the desired station and push and hold the desired station preset buttons 1 to
6 until a beep sound is heard. (The radio
mutes when the select button is pushed.)
4. The station indicator will then come on and the sound will resume. Memorizing is now
complete.
5. Other buttons can be set in the same manner.
If the battery cable is disconnected, or if the fuse
blows, the radio memory will be erased. In that
case, reset the desired stations.
Compact Disc (CD) player operationPlace the ignition switch in the ACC or ON
position, and insert the CD into the slot with the
label side facing up. The CD will be guided
automatically into the slot and start playing.
Heater, air conditioner, audio and phone systems
4-35
Page 186 of 345
Black plate (184,1)
Model "Z12-D" EDITED: 2010/ 9/ 27
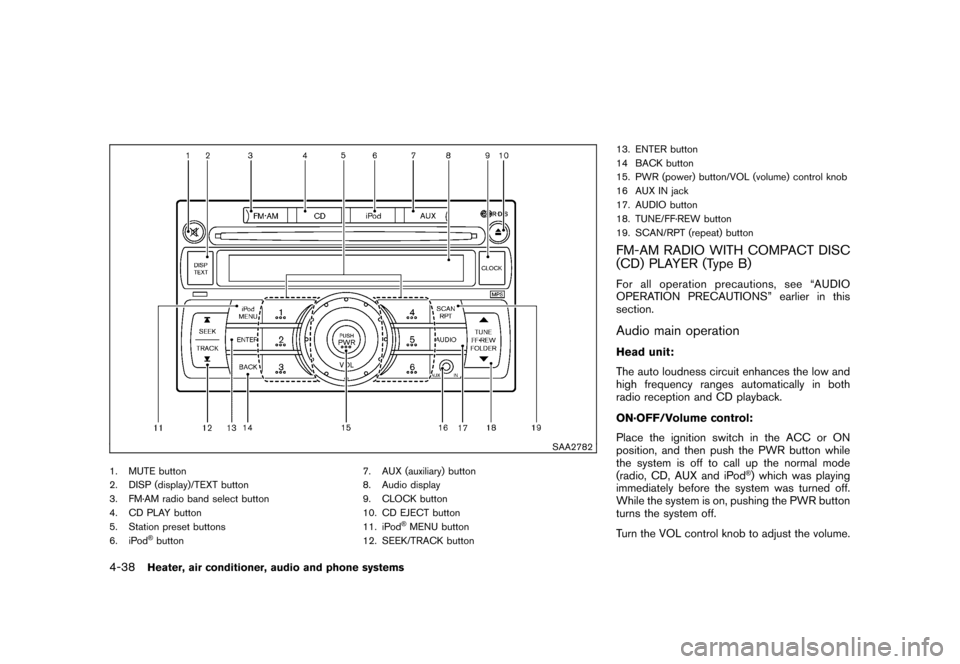
SAA2782
1. MUTE button
2. DISP (display)/TEXT button
3. FM·AM radio band select button
4. CD PLAY button
5. Station preset buttons
6. iPod
®button7. AUX (auxiliary) button
8. Audio display
9. CLOCK button
10. CD EJECT button
11. iPod
®MENU button
12. SEEK/TRACK button 13. ENTER button
14 BACK button
15. PWR (power) button/VOL (volume) control knob
16 AUX IN jack
17. AUDIO button
18. TUNE/FF·REW button
19. SCAN/RPT (repeat) button
FM-AM RADIO WITH COMPACT DISC
(CD) PLAYER (Type B)For all operation precautions, see “AUDIO
OPERATION PRECAUTIONS” earlier in this
section.Audio main operationHead unit:
The auto loudness circuit enhances the low and
high frequency ranges automatically in both
radio reception and CD playback.
ON·OFF/Volume control:
Place the ignition switch in the ACC or ON
position, and then push the PWR button while
the system is off to call up the normal mode
(radio, CD, AUX and iPod
®) which was playing
immediately before the system was turned off.
While the system is on, pushing the PWR button
turns the system off.
Turn the VOL control knob to adjust the volume.
4-38
Heater, air conditioner, audio and phone systems
Page 187 of 345
Black plate (185,1)
Model "Z12-D" EDITED: 2010/ 9/ 27
MUTE button:
Push the
button to mute the audio sound.
Push thebutton again to release the mute
setting.
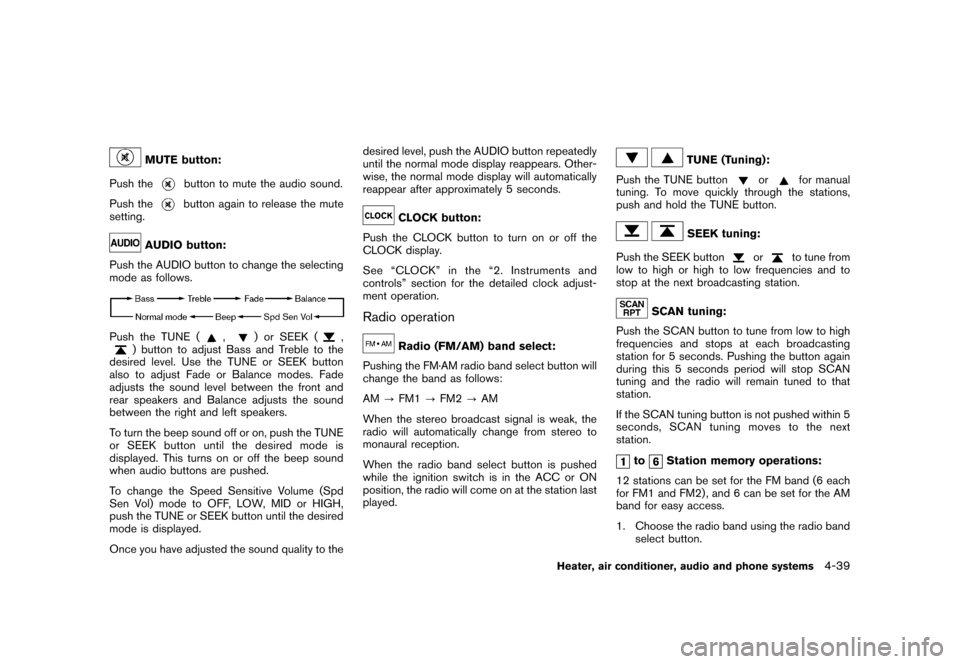
AUDIO button:
Push the AUDIO button to change the selecting
mode as follows.
Push the TUNE (
,
) or SEEK (
,
) button to adjust Bass and Treble to the
desired level. Use the TUNE or SEEK button
also to adjust Fade or Balance modes. Fade
adjusts the sound level between the front and
rear speakers and Balance adjusts the sound
between the right and left speakers.
To turn the beep sound off or on, push the TUNE
or SEEK button until the desired mode is
displayed. This turns on or off the beep sound
when audio buttons are pushed.
To change the Speed Sensitive Volume (Spd
Sen Vol) mode to OFF, LOW, MID or HIGH,
push the TUNE or SEEK button until the desired
mode is displayed.
Once you have adjusted the sound quality to the desired level, push the AUDIO button repeatedly
until the normal mode display reappears. Other-
wise, the normal mode display will automatically
reappear after approximately 5 seconds.
CLOCK button:
Push the CLOCK button to turn on or off the
CLOCK display.
See “CLOCK” in the “2. Instruments and
controls” section for the detailed clock adjust-
ment operation.
Radio operation
Radio (FM/AM) band select:
Pushing the FM·AM radio band select button will
change the band as follows:
AM ?FM1 ?FM2 ?AM
When the stereo broadcast signal is weak, the
radio will automatically change from stereo to
monaural reception.
When the radio band select button is pushed
while the ignition switch is in the ACC or ON
position, the radio will come on at the station last
played.
TUNE (Tuning):
Push the TUNE button
or
for manual
tuning. To move quickly through the stations,
push and hold the TUNE button.
SEEK tuning:
Push the SEEK button
or
to tune from
low to high or high to low frequencies and to
stop at the next broadcasting station.
SCAN tuning:
Push the SCAN button to tune from low to high
frequencies and stops at each broadcasting
station for 5 seconds. Pushing the button again
during this 5 seconds period will stop SCAN
tuning and the radio will remain tuned to that
station.
If the SCAN tuning button is not pushed within 5
seconds, SCAN tuning moves to the next
station.
to
Station memory operations:
12 stations can be set for the FM band (6 each
for FM1 and FM2) , and 6 can be set for the AM
band for easy access.
1. Choose the radio band using the radio band select button.
Heater, air conditioner, audio and phone systems
4-39
Page 188 of 345
Black plate (186,1)
Model "Z12-D" EDITED: 2010/ 9/ 27
2. Tune to the desired station using the SEEK,SCAN or TUNE button.
3. Push and hold the desired radio station preset button
to
until a beep sound is
heard. (The radio mutes when the radio
station preset button is pushed.)
4. The station indicator will then come on and the sound will resume. Memorizing is now
complete.
5. Other buttons can be set in the same manner.
If the battery cable is disconnected, or if the fuse
opens, the radio memory will be erased. In that
case, reset the desired stations.
Radio Data System (RDS):
RDS stands for Radio Data System, and is a
data information service transmitted by some
radio stations on the FM band (not AM band)
encoded within a regular radio broadcast.
Currently, most RDS stations are in large cities,
but many stations are now considering broad-
casting RDS data.
RDS can display:
. Station call sign, such as “WHFR 98.3”.
. Station name, such as “The Groove”.
. Music or programming type such as “Clas- sical”, “Country” or “Rock”.
. Traffic reports about delays or construction.
If the station broadcasts RDS information, the
RDS icon is displayed.
RADIO DISPLAY change:
When the DISP button is pushed during the FM
radio mode, the radio display will change in the
following order.
FM radio:
Frequency ↔PS/PTY
In the FM radio mode, pressing the DISP button
will switch the frequency display to the PTY
display (if available) , and if the DISP button is
not pushed again within 5 seconds, it will
automatically switch to the PS display. If PTY
is not available, pressing the DISP button will
only switch between the frequency display and
the PS display.
Compact Disc (CD) player operationPlace the ignition switch in the ACC or ON
position, and insert the CD into the slot with the
label side facing up. The CD will be guided
automatically into the slot and start playing.
After loading the disc, the number of tracks on
the disc will appear on the display. If the radio is already operating, it will auto-
matically turn off and the CD will play.
If the system has been turned off while the CD
was playing, pushing the PWR button will start
the CD.
Do not use 3.1 in (8 cm) discs.
CD PLAY:
When the CD button is pushed with the system
off and the CD loaded, the system will turn on
and the CD will start to play.
When the CD button is pushed with the CD
loaded and the radio playing, the radio will
automatically be turned off and the CD will start
to play.CD play information:
When the DISP button is pushed for less than
1.5 seconds while the CD is being played, the
disc information display will change as follows:
CD:
4-40
Heater, air conditioner, audio and phone systems