Page 49 of 489
WARNING
When fastening the seat belts, be certain
that the seatbacks are completely se-
cured in the latched position. If they are
not completely secured, passengers may
be injured in an accident or sudden stop.
Unfastening the seat belts
�1To unfasten the seat belt, press the button on
the buckle. The seat belt automatically re-
tracts.
Checking seat belt operation
Seat belt retractors are designed to lock seat belt
movement by two separate methods:
● When the seat belt is pulled quickly from the
retractor.
● When the vehicle slows down rapidly. To increase your confidence in the seat belts,
check the operation as follows:
● Grasp the shoulder belt and pull forward
quickly. The retractor should lock and re-
strict further belt movement.
If the retractor does not lock during this check or
if you have any questions about seat belt opera-
tion, see a NISSAN dealer.
Page 53 of 489
WARNING
●After adjustment, release the adjust-
ment button and try to move the shoul-
der belt anchor up and down to make
sure it is securely fixed in position.
● The shoulder belt anchor height should
be adjusted to the position best for you.
Failure to do so may reduce the effec-
tiveness of the entire restraint system
and increase the chance or severity of
injury in an accident.
SEAT BELT EXTENDERS
If, because of body size or driving position, it is
not possible to properly fit the lap/shoulder belt
and fasten it, an extender that is compatible with
the installed seat belts is available that can be
purchased. The extender adds approximately 8 in
(200 mm) of length and may be used for either
the driver or front passenger seating position.
See a NISSAN dealer for assistance with pur-
chasing an extender if an extender is required.
Page 56 of 489
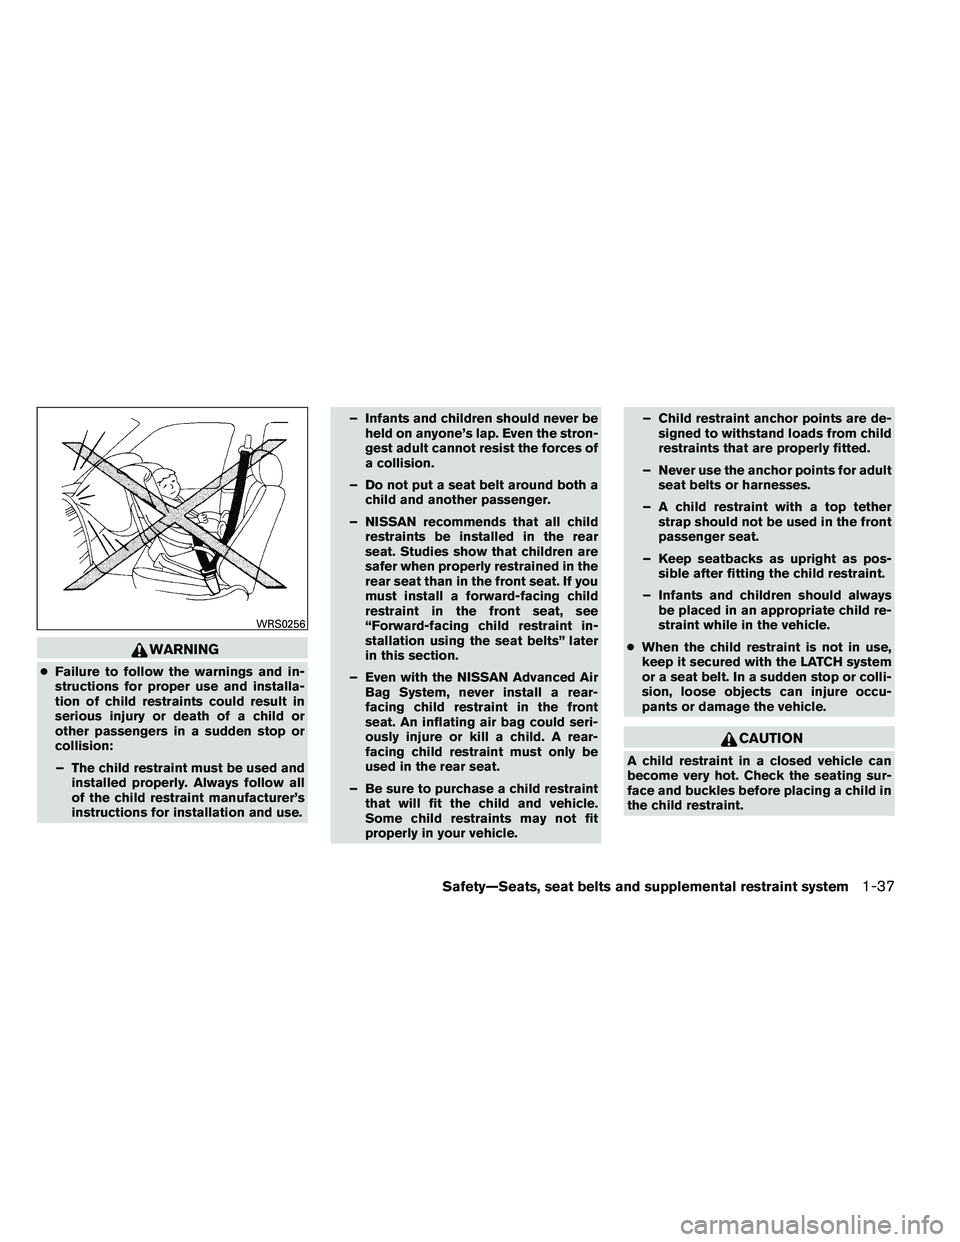
WARNING
●Failure to follow the warnings and in-
structions for proper use and installa-
tion of child restraints could result in
serious injury or death of a child or
other passengers in a sudden stop or
collision:
– The child restraint must be used and installed properly. Always follow all
of the child restraint manufacturer’s
instructions for installation and use. – Infants and children should never be
held on anyone’s lap. Even the stron-
gest adult cannot resist the forces of
a collision.
– Do not put a seat belt around both a child and another passenger.
– NISSAN recommends that all child restraints be installed in the rear
seat. Studies show that children are
safer when properly restrained in the
rear seat than in the front seat. If you
must install a forward-facing child
restraint in the front seat, see
“Forward-facing child restraint in-
stallation using the seat belts” later
in this section.
– Even with the NISSAN Advanced Air Bag System, never install a rear-
facing child restraint in the front
seat. An inflating air bag could seri-
ously injure or kill a child. A rear-
facing child restraint must only be
used in the rear seat.
– Be sure to purchase a child restraint that will fit the child and vehicle.
Some child restraints may not fit
properly in your vehicle. – Child restraint anchor points are de-
signed to withstand loads from child
restraints that are properly fitted.
– Never use the anchor points for adult seat belts or harnesses.
– A child restraint with a top tether strap should not be used in the front
passenger seat.
– Keep seatbacks as upright as pos- sible after fitting the child restraint.
– Infants and children should always be placed in an appropriate child re-
straint while in the vehicle.
● When the child restraint is not in use,
keep it secured with the LATCH system
or a seat belt. In a sudden stop or colli-
sion, loose objects can injure occu-
pants or damage the vehicle.
Page 61 of 489
1. Top tether strap
2. Anchor pointTop tether anchor point locations
Anchor points are located in the following loca-
tions:● 2nd row bench (if so equipped) on the floor
behind the outboard seating positions as
shown.
● 2nd row captain’s chairs (if so equipped) on
the floor behind the seats as shown.
● 3rd row bench seat on the floor of the cargo
area behind the center seat position as
shown.
REAR-FACING CHILD RESTRAINT
INSTALLATION USING LATCH
Refer to all Warnings and Cautions in the “Child
Safety” and “Child Restraint” sections before in-
stalling a child restraint.
Follow these steps to install a rear-facing child
restraint in the 2nd row seats using the LATCH
system:
1. Position the child restraint on the seat. Al- ways follow the child restraint manufactur-
er’s instructions.
Page 64 of 489
WARNING
●The three-point seat belt with Auto-
matic Locking Retractor (ALR) must be
used when installing a child restraint.
Failure to use the ALR mode will result
in the child restraint not being properly
secured. The restraint could tip over or
be loose and cause injury to a child in a
sudden stop or collision. Also, it can
change the operation of the front pas-
senger air bag. See “Front passenger
air bag and status light” later in this
section.
● When installing a child restraint system
in the rear center position, both the
center seat belt connector tongue and
buckle tongue must be secured. See
“Attaching the 3rd row center seat belt”
in this section. Refer to all Warnings and Cautions in the “Child
Safety” and “Child Restraint” sections before in-
stalling a child restraint.
Follow these steps to install a rear-facing child
restraint using the vehicle seat belts in the rear
seats:
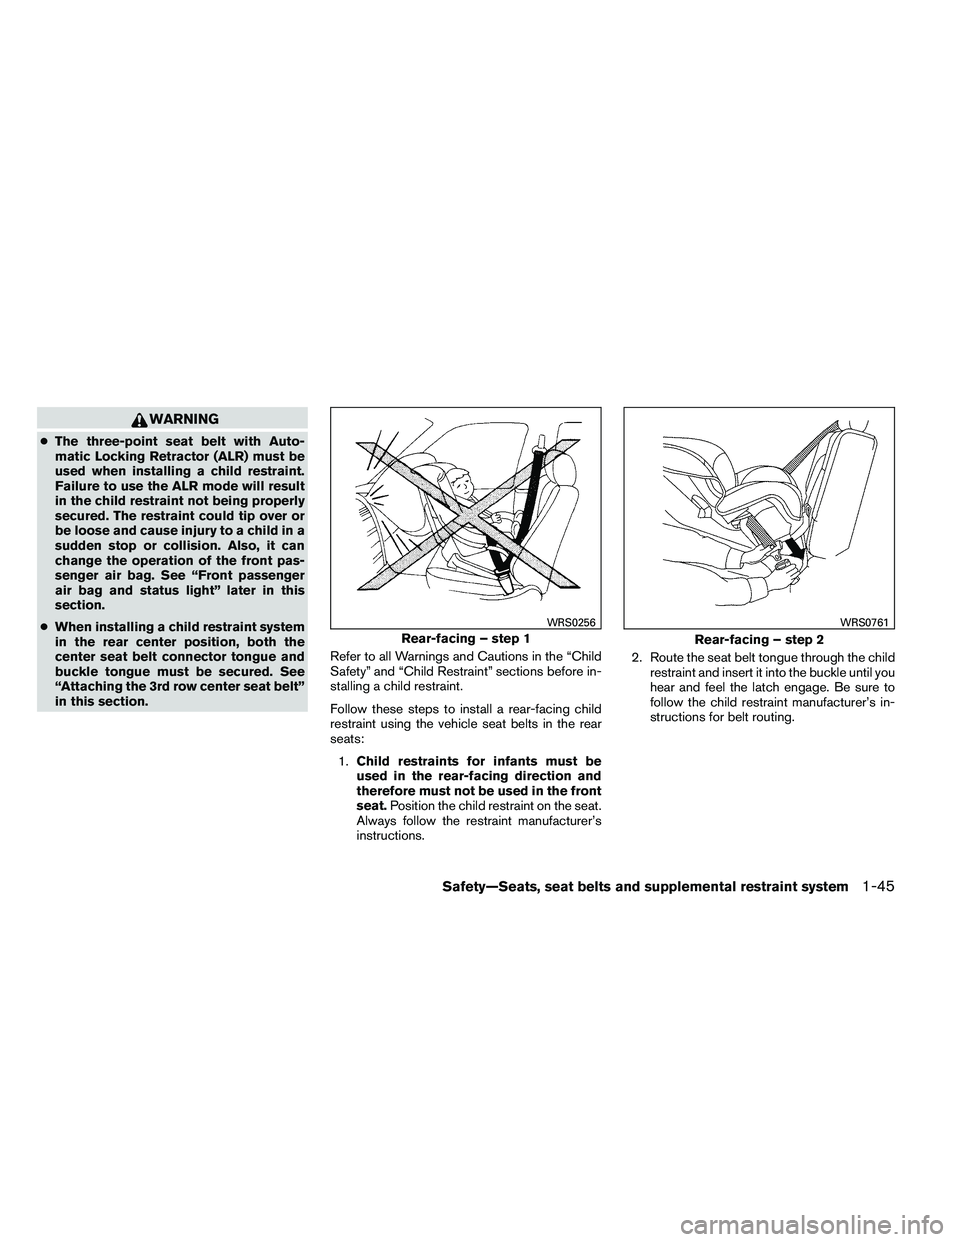
1. Child restraints for infants must be
used in the rear-facing direction and
therefore must not be used in the front
seat. Position the child restraint on the seat.
Always follow the restraint manufacturer’s
instructions. 2. Route the seat belt tongue through the child
restraint and insert it into the buckle until you
hear and feel the latch engage. Be sure to
follow the child restraint manufacturer’s in-
structions for belt routing.
Page 66 of 489
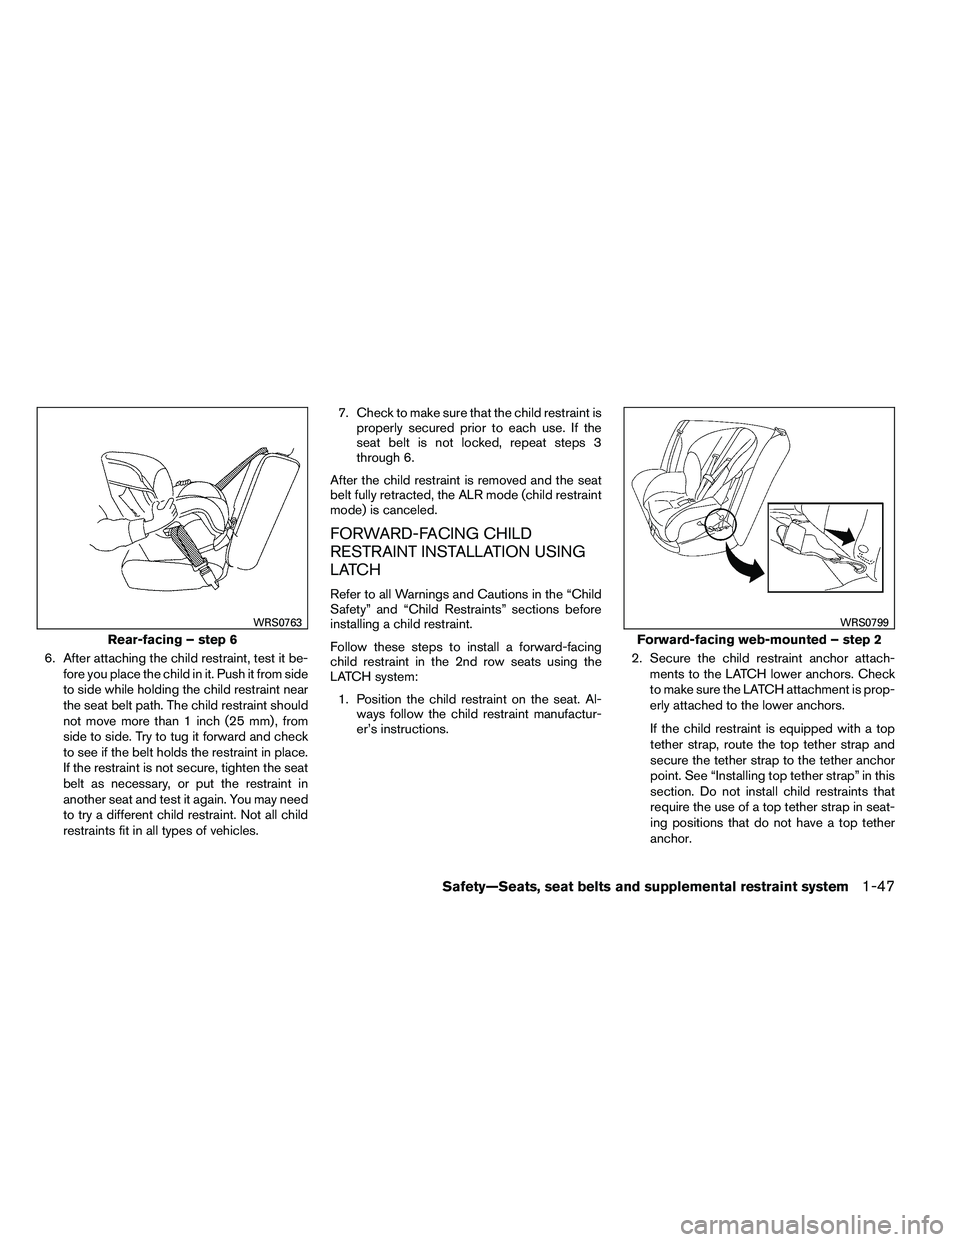
6. After attaching the child restraint, test it be-fore you place the child in it. Push it from side
to side while holding the child restraint near
the seat belt path. The child restraint should
not move more than 1 inch (25 mm) , from
side to side. Try to tug it forward and check
to see if the belt holds the restraint in place.
If the restraint is not secure, tighten the seat
belt as necessary, or put the restraint in
another seat and test it again. You may need
to try a different child restraint. Not all child
restraints fit in all types of vehicles. 7. Check to make sure that the child restraint is
properly secured prior to each use. If the
seat belt is not locked, repeat steps 3
through 6.
After the child restraint is removed and the seat
belt fully retracted, the ALR mode (child restraint
mode) is canceled.
FORWARD-FACING CHILD
RESTRAINT INSTALLATION USING
LATCH
Refer to all Warnings and Cautions in the “Child
Safety” and “Child Restraints” sections before
installing a child restraint.
Follow these steps to install a forward-facing
child restraint in the 2nd row seats using the
LATCH system: 1. Position the child restraint on the seat. Al- ways follow the child restraint manufactur-
er’s instructions. 2. Secure the child restraint anchor attach-
ments to the LATCH lower anchors. Check
to make sure the LATCH attachment is prop-
erly attached to the lower anchors.
If the child restraint is equipped with a top
tether strap, route the top tether strap and
secure the tether strap to the tether anchor
point. See “Installing top tether strap” in this
section. Do not install child restraints that
require the use of a top tether strap in seat-
ing positions that do not have a top tether
anchor.
Page 75 of 489
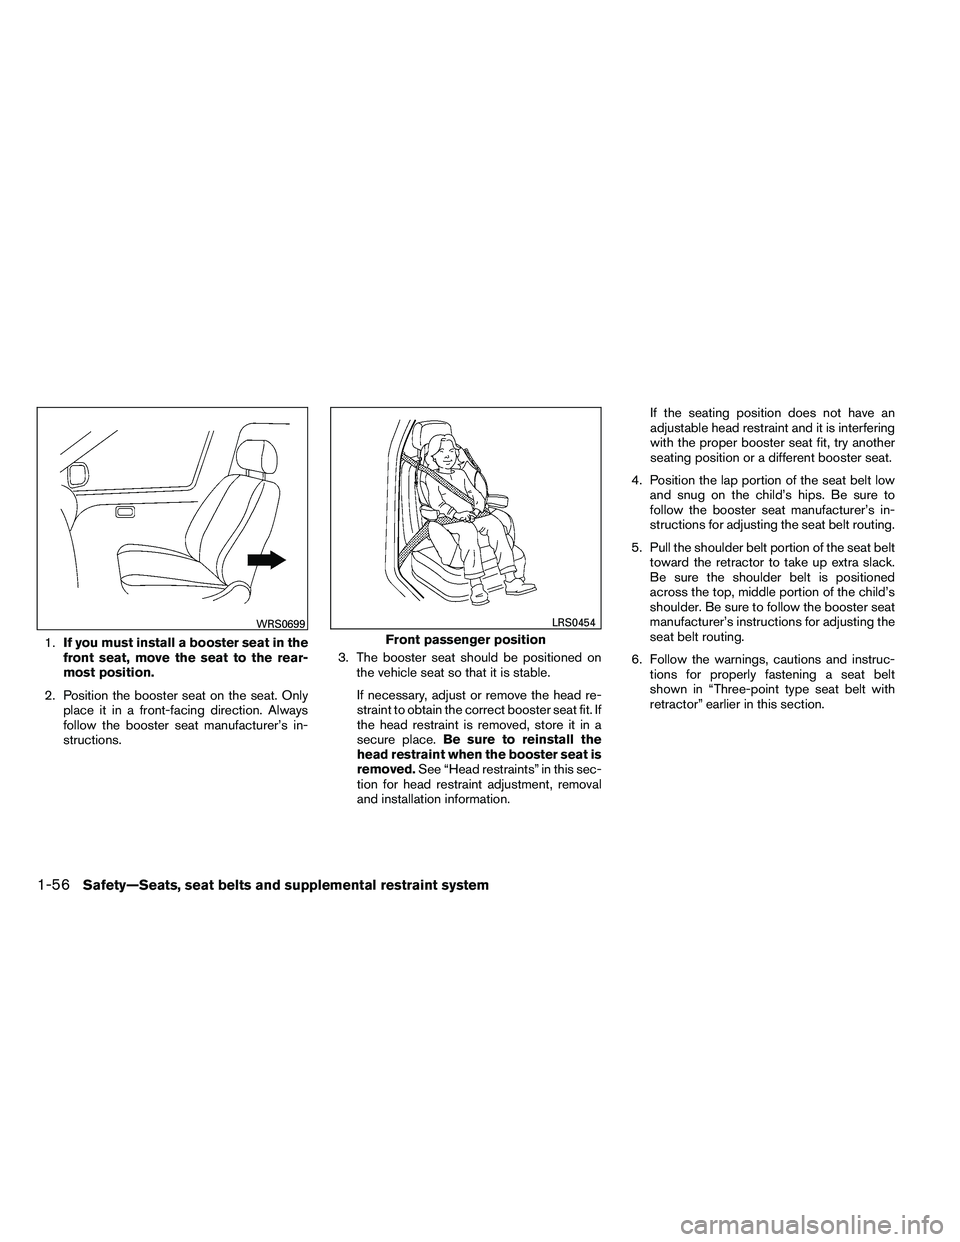
1.If you must install a booster seat in the
front seat, move the seat to the rear-
most position.
2. Position the booster seat on the seat. Only place it in a front-facing direction. Always
follow the booster seat manufacturer’s in-
structions. 3. The booster seat should be positioned on
the vehicle seat so that it is stable.
If necessary, adjust or remove the head re-
straint to obtain the correct booster seat fit. If
the head restraint is removed, store it in a
secure place. Be sure to reinstall the
head restraint when the booster seat is
removed. See “Head restraints” in this sec-
tion for head restraint adjustment, removal
and installation information. If the seating position does not have an
adjustable head restraint and it is interfering
with the proper booster seat fit, try another
seating position or a different booster seat.
4. Position the lap portion of the seat belt low and snug on the child’s hips. Be sure to
follow the booster seat manufacturer’s in-
structions for adjusting the seat belt routing.
5. Pull the shoulder belt portion of the seat belt toward the retractor to take up extra slack.
Be sure the shoulder belt is positioned
across the top, middle portion of the child’s
shoulder. Be sure to follow the booster seat
manufacturer’s instructions for adjusting the
seat belt routing.
6. Follow the warnings, cautions and instruc- tions for properly fastening a seat belt
shown in “Three-point type seat belt with
retractor” earlier in this section.
Page 77 of 489
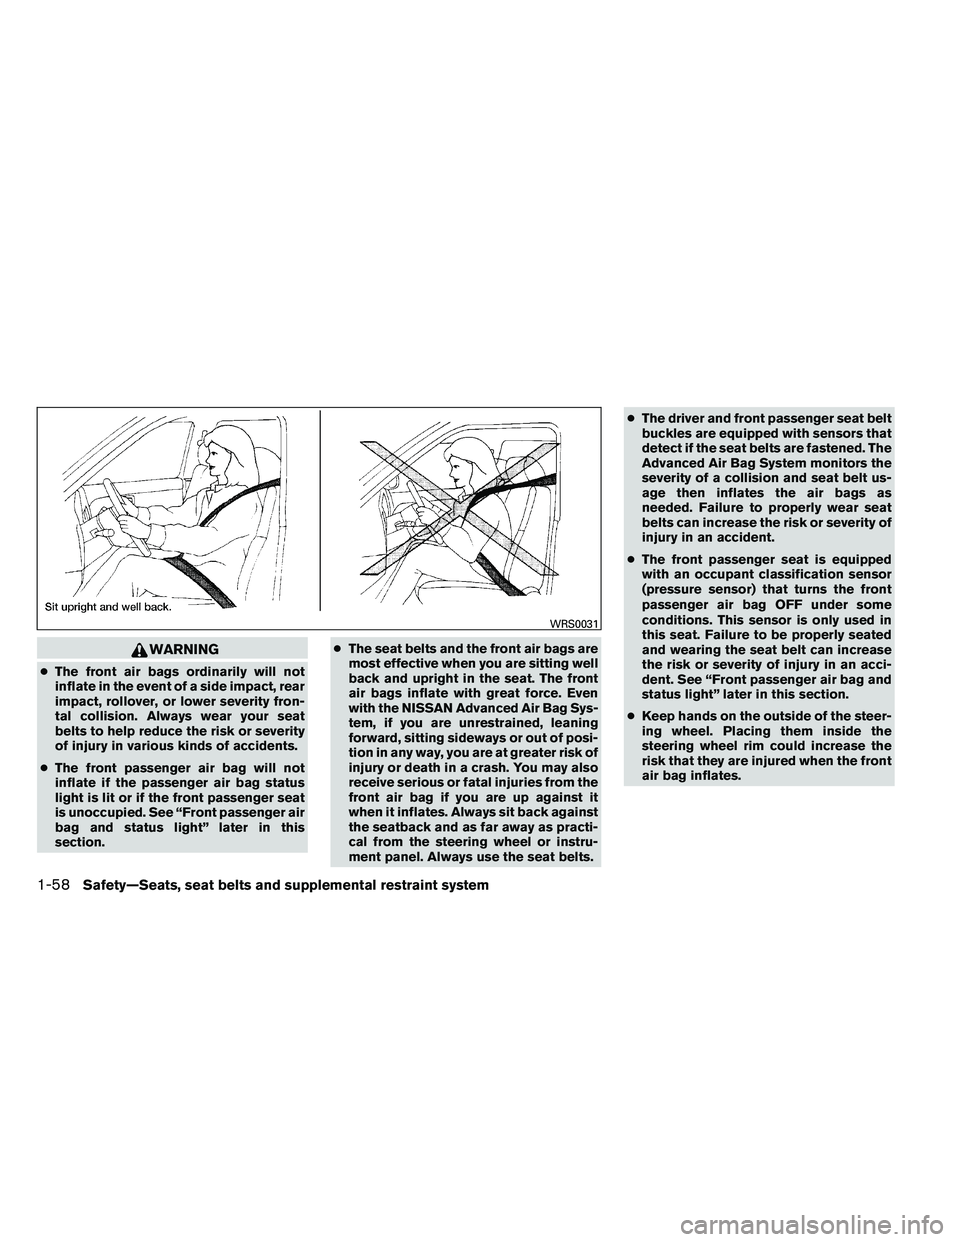
WARNING
●The front air bags ordinarily will not
inflate in the event of a side impact, rear
impact, rollover, or lower severity fron-
tal collision. Always wear your seat
belts to help reduce the risk or severity
of injury in various kinds of accidents.
● The front passenger air bag will not
inflate if the passenger air bag status
light is lit or if the front passenger seat
is unoccupied. See “Front passenger air
bag and status light” later in this
section. ●
The seat belts and the front air bags are
most effective when you are sitting well
back and upright in the seat. The front
air bags inflate with great force. Even
with the NISSAN Advanced Air Bag Sys-
tem, if you are unrestrained, leaning
forward, sitting sideways or out of posi-
tion in any way, you are at greater risk of
injury or death in a crash. You may also
receive serious or fatal injuries from the
front air bag if you are up against it
when it inflates. Always sit back against
the seatback and as far away as practi-
cal from the steering wheel or instru-
ment panel. Always use the seat belts. ●
The driver and front passenger seat belt
buckles are equipped with sensors that
detect if the seat belts are fastened. The
Advanced Air Bag System monitors the
severity of a collision and seat belt us-
age then inflates the air bags as
needed. Failure to properly wear seat
belts can increase the risk or severity of
injury in an accident.
● The front passenger seat is equipped
with an occupant classification sensor
(pressure sensor) that turns the front
passenger air bag OFF under some
conditions. This sensor is only used in
this seat. Failure to be properly seated
and wearing the seat belt can increase
the risk or severity of injury in an acci-
dent. See “Front passenger air bag and
status light” later in this section.
● Keep hands on the outside of the steer-
ing wheel. Placing them inside the
steering wheel rim could increase the
risk that they are injured when the front
air bag inflates.