Page 306 of 489

PHONEBOOK
Up to 40 phone numbers can be stored in the
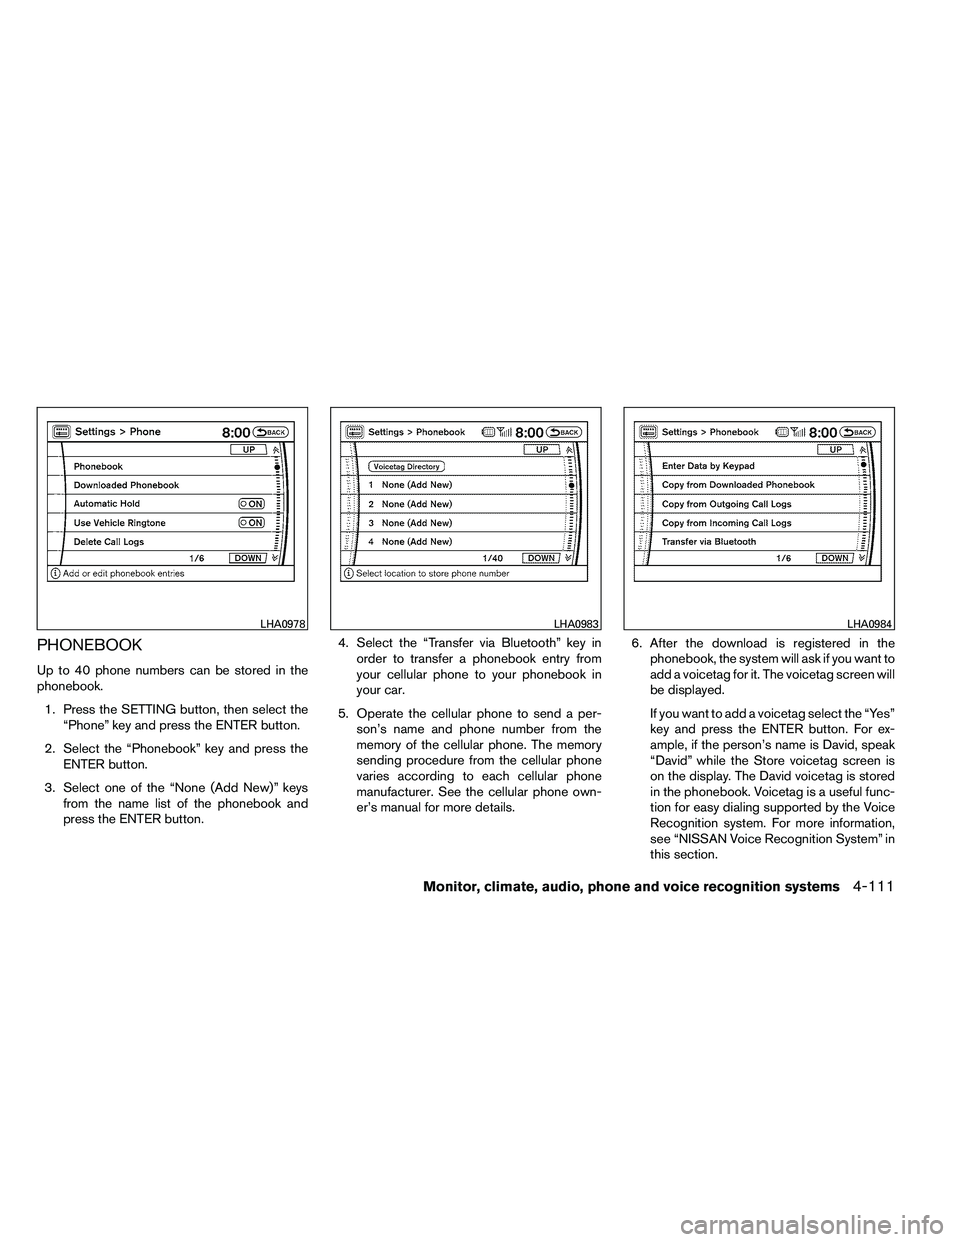
phonebook.1. Press the SETTING button, then select the “Phone” key and press the ENTER button.
2. Select the “Phonebook” key and press the ENTER button.
3. Select one of the “None (Add New)” keys from the name list of the phonebook and
press the ENTER button. 4. Select the “Transfer via Bluetooth” key in
order to transfer a phonebook entry from
your cellular phone to your phonebook in
your car.
5. Operate the cellular phone to send a per- son’s name and phone number from the
memory of the cellular phone. The memory
sending procedure from the cellular phone
varies according to each cellular phone
manufacturer. See the cellular phone own-
er’s manual for more details. 6. After the download is registered in the
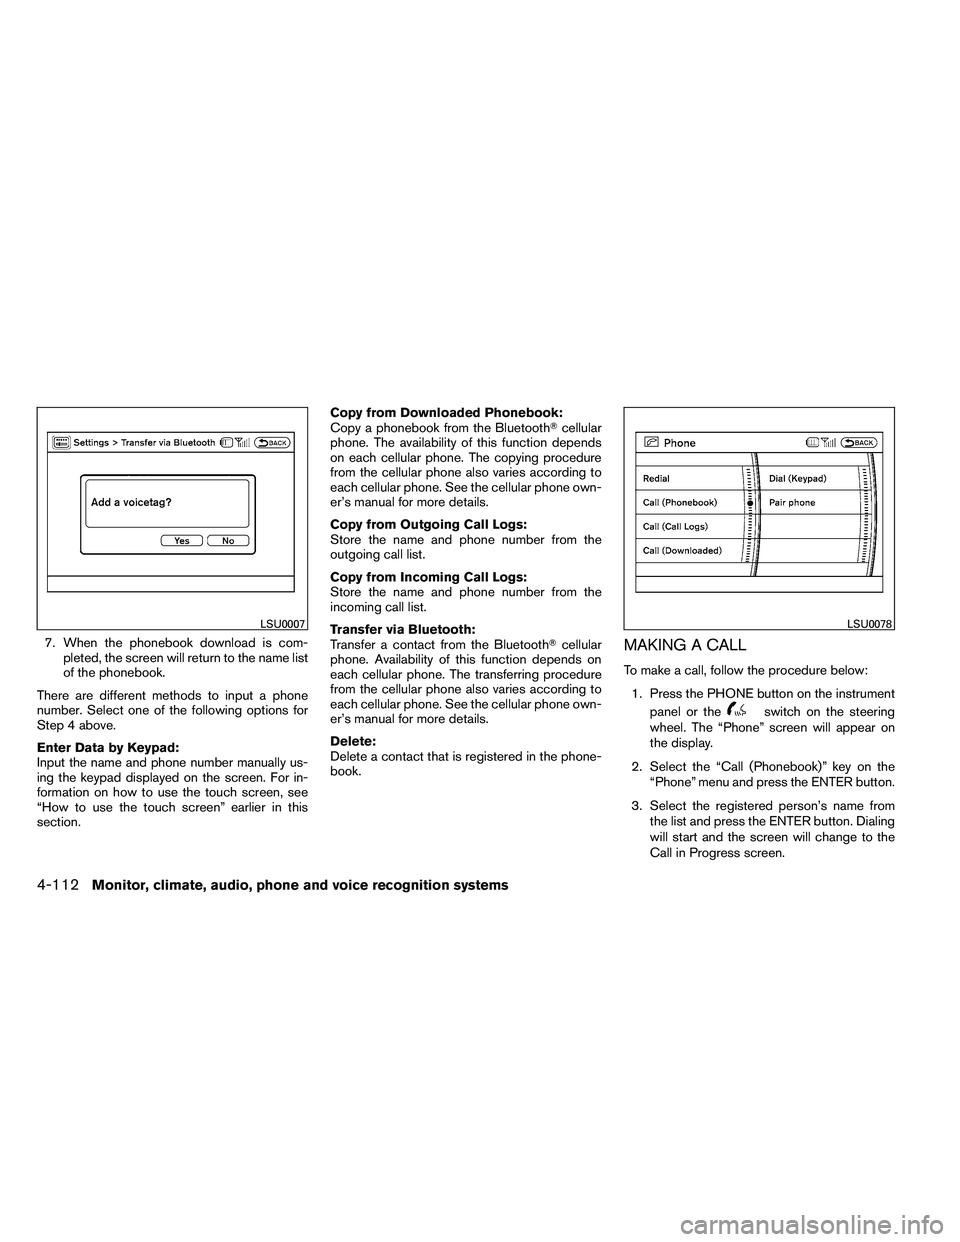
phonebook, the system will ask if you want to
add a voicetag for it. The voicetag screen will
be displayed.
If you want to add a voicetag select the “Yes”
key and press the ENTER button. For ex-
ample, if the person’s name is David, speak
“David” while the Store voicetag screen is
on the display. The David voicetag is stored
in the phonebook. Voicetag is a useful func-
tion for easy dialing supported by the Voice
Recognition system. For more information,
see “NISSAN Voice Recognition System” in
this section.
Page 307 of 489

7. When the phonebook download is com-pleted, the screen will return to the name list
of the phonebook.
There are different methods to input a phone
number. Select one of the following options for
Step 4 above.
Enter Data by Keypad:
Input the name and phone number manually us-
ing the keypad displayed on the screen. For in-
formation on how to use the touch screen, see
“How to use the touch screen” earlier in this
section. Copy from Downloaded Phonebook:
Copy a phonebook from the Bluetooth�
cellular
phone. The availability of this function depends
on each cellular phone. The copying procedure
from the cellular phone also varies according to
each cellular phone. See the cellular phone own-
er’s manual for more details.
Copy from Outgoing Call Logs:
Store the name and phone number from the
outgoing call list.
Copy from Incoming Call Logs:
Store the name and phone number from the
incoming call list.
Transfer via Bluetooth:
Transfer a contact from the Bluetooth� cellular
phone. Availability of this function depends on
each cellular phone. The transferring procedure
from the cellular phone also varies according to
each cellular phone. See the cellular phone own-
er’s manual for more details.
Delete:
Delete a contact that is registered in the phone-
book.MAKING A CALL
To make a call, follow the procedure below:
1. Press the PHONE button on the instrument panel or the
Page 309 of 489
Answer:
Accept an incoming call to talk.
On Hold:
Put an incoming call on hold.
Reject Call:
Reject an incoming call.
To finish the call, follow one of the procedures
listed below:
a. Touch the “Reject Call” key on the display.
b. Press the PHONE button on the instrumentpanel.
c. Press and hold the phone
Page 310 of 489
ENDING A CALL
To finish the call, perform one of the following
procedures:● Select the “Hang up” key on the Call in
Progress display and press the ENTER but-
ton.
● Push the
Page 312 of 489

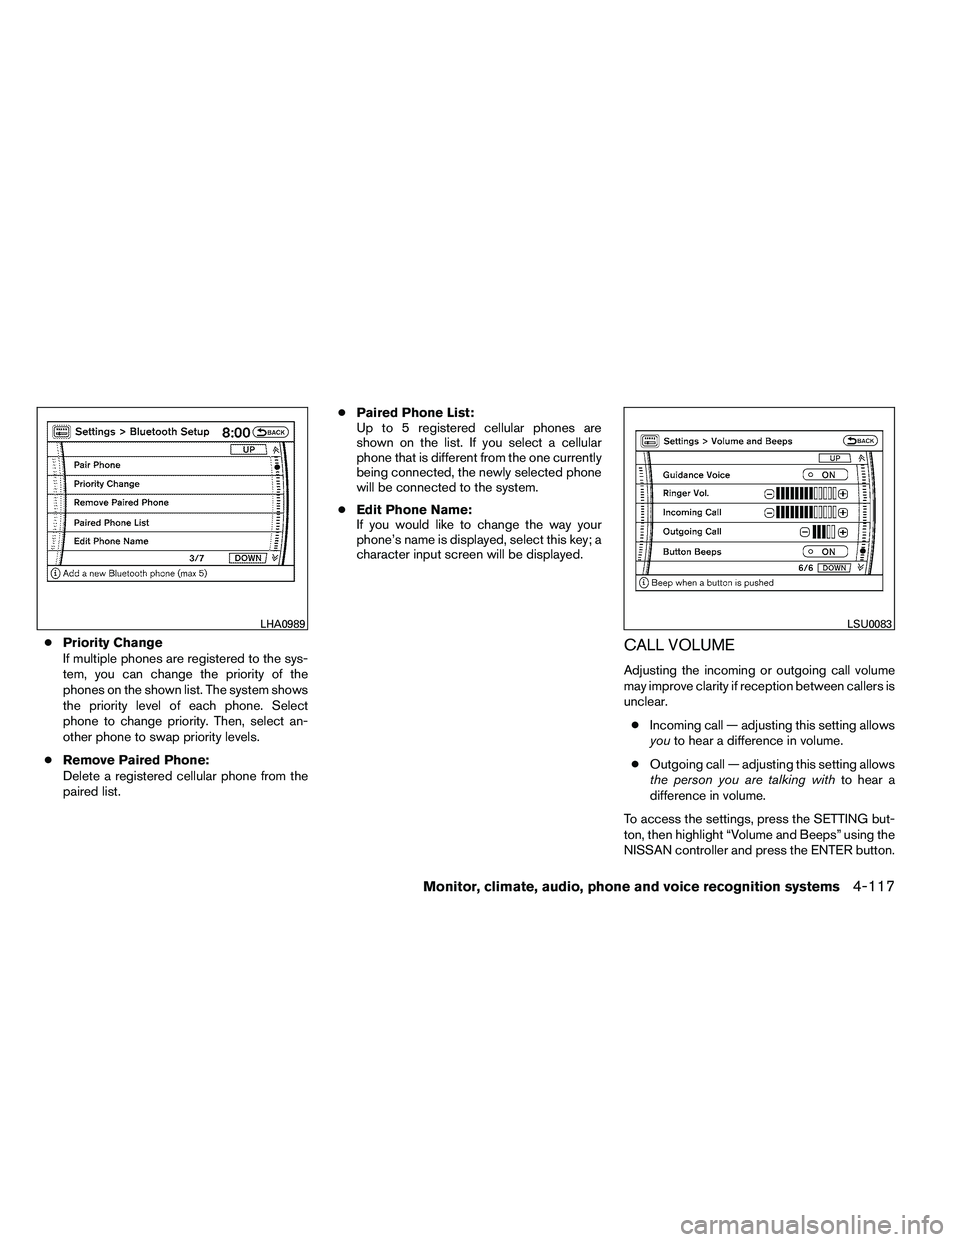
●Priority Change
If multiple phones are registered to the sys-
tem, you can change the priority of the
phones on the shown list. The system shows
the priority level of each phone. Select
phone to change priority. Then, select an-
other phone to swap priority levels.
● Remove Paired Phone:
Delete a registered cellular phone from the
paired list. ●
Paired Phone List:
Up to 5 registered cellular phones are
shown on the list. If you select a cellular
phone that is different from the one currently
being connected, the newly selected phone
will be connected to the system.
● Edit Phone Name:
If you would like to change the way your
phone’s name is displayed, select this key; a
character input screen will be displayed.CALL VOLUME
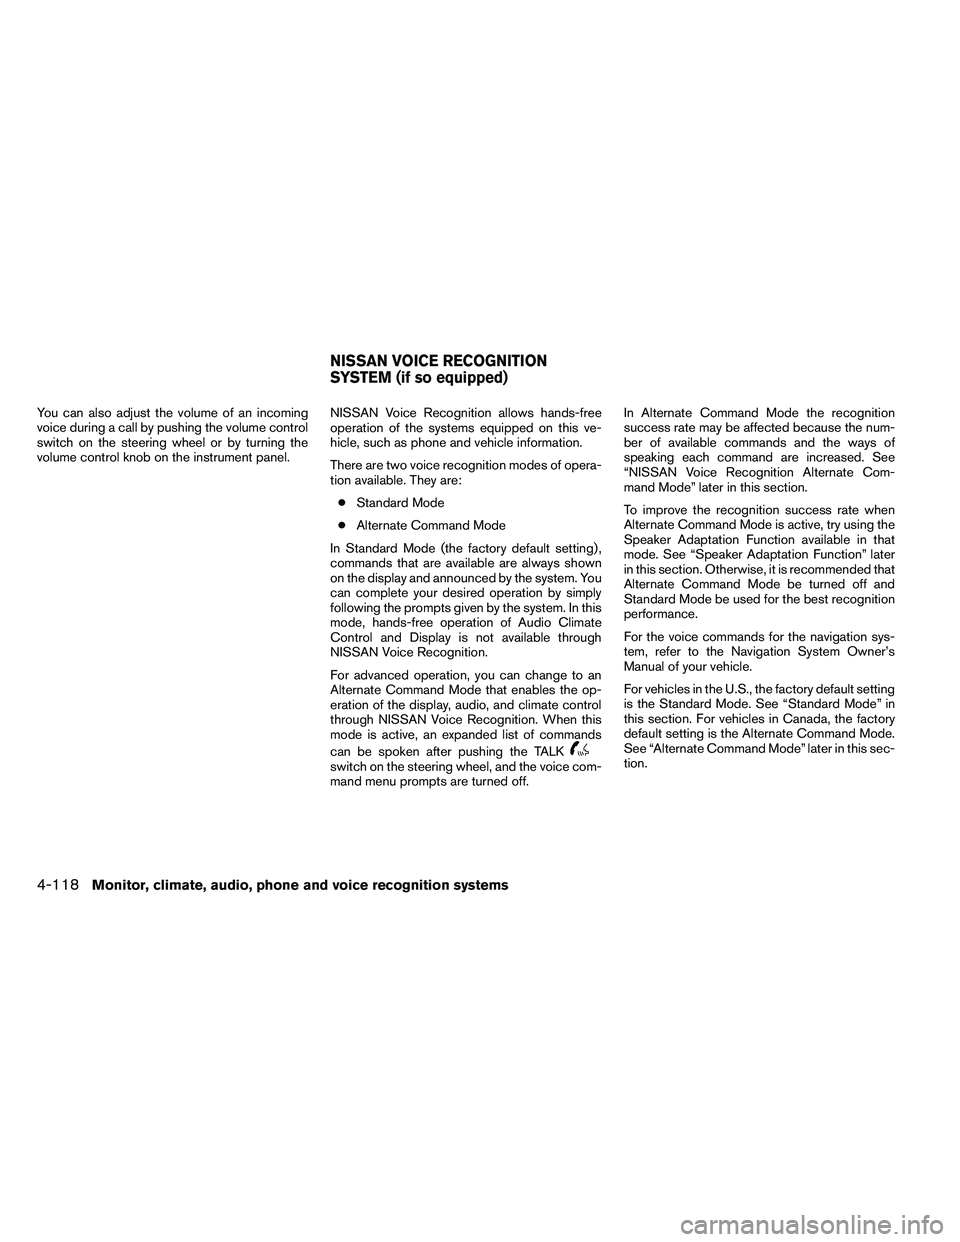
Adjusting the incoming or outgoing call volume
may improve clarity if reception between callers is
unclear.
● Incoming call — adjusting this setting allows
you to hear a difference in volume.
● Outgoing call — adjusting this setting allows
the person you are talking with to hear a
difference in volume.
To access the settings, press the SETTING but-
ton, then highlight “Volume and Beeps” using the
NISSAN controller and press the ENTER button.
Page 313 of 489

You can also adjust the volume of an incoming
voice during a call by pushing the volume control
switch on the steering wheel or by turning the
volume control knob on the instrument panel.NISSAN Voice Recognition allows hands-free
operation of the systems equipped on this ve-
hicle, such as phone and vehicle information.
There are two voice recognition modes of opera-
tion available. They are:
● Standard Mode
● Alternate Command Mode
In Standard Mode (the factory default setting) ,
commands that are available are always shown
on the display and announced by the system. You
can complete your desired operation by simply
following the prompts given by the system. In this
mode, hands-free operation of Audio Climate
Control and Display is not available through
NISSAN Voice Recognition.
For advanced operation, you can change to an
Alternate Command Mode that enables the op-
eration of the display, audio, and climate control
through NISSAN Voice Recognition. When this
mode is active, an expanded list of commands
can be spoken after pushing the TALK
Page 314 of 489
NISSAN VOICE RECOGNITION
STANDARD MODE
The Standard Mode enables control of naviga-
tion, phone and vehicle information. With this
setting active, commands that are available are
always shown on the display and announced by
the system.
Displaying user guide
If you use the NISSAN Voice Recognition system
for the first time or you do not know how to
operate it, you can display the User Guide for
confirmation.
You can confirm how to use voice commands by
accessing a simplified User Guide, which con-
tains basic instructions and tutorials for several
voice commands.1. Press the INFO button on the instrument
panel.
2. Highlight the “Others” key using the NISSAN controller and press the ENTER
button.
3. Highlight the “Voice Recognition” key using the NISSAN controller and press the ENTER
button. NOTE:
You can skip steps 1 to 3 by pressing
the
Page 315 of 489
●Finding a Street Address
Tutorial for entering a destination by street
address.
● Placing Calls
Tutorial for making a phone call by voice
command operation.
● Help on Speaking
Displays useful tips of speaking for correct
command recognition by the system.
● Voice Recognition Settings
Describes the available Voice Recognition
settings.
Getting started
Before using the Voice Recognition system for
the first time, you can confirm how to use com-
mands by viewing the Getting Started section of
the User Guide. 1. Highlight “Getting Started” and press the ENTER button.
2. You can confirm the page by scrolling the screen using the NISSAN controller. Tutorials on the operation of the Voice Rec-
ognition system
If you choose “Finding a Street Address” or
“Placing Calls”, you can view tutorials on how to
perform these operations using Voice Recogni-
tion.