2011 NISSAN ARMADA driver seat adjustment
[x] Cancel search: driver seat adjustmentPage 19 of 489
1 Safety—Seats, seat belts and
supplemental restraint system
Seats ............................................1-2
Front manual seat adjustment
(if so equipped for passenger’s seat) .............1-2
Front power seat adjustment
(for driver’s seat and if so equipped for
passenger’s seat) ..............................1-4
2nd row captain’s chair adjustment
(if so equipped) ................................1-5
2nd row bench seat adjustment
(if so equipped) ................................1-6
Armrests ......................................1-8
Head restraints (1st row only) ....................1-8
Head restraints (2nd row – outboard
positions only) ................................ 1-12
Adjustable headrest ........................... 1-14
Flexible seating ................................ 1-17
3rd row power folding seats (if so equipped) .....1-23
Seat belts ....................................... 1-25
Precautions on seat belt usage ..................1-25
Pregnant women .............................. 1-28
Injured persons ................................ 1-28
Three-point type seat belt with retractor ..........1-28
Seat belt extenders ............................ 1-34Seat belt maintenance
......................... 1-34
Child safety ...................................... 1-35
Infants ........................................ 1-35
Small children ................................. 1-35
Larger children ................................ 1-36
Child restraints ................................... 1-36
Precautions on child restraints ..................1-36
LATCH (Lower Anchors and Tethers for
CHildren) System ............................. 1-38
Rear-facing child restraint installation using
LATCH....................................... 1-42
Rear-facing child restraint installation using
the seat belts . . ............................... 1-44
Forward-facing child restraint installation
using LATCH. . . ............................... 1-47
Forward-facing child restraint installation
using the seat belts ............................ 1-49
Installing top tether strap (2nd row captain’s
chairs or 2nd row bench seat
[if so equipped] ) .............................. 1-52
Installing top tether strap
(3rd row bench seat) ........................... 1-53
Booster seats ................................. 1-54
Page 23 of 489

FRONT POWER SEAT ADJUSTMENT
(for driver’s seat and if so equipped for
passenger’s seat)
Operating tips
●The power seat motor has an auto-reset
overload protection circuit. If the motor
stops during operation, wait 30 seconds,
then reactivate the switch.
● Do not operate the power seat switch for a
long period of time when the engine is off.
This will discharge the battery. See “Automatic drive positioner” in “Pre-driving
checks and adjustments” for automatic drive po-
sitioner operation.
Forward and backward
Moving the switch forward or backward will slide
the seat forward or backward to the desired
position.
Reclining
Move the recline switch backward until the de-
sired angle is obtained. To bring the seatback
forward again, move the switch forward and
move your body forward. The seatback will move
forward. The reclining feature allows adjustment of the
seatback for occupants of different sizes for
added comfort and to help obtain proper seat
belt fit. See “Precautions on seat belt usage” later
in this section. Also, the seatback can be reclined
to allow occupants to rest when the vehicle is
stopped and the shift selector is in P (Park) .
Page 24 of 489
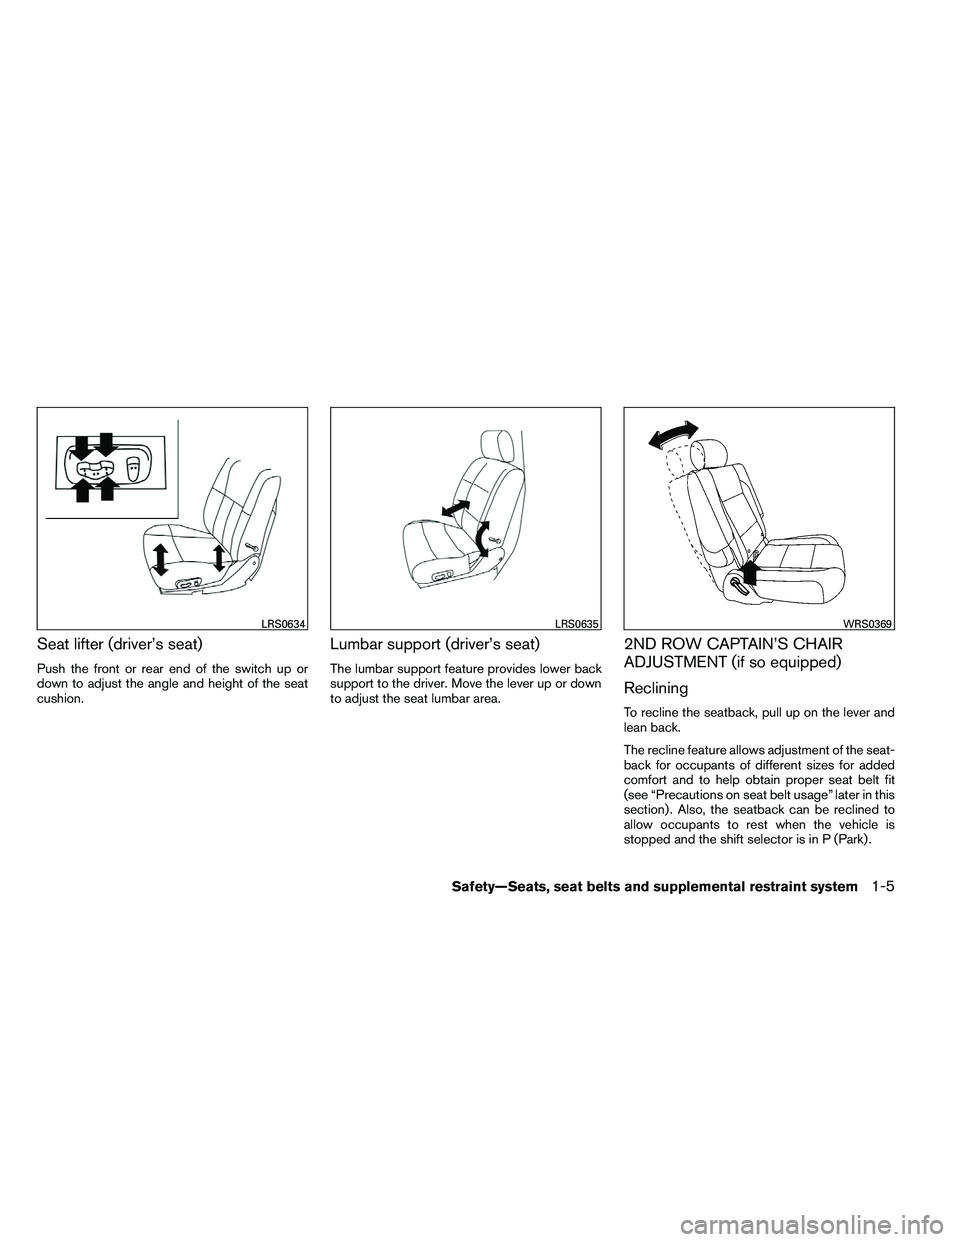
Seat lifter (driver’s seat)
Push the front or rear end of the switch up or
down to adjust the angle and height of the seat
cushion.
Lumbar support (driver’s seat)
The lumbar support feature provides lower back
support to the driver. Move the lever up or down
to adjust the seat lumbar area.
2ND ROW CAPTAIN’S CHAIR
ADJUSTMENT (if so equipped)
Reclining
To recline the seatback, pull up on the lever and
lean back.
The recline feature allows adjustment of the seat-
back for occupants of different sizes for added
comfort and to help obtain proper seat belt fit
(see “Precautions on seat belt usage” later in this
section) . Also, the seatback can be reclined to
allow occupants to rest when the vehicle is
stopped and the shift selector is in P (Park) .
Page 53 of 489
WARNING
●After adjustment, release the adjust-
ment button and try to move the shoul-
der belt anchor up and down to make
sure it is securely fixed in position.
● The shoulder belt anchor height should
be adjusted to the position best for you.
Failure to do so may reduce the effec-
tiveness of the entire restraint system
and increase the chance or severity of
injury in an accident.
SEAT BELT EXTENDERS
If, because of body size or driving position, it is
not possible to properly fit the lap/shoulder belt
and fasten it, an extender that is compatible with
the installed seat belts is available that can be
purchased. The extender adds approximately 8 in
(200 mm) of length and may be used for either
the driver or front passenger seating position.
See a NISSAN dealer for assistance with pur-
chasing an extender if an extender is required.
Page 192 of 489
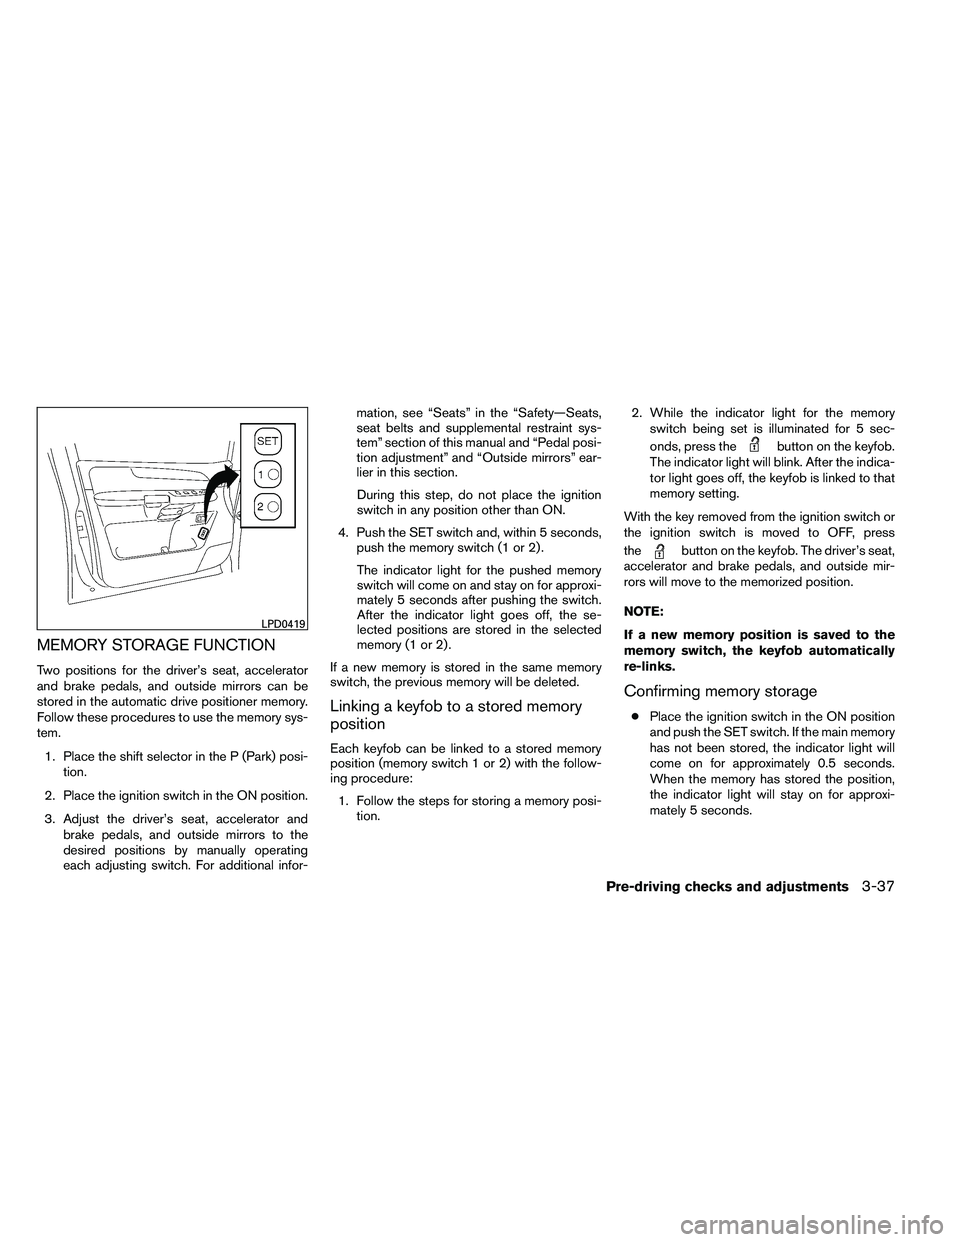
MEMORY STORAGE FUNCTION
Two positions for the driver’s seat, accelerator
and brake pedals, and outside mirrors can be
stored in the automatic drive positioner memory.
Follow these procedures to use the memory sys-
tem.1. Place the shift selector in the P (Park) posi- tion.
2. Place the ignition switch in the ON position.
3. Adjust the driver’s seat, accelerator and brake pedals, and outside mirrors to the
desired positions by manually operating
each adjusting switch. For additional infor- mation, see “Seats” in the “Safety—Seats,
seat belts and supplemental restraint sys-
tem” section of this manual and “Pedal posi-
tion adjustment” and “Outside mirrors” ear-
lier in this section.
During this step, do not place the ignition
switch in any position other than ON.
4. Push the SET switch and, within 5 seconds, push the memory switch (1 or 2) .
The indicator light for the pushed memory
switch will come on and stay on for approxi-
mately 5 seconds after pushing the switch.
After the indicator light goes off, the se-
lected positions are stored in the selected
memory (1 or 2) .
If a new memory is stored in the same memory
switch, the previous memory will be deleted.
Linking a keyfob to a stored memory
position
Each keyfob can be linked to a stored memory
position (memory switch 1 or 2) with the follow-
ing procedure: 1. Follow the steps for storing a memory posi- tion. 2. While the indicator light for the memory
switch being set is illuminated for 5 sec-
onds, press the
Page 193 of 489
●If the battery cable is disconnected, or if the
fuse opens, the memory storage function will
be canceled and must be restarted before a
stored memory position can be set again.
Drive the vehicle over 25 MPH (40 km/h) to
restart the memory storage function. You
can also restart the memory storage function
using the following procedure.
1. Connect the battery cable or replace the fuse.
2. Open and close the driver’s door more than 2 times with the ignition switch in the LOCK
position.
Once the memory storage function has been
restarted, you can store a memory position.
See “Memory storage function” in this section.
Selecting the memorized position
Set the shift selector to the P (Park) position,
then:
● Within 45 seconds of opening the driver’s
door, push the memory switch (1 or 2) or
● Place the ignition switch in the ON position
and push the memory switch (1 or 2) .
The driver’s seat, accelerator and brake pedals,
and outside mirrors will move to the memorized
position with the indicator light blinking, and then
the light will stay on for approximately 5 seconds.
ENTRY/EXIT FUNCTION
This system is designed so that the driver’s seat
will automatically move when the shift selector is
placed in the P (Park) position. This allows the
driver to get into and out of the driver’s seat more
easily.
The driver’s seat will slide backward: ● When the key is removed from the ignition
switch and the driver’s door is opened.
● When the driver’s door is opened with the
ignition switch placed in the LOCK position.
● When the ignition switch is turned from
ACC to LOCK with the driver’s door open.
The driver’s seat will return to the previous posi-
tion: ● When the key is inserted into the ignition
switch and the driver’s door is closed.
● When the driver’s door is closed with the
ignition switch placed in the LOCK position.
● When the ignition switch is turned from
ACC to ON while the shift selector is in the P
(Park) position.
The entry/exit function can be adjusted or can-
celed. For vehicles with navigation system, see
“Comfort & convenience settings” in the “Moni-
tor, climate, audio, phone and voice recognition systems” section of this manual. For vehicles
without navigation system, see your NISSAN
dealer.
Restarting the entry/exit function
If the battery cable is disconnected or if the fuse
opens, the entry/exit function will be disabled.
Drive the vehicle over 25 MPH (40 km/h) to
restart the entry/exit function. You can also restart
the entry/exit function using the following proce-
dure.
1. Connect the battery cable or replace the fuse.
2. Open and close the driver’s door more than 2 times with the ignition switch in the LOCK
position.
The entry/exit function should now work properly.
SYSTEM OPERATION
The automatic drive positioner system will not
work or will stop operating under the following
conditions: ● When the vehicle speed is above 4 MPH (7
km/h) .
● When any of the memory switches are
pushed while the automatic drive positioner
is operating.
3-38Pre-driving checks and adjustments
Page 194 of 489
●When the adjusting switch for the driver’s
seat is turned on while the automatic drive
positioner is operating.
● When the seat has been already moved to
the memorized position.
● When no seat position is stored in the
memory switch.
● When the shift selector is moved from P
(Park) to any other position.
● When the driver’s door remains open more
than 45 seconds and the ignition switch is
not in the ON position.
The automatic drive positioner system can be
adjusted and canceled. For vehicles with naviga-
tion system, see “Comfort & convenience set-
tings” in the “Monitor, climate, audio, phone and
voice recognition systems” section of this
manual. For vehicles without navigation system,
see your NISSAN dealer.
Pre-driving checks and adjustments3-39