Page 269 of 489
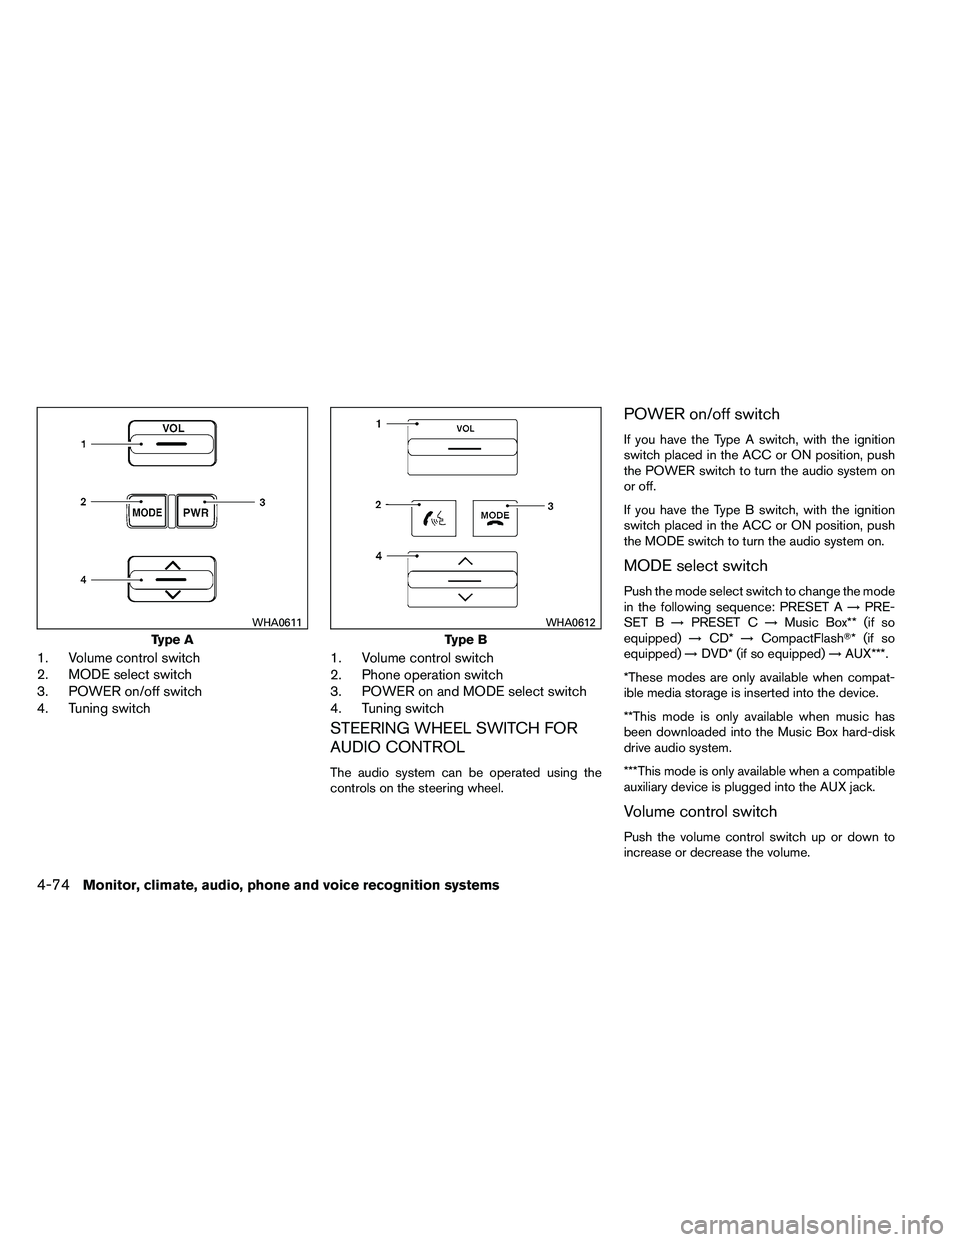
1. Volume control switch
2. MODE select switch
3. POWER on/off switch
4. Tuning switch1. Volume control switch
2. Phone operation switch
3. POWER on and MODE select switch
4. Tuning switch
STEERING WHEEL SWITCH FOR
AUDIO CONTROL
The audio system can be operated using the
controls on the steering wheel.
POWER on/off switch
If you have the Type A switch, with the ignition
switch placed in the ACC or ON position, push
the POWER switch to turn the audio system on
or off.
If you have the Type B switch, with the ignition
switch placed in the ACC or ON position, push
the MODE switch to turn the audio system on.
MODE select switch
Push the mode select switch to change the mode
in the following sequence: PRESET A
→PRE-
SET B →PRESET C →Music Box** (if so
equipped) →CD* →CompactFlash�* (if so
equipped) →DVD* (if so equipped) →AUX***.
*These modes are only available when compat-
ible media storage is inserted into the device.
**This mode is only available when music has
been downloaded into the Music Box hard-disk
drive audio system.
***This mode is only available when a compatible
auxiliary device is plugged into the AUX jack.
Volume control switch
Push the volume control switch up or down to
increase or decrease the volume.
Page 275 of 489
Headphones
Power ON/OFF:
Press the power button to turn the headphones
on or off.
Volume control:
Turn the volume control knob to adjust the vol-
ume.
The headphones will automatically be turned off
in 30 seconds if there is no sound during that
period. To prevent the battery from being dis-
charged, keep the power supply turned off when
not in use.NOTE:
For optimum infrared headphone perfor-
mance, increase the volume on the rear
seat controller to the maximum level and
adjust the infrared headphone volume us-
ing the volume control on the headphones.
Using a lower volume setting on the rear
seat controller can cause static noise in the
infrared headphones.
BEFORE OPERATING THE DVD
MOBILE ENTERTAINMENT SYSTEM
Precautions
Start the engine when using the DVD entertain-
ment system.
Page 277 of 489
Rear display:
To adjust the rear display mode, press the DISP
(Display) button on the remote controller.
To adjust the display brightness, tint, color and
contrast, select each key using the joystick on the
remote controller and tilt the joystick to the right
or left.
Press the BACK button to apply the settings and
return to the previous display.
PLAYING A DIGITAL VERSATILE
DISC (DVD)
With the DVD player, you can hear DVD videos,
video CDs and CDs using headphones. Passen-
gers in the rear seat can enjoy the sound inde-
pendently of the front seat.
Press the DISC/AUX button located on the front
controls to hear the sound of the DVD play
through the speakers.
Press the REAR CTRL button located on the
front controls to disable or enable rear seat audio
controls. For more information on rear seat audio
controls see, “Rear Audio Controls” earlier in this
section.Pressing the
Page 285 of 489
●DVDs with a region code other than
“1”. The region code
�Ais displayed in
a small symbol printed on the top of
the DVD
�B.
● DVDs that are not round.
● DVDs with a paper label.
● DVDs that are warped, scratched, or
have unequal edges.
● Recordable digital video discs
(DVD+R) .
● Rewritable digital video discs
(DVD+RW) .
If a DVD with a paper label is used and
becomes jammed, you may be able to reset
the unit and eject the jammed disc with the
following procedure: 1. Record the radio presets.
2. Disconnect the negative terminal from
the battery for five minutes.
3. Reconnect the negative battery termi-
nal. 4.
Check to see if the jammed DVD has
been ejected. If it has not, try to eject
the DVD by pushing the eject button.
5. If the disc cannot be ejected see your
NISSAN dealer for further assistance.
6. Re-program the radio presets.
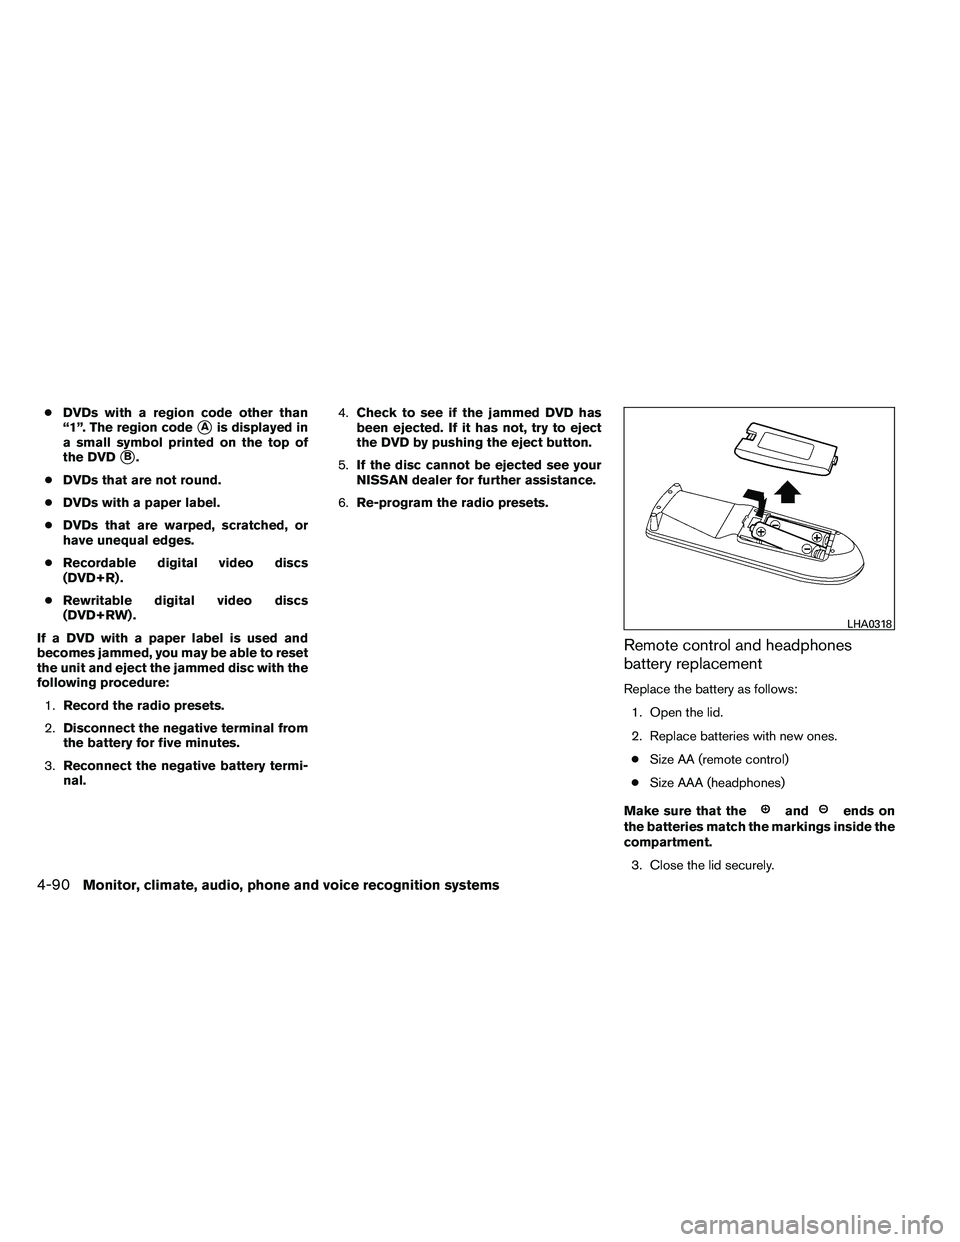
Remote control and headphones
battery replacement
Replace the battery as follows:
1. Open the lid.
2. Replace batteries with new ones.● Size AA (remote control)
● Size AAA (headphones)
Make sure that the
Page 286 of 489
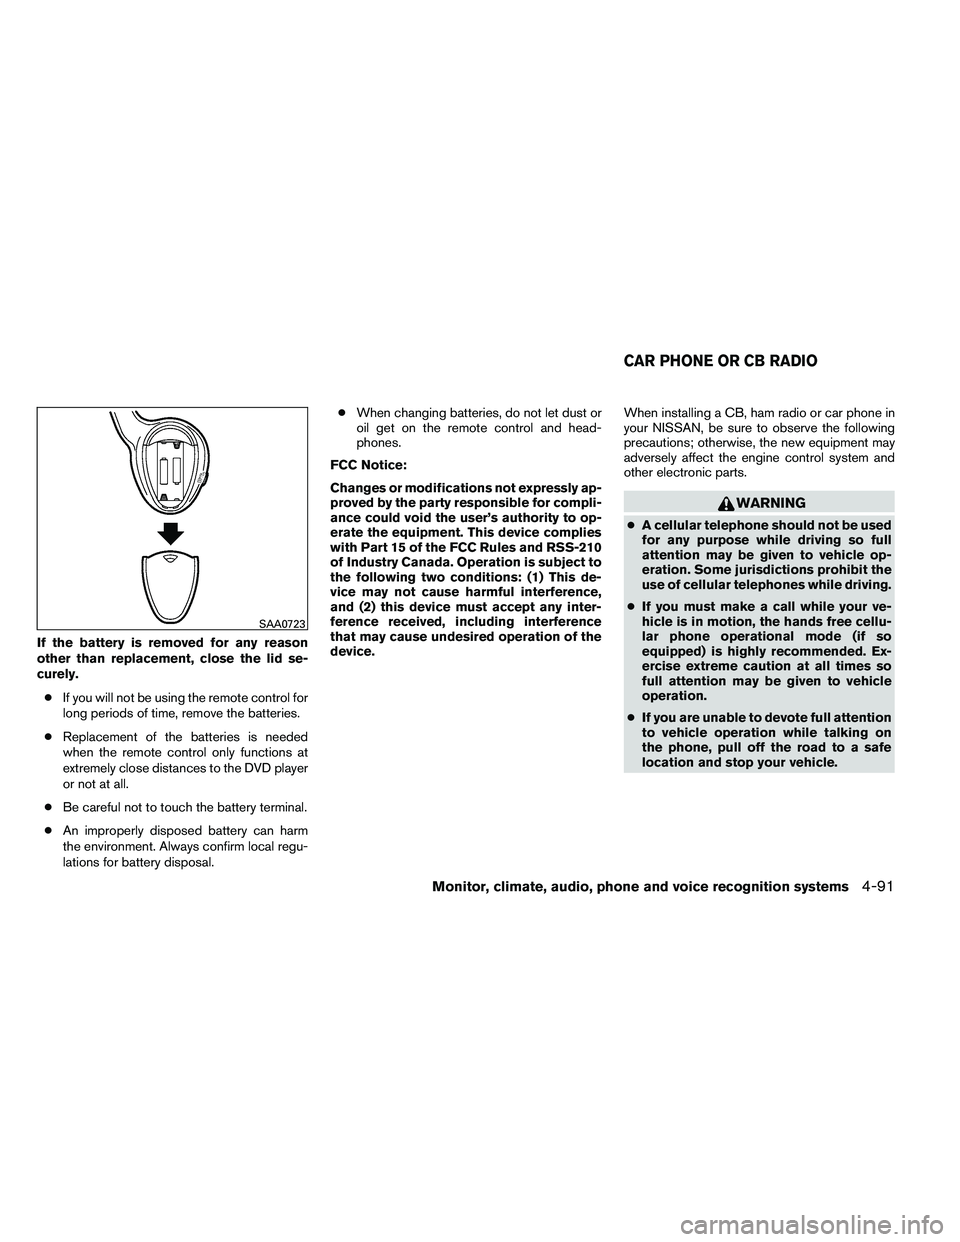
If the battery is removed for any reason
other than replacement, close the lid se-
curely.● If you will not be using the remote control for
long periods of time, remove the batteries.
● Replacement of the batteries is needed
when the remote control only functions at
extremely close distances to the DVD player
or not at all.
● Be careful not to touch the battery terminal.
● An improperly disposed battery can harm
the environment. Always confirm local regu-
lations for battery disposal. ●
When changing batteries, do not let dust or
oil get on the remote control and head-
phones.
FCC Notice:
Changes or modifications not expressly ap-
proved by the party responsible for compli-
ance could void the user’s authority to op-
erate the equipment. This device complies
with Part 15 of the FCC Rules and RSS-210
of Industry Canada. Operation is subject to
the following two conditions: (1) This de-
vice may not cause harmful interference,
and (2) this device must accept any inter-
ference received, including interference
that may cause undesired operation of the
device. When installing a CB, ham radio or car phone in
your NISSAN, be sure to observe the following
precautions; otherwise, the new equipment may
adversely affect the engine control system and
other electronic parts.
Page 288 of 489
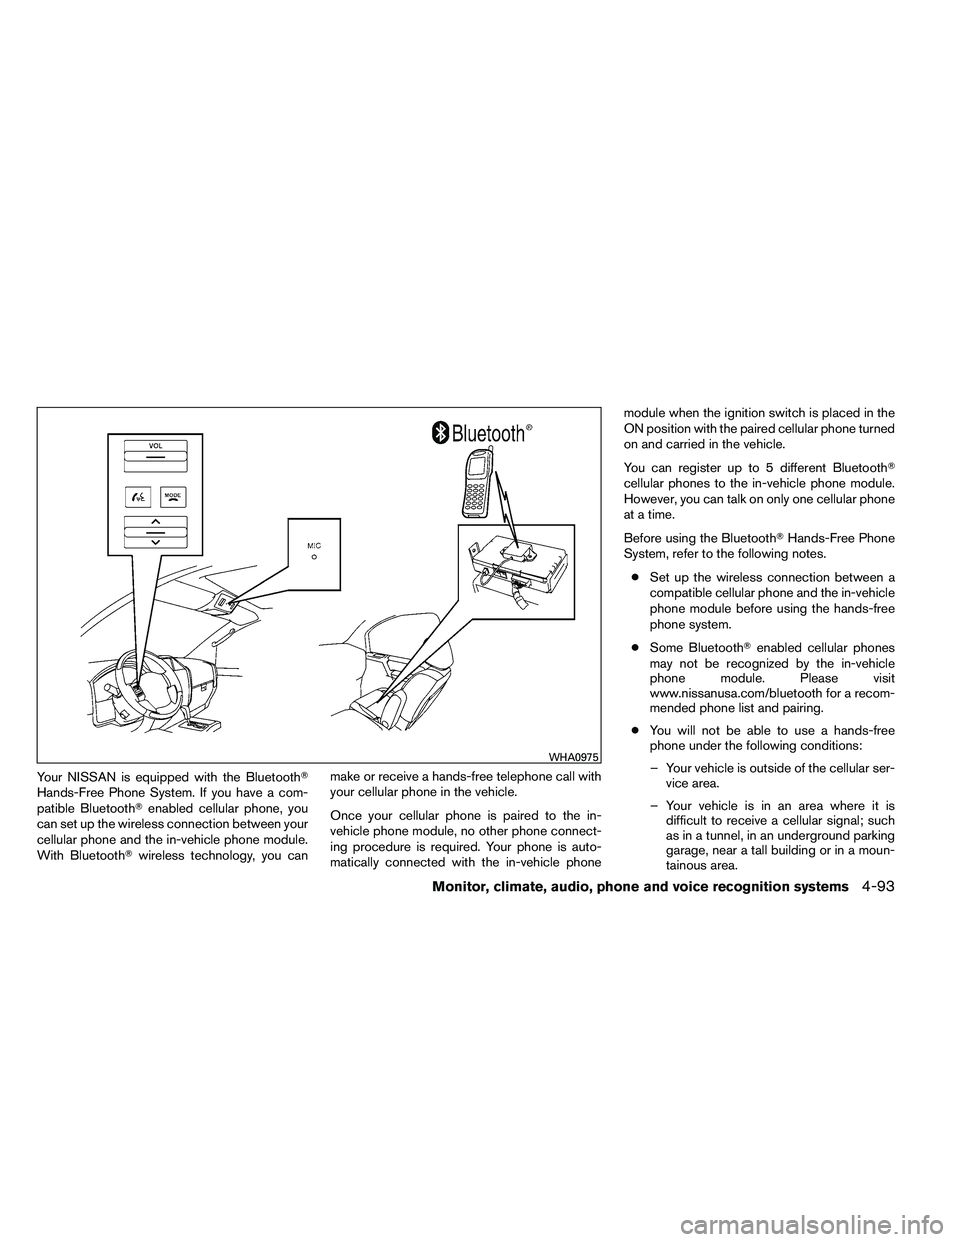
Your NISSAN is equipped with the Bluetooth�
Hands-Free Phone System. If you have a com-
patible Bluetooth�enabled cellular phone, you
can set up the wireless connection between your
cellular phone and the in-vehicle phone module.
With Bluetooth� wireless technology, you can make or receive a hands-free telephone call with
your cellular phone in the vehicle.
Once your cellular phone is paired to the in-
vehicle phone module, no other phone connect-
ing procedure is required. Your phone is auto-
matically connected with the in-vehicle phone module when the ignition switch is placed in the
ON position with the paired cellular phone turned
on and carried in the vehicle.
You can register up to 5 different Bluetooth�
cellular phones to the in-vehicle phone module.
However, you can talk on only one cellular phone
at a time.
Before using the Bluetooth�
Hands-Free Phone
System, refer to the following notes.
● Set up the wireless connection between a
compatible cellular phone and the in-vehicle
phone module before using the hands-free
phone system.
● Some Bluetooth� enabled cellular phones
may not be recognized by the in-vehicle
phone module. Please visit
www.nissanusa.com/bluetooth for a recom-
mended phone list and pairing.
● You will not be able to use a hands-free
phone under the following conditions:
– Your vehicle is outside of the cellular ser- vice area.
– Your vehicle is in an area where it is difficult to receive a cellular signal; such
as in a tunnel, in an underground parking
garage, near a tall building or in a moun-
tainous area.
Page 289 of 489
– Your cellular phone is locked to prevent itfrom being dialed.
● When the radio wave condition is not ideal
or ambient sound is too loud, it may be
difficult to hear the other person’s voice dur-
ing a call.
● Do not place the cellular phone in an area
surrounded by metal or far away from the
in-vehicle phone module to prevent tone
quality degradation and wireless connection
disruption.
● While a cellular phone is connected through
the Bluetooth� wireless connection, the bat-
tery power of the cellular phone may dis-
charge quicker than usual. The Bluetooth�
Hands-Free Phone System cannot charge
cellular phones.
● If the hands-free phone system seems to be
malfunctioning, see “Troubleshooting guide”
in this section. You can also visit
www.nissanusa.com/bluetooth for trouble-
shooting help.
● Some cellular phones or other devices may
cause interference or a buzzing noise to
come from the audio system speakers. Stor-
ing the device in a different location may
reduce or eliminate the noise. ●
Refer to the cellular phone Owner’s Manual
regarding the telephone charges, cellular
phone antenna and body, etc.
REGULATORY INFORMATION
FCC Regulatory information
– CAUTION: To maintain compliance with FCC’s RF exposure guidelines, use only the
supplied antenna. Unauthorized antenna,
modification, or attachments could damage
the transmitter and may violate FCC regula-
tions.
– Operation is subject to the following two con- ditions:
1. This device may not cause interference and
2. this device must accept any interference, including interference that may cause unde-
sired operation of the device.
IC Regulatory information
– Operation is subject to the following two con- ditions: (1) this device may not cause interfer-
ence, and (2) this device must accept any
interference, including interference that may
cause undesired operation of the device.
– This Class B digital apparatus meets all re- quirements of the Canadian Interference-
Causing Equipment Regulations.
Page 291 of 489
●Numbers can be spoken in small groups.
The system will prompt you to continue en-
tering digits, if desired.
Example: 1-800-662-6200
– “One eight zero zero”
The system repeats the numbers and
prompts you to enter more.
– “six six two”
The system repeats the numbers and
prompts you to enter more.
– “six two zero zero”
● Say “pound” for “#”. Say “star” for “*” (avail-
able when using the “Call International”
command and the “Send” command during
a call) .
● Say “plus” for “+” (available only when using
the “Call International” command) .
● Say “pause” for a 2 second pause (available
only when storing a phone book number) .
● You can say “star” for “*” and “pound” for “#”
at any time in any position of the phone
number (available only when using “Call In-
ternational” command) .
See “List of voice commands” and “Interna-
tional” in this section for more information. Example: 1-555-1212 *123
– “One five five five one two one two star
one two three”
NOTE:
For best results, say phone numbers as
single digits.
The voice command “Help” is available at any
time. Please use the “Help” command to get
information on how to use the system.
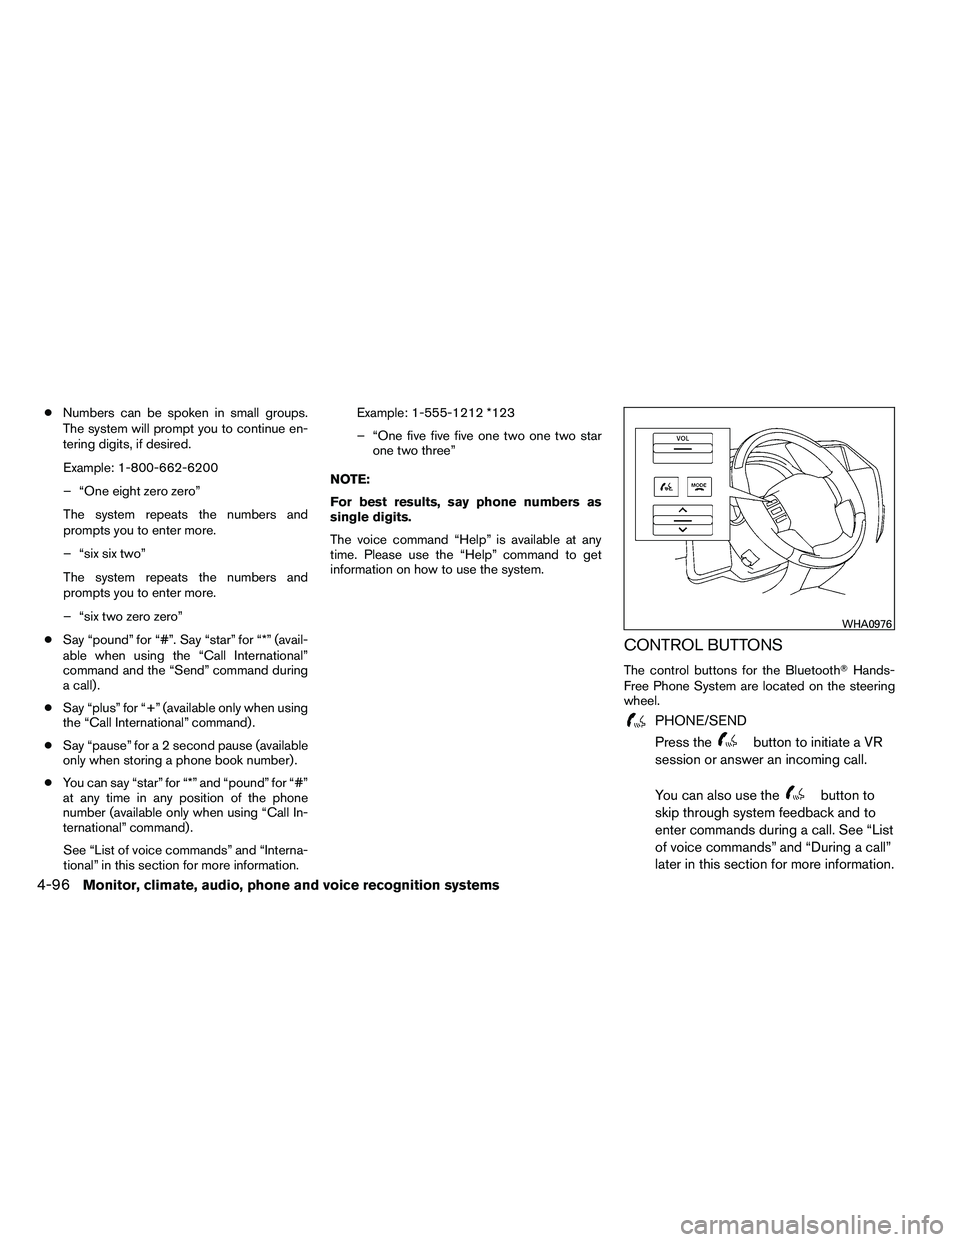
CONTROL BUTTONS
The control buttons for the Bluetooth� Hands-
Free Phone System are located on the steering
wheel.