Page 389 of 446
EXTERIOR AND INTERIOR LIGHTS
ItemWattage (W)Bulb No.*1
Headlight assembly *2
Low (Halogen) 55H11
Low (Xenon) 35D2R
High 65H9
Park 5WY5W
Park/Turn 28/83457NAK
Sidemarker Sedan 5WY5W
Coupe 5W5W
Front fog light (if so equipped) *
255 H11
Step light 3.8194
Rear combination light Tail/Stop 27/83157K
Turn 273156
Backup (reversing) Sedan 16921LF
Coupe 13912
License plate light *
25 W5W
High-mounted stop light *2
Inside (coupe) —LED
Inside (sedan) 18921
Spoiler (if so equipped) —LED
Front map light 8U89
Rear personal light 8U88
Trunk light 3.4158
Vanity mirror light —HTU–14v
Glove box light *
2——
Console light *2——
*1Always check with the Parts Department at a NISSAN dealer for the latest parts information.
*
2See a NISSAN dealer for assistance.
8-30Maintenance and do-it-yourself
Page 390 of 446
Coupe
1. Mirror-mounted turn signal light(if so equipped)
2. Interior light
3. Map light
4. Headlamp assembly
5. Fog light (if so equipped)
6. Step light
7. High-mount stoplight
8. Trunk light
9. License plate light
10. Rear combination light
WDI0626
Maintenance and do-it-yourself8-31
Page 391 of 446
Sedan
1. Rear map light
2. Front map light
3. Step light
4. Headlamp assembly
5. Fog light (if so equipped)
6. High-mount stoplight (if so equipped)
7. Trunk light
8. Spoiler mounted stoplight(if so equipped)
9. Rear combination light
10. License plate light
11. Mirror-mounted turn signal light
(if so equipped)
WDI0680
8-32Maintenance and do-it-yourself
Page 392 of 446
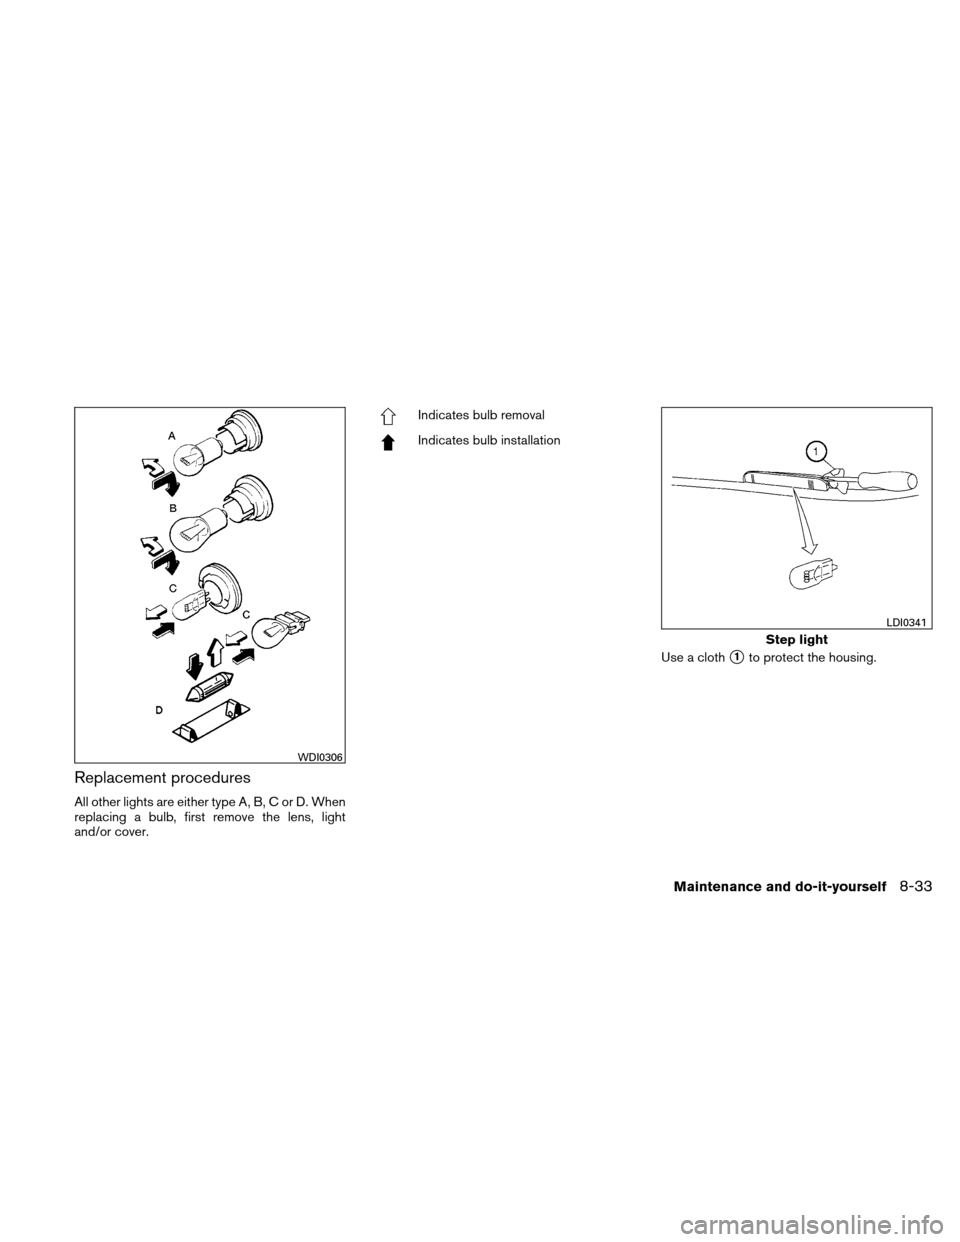
Replacement procedures
All other lights are either type A, B, C or D. When
replacing a bulb, first remove the lens, light
and/or cover.
Indicates bulb removal
Indicates bulb installationUse a cloth
�1to protect the housing.
WDI0306
Step light
LDI0341
Maintenance and do-it-yourself8-33
Page 393 of 446
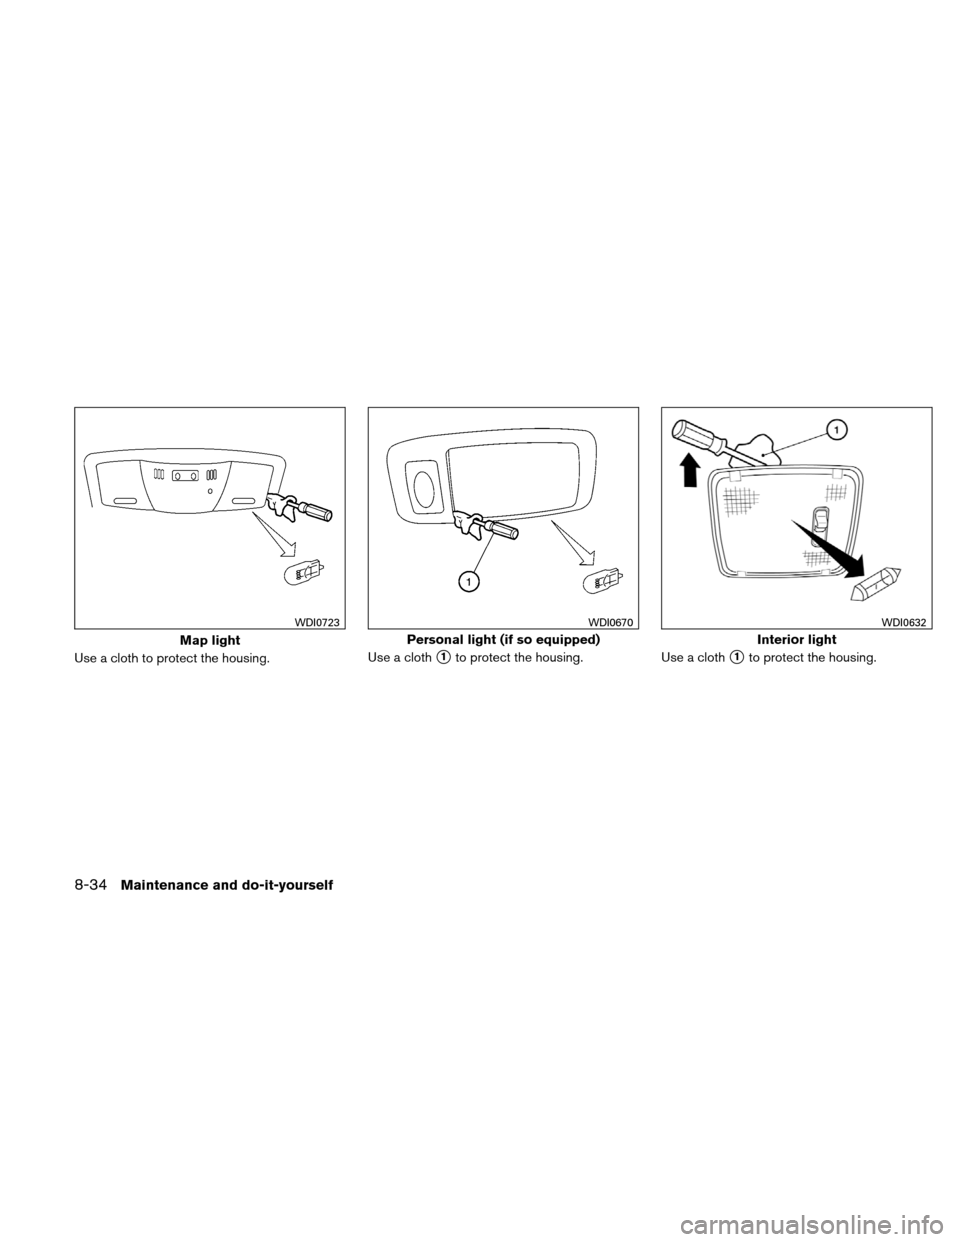
Use a cloth to protect the housing.Use a cloth�1to protect the housing.
Use a cloth�1to protect the housing.
Map light
WDI0723
Personal light (if so equipped)
WDI0670
Interior light
WDI0632
8-34Maintenance and do-it-yourself
Page 394 of 446
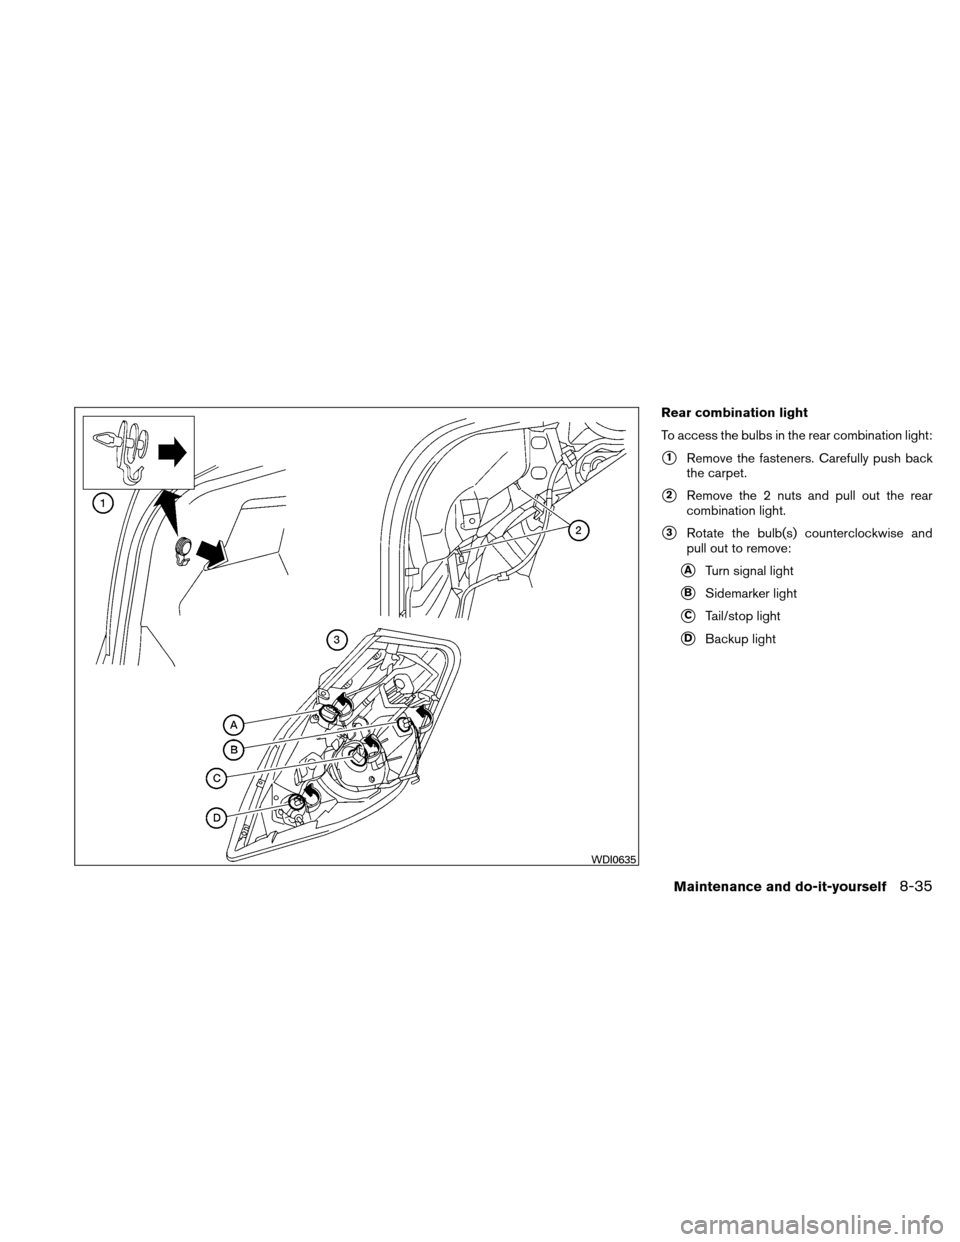
Rear combination light
To access the bulbs in the rear combination light:
�1Remove the fasteners. Carefully push back
the carpet.
�2Remove the 2 nuts and pull out the rear
combination light.
�3Rotate the bulb(s) counterclockwise and
pull out to remove:
�ATurn signal light
�BSidemarker light
�CTail/stop light
�DBackup light
WDI0635
Maintenance and do-it-yourself8-35
Page 395 of 446
CAUTION
Never force the covers into place because
the hinge pins can be damaged. Follow
the removal and installation instructions
to prevent inoperability of the covers.
Trunk light
WDI0343
High-mounted stoplight (rear window)
WDI0320
UPPER TETHER ANCHOR/KEY
CYLINDER COVERS
8-36Maintenance and do-it-yourself
Page 397 of 446

2. With the first pin in position�2, align the
second pin with its hinge slot
�1and push
down on the cover to completely engage it.
A snap sound will be heard. 3. Close the cover. If you have a flat tire, see “Flat tire” in the
“In case of emergency” section of this
manual.
TIRE PRESSURE
Tire Pressure Monitoring System
(TPMS)
This vehicle is equipped with the Tire
Pressure Monitoring System (TPMS) . It
monitors tire pressure of all tires except
the spare. When the low tire pressure
warning light is lit and the CHECK TIRE
PRESSURE warning appears in the ve-
hicle information display, one or more of
your tires is significantly under-inflated.
The TPMS will activate only when the
vehicle is driven at speeds above 16 MPH
(25 km/h) . Also, this system may not de-
tect a sudden drop in tire pressure (for
example a flat tire while driving) .
For more details, refer to “Low tire pres-
sure warning light” in the “Instruments and
controls” section, “Tire Pressure Monitor-
ing System (TPMS)” in the “Starting and
driving” section, and “Flat tire” in the “In
case of emergency” section.
LDI2012LDI2013
WHEELS AND TIRES
8-38Maintenance and do-it-yourself
Bulb No.*1
Headlight assembly *2
Low (Halogen) 55H11
Low (Xenon) 35D2R
High 65H9
Park 5WY5W
Park/Turn 28/83457NAK
Sidemarker Sedan 5WY5W
Coupe 5W5W
Front fo")

2. Interior light
3. Map light
4. Headlamp assembly
5. Fog light (if so equipped)
6. Step light
7. High-mount stoplight
8. Trunk light
9. Lice")

6. High-mount stoplight (if so equipped)
7. Trunk light
8. Spoiler mounted stoplight(if so e")