Page 27 of 419

Black plate (23,1)
Model "Z34-D" EDITED: 2010/ 7/ 27
SSS0684
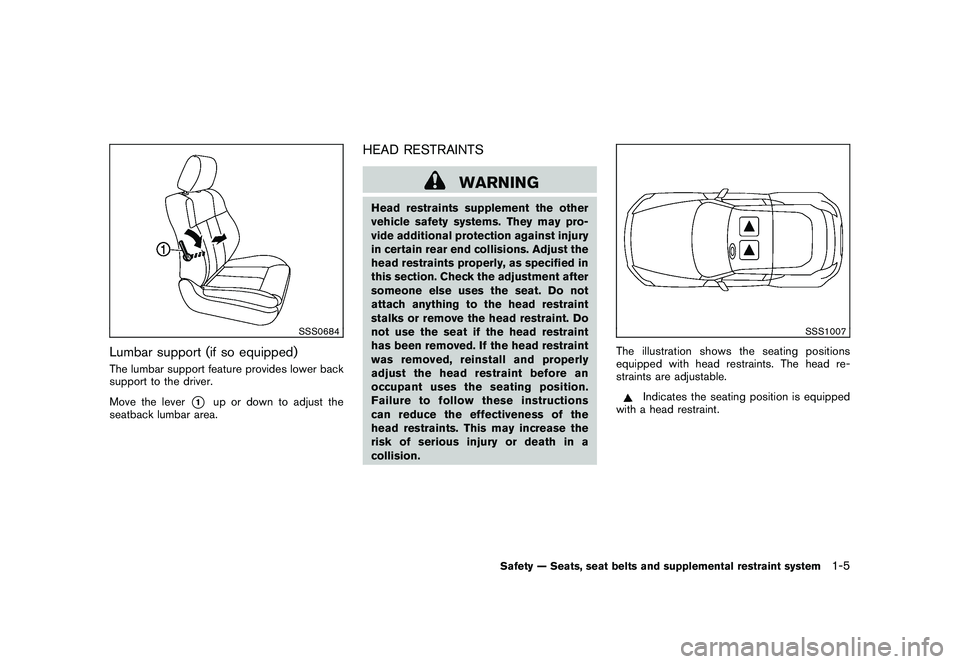
Lumbar support (if so equipped)The lumbar support feature provides lower back
support to the driver.
Move the lever
*1
up or down to adjust the
seatback lumbar area.
HEAD RESTRAINTS
WARNING
Head restraints supplement the other
vehicle safety systems. They may pro-
vide additional protection against injury
in certain rear end collisions. Adjust the
head restraints properly, as specified in
this section. Check the adjustment after
someone else uses the seat. Do not
attach anything to the head restraint
stalks or remove the head restraint. Do
not use the seat if the head restraint
has been removed. If the head restraint
was removed, reinstall and properly
adjust the head restraint before an
occupant uses the seating position.
Failure to follow these instructions
can reduce the effectiveness of the
head restraints. This may increase the
risk of serious injury or death in a
collision.
SSS1007
The illustration shows the seating positions
equipped with head restraints. The head re-
straints are adjustable.
Indicates the seating position is equipped
with a head restraint.
Safety — Seats, seat belts and supplemental restraint system
1-5
Page 118 of 419

Black plate (114,1)
Model "Z34-D" EDITED: 2010/ 7/ 27
WARNING
.Always have the doors locked while
driving. Along with the use of seat
belts, this provides greater safety in
the event of an accident by helping
to prevent persons from being
thrown from the vehicle. This also
helps keep children and others from
unintentionally opening the doors,
and will help keep out intruders.
. Before opening any door, always
look for and avoid oncoming traffic.
. Do not leave children unattended
inside the vehicle. They could un-
knowingly activate switches or con-
trols. Unattended children could
become involved in serious acci-
dents.
SPA2565
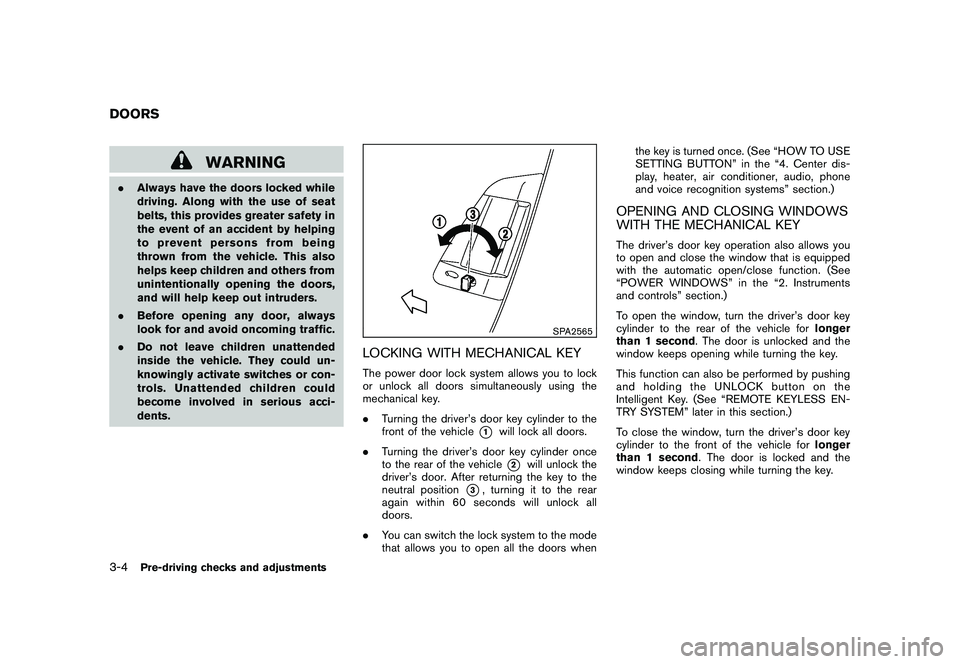
LOCKING WITH MECHANICAL KEYThe power door lock system allows you to lock
or unlock all doors simultaneously using the
mechanical key.
.Turning the driver’s door key cylinder to the
front of the vehicle
*1
will lock all doors.
. Turning the driver’s door key cylinder once
to the rear of the vehicle*2
will unlock the
driver’s door. After returning the key to the
neutral position
*3, turning it to the rear
again within 60 seconds will unlock all
doors.
. You can switch the lock system to the mode
that allows you to open all the doors when the key is turned once. (See “HOW TO USE
SETTING BUTTON” in the “4. Center dis-
play, heater, air conditioner, audio, phone
and voice recognition systems” section.)
OPENING AND CLOSING WINDOWS
WITH THE MECHANICAL KEYThe driver’s door key operation also allows you
to open and close the window that is equipped
with the automatic open/close function. (See
“POWER WINDOWS” in the “2. Instruments
and controls” section.)
To open the window, turn the driver’s door key
cylinder to the rear of the vehicle for
longer
than 1 second . The door is unlocked and the
window keeps opening while turning the key.
This function can also be performed by pushing
and holding the UNLOCK button on the
Intelligent Key. (See “REMOTE KEYLESS EN-
TRY SYSTEM” later in this section.)
To close the window, turn the driver’s door key
cylinder to the front of the vehicle for longer
than 1 second . The door is locked and the
window keeps closing while turning the key.
DOORS3-4
Pre-driving checks and adjustments
Page 150 of 419

Black plate (146,1)
Model "Z34-D" EDITED: 2010/ 7/ 27
WARNING
.Do not adjust the steering wheel
while driving. You could lose control
of your vehicle and cause an acci-
dent.
. Do not adjust the steering wheel
any closer to you than is necessary
for proper steering operation and
comfort. The driver’s air bag inflates
with great force. If you are unrest-
rained, leaning forward, sitting side-
ways or out of position in any way,
you are at greater risk of injury or
death in a crash. You may also
receive serious or fatal injuries from
the air bag if you are up against it
when it inflates. Always sit back
against the seatback and as far
away as practical from the steering
wheel. Always use the seat belts.
SPA2583
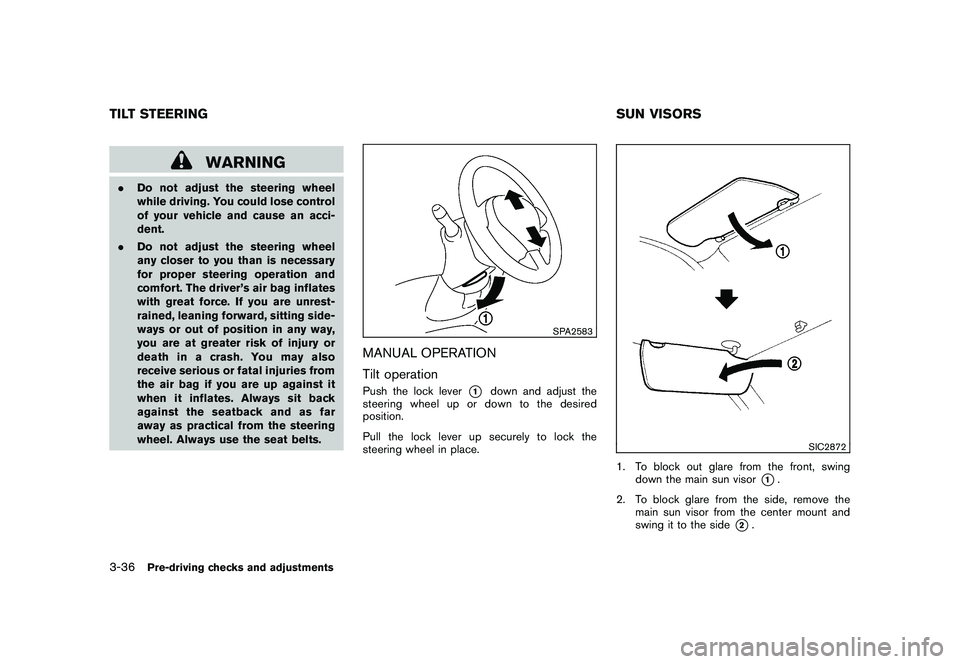
MANUAL OPERATION
Tilt operationPush the lock lever
*1
down and adjust the
steering wheel up or down to the desired
position.
Pull the lock lever up securely to lock the
steering wheel in place.
SIC2872
1. To block out glare from the front, swing down the main sun visor
*1.
2. To block glare from the side, remove the main sun visor from the center mount and
swing it to the side
*2.
TILT STEERING SUN VISORS3-36
Pre-driving checks and adjustments
Page 166 of 419

Black plate (162,1)
Model "Z34-D" EDITED: 2010/ 7/ 27
it with the multi-function controller.
You can also adjust the guidance voice volume
by turning the VOLUME control knob while voice
guidance is being announced.
Ringtone/Incoming Call/Outgoing Call:
For the details of these items, see “BLUE-
TOOTH
®HANDS-FREE PHONE SYSTEM
(models with navigation system)” later in this
section.
Switch Beeps:
When this item is turned to ON, you will hear a
beep sound when you use a button.
Guidance Voice:
When this item is turned to ON, you will hear
voice guidance in the navigation operation or in
other operations.
NOTE:
When the voice guidance is being an-
nounced during audio playback, turning
the volume knob does not adjust the music
level; it adjusts the guidance volume level.
If voice guidance is not being heard,
please check the Guidance Volume level.
SAA2486
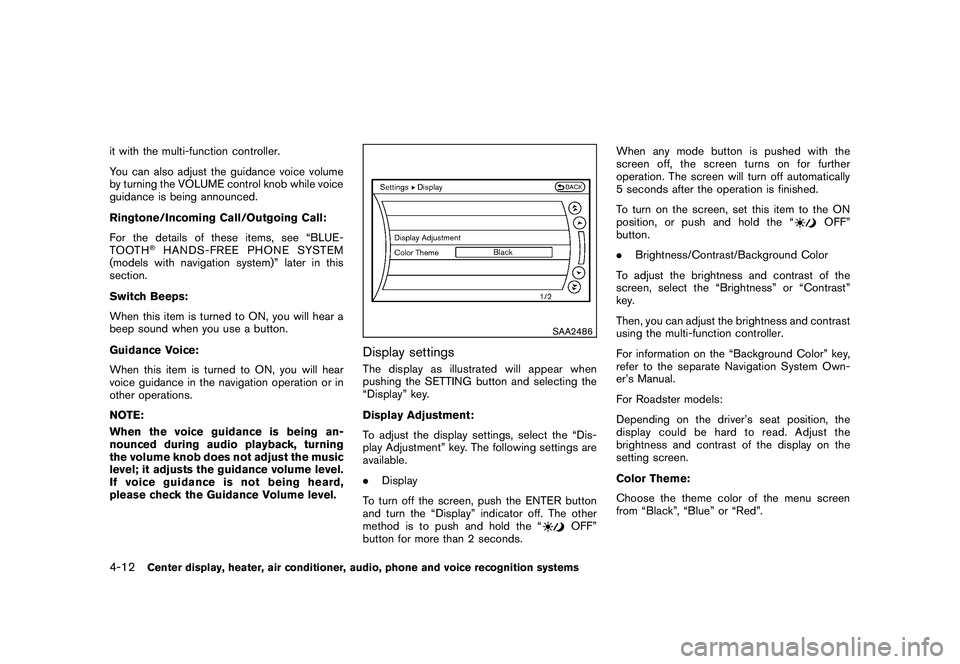
Display settingsThe display as illustrated will appear when
pushing the SETTING button and selecting the
“Display” key.
Display Adjustment:
To adjust the display settings, select the “Dis-
play Adjustment” key. The following settings are
available.
. Display
To turn off the screen, push the ENTER button
and turn the “Display” indicator off. The other
method is to push and hold the “
OFF”
button for more than 2 seconds. When any mode button is pushed with the
screen off, the screen turns on for further
operation. The screen will turn off automatically
5 seconds after the operation is finished.
To turn on the screen, set this item to the ON
position, or push and hold the “
OFF”
button.
. Brightness/Contrast/Background Color
To adjust the brightness and contrast of the
screen, select the “Brightness” or “Contrast”
key.
Then, you can adjust the brightness and contrast
using the multi-function controller.
For information on the “Background Color” key,
refer to the separate Navigation System Own-
er’s Manual.
For Roadster models:
Depending on the driver’s seat position, the
display could be hard to read. Adjust the
brightness and contrast of the display on the
setting screen.
Color Theme:
Choose the theme color of the menu screen
from “Black”, “Blue” or “Red”.
4-12
Center display, heater, air conditioner, audio, phone and voice recognition systems