2011 NISSAN 370Z ROADSTER warning light
[x] Cancel search: warning lightPage 95 of 419
Black plate (91,1)
Model "Z34-D" EDITED: 2010/ 7/ 27
SIC3997
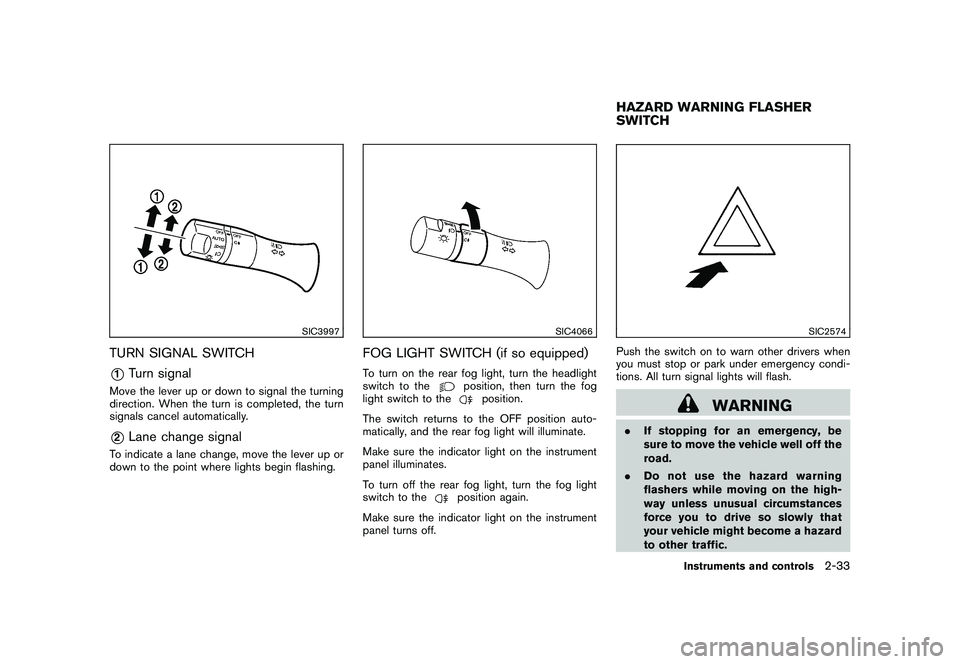
TURN SIGNAL SWITCH*1
Turn signal
Move the lever up or down to signal the turning
direction. When the turn is completed, the turn
signals cancel automatically.*2
Lane change signal
To indicate a lane change, move the lever up or
down to the point where lights begin flashing.
SIC4066
FOG LIGHT SWITCH (if so equipped)To turn on the rear fog light, turn the headlight
switch to the
position, then turn the fog
light switch to the
position.
The switch returns to the OFF position auto-
matically, and the rear fog light will illuminate.
Make sure the indicator light on the instrument
panel illuminates.
To turn off the rear fog light, turn the fog light
switch to the
position again.
Make sure the indicator light on the instrument
panel turns off.
SIC2574
Push the switch on to warn other drivers when
you must stop or park under emergency condi-
tions. All turn signal lights will flash.
WARNING
. If stopping for an emergency, be
sure to move the vehicle well off the
road.
. Do not use the hazard warning
flashers while moving on the high-
way unless unusual circumstances
force you to drive so slowly that
your vehicle might become a hazard
to other traffic.HAZARD WARNING FLASHER
SWITCH
Instruments and controls
2-33
Page 96 of 419
Black plate (92,1)
Model "Z34-D" EDITED: 2010/ 7/ 27
.Turn signals do not work when the
hazard warning flasher lights are
on.
The flasher can be actuated with the ignition
switch in any position.
Some state laws may prohibit the use of
the hazard warning flasher switch while
driving.
SIC3982
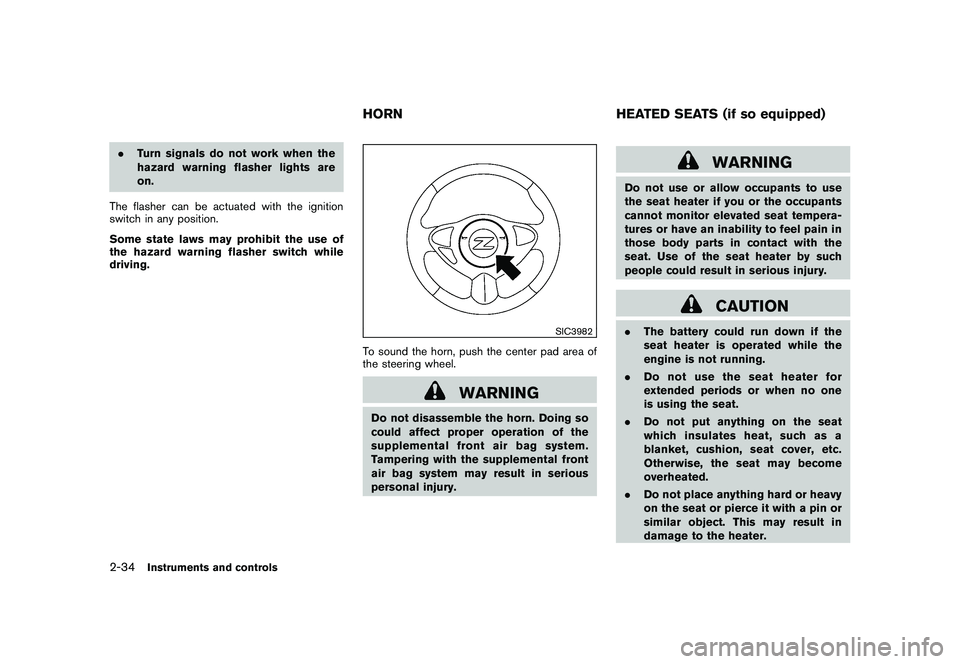
To sound the horn, push the center pad area of
the steering wheel.
WARNING
Do not disassemble the horn. Doing so
could affect proper operation of the
supplemental front air bag system.
Tampering with the supplemental front
air bag system may result in serious
personal injury.
WARNING
Do not use or allow occupants to use
the seat heater if you or the occupants
cannot monitor elevated seat tempera-
tures or have an inability to feel pain in
those body parts in contact with the
seat. Use of the seat heater by such
people could result in serious injury.
CAUTION
. The battery could run down if the
seat heater is operated while the
engine is not running.
. Do not use the seat heater for
extended periods or when no one
is using the seat.
. Do not put anything on the seat
which insulates heat, such as a
blanket, cushion, seat cover, etc.
Otherwise, the seat may become
overheated.
. Do not place anything hard or heavy
on the seat or pierce it with a pin or
similar object. This may result in
damage to the heater.
HORN HEATED SEATS (if so equipped)
2-34
Instruments and controls
Page 105 of 419

Black plate (101,1)
Model "Z34-D" EDITED: 2010/ 7/ 27
SIC3288
Automatic operationTo fully open or close the window, completely
push down or pull up the switch and release it; it
need not be held. The window will automatically
open or close all the way. To stop the window,
just push or lift the switch in the opposite
direction.
A light push or pull on the switch will cause the
window to open or close until the switch is
released.
Auto reverse function
WARNING
There are some small distances imme-
diately before the closed position which
cannot be detected. Make sure that all
passengers have their hands, etc., in-
side the vehicle before closing the
window.
If the control unit detects something caught in
the window as it is closing, the window will be
immediately lowered.
The auto reverse function can be activated when
the window is closed by automatic operation
when the ignition switch is in the ON position or
for 45 seconds after the ignition switch is
pushed to the OFF position.
Depending on the environment or driving
conditions, the auto reverse function may
be activated if an impact or load similar to
something being caught in the window
occurs.
Automatic window lowering (Roadster
models)When the soft top operating switch is pressed,
the power windows will automatically be low-
ered completely. The windows do not rise
automatically after the soft top open/close
operation is completed. Use the power window
switches to raise them.Automatic adjusting function
CAUTION
When the battery cable is removed from
the battery terminal, do not close either
of the front doors. The automatic win-
dow adjusting function will not work
and the side roof panel may be da-
maged.
The power window has an automatic adjusting
function. When the door is being opened, the
window is automatically lowered slightly to avoid
contact between the window and the side roof
panel. When the door is closed, the window is
automatically raised slightly.
While the automatic adjusting function does not
work, the window will be controlled as follows:
. When the door is opened, the window
lowers for approximately 2 seconds.
Instruments and controls
2-43
Page 109 of 419
Black plate (105,1)
Model "Z34-D" EDITED: 2010/ 7/ 27
HomeLink
®Universal Transceiver provides a
convenient way to consolidate the functions of
up to three individual hand-held transmitters into
one built-in device.
HomeLink®Universal Transceiver:
. Will operate most Radio Frequency (RF)
devices such as garage doors, gates, home
and office lighting, entry door locks and
security systems.
. Is powered by your vehicle’s battery. No
separate batteries are required. If the
vehicle’s battery is discharged or is dis-
connected, HomeLink
®will retain all pro-
gramming.
Once HomeLink
®Universal Transceiver is
programmed, retain the original transmit-
ter for future programming procedures
(Example: new vehicle purchases) . Upon
sale of the vehicle, the programmed
HomeLink
®Universal Transceiver buttons
should be erased for security purposes.
For additional information, see “PRO-
GRAMMING HomeLink
®” later in this sec-
tion.
WARNING
. Do not use HomeLink
®Universal
Transceiver with any garage door
opener that lacks safety stop and reverse features as required by
federal safety standards. (These
standards became effective for
opener models manufactured after
April 1, 1982.) A garage door opener
which cannot detect an object in the
path of a closing garage door and
then automatically stop and reverse,
does not meet current federal safety
standards. Using a garage door
opener without these features in-
creases the risk of serious injury or
death.
. During programming procedure,
your garage door or security gate
may open or close. Make sure that
people and objects are clear of the
garage door, gate, etc. that you are
programming.
. Your vehicle’s engine should be
turned off while programming
HomeLink
®Universal Transceiver.
PROGRAMMING HomeLink
®
To program your HomeLink
®Transceiver to
operate a garage door, gate, or entry door
opener, home or office lighting, you need to be
at the same location as the device. Note:
Garage door openers (manufactured after 1996) have “rolling code protection”. To pro-
gram a garage door opener equipped with
“rolling code protection”; you will need to use
a ladder to get up to the garage door opener
motor to be able to access the “smart or learn”
program button.
HomeLink
®UNIVERSAL
TRANSCEIVER (if so equipped)
Instruments and controls
2-47
Page 120 of 419
Black plate (116,1)
Model "Z34-D" EDITED: 2010/ 7/ 27
3. Within 20 seconds of performing Step 2,push and hold the power door lock switch to
the
position (UNLOCK) for more than 5
seconds.
4. When activated, the hazard indicator will flash twice. When deactivated, the hazard
indicator will flash once.
5. The ignition switch must be placed in the OFF and ON position again between each
setting change.
When the automatic door unlock system is
deactivated, the doors do not unlock when the
ignition switch is placed in the OFF position. To
unlock the door manually, use the inside lock
knob or the power door lock switch (driver’s or
front passenger’s side) .
WARNING
. Radio waves could adversely affect
electric medical equipment. Those
who use a pacemaker should con-
tact the electric medical equipment
manufacturer for the possible influ-
ences before use.
. The Intelligent Key transmits radio
waves when the buttons are
pushed. The FAA advises that the
radio waves may affect aircraft na-
vigation and communication sys-
tems. Do not operate the
Intelligent Key while on an airplane.
Makesurethebuttonsarenot
operated unintentionally when the
unit is stored during a flight.
The Intelligent Key system can operate all the
door and rear hatch/trunk lid locks using the
remote controller function or pushing the re-
quest switch on the vehicle without taking the
key out from a pocket or purse. The operating
environment and/or conditions may affect the
Intelligent Key system operation.
Be sure to read the following before using the
Intelligent Key system.
CAUTION
. Be sure to carry the Intelligent Key
with you when operating the vehi-
cle.
. Never leave the Intelligent Key in
the vehicle when you leave the
vehicle.
The Intelligent Key is always communicating with
the vehicle as it receives radio waves. The
Intelligent Key system transmits weak radio
waves. Environmental conditions may interfere
with the operation of the Intelligent Key system
under the following operating conditions.
. When operating near a location where
strong radio waves are transmitted, such
as a TV tower, power station and broad-
casting station.
. When in possession of wireless equipment,
such as a cellular telephone, transceiver,
and CB radio.
. When the Intelligent Key is in contact with or
covered by metallic materials.
. When any type of radio wave remote control
is used nearby.
. When the Intelligent Key is placed near an
electric appliance such as a personal
INTELLIGENT KEY SYSTEM
3-6
Pre-driving checks and adjustments
Page 127 of 419
Black plate (123,1)
Model "Z34-D" EDITED: 2010/ 7/ 27
WARNING
The Intelligent Key transmits radio
waves when the buttons are pushed.
The FAA advises that the radio waves
may affect aircraft navigation and com-
munication systems. Do not operate the
Intelligent Key while on an airplane.
Make sure the buttons are not operated
unintentionally when the unit is stored
during a flight.
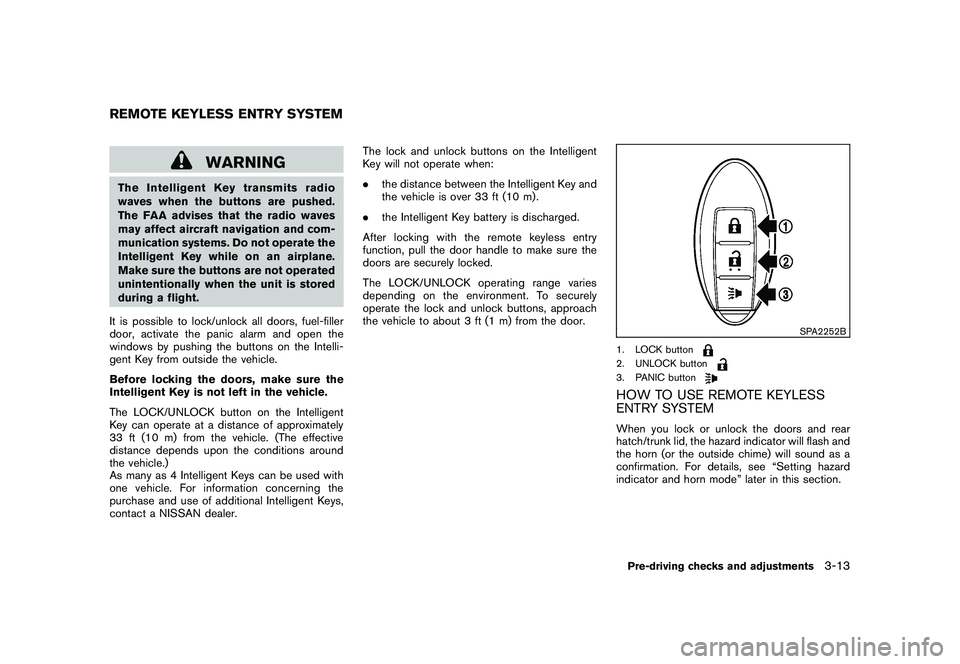
It is possible to lock/unlock all doors, fuel-filler
door, activate the panic alarm and open the
windows by pushing the buttons on the Intelli-
gent Key from outside the vehicle.
Before locking the doors, make sure the
Intelligent Key is not left in the vehicle.
The LOCK/UNLOCK button on the Intelligent
Key can operate at a distance of approximately
33 ft (10 m) from the vehicle. (The effective
distance depends upon the conditions around
the vehicle.)
As many as 4 Intelligent Keys can be used with
one vehicle. For information concerning the
purchase and use of additional Intelligent Keys,
contact a NISSAN dealer. The lock and unlock buttons on the Intelligent
Key will not operate when:
.
the distance between the Intelligent Key and
the vehicle is over 33 ft (10 m) .
. the Intelligent Key battery is discharged.
After locking with the remote keyless entry
function, pull the door handle to make sure the
doors are securely locked.
The LOCK/UNLOCK operating range varies
depending on the environment. To securely
operate the lock and unlock buttons, approach
the vehicle to about 3 ft (1 m) from the door.
SPA2252B
1. LOCK button2. UNLOCK button3. PANIC buttonHOW TO USE REMOTE KEYLESS
ENTRY SYSTEMWhen you lock or unlock the doors and rear
hatch/trunk lid, the hazard indicator will flash and
the horn (or the outside chime) will sound as a
confirmation. For details, see “Setting hazard
indicator and horn mode” later in this section.
REMOTE KEYLESS ENTRY SYSTEM
Pre-driving checks and adjustments
3-13
Page 128 of 419
Black plate (124,1)
Model "Z34-D" EDITED: 2010/ 7/ 27
Locking doors, rear hatch/trunk lid and
fuel-filler door1. Push the ignition switch to the OFF positionand make sure you carry the Intelligent Key
with you.*1
2. Close all the doors and the rear hatch/trunk lid.*2
3. Push the LOCK
button
*1
on the
Intelligent Key.
4. All the doors, the rear hatch/trunk lid and fuel-filler door will lock.
5. The hazard indicator flashes twice and the horn chirps once.
*1: Doors and the rear hatch/trunk lid will lock with the Intelligent Key while the ignition
switch is in the ACC or ON position.
*2: Doors and the rear hatch/trunk lid will not lock with the Intelligent Key while any door
or the rear hatch/trunk lid is open.
Unlocking doors, rear hatch/trunk lid and
fuel-filler door1. Push the UNLOCK
button
*2
on the
Intelligent Key once.
2. The hazard indicator flashes once. The driver’s door and fuel-filler door will unlock. 3. Push the UNLOCK
button on the
Intelligent Key again within 60 seconds.
4. The hazard indicator flashes once again. All the doors and the rear hatch/trunk lid will
unlock.
All doors and the rear hatch/trunk lid will be
locked automatically unless one of the following
operations is performed within 1 minute after
pushing the UNLOCKbutton on the
Intelligent Key while the doors are locked. If
during this 1-minute time period, the UNLOCK
button on the Intelligent Key is pushed, all
doors and the rear hatch/trunk lid will be locked
automatically after another 1 minute.
. Opening any door
. Pushing the ignition switch
. Inserting the Intelligent Key into the Intelli-
gent Key port
Opening windowsThe UNLOCK
button operation also allows
you to open a window that is equipped with the
automatic open/close function. (See “POWER
WINDOWS” in the “2. Instruments and con-
trols” section.)
To open the window, push the door UNLOCK
button
*2
on the Intelligent Key for about
3 seconds after the door is unlocked. To stop opening, release the UNLOCK
button.
Window cannot be closed using the Intelligent
Key.
The door window can be opened or closed by
turning the metal key in a door lock. (See
“DOORS” earlier in this section.)Using panic alarmIf you are near your vehicle and feel threatened,
you may activate the alarm to call attention as
follows:
1. Push the PANIC
button
*3
on the Key
for more than 1 second.
2. The theft warning alarm and headlights will stay on for 25 seconds.
3. The panic alarm stops when: .It has run for 25 seconds, or
. Any of the buttons on the Intelligent Key
are pushed. (Note: Panic button should
be pushed for more than 1 second.)
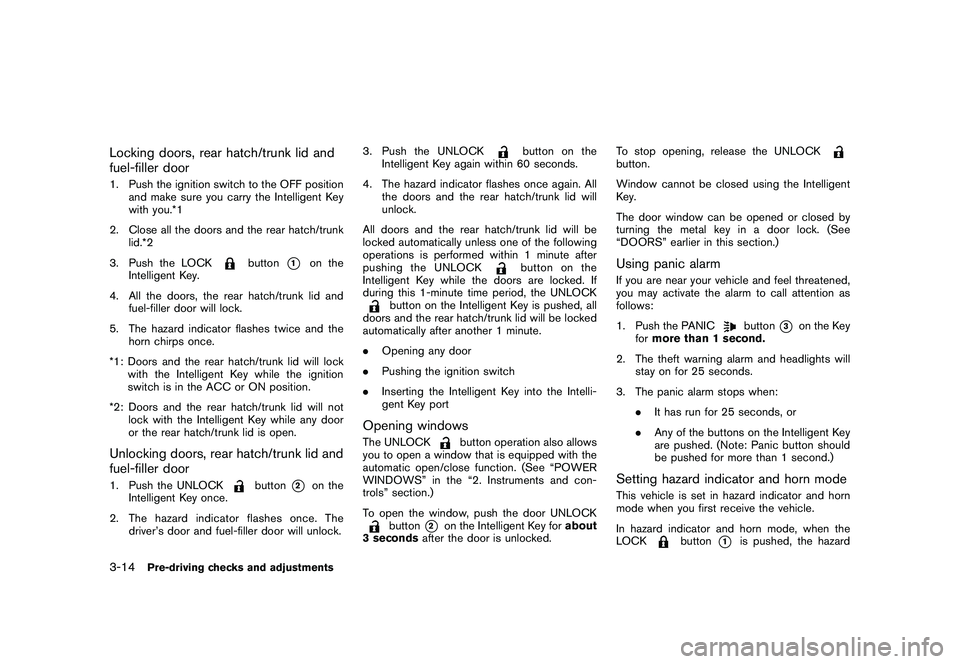
Setting hazard indicator and horn modeThis vehicle is set in hazard indicator and horn
mode when you first receive the vehicle.
In hazard indicator and horn mode, when the
LOCK
button
*1
is pushed, the hazard
3-14
Pre-driving checks and adjustments
Page 130 of 419
Black plate (126,1)
Model "Z34-D" EDITED: 2010/ 7/ 27
Switching procedure:
To switch the hazard indicator and horn (chime)
operation, push the LOCK
*1
and UN-
LOCK
*2
buttons on the Intelligent Key
simultaneously for more than 2 seconds.
. When the hazard indicator mode is set, the
hazard indicator flashes 3 times.
. When the hazard indicator and horn mode is
set, the hazard indicator flashes once and
the horn chirps once.
SPA2572
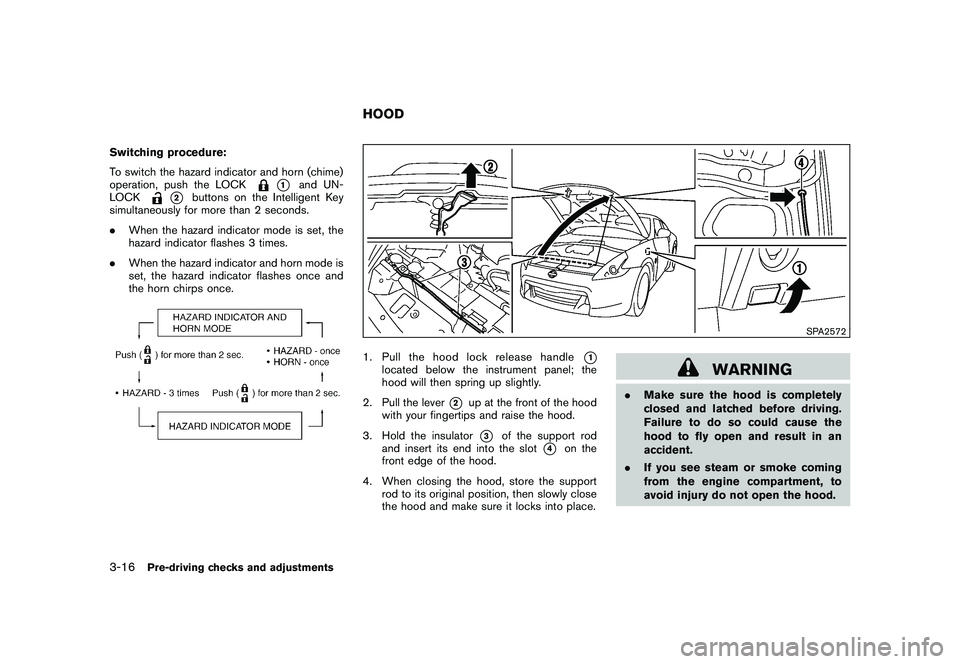
1. Pull the hood lock release handle
*1
located below the instrument panel; the
hood will then spring up slightly.
2. Pull the lever
*2
up at the front of the hood
with your fingertips and raise the hood.
3. Hold the insulator*3
of the support rod
and insert its end into the slot
*4
on the
front edge of the hood.
4. When closing the hood, store the support rod to its original position, then slowly close
the hood and make sure it locks into place.
WARNING
.Make sure the hood is completely
closed and latched before driving.
Failure to do so could cause the
hood to fly open and result in an
accident.
. If you see steam or smoke coming
from the engine compartment, to
avoid injury do not open the hood.
HOOD
3-16
Pre-driving checks and adjustments