2011 NISSAN 370Z ROADSTER instrument panel
[x] Cancel search: instrument panelPage 94 of 419
Black plate (90,1)
Model "Z34-D" EDITED: 2010/ 7/ 27
When the headlight switch is in the
or
position while the ignition switch is in the ON
position, the lights will automatically turn off 5
minutesaftertheignitionswitchhasbeen
pushed to the OFF position.
When the headlight switch remains in theor
position after the lights automatically
turn off, the lights will turn on when the ignition
switch is pushed to the ON position.
CAUTION
. When you turn on the headlight
switch again after the lights auto-
matically turn off, the lights will not
turn off automatically. Be sure to
turn the light switch to the OFF
position when you leave the vehicle
for extended periods of time, other-
wise the battery will be discharged.
. Never leave the light switch on
when the engine is not running for
extended periods of time even if the
headlights turn off automatically.Daytime running light system (Canada
only)The daytime running lights automatically illumi-
nate when the engine is started with the parking
brake released. The daytime running lights operate with the headlight switch in the OFF
position or in the
position. Turn the
headlight switch to the
position for full
illumination when driving at night.
If the parking brake is applied before the engine
is started, the daytime running lights do not
illuminate. The daytime running lights illuminate
once the parking brake is released. The daytime
running lights will remain on until the ignition
switch is pushed to the OFF position.
WARNING
It is necessary at dusk to turn on your
headlights. Failure to do so could cause
an accident injuring yourself and
others.
SIC3981
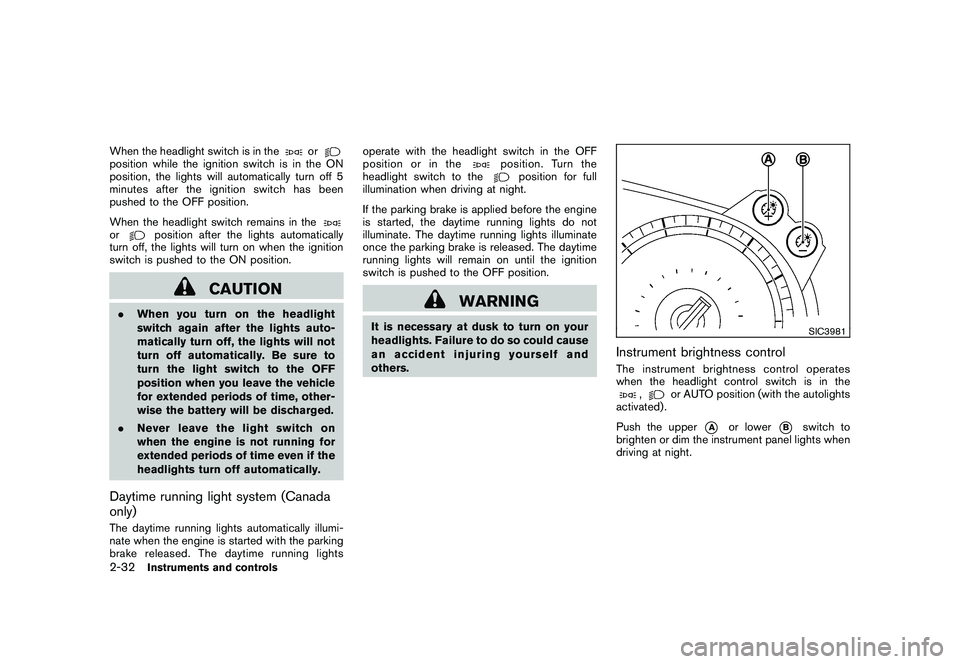
Instrument brightness controlThe instrument brightness control operates
when the headlight control switch is in the
,
or AUTO position (with the autolights
activated) .
Push the upper
*A
or lower
*B
switch to
brighten or dim the instrument panel lights when
driving at night.
2-32
Instruments and controls
Page 95 of 419
Black plate (91,1)
Model "Z34-D" EDITED: 2010/ 7/ 27
SIC3997
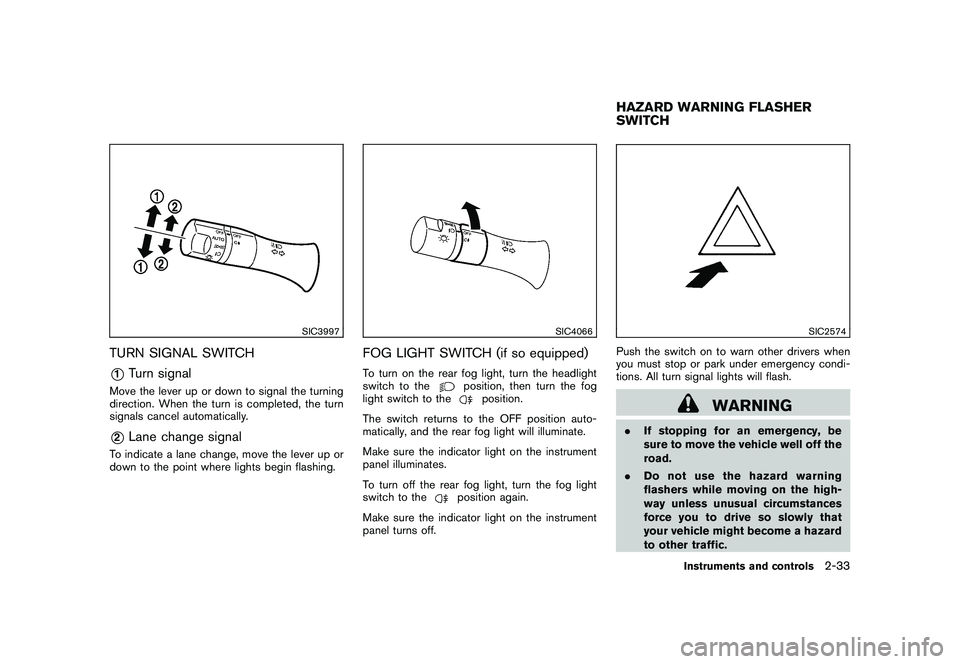
TURN SIGNAL SWITCH*1
Turn signal
Move the lever up or down to signal the turning
direction. When the turn is completed, the turn
signals cancel automatically.*2
Lane change signal
To indicate a lane change, move the lever up or
down to the point where lights begin flashing.
SIC4066
FOG LIGHT SWITCH (if so equipped)To turn on the rear fog light, turn the headlight
switch to the
position, then turn the fog
light switch to the
position.
The switch returns to the OFF position auto-
matically, and the rear fog light will illuminate.
Make sure the indicator light on the instrument
panel illuminates.
To turn off the rear fog light, turn the fog light
switch to the
position again.
Make sure the indicator light on the instrument
panel turns off.
SIC2574
Push the switch on to warn other drivers when
you must stop or park under emergency condi-
tions. All turn signal lights will flash.
WARNING
. If stopping for an emergency, be
sure to move the vehicle well off the
road.
. Do not use the hazard warning
flashers while moving on the high-
way unless unusual circumstances
force you to drive so slowly that
your vehicle might become a hazard
to other traffic.HAZARD WARNING FLASHER
SWITCH
Instruments and controls
2-33
Page 105 of 419

Black plate (101,1)
Model "Z34-D" EDITED: 2010/ 7/ 27
SIC3288
Automatic operationTo fully open or close the window, completely
push down or pull up the switch and release it; it
need not be held. The window will automatically
open or close all the way. To stop the window,
just push or lift the switch in the opposite
direction.
A light push or pull on the switch will cause the
window to open or close until the switch is
released.
Auto reverse function
WARNING
There are some small distances imme-
diately before the closed position which
cannot be detected. Make sure that all
passengers have their hands, etc., in-
side the vehicle before closing the
window.
If the control unit detects something caught in
the window as it is closing, the window will be
immediately lowered.
The auto reverse function can be activated when
the window is closed by automatic operation
when the ignition switch is in the ON position or
for 45 seconds after the ignition switch is
pushed to the OFF position.
Depending on the environment or driving
conditions, the auto reverse function may
be activated if an impact or load similar to
something being caught in the window
occurs.
Automatic window lowering (Roadster
models)When the soft top operating switch is pressed,
the power windows will automatically be low-
ered completely. The windows do not rise
automatically after the soft top open/close
operation is completed. Use the power window
switches to raise them.Automatic adjusting function
CAUTION
When the battery cable is removed from
the battery terminal, do not close either
of the front doors. The automatic win-
dow adjusting function will not work
and the side roof panel may be da-
maged.
The power window has an automatic adjusting
function. When the door is being opened, the
window is automatically lowered slightly to avoid
contact between the window and the side roof
panel. When the door is closed, the window is
automatically raised slightly.
While the automatic adjusting function does not
work, the window will be controlled as follows:
. When the door is opened, the window
lowers for approximately 2 seconds.
Instruments and controls
2-43
Page 130 of 419
Black plate (126,1)
Model "Z34-D" EDITED: 2010/ 7/ 27
Switching procedure:
To switch the hazard indicator and horn (chime)
operation, push the LOCK
*1
and UN-
LOCK
*2
buttons on the Intelligent Key
simultaneously for more than 2 seconds.
. When the hazard indicator mode is set, the
hazard indicator flashes 3 times.
. When the hazard indicator and horn mode is
set, the hazard indicator flashes once and
the horn chirps once.
SPA2572
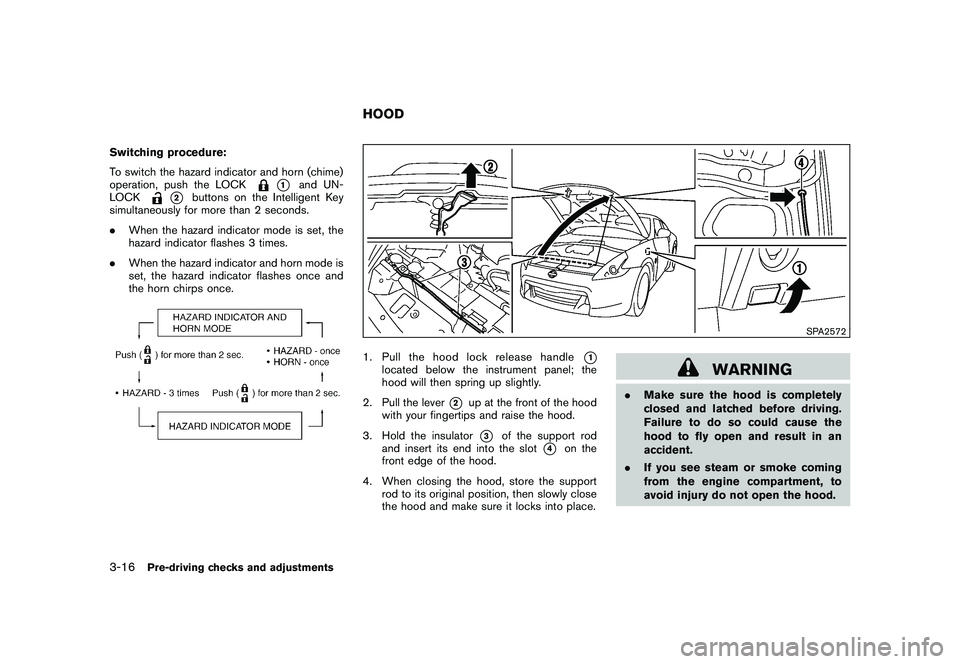
1. Pull the hood lock release handle
*1
located below the instrument panel; the
hood will then spring up slightly.
2. Pull the lever
*2
up at the front of the hood
with your fingertips and raise the hood.
3. Hold the insulator*3
of the support rod
and insert its end into the slot
*4
on the
front edge of the hood.
4. When closing the hood, store the support rod to its original position, then slowly close
the hood and make sure it locks into place.
WARNING
.Make sure the hood is completely
closed and latched before driving.
Failure to do so could cause the
hood to fly open and result in an
accident.
. If you see steam or smoke coming
from the engine compartment, to
avoid injury do not open the hood.
HOOD
3-16
Pre-driving checks and adjustments
Page 138 of 419
Black plate (134,1)
Model "Z34-D" EDITED: 2010/ 7/ 27
NOTE:
.In case of low battery or low tempera-
ture, the top may temporarily stop
moving during the operation. This func-
tions to protect the top control me-
chanism, and it is not a malfunction.
. If the top is opened and closed repeat-
edly in a short period of time or the top
operation is stopped while opening or
closing, the top operation may be
automatically stopped to protect the
system. Wait for approximately 5 min-
utes before operating the top again.
SPA1691
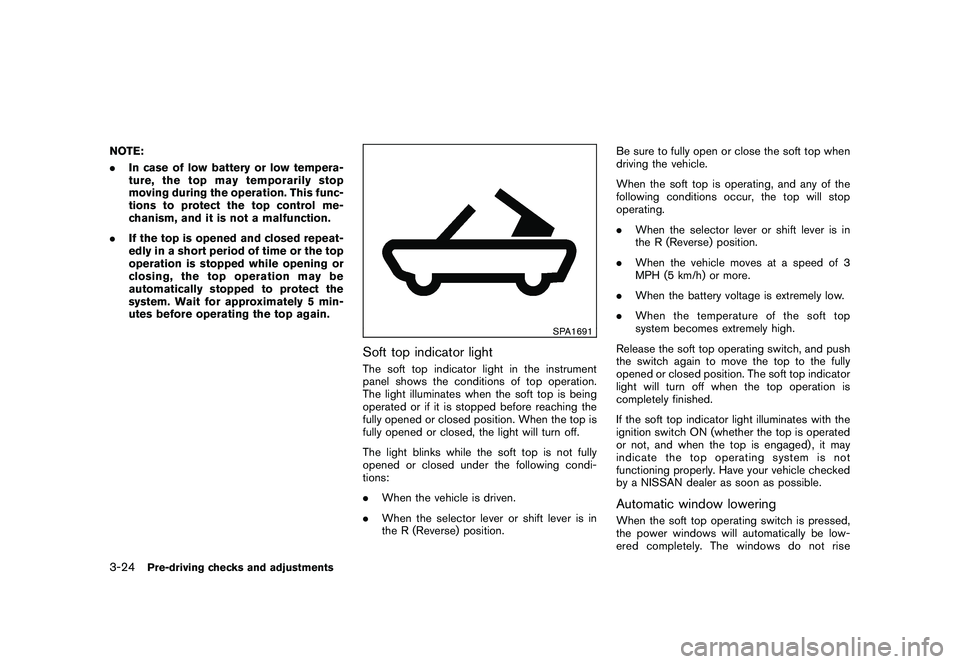
Soft top indicator lightThe soft top indicator light in the instrument
panel shows the conditions of top operation.
The light illuminates when the soft top is being
operated or if it is stopped before reaching the
fully opened or closed position. When the top is
fully opened or closed, the light will turn off.
The light blinks while the soft top is not fully
opened or closed under the following condi-
tions:
.When the vehicle is driven.
. When the selector lever or shift lever is in
the R (Reverse) position. Be sure to fully open or close the soft top when
driving the vehicle.
When the soft top is operating, and any of the
following conditions occur, the top will stop
operating.
.
When the selector lever or shift lever is in
the R (Reverse) position.
. When the vehicle moves at a speed of 3
MPH (5 km/h) or more.
. When the battery voltage is extremely low.
. When the temperature of the soft top
system becomes extremely high.
Release the soft top operating switch, and push
the switch again to move the top to the fully
opened or closed position. The soft top indicator
light will turn off when the top operation is
completely finished.
If the soft top indicator light illuminates with the
ignition switch ON (whether the top is operated
or not, and when the top is engaged) , it may
indicate the top operating system is not
functioning properly. Have your vehicle checked
by a NISSAN dealer as soon as possible.
Automatic window loweringWhen the soft top operating switch is pressed,
the power windows will automatically be low-
ered completely. The windows do not rise
3-24
Pre-driving checks and adjustments
Page 183 of 419
Black plate (179,1)
Model "Z34-D" EDITED: 2010/ 7/ 27
controlled automatically.
Air flow control:
Pushing the “MODE” manual air flow control
button selects the air outlet to:
: Air flows from center and side ventila-tors.: Air flows from center and side ventila-tors and foot outlets.: Air flows mainly from foot outlets.: Air flows from defroster and foot out-lets.
To turn the system offPush the “OFF” button.
SAA2324SAA2315
OPERATING TIPSWhen the engine coolant temperature and
outside air temperature are low, the air flow
from the foot outlets may not operate for a
maximum of 150 seconds. This is not a
malfunction. After the coolant temperature
warms up, air will flow normally from the foot
outlets.
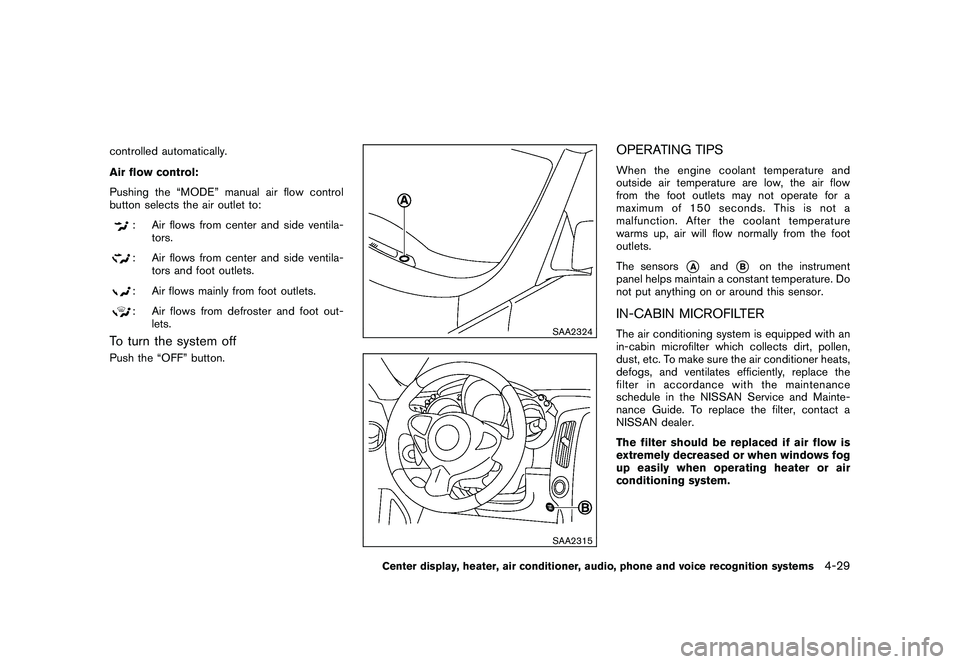
The sensors
*A
and
*B
on the instrument
panel helps maintain a constant temperature. Do
not put anything on or around this sensor.
IN-CABIN MICROFILTERThe air conditioning system is equipped with an
in-cabin microfilter which collects dirt, pollen,
dust, etc. To make sure the air conditioner heats,
defogs, and ventilates efficiently, replace the
filter in accordance with the maintenance
schedule in the NISSAN Service and Mainte-
nance Guide. To replace the filter, contact a
NISSAN dealer.
The filter should be replaced if air flow is
extremely decreased or when windows fog
up easily when operating heater or air
conditioning system.
Center display, heater, air conditioner, audio, phone and voice recognition systems
4-29
Page 210 of 419
Black plate (206,1)
Model "Z34-D" EDITED: 2010/ 7/ 27
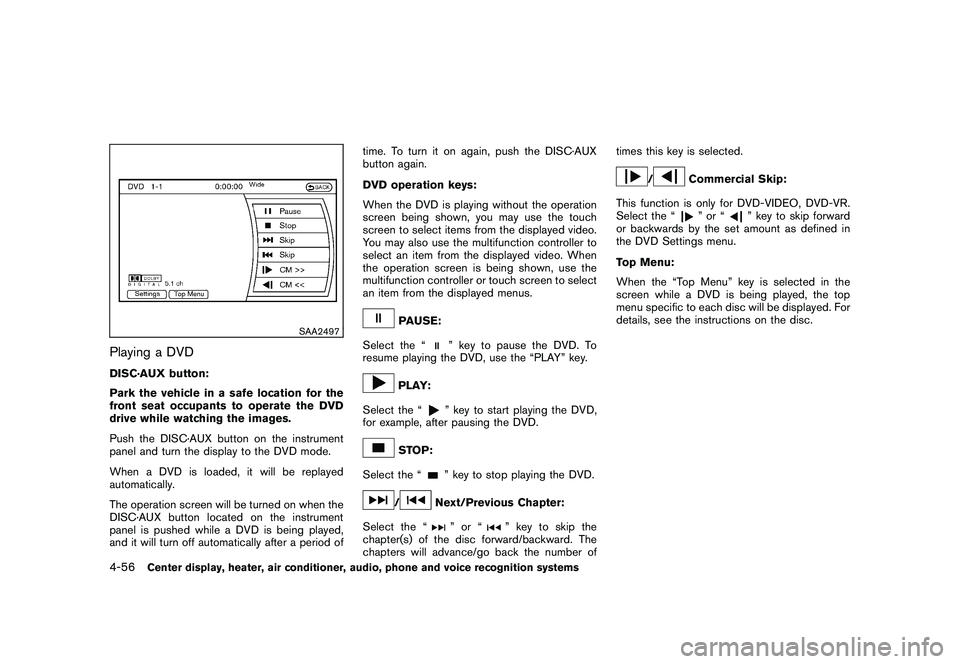
SAA2497
Playing a DVDDISC·AUX button:
Park the vehicle in a safe location for the
front seat occupants to operate the DVD
drive while watching the images.
Push the DISC·AUX button on the instrument
panel and turn the display to the DVD mode.
When a DVD is loaded, it will be replayed
automatically.
The operation screen will be turned on when the
DISC·AUX button located on the instrument
panel is pushed while a DVD is being played,
and it will turn off automatically after a period oftime. To turn it on again, push the DISC·AUX
button again.
DVD operation keys:
When the DVD is playing without the operation
screen being shown, you may use the touch
screen to select items from the displayed video.
You may also use the multifunction controller to
select an item from the displayed video. When
the operation screen is being shown, use the
multifunction controller or touch screen to select
an item from the displayed menus.
PAUSE:
Select the “
” key to pause the DVD. To
resume playing the DVD, use the “PLAY” key.
PLAY:
Select the “
” key to start playing the DVD,
for example, after pausing the DVD.
STOP:
Select the “
” key to stop playing the DVD.
/
Next/Previous Chapter:
Select the “
”or“
” key to skip the
chapter(s) of the disc forward/backward. The
chapters will advance/go back the number of times this key is selected.
/
Commercial Skip:
This function is only for DVD-VIDEO, DVD-VR.
Select the “”or“
” key to skip forward
or backwards by the set amount as defined in
the DVD Settings menu.
Top Menu:
When the “Top Menu” key is selected in the
screen while a DVD is being played, the top
menu specific to each disc will be displayed. For
details, see the instructions on the disc.
4-56
Center display, heater, air conditioner, audio, phone and voice recognition systems
Page 240 of 419
Black plate (236,1)
Model "Z34-D" EDITED: 2010/ 7/ 27
.Voicetag
Confirm and store the voicetag. Voicetags
allow easy dialing using the NISSAN Voice
Recognition system. (See “NISSAN VOICE
RECOGNITION SYSTEM (models with na-
vigation system)” later in this section.)
To delete an entry, select the “Delete” key at
step 3.
SAA2524
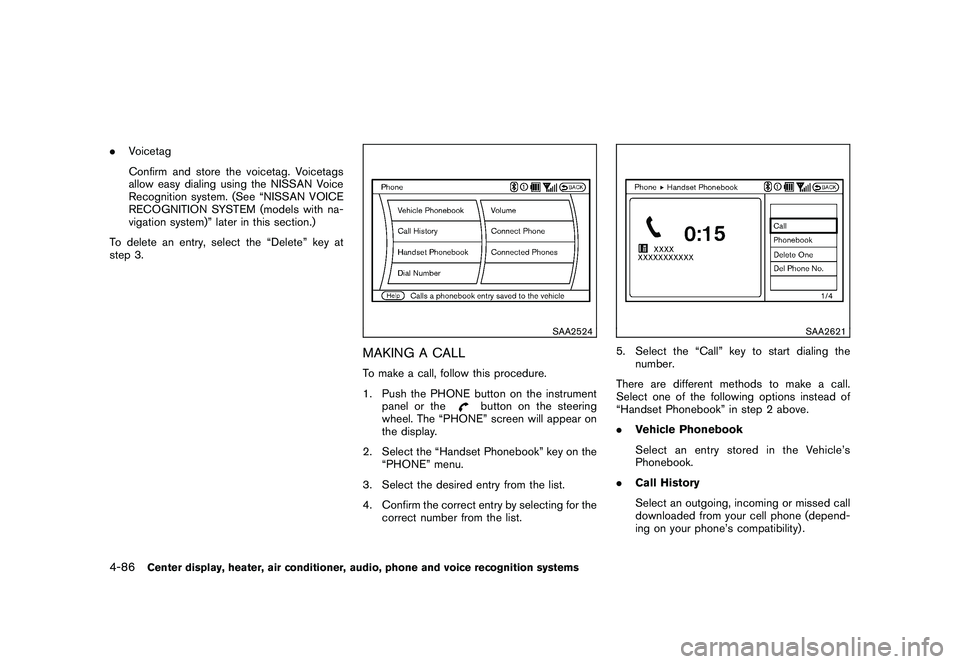
MAKING A CALLTo make a call, follow this procedure.
1. Push the PHONE button on the instrument panel or the
button on the steering
wheel. The “PHONE” screen will appear on
the display.
2. Select the “Handset Phonebook” key on the “PHONE” menu.
3. Select the desired entry from the list.
4. Confirm the correct entry by selecting for the correct number from the list.
SAA2621
5. Select the “Call” key to start dialing thenumber.
There are different methods to make a call.
Select one of the following options instead of
“Handset Phonebook” in step 2 above.
. Vehicle Phonebook
Select an entry stored in the Vehicle’s
Phonebook.
. Call History
Select an outgoing, incoming or missed call
downloaded from your cell phone (depend-
ing on your phone’s compatibility) .
4-86
Center display, heater, air conditioner, audio, phone and voice recognition systems