Page 16 of 419
Black plate (10,1)
Model "Z34-D" EDITED: 2010/ 7/ 27
SSI0650
COUPE MODELS1. Cargo cover (if so equipped) (P.2-41)
2. Secondary rear hatch release (P.3-18)
3. Power windows (P.2-42)— Outside mirror remote control switch (P.3-38)
4. Sun visors (P.3-36) 5. Map light (P.2-44)
6. Inside rearview mirror
— Operation (P.3-37)
— HomeLink
®(if so equipped) (P.2-47)
7. Rear parcel box (P.2-40) 8. Console box
— Power outlet (P.2-37)
— USB memory operation (if so equipped)
(P.4-58)
—iPod
®player operation (if so equipped) (P.4-67)
9. Front cup holders (P.2-38)
PASSENGER COMPARTMENT0-8
Illustrated table of contents
Page 17 of 419
Black plate (11,1)
Model "Z34-D" EDITED: 2010/ 7/ 27
SSI0651
ROADSTER MODELS1. Power windows (P.2-42)— Outside mirror remote control switch (P.3-38)
2. Sun visors (P.3-36)
3. Map light (P.2-44) 4. Inside rearview mirror
— Operation (P.3-37)
— HomeLink
®(if so equipped) (P.2-47)
5. Rear parcel box (P.2-40) — Secondary trunk lid release (P.3-21) 6. Console box
— Power outlet (P.2-37)
— USB memory operation (if so equipped)
(P.4-58)
—iPod
®player operation (if so equipped) (P.4-67)
7. Front cup holders (P.2-38)Illustrated table of contents
0-9
Page 151 of 419

Black plate (147,1)
Model "Z34-D" EDITED: 2010/ 7/ 27
SPA2447
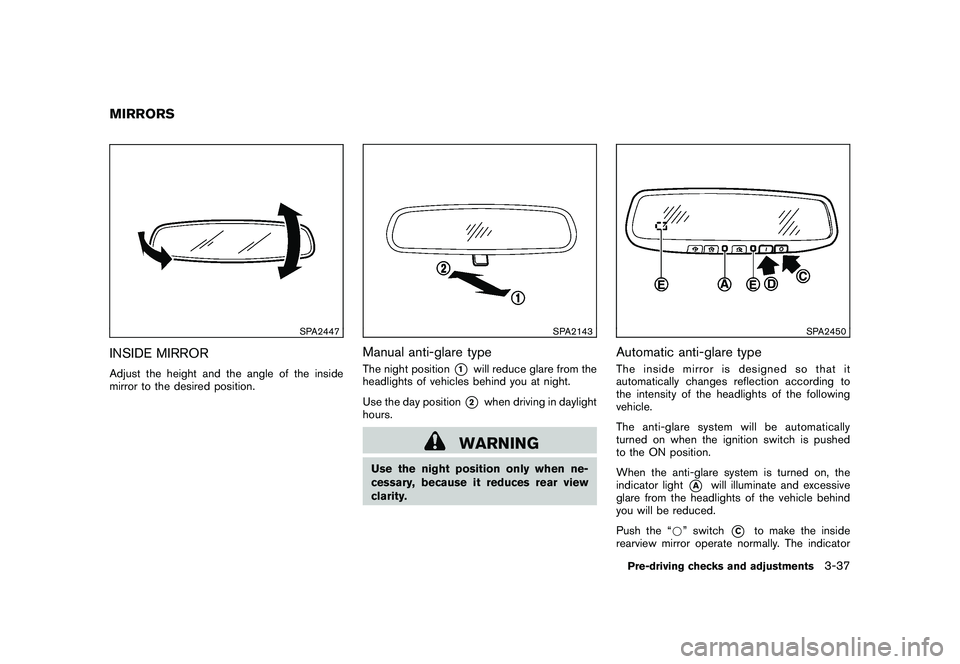
INSIDE MIRRORAdjust the height and the angle of the inside
mirror to the desired position.
SPA2143
Manual anti-glare typeThe night position
*1
will reduce glare from the
headlights of vehicles behind you at night.
Use the day position*2
when driving in daylight
hours.
WARNING
Use the night position only when ne-
cessary, because it reduces rear view
clarity.
SPA2450
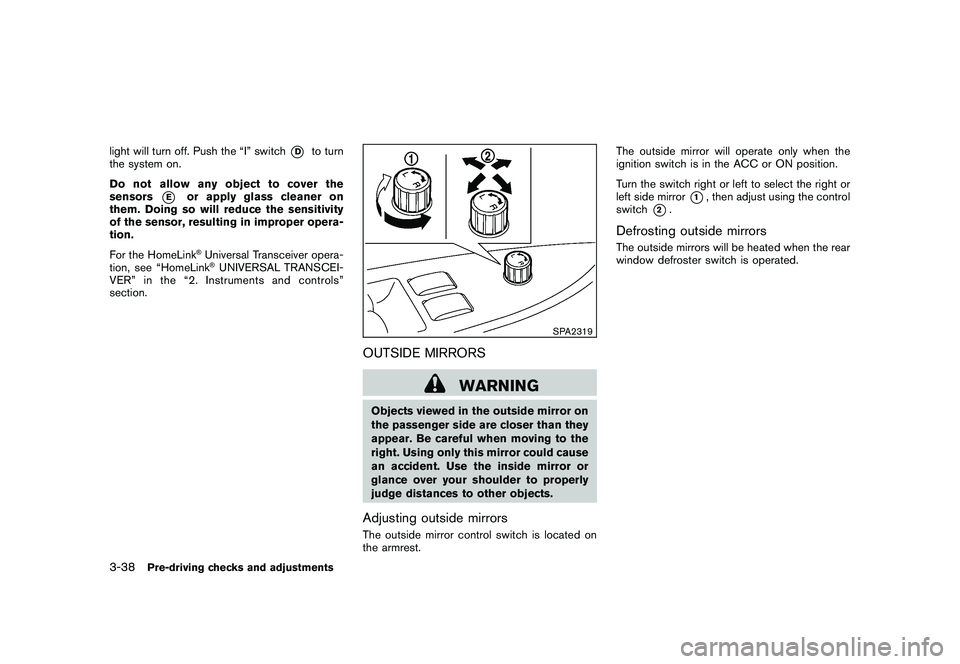
Automatic anti-glare typeThe inside mirror is designed so that it
automatically changes reflection according to
the intensity of the headlights of the following
vehicle.
The anti-glare system will be automatically
turned on when the ignition switch is pushed
to the ON position.
When the anti-glare system is turned on, the
indicator light
*A
will illuminate and excessive
glare from the headlights of the vehicle behind
you will be reduced.
Push the “* ” switch
*C
to make the inside
rearview mirror operate normally. The indicator
MIRRORS
Pre-driving checks and adjustments
3-37
Page 152 of 419

Black plate (148,1)
Model "Z34-D" EDITED: 2010/ 7/ 27
light will turn off. Push the “I” switch
*D
to turn
the system on.
Do not allow any object to cover the
sensors
*E
or apply glass cleaner on
them. Doing so will reduce the sensitivity
of the sensor, resulting in improper opera-
tion.
For the HomeLink®Universal Transceiver opera-
tion, see “HomeLink®UNIVERSAL TRANSCEI-
VER” in the “2. Instruments and controls”
section.
SPA2319
OUTSIDE MIRRORS
WARNING
Objects viewed in the outside mirror on
the passenger side are closer than they
appear. Be careful when moving to the
right. Using only this mirror could cause
an accident. Use the inside mirror or
glance over your shoulder to properly
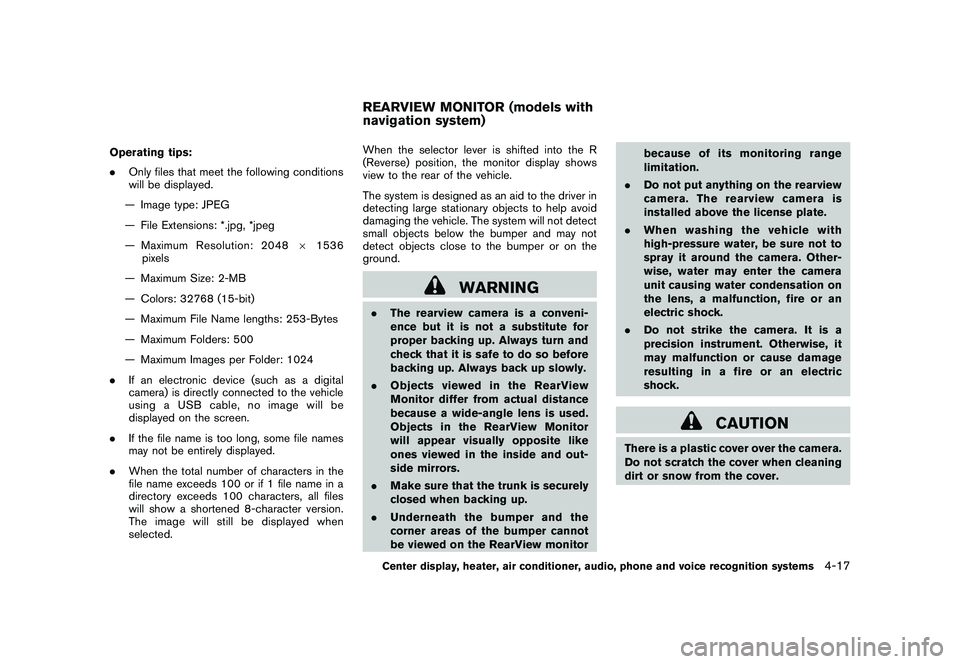
judge distances to other objects.Adjusting outside mirrorsThe outside mirror control switch is located on
the armrest. The outside mirror will operate only when the
ignition switch is in the ACC or ON position.
Turn the switch right or left to select the right or
left side mirror
*1, then adjust using the control
switch
*2.
Defrosting outside mirrorsThe outside mirrors will be heated when the rear
window defroster switch is operated.
3-38
Pre-driving checks and adjustments
Page 171 of 419

Black plate (167,1)
Model "Z34-D" EDITED: 2010/ 7/ 27
Operating tips:
.Only files that meet the following conditions
will be displayed.
— Image type: JPEG
— File Extensions: *.jpg, *jpeg
— Maximum Resolution: 2048 61536
pixels
— Maximum Size: 2-MB
— Colors: 32768 (15-bit)
— Maximum File Name lengths: 253-Bytes
— Maximum Folders: 500
— Maximum Images per Folder: 1024
. If an electronic device (such as a digital
camera) is directly connected to the vehicle
using a USB cable, no image will be
displayed on the screen.
. If the file name is too long, some file names
may not be entirely displayed.
. When the total number of characters in the
file name exceeds 100 or if 1 file name in a
directory exceeds 100 characters, all files
will show a shortened 8-character version.
The image will still be displayed when
selected. When the selector lever is shifted into the R
(Reverse) position, the monitor display shows
view to the rear of the vehicle.
The system is designed as an aid to the driver in
detecting large stationary objects to help avoid
damaging the vehicle. The system will not detect
small objects below the bumper and may not
detect objects close to the bumper or on the
ground.
WARNING
.
The rearview camera is a conveni-
ence but it is not a substitute for
proper backing up. Always turn and
check that it is safe to do so before
backing up. Always back up slowly.
. Objects viewed in the RearView
Monitor differ from actual distance
because a wide-angle lens is used.
Objects in the RearView Monitor
will appear visually opposite like
ones viewed in the inside and out-
side mirrors.
. Make sure that the trunk is securely
closed when backing up.
. Underneath the bumper and the
corner areas of the bumper cannot
be viewed on the RearView monitor because of its monitoring range
limitation.
. Do not put anything on the rearview
camera. The rearview camera is
installed above the license plate.
. When washing the vehicle with
high-pressure water, be sure not to
spray it around the camera. Other-
wise, water may enter the camera
unit causing water condensation on
the lens, a malfunction, fire or an
electric shock.
. Do not strike the camera. It is a
precision instrument. Otherwise, it
may malfunction or cause damage
resulting in a fire or an electric
shock.
CAUTION
There is a plastic cover over the camera.
Do not scratch the cover when cleaning
dirt or snow from the cover.
REARVIEW MONITOR (models with
navigation system)
Center display, heater, air conditioner, audio, phone and voice recognition systems
4-17
Page 173 of 419
Black plate (169,1)
Model "Z34-D" EDITED: 2010/ 7/ 27
closer than they appear. Use the
inside mirror or glance over your
shoulder to properly judge dis-
tances to other objects.
The vehicle width and predicted course
lines are wider than the actual width and
course.
SAA1897
1. Visually check that the parking space is safe before parking your vehicle.
2. The rearview of the vehicle is displayed on the screen
*A
as illustrated when the
selector lever is moved to the R (Reverse)
position.
SAA1898
3. Slowly back up the vehicle adjusting the steering wheel so that the predicted course
lines
*B
enter the parking space
*C.
4. Maneuver the steering wheel to make the vehicle width guide lines
*D
parallel to the
parking space
*C
while referring to the
predicted course lines.
Center display, heater, air conditioner, audio, phone and voice recognition systems
4-19