2011 NISSAN 370Z COUPE flat tire
[x] Cancel search: flat tirePage 375 of 419
Black plate (375,1)
Model "Z34-D" EDITED: 2010/ 7/ 27
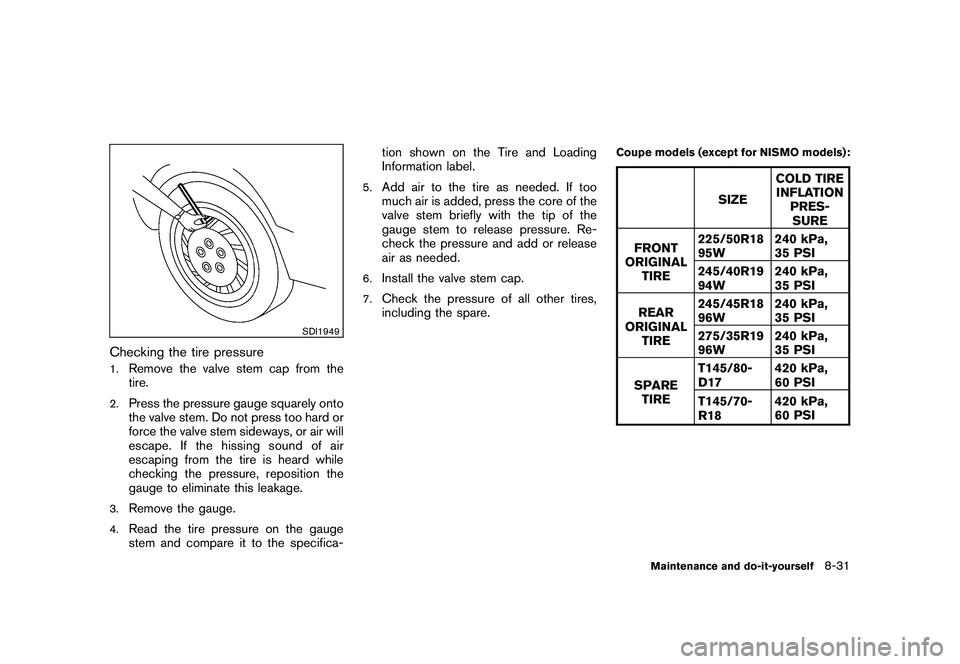
SDI1949
Checking the tire pressure1.
Remove the valve stem cap from the
tire.
2.
Press the pressure gauge squarely onto
the valve stem. Do not press too hard or
force the valve stem sideways, or air will
escape. If the hissing sound of air
escaping from the tire is heard while
checking the pressure, reposition the
gauge to eliminate this leakage.
3.
Remove the gauge.
4.
Read the tire pressure on the gauge
stem and compare it to the specifica-tion shown on the Tire and Loading
Information label.
5.
Add air to the tire as needed. If too
much air is added, press the core of the
valve stem briefly with the tip of the
gauge stem to release pressure. Re-
check the pressure and add or release
air as needed.
6.
Install the valve stem cap.
7.
Check the pressure of all other tires,
including the spare.
Coupe models (except for NISMO models):
SIZE
COLD TIRE
INFLATION PRES-
SURE
FRONT
ORIGINAL
TIRE 225/50R18
95W
240 kPa,
35 PSI
245/40R19
94W 240 kPa,
35 PSI
REAR
ORIGINAL TIRE 245/45R18
96W
240 kPa,
35 PSI
275/35R19
96W 240 kPa,
35 PSI
SPARE TIRE T145/80-
D17
420 kPa,
60 PSI
T145/70-
R18 420 kPa,
60 PSI
Maintenance and do-it-yourself
8-31
Page 376 of 419
Black plate (376,1)
Model "Z34-D" EDITED: 2010/ 7/ 27
Roadster models (except for NISMO mod-
els):
SIZECOLD TIRE
INFLATION PRES-SURE
FRONT
ORIGINAL TIRE 225/50R18
95W
260 kPa,
38 PSI
245/40R19
94W 240 kPa,
35 PSI
REAR
ORIGINAL TIRE 245/45R18
96W
260 kPa,
38 PSI
275/35R19
96W 240 kPa,
35 PSI
SPARE TIRE T145/80-
D17
420 kPa,
60 PSI
T145/70-
R18 420 kPa,
60 PSI NISMO models:
SIZECOLD TIRE
INFLATION
PRES-SURE
FRONT
ORIGINAL
TIRE 245/40R19
98Y
240 kPa,
35 PSI
REAR
ORIGINAL TIRE 285/35R19
99Y
240 kPa,
35 PSI
SPARE TIRE T145/70R18 420 kPa,
60 PSI
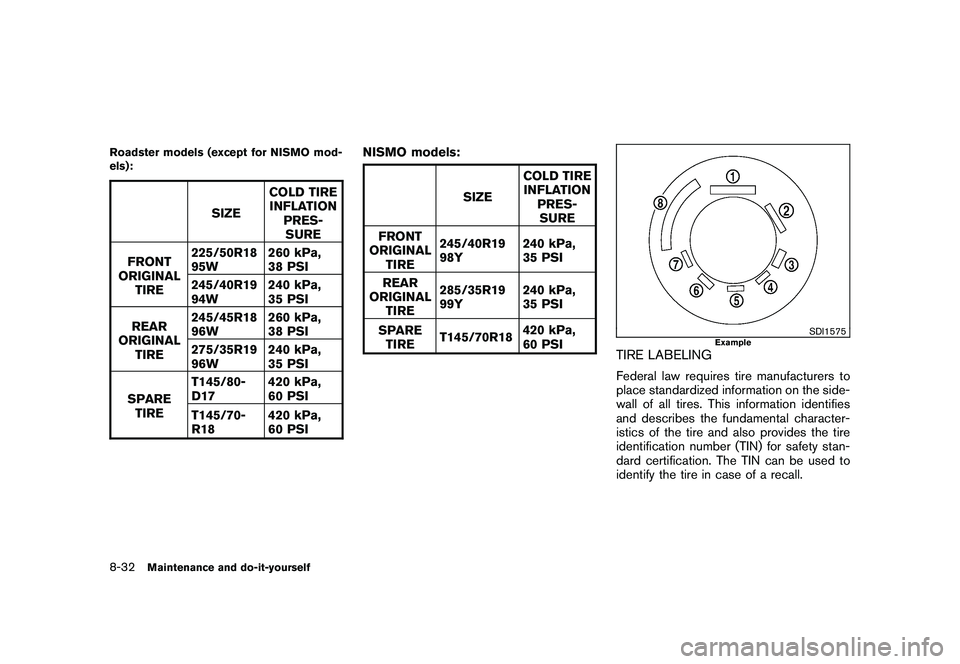
SDI1575
Example
TIRE LABELINGFederal law requires tire manufacturers to
place standardized information on the side-
wall of all tires. This information identifies
and describes the fundamental character-
istics of the tire and also provides the tire
identification number (TIN) for safety stan-
dard certification. The TIN can be used to
identify the tire in case of a recall.
8-32
Maintenance and do-it-yourself
Page 378 of 419
Black plate (378,1)
Model "Z34-D" EDITED: 2010/ 7/ 27
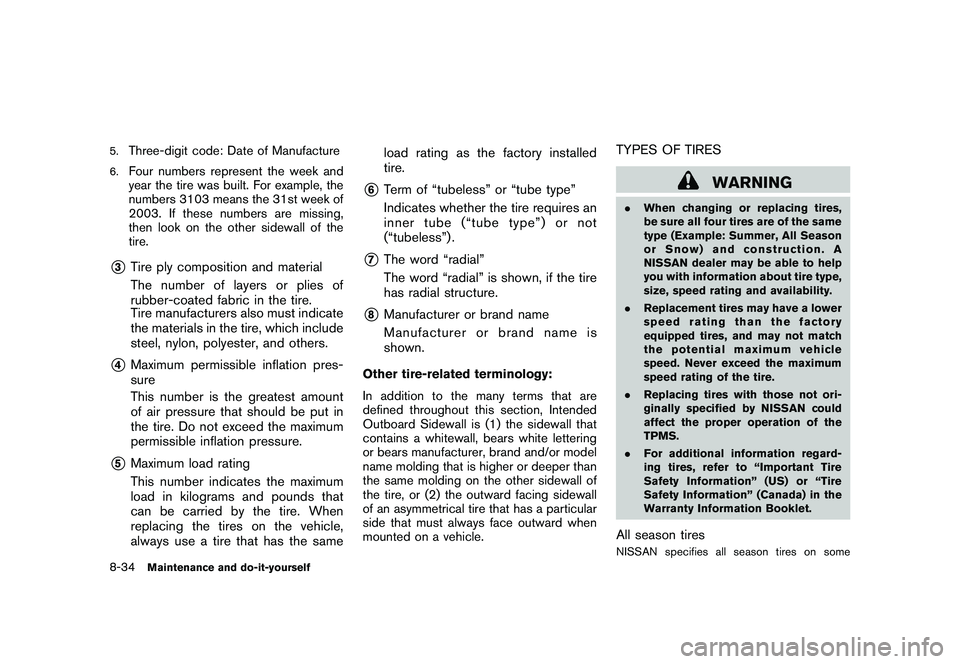
5.
Three-digit code: Date of Manufacture
6.
Four numbers represent the week and
year the tire was built. For example, the
numbers 3103 means the 31st week of
2003. If these numbers are missing,
then look on the other sidewall of the
tire.
*3
Tire ply composition and material
The number of layers or plies of
rubber-coated fabric in the tire.
Tire manufacturers also must indicate
the materials in the tire, which include
steel, nylon, polyester, and others.
*4
Maximum permissible inflation pres-
sure
This number is the greatest amount
of air pressure that should be put in
the tire. Do not exceed the maximum
permissible inflation pressure.
*5
Maximum load rating
This number indicates the maximum
load in kilograms and pounds that
can be carried by the tire. When
replacing the tires on the vehicle,
always use a tire that has the sameload rating as the factory installed
tire.
*6
Term of “tubeless” or “tube type”
Indicates whether the tire requires an
inner tube (“tube type”) or not
(“tubeless”) .
*7
The word “radial”
The word “radial” is shown, if the tire
has radial structure.
*8
Manufacturer or brand name
Manufacturer or brand name is
shown.
Other tire-related terminology:
In addition to the many terms that are
defined throughout this section, Intended
Outboard Sidewall is (1) the sidewall that
contains a whitewall, bears white lettering
or bears manufacturer, brand and/or model
name molding that is higher or deeper than
the same molding on the other sidewall of
the tire, or (2) the outward facing sidewall
of an asymmetrical tire that has a particular
side that must always face outward when
mounted on a vehicle.
TYPES OF TIRES
WARNING
.
When changing or replacing tires,
be sure all four tires are of the same
type (Example: Summer, All Season
or Snow) and construction. A
NISSAN dealer may be able to help
you with information about tire type,
size, speed rating and availability.
. Replacement tires may have a lower
speed rating than the factory
equipped tires, and may not match
the potential maximum vehicle
speed. Never exceed the maximum
speed rating of the tire.
. Replacing tires with those not ori-
ginally specified by NISSAN could
affect the proper operation of the
TPMS.
. For additional information regard-
ing tires, refer to “Important Tire
Safety Information” (US) or “Tire
Safety Information” (Canada) in the
Warranty Information Booklet.All season tiresNISSAN specifies all season tires on some
8-34
Maintenance and do-it-yourself
Page 380 of 419
Black plate (380,1)
Model "Z34-D" EDITED: 2010/ 7/ 27
CHANGING WHEELS AND TIRES
Tire rotationTires cannot be rotated on this vehicle
because the front tires are a different size
than the rear tires.
A pin is on the front brake rotor to prevent
the rear wheels from being installed in
place of the front wheels. The spare tire
can be installed in place of the front and
rear wheels. When installing the spare tire
in the front wheel, the hole in the spare tire
wheel must be aligned with the pin on the
brake rotor.
WARNING
.
Retighten the wheel nuts when
the vehicle has been driven for
600 miles (1,000 km) (also in
cases of a flat tire, etc.) .
.
For additional information re-
garding tires, refer to “Important
Tire Safety Information” (US) or
“Tire Safety Information” (Cana-
da) in the Warranty Information
Booklet.
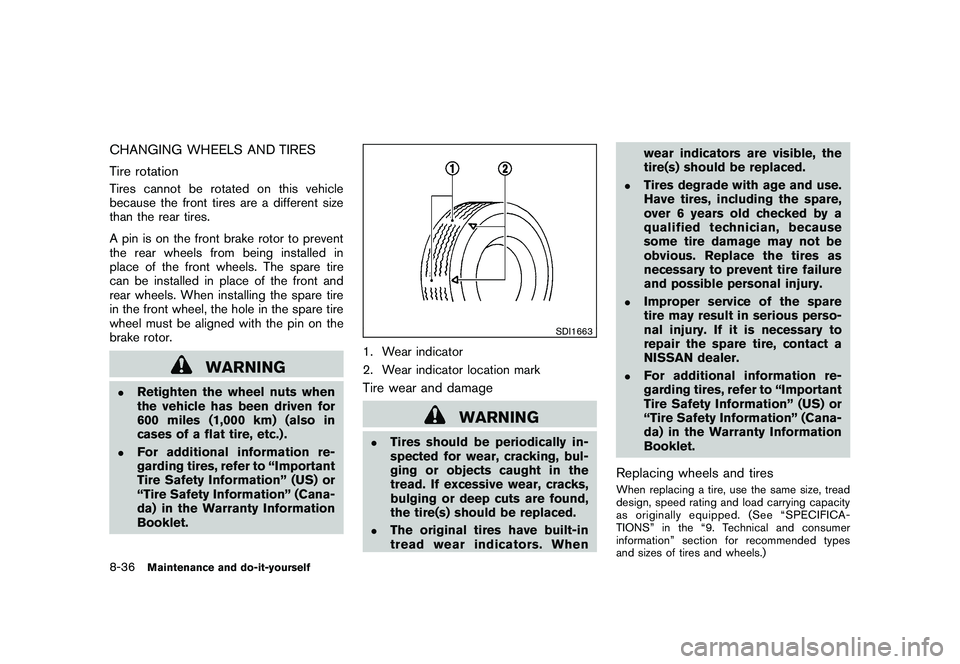
SDI1663
1. Wear indicator
2. Wear indicator location markTire wear and damage
WARNING
.
Tires should be periodically in-
spected for wear, cracking, bul-
ging or objects caught in the
tread. If excessive wear, cracks,
bulging or deep cuts are found,
the tire(s) should be replaced.
.
The original tires have built-in
tread wear indicators. Whenwear indicators are visible, the
tire(s) should be replaced.
.
Tires degrade with age and use.
Have tires, including the spare,
over 6 years old checked by a
qualified technician, because
some tire damage may not be
obvious. Replace the tires as
necessary to prevent tire failure
and possible personal injury.
.
Improper service of the spare
tire may result in serious perso-
nal injury. If it is necessary to
repair the spare tire, contact a
NISSAN dealer.
.
For additional information re-
garding tires, refer to “Important
Tire Safety Information” (US) or
“Tire Safety Information” (Cana-
da) in the Warranty Information
Booklet.
Replacing wheels and tiresWhen replacing a tire, use the same size, tread
design, speed rating and load carrying capacity
as originally equipped. (See “SPECIFICA-
TIONS” in the “9. Technical and consumer
information” section for recommended types
and sizes of tires and wheels.)
8-36
Maintenance and do-it-yourself
Page 382 of 419
Black plate (382,1)
Model "Z34-D" EDITED: 2010/ 7/ 27
the first opportunity to avoid possi-
ble tire or differential damage.
. Drive carefully while the TEMPOR-
ARY USE ONLY spare tire is in-
stalled. Avoid sharp turns and
abrupt braking while driving.
. Periodically check spare tire infla-
tion pressure. Always keep the
pressure of the TEMPORARY USE
ONLY spare tire at 60 psi (420 kPa,
4.2 bar) . Always keep the pressure
of the full size spare tire (if so
equipped) at the recommended
pressure for standard tires, as in-
dicated on the Tire and Loading
Information label. For Tire and
Loading Information label location,
see “Tire and Loading Information
label” in the index of this manual.
. With the TEMPORARY USE ONLY
spare tire installed do not drive your
vehicle at speeds faster than 50
MPH (80 km/h) .
. When driving on roads covered with
snow or ice, the TEMPORARY USE
ONLY spare tire should be used on
the front wheels and original tire
used on the rear wheels (drive wheels) . Use tire chains only on the
two rear original tires.
. Tire tread of the TEMPORARY USE
ONLY spare tire will wear at a faster
rate than the standard tire. Replace
the spare tire as soon as the tread
wear indicators appear.
. Do not use the spare tire on other
vehicles.
. Do not use more than one spare tire
at the same time.
CAUTION
.Do not use tire chains on a TEM-
PORARY USE ONLY spare tire. Tire
chains will not fit properly and may
cause damage to the vehicle.
. Because the TEMPORARY USE
ONLY spare tire is smaller than the
original tire, ground clearance is
reduced. To avoid damage to the
vehicle, do not drive over obstacles.
Also do not drive the vehicle
through an automatic car wash
since it may get caught.
EMERGENCY TIRE PUNCTURE RE-
PAIR KIT (if so equipped)The emergency tire puncture repair kit (Emer-
gency Tire Sealant) is supplied with the vehicle
instead of a spare tire. It can be used to
temporarily repair minor tire punctures.
If possible, have the vehicle towed to a facility
that can repair or replace the flat tire. Using the
emergency tire puncture repair kit may cause a
malfunction of the tire pressure sensor and
cause the low tire pressure warning light to
illuminate.
See “FLAT TIRE” in the “6. In case of
emergency” section for more details.
8-38
Maintenance and do-it-yourself
Page 385 of 419

Black plate (28,1)
9 Technical and consumer information
Model "Z34-D" EDITED: 2010/ 7/ 28
Capacities and recommended fuel/lubricants............ 9-2
Fuel recommendation ...................................... 9-4
Engine oil and oil filter recommendation ............... 9-6
Air conditioning system refrigerant and lubricant
recommendations ........................................... 9-7
Specifications. ................................................... 9-8
Engine ......................................................... 9-8
Wheels and tires ............................................ 9-9
Dimensions ................................................. 9-10
When traveling or registering your vehicle in
another country ................................................ 9-11
Vehicle identification ......................................... 9-11
Vehicle Identification Number (VIN) plate ........... 9-11
Vehicle identification number (chassis number) .... 9-11
Engine serial number .................................... 9-12
F.M.V.S.S./C.M.V.S.S. certification label ............. 9-12
Emission control information label .................... 9-12
Tire and loading information label ..................... 9-13
Air conditioner specification label ..................... 9-13
Installing front license plate ................................ 9-14
Except for NISMO models .............................. 9-14
For NISMO models ...................................... 9-16 Removing air deflectors
(except for NISMO models)
................................ 9-17
Vehicle loading information ................................. 9-18
Terms ........................................................ 9-18
Vehicle load capacity .................................... 9-19
Loading tips ................................................ 9-20
Measurement of weights ................................ 9-20
Towing a trailer ................................................ 9-20
Flat towing ..................................................... 9-21
Automatic transmission .................................. 9-21
Manual Transmission ..................................... 9-21
Uniform tire quality grading ................................. 9-21
Treadwear .................................................. 9-21
Traction AA, A, B and C ................................ 9-21
Temperature A, B and C ................................ 9-22
Emission control system warranty ......................... 9-22
Reporting safety defects .................................... 9-23
Readiness for Inspection/Maintenance (I/M) test . . .... 9-24
Event Data Recorders (EDR) .............................. 9-24
Owner’s Manual/Service Manual order information . . . 9-25
In the event of a collision ............................... 9-25
Page 403 of 419
Black plate (403,1)
Model "Z34-D" EDITED: 2010/ 7/ 27
STI0365
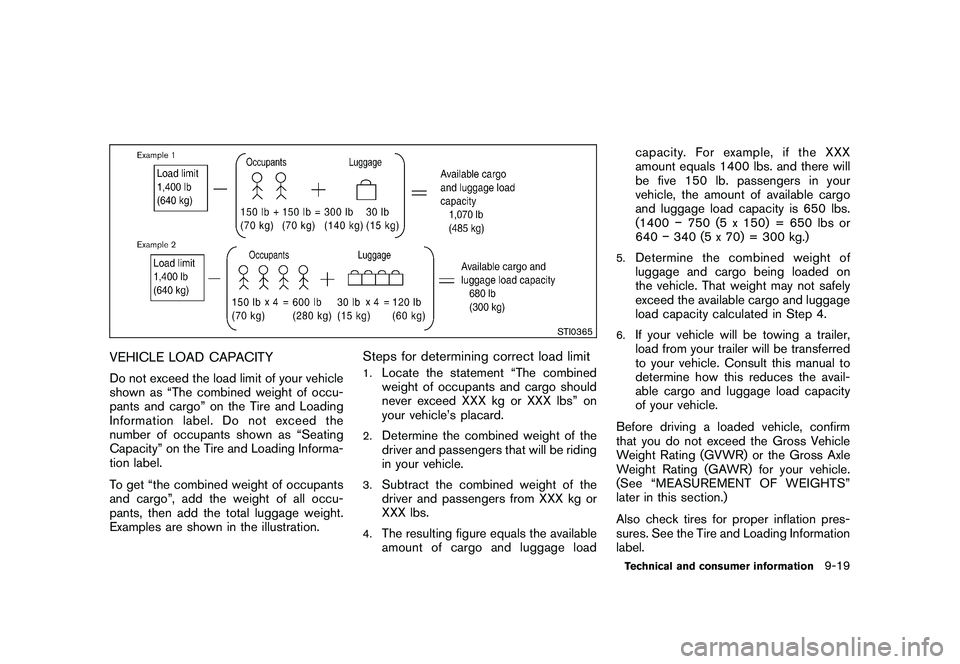
VEHICLE LOAD CAPACITYDo not exceed the load limit of your vehicle
shown as “The combined weight of occu-
pants and cargo” on the Tire and Loading
Information label. Do not exceed the
number of occupants shown as “Seating
Capacity” on the Tire and Loading Informa-
tion label.
To get “the combined weight of occupants
and cargo”, add the weight of all occu-
pants, then add the total luggage weight.
Examples are shown in the illustration.
Steps for determining correct load limit1.
Locate the statement “The combined
weight of occupants and cargo should
never exceed XXX kg or XXX lbs” on
your vehicle’s placard.
2.
Determine the combined weight of the
driver and passengers that will be riding
in your vehicle.
3.
Subtract the combined weight of the
driver and passengers from XXX kg or
XXX lbs.
4.
The resulting figure equals the available
amount of cargo and luggage loadcapacity. For example, if the XXX
amount equals 1400 lbs. and there will
be five 150 lb. passengers in your
vehicle, the amount of available cargo
and luggage load capacity is 650 lbs.
(1400
�750 (5 x 150) = 650 lbs or
640 �340 (5 x 70) = 300 kg.)
5.
Determine the combined weight of
luggage and cargo being loaded on
the vehicle. That weight may not safely
exceed the available cargo and luggage
load capacity calculated in Step 4.
6.
If your vehicle will be towing a trailer,
load from your trailer will be transferred
to your vehicle. Consult this manual to
determine how this reduces the avail-
able cargo and luggage load capacity
of your vehicle.
Before driving a loaded vehicle, confirm
that you do not exceed the Gross Vehicle
Weight Rating (GVWR) or the Gross Axle
Weight Rating (GAWR) for your vehicle.
(See “MEASUREMENT OF WEIGHTS”
later in this section.)
Also check tires for proper inflation pres-
sures. See the Tire and Loading Information
label.Technical and consumer information
9-19
Page 405 of 419
Black plate (405,1)
Model "Z34-D" EDITED: 2010/ 7/ 27
Towing your vehicle with all four wheels on the
ground is sometimes called flat towing. This
method is sometimes used when towing a
vehicle behind a recreational vehicle, such as a
motor home.
CAUTION
.Failure to follow these guidelines
can result in severe transmission
damage.
. Whenever flat towing your vehicle,
always tow forward, never back-
ward.
. DO NOT tow any automatic trans-
mission vehicle with all four wheels
on the ground (flat towing) . Doing
so WILL DAMAGE internal transmis-
sion parts due to lack of transmis-
sion lubrication.
. For emergency towing procedures
refer to “TOWING RECOMMENDED
BY NISSAN (except for NISMO
models)” in the “6. In case of
emergency” section of this manual.
AUTOMATIC TRANSMISSIONTo tow a vehicle equipped with an automatic
transmission, an appropriate vehicle dolly MUST
be placed under the towed vehicle’s drive
wheels. Always follow the dolly manufacturer’s
recommendations when using their product.MANUAL TRANSMISSION. Always tow with the manual transmission in
Neutral.
. Your vehicle speed should never exceed 70
MPH (112 km/h) when flat towing your
vehicle.
. After towing 500 miles, start and idle the
engine with the transmission in Neutral for
two minutes. Failure to idle the engine after
every 500 miles of towing may cause
damage to the transmission’s internal parts. DOT (Department Of Transportation) Quality
Grades: All passenger car tires must conform to
federal safety requirements in addition to these
grades.
Quality grades can be found where applicable
on the tire sidewall between tread shoulder and
maximum section width. For example:
Treadwear 200 Traction AA Temperature A
TREADWEARThe treadwear grade is a comparative rating
based on the wear rate of the tire when tested
under controlled conditions on a specified
government test course. For example, a tire
graded 150 would wear one and one-half (1
1/2) times as well on the government course as
a tire graded 100. The relative performance of
tires depends upon actual conditions of their
use, however, and may depart significantly from
the norm due to variations in driving habits,
service practices and differences in road char-
acteristics and climate.TRACTION AA, A, B AND CThe traction grades, from highest to lowest, are
AA, A, B and C. Those grades represent the
tire’s ability to stop on wet pavement as
measured under controlled conditions on spe-
cified government test surfaces of asphalt and
concrete. A tire marked C may have poor
traction performance.
FLAT TOWING
UNIFORM TIRE QUALITY GRADING
Technical and consumer information
9-21