2011 MITSUBISHI TRITON ignition
[x] Cancel search: ignitionPage 237 of 369

1. Press the SPEECH button.
2. Say “Setup”.
3. Say “Confirmation prompts”.
4. The voice
guide will say “Confirmation
prompts are
confirmation prompts
Answer “Yes” to change the setting or an-
swer “No” to keep the current setting.
5. The voice guide will say “Confirmation prompts are
will return to the main menu.
Security function E00760500131
It is possible to use a password as a security func-
tion by setting a password
of your choice for the
Bluetooth ®
2.0 interface.
When the security function is turned on, it is neces-
sary to make a voice input of a 4-digit password in
order to use all functions of the Bluetooth ®
2.0 in-
terface, except for reception.
Setting the password
Use the following procedure to turn on the security
function by setting a password. 1. Press the SPEECH button.
2. Say “Setup”.
3. Say “Password.”
4. The voice guide will say “Password is disa-bled. Would you like to enable it?” Answer
“Yes.”
Answer “No” to cancel the setting of the pass-
word and return to the main menu.
5. The voice guide will say “Please say a 4-dig- it password. Remember this password. It will
be required to use this system”.
Say a 4-digit number which you want to set
as a password. 6. For confirmation purposes, the voice guide
will say “Password <4-digit
password>. Is
this correct?” Answer “Yes.”
Answer “No” to return to the password input
in Step 5.
7. When the registration of the password is com- pleted, the voice guide will say “Password is
enabled” and the system will return to the
main menu.
NOTE l Password will be required to access the sys-
tem after the next ignition cycle.
l It is required for a little time after engine
stop that the entered password is actually re-
corded in the system.
If the ignition switch is made to “ACC” or
“ON” or the engine is started immediately af-
ter engine stop, there is a case when the en-
tered password is not recorded in the system.
At this time, please try to enter the password
again.
Entering the password
If a password has been set and the security function
is enabled, the voice guide will say “Hands-free sys-
tem is locked. State the password to continue”
when the SPEECH button is pressed to enter voice
recognition mode. Say the 4-digit password num-
ber to enter the password.
If the entered password is wrong, the voice guide
will say “<4- digit password>, Incorrect password.
Please try again”. Enter the correct password.
NOTE l You can re-enter the password as many times
as you want. l
If
you have forgotten your password, say
“Cancel” to quit the voice input mode and
then check with a MITSUBISHI MOTORS
Authorized Service Point.
Disabling the password
Use the following procedure to turn off the security
function by disabling the password.
NOTE l System must be unlocked to disable the pass-
word.
1. Press the SPEECH button.
2. Say “Setup”.
3. Say “Password.”
4. The voice guide will say “Password is ena- bled. Would you like to disable it?”
Answer “Yes.” Answer “No” to cancel the
disabling of the password and return to the
main menu.
5. When the disabling of the password is com- pleted, the voice guide will say “Password is
disabled” and the system will return to the
main menu.
Speaker enrollment function E00727400209
The Bluetooth ®
2.0 interface can use
the speaker en-
rollment function to create a voice model for one
person per language.
This makes it easier for the Bluetooth ®
2.0 inter-
face to recognise voice commands said by you.
You can turn a voice model registered with the
speaker enrollment function on and off whenever
you want. For pleasant driving
5-54
5
OCRE12E1
Presented by http://mmc-manuals.ru/ \251
Page 250 of 369

USB input terminal*
E00761900015
You can connect your USB
memory device or
iPod* to play music files stored in the USB memo-
ry device or iPod.
The following explains how to connect and remove
a USB memory device or iPod.
Refer to the following sections for details on how
to play music files:
Refer to “To play tracks from USB device” on
page 5-27.
*: “iPod” is a registered trademark of Apple Inc. in
the United States and other countries.
How to connect a USB memory device E00762000202
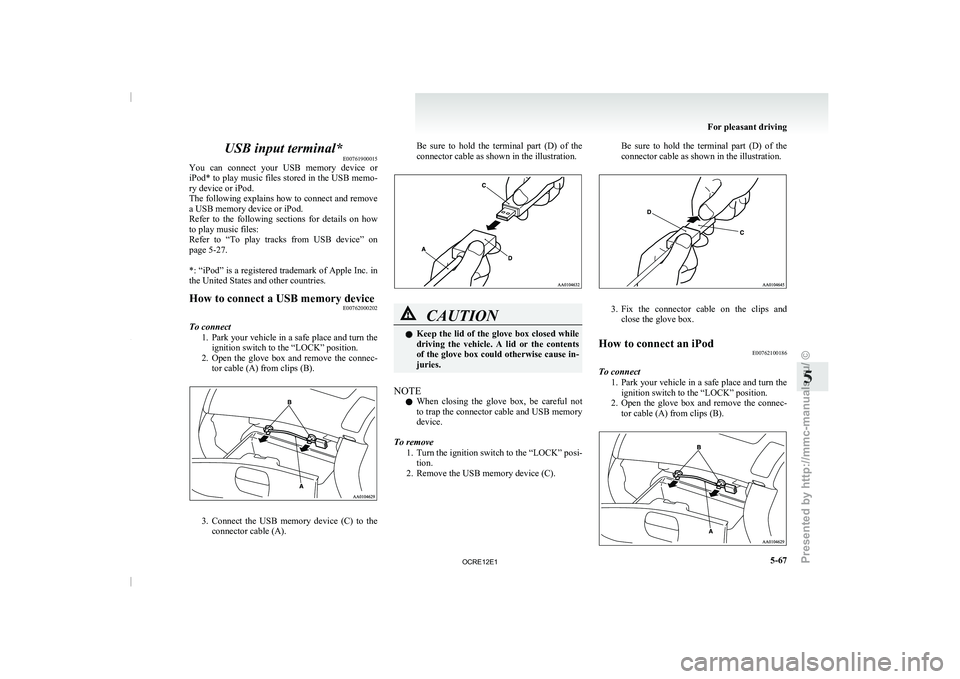
To connect 1. Park your vehicle in a
safe place and turn the
ignition switch to the “LOCK” position.
2. Open the glove box and remove the connec- tor cable (A) from clips (B). 3. Connect the USB memory device (C) to the
connector cable (A). Be sure to
hold
the terminal part (D) of the
connector cable as shown in the illustration. CAUTION
l
Keep the lid of
the
glove box closed while
driving the vehicle. A lid or the contents
of the glove box could otherwise cause in-
juries.
NOTE l When
closing the glove box,
be careful not
to trap the connector cable and USB memory
device.
To remove 1. Turn the ignition switch to the “LOCK” posi-tion.
2. Remove the USB memory device (C). Be sure to hold the terminal part (D) of the
connector cable as shown in the illustration.
3. Fix the connector cable on the clips and
close the glove box.
How to connect an iPod E00762100186
To connect 1. Park your vehicle in
a
safe place and turn the
ignition switch to the “LOCK” position.
2. Open the glove box and remove the connec- tor cable (A) from clips (B). For pleasant driving
5-67 5
OCRE12E1
Presented by http://mmc-manuals.ru/ \251
Page 251 of 369

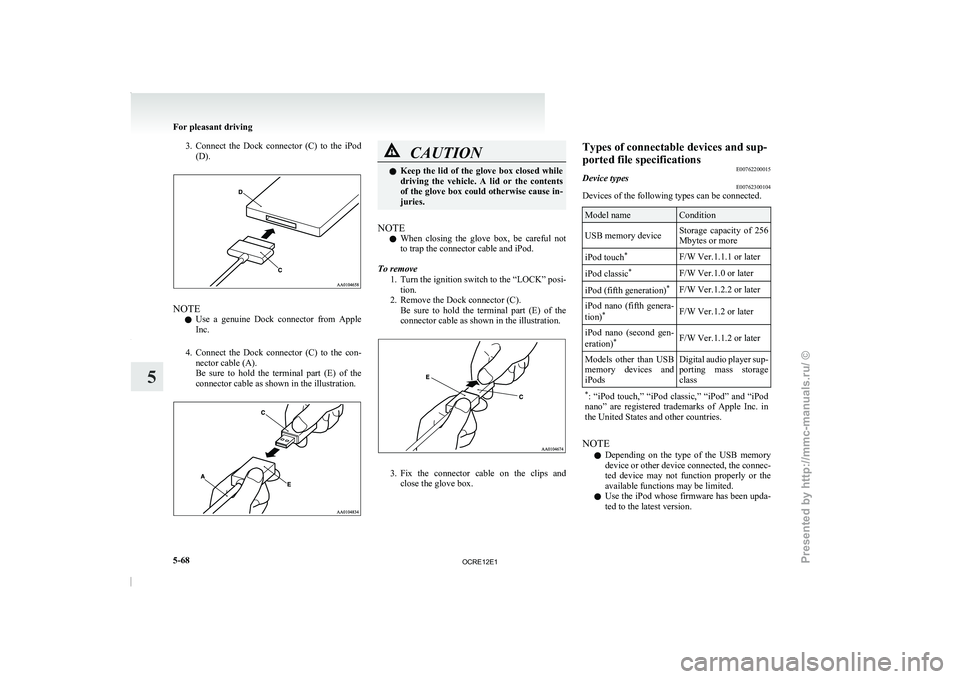
3. Connect the Dock connector (C) to the iPod
(D). NOTE
l Use
a genuine Dock connector
from Apple
Inc.
4. Connect the Dock connector (C) to the con- nector cable (A).
Be sure to hold the terminal part (E) of the
connector cable as shown in the illustration. CAUTION
l
Keep the lid of the
glove box closed while
driving the vehicle. A lid or the contents
of the glove box could otherwise cause in-
juries.
NOTE l When
closing the glove box,
be careful not
to trap the connector cable and iPod.
To remove 1. Turn the ignition switch to the “LOCK” posi-tion.
2. Remove the Dock connector (C). Be sure to hold the terminal part (E) of the
connector cable as shown in the illustration. 3. Fix the connector cable on the clips and
close the glove box. Types of connectable devices and sup-
ported file specifications
E00762200015
Device types E00762300104
Devices of the following types can be connected. Model name Condition
USB memory device Storage capacity of 256
Mbytes or more
iPod touch *
F/W Ver.1.1.1 or later
iPod classic *
F/W Ver.1.0 or later
iPod (fifth generation) *
F/W Ver.1.2.2 or later
iPod nano (fifth genera-
tion) *
F/W Ver.1.2 or later
iPod nano (second gen-
eration) *
F/W Ver.1.1.2 or later
Models other than USB
memory devices and
iPods Digital audio
player
sup-
porting mass storage
class
* : “iPod touch,” “iPod classic,”
“iPod” and “iPod
nano” are registered trademarks of Apple Inc. in
the United States and other countries. NOTE
l Depending
on the
type of
the USB memory
device or other device connected, the connec-
ted device may not function properly or the
available functions may be limited.
l Use the iPod whose firmware has been upda-
ted to the latest version. For pleasant driving
5-68
5
OCRE12E1
Presented by http://mmc-manuals.ru/ \251
Page 252 of 369

l
You can charge your iPod by connecting it to
the USB input terminal
when
the ignition
switch is in the “ACC” or “ON” position.
l Do not keep your USB memory device or
iPod in your vehicle.
l It is recommended that you back up files in
case of data damage.
l Do not connect to the USB input terminal
any device (hard disk, card reader, memory
reader, etc.) other than the connectable devi-
ces specified in the previous section. The de-
vice and/or data may be damaged. If any of
these devices was connected by mistake, re-
move it after turning the ignition switch to
the “LOCK” position.
File specifications E00762400017
You can play music files of the following specifica-
tions that are saved in
a USB memory device or oth-
er device supporting mass storage class. Item Condition
File format MP3, WMA, AAC,
WAV
Maximum number of
levels (including the
root) Level 8
Number of folders 700
Number of files 65,535 Sun visors
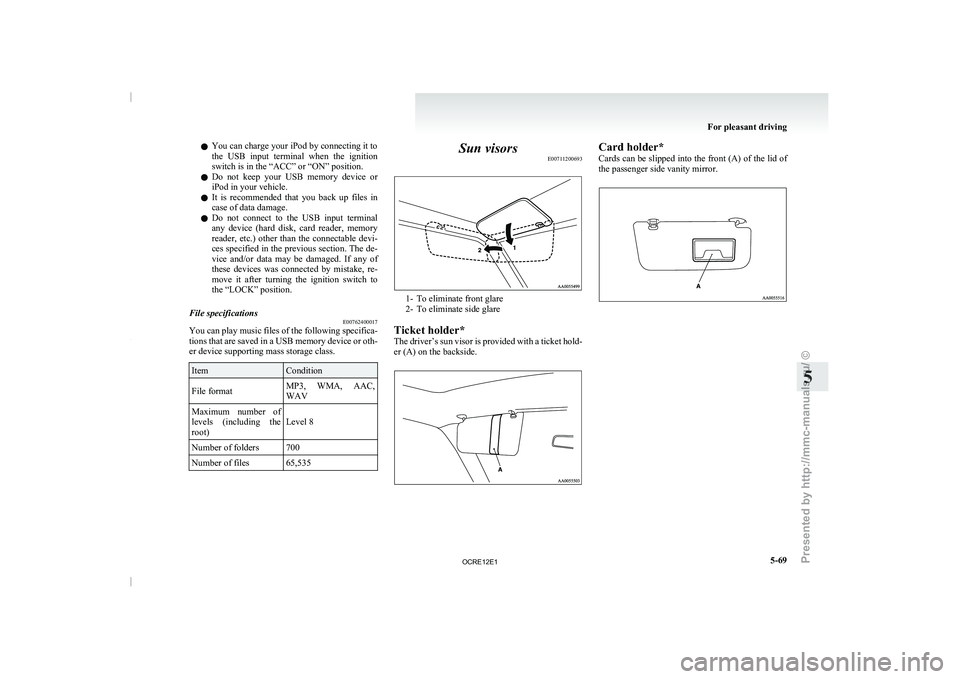
E00711200693 1- To eliminate front glare
2- To eliminate side glare
Ticket holder*
The driver’s sun visor
is provided with a ticket hold-
er (A) on the backside. Card holder*
Cards can be slipped
into
the front (A) of the lid of
the passenger side vanity mirror. For pleasant driving
5-69 5
OCRE12E1
Presented by http://mmc-manuals.ru/ \251
Page 254 of 369

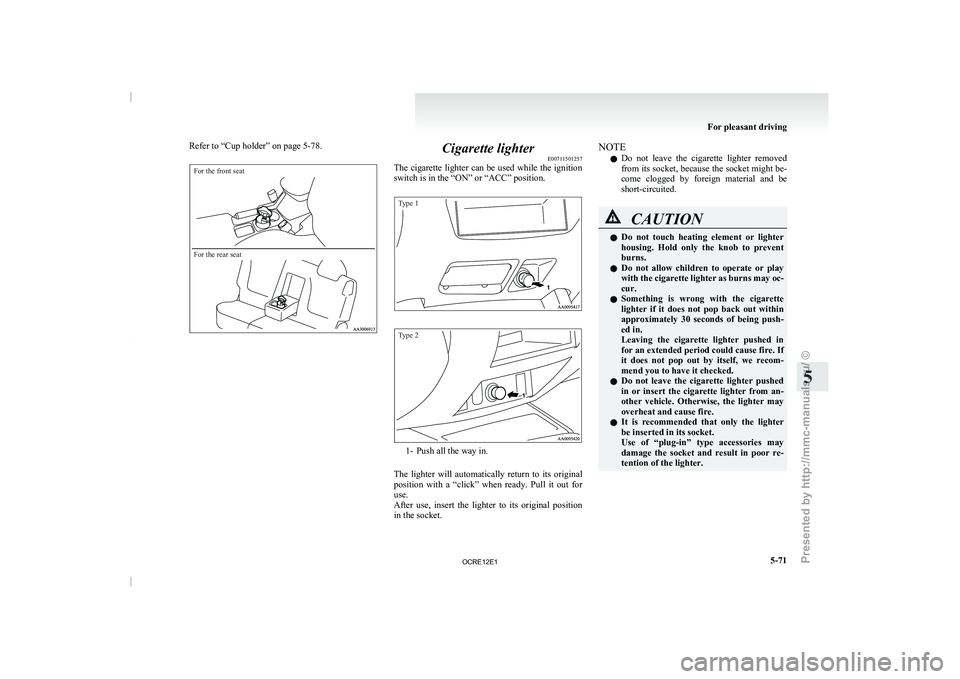
Refer to “Cup holder” on page 5-78.For the front seat
For the rear seat
Cigarette lighter
E00711501257
The cigarette lighter can be
used while the ignition
switch is in the “ON” or “ACC” position.
Type 1
Type 2 1- Push all the way in.
The lighter will automatically return
to its original
position with a “click” when ready. Pull it out for
use.
After use, insert the lighter to its original position
in the socket. NOTE
l Do
not leave
the cigarette
lighter removed
from its socket, because the socket might be-
come clogged by foreign material and be
short-circuited. CAUTION
l
Do not touch heating
element
or lighter
housing. Hold only the knob to prevent
burns.
l Do not allow children to operate or play
with the cigarette lighter as burns may oc-
cur.
l Something is wrong with the cigarette
lighter if it does not pop back out within
approximately 30 seconds of being push-
ed in.
Leaving the cigarette lighter pushed in
for an extended period could cause fire. If
it does not pop out by itself, we recom-
mend you to have it checked.
l Do not leave the cigarette lighter pushed
in or insert the cigarette lighter from an-
other vehicle. Otherwise, the lighter may
overheat and cause fire.
l It is recommended that only the lighter
be inserted in its socket.
Use of “plug-in” type accessories may
damage the socket and result in poor re-
tention of the lighter. For pleasant driving
5-71 5
OCRE12E1
Presented by http://mmc-manuals.ru/ \251
Page 257 of 369
![MITSUBISHI TRITON 2011 Owners Manual Rear (Type 2)*1
(ON/
) - The lamp illuminates.
2
( ) -
[Vehicles without central door locks
system]
The room lamp goes
on when a door
is opened. When all doors are
closed, the room lamp is i MITSUBISHI TRITON 2011 Owners Manual Rear (Type 2)*1
(ON/
) - The lamp illuminates.
2
( ) -
[Vehicles without central door locks
system]
The room lamp goes
on when a door
is opened. When all doors are
closed, the room lamp is i](/manual-img/19/58153/w960_58153-256.png)
Rear (Type 2)*1
(ON/
) - The lamp illuminates.
2
( ) -
[Vehicles without central door locks
system]
The room lamp goes
on when a door
is opened. When all doors are
closed, the room lamp is illuminated
and dimmed gradually for 7 seconds
then goes out.
However, the lamp goes out immedi-
ately without being dimmed when
the ignition switch is turned to the
“ON” position.
[Vehicles with central door locks sys-
tem]
The room lamp goes on when a door
is opened. When all doors are
closed, the room lamp is illuminated
and dimmed gradually for 15 sec-
onds then goes out.
However, the lamp goes out immedi-
ately without being dimmed in case
of the followings:
l All doors are closed and the ig-
nition switch is turned to the
“ON” position.
l All doors are locked using the
key mechanism of the driver’s
door, the lock knob of the driv-
er’s door, or the remote con-
trol switch of the keyless entry
system (if so equipped).
NOTE
l On
vehicles with keyless entry
system,
when the ignition key
is removed with the doors
closed, the lamp is illuminated
and after about 15 seconds it
goes off.
The dimming period is also ad-
justable.
For further information, we
recommend you to consult a
MITSUBISHI MOTORS Au-
thorized Service Point.
3
(OFF/ ) - The lamp goes off.
Personal lamps* E00712500156
Push the switch (A) to turn on the lamp. Push it
again to turn it off. For pleasant driving
5-74
5
OCRE12E1
Presented by http://mmc-manuals.ru/ \251
Page 267 of 369

If the vehicle breaks down
E00800101166
If the vehicle breaks down
on the road, move it to
the shoulder and use the hazard warning flashers and/
or the warning triangle etc.
Refer to “Hazard warning flasher switch” on page
3-34.
If the engine stops/fails
Vehicle operation and control are affected if the en-
gine stops.
Before moving the vehicle to a safe area, be aware
of the following:
l The brake booster becomes inoperative and
the pedal effort will increase. Press down the
brake pedal harder than usual.
l Since the power steering pump is no longer
operative, the steering wheel feels heavy
when turning it. Emergency starting
E00800502112
If the engine cannot be
started because the battery
is weak or dead, the battery from another vehicle
can be used with jumper cables to start the engine. WARNING
l To start the engine
using
jumper cables
connected from another vehicle, perform
the correct procedures according to the in-
struction manual. Incorrect procedures
could result in a fire or explosion or dam-
age to the vehicles.
1. Get the vehicles close enough so the jumper
cables can
reach, but
be sure the vehicles
aren’t touching each other.
If they are, it could cause a ground connec-
tion you don’t want. The vehicle will not
start, and the bad grounding could damage
the electrical systems. CAUTION
l
Check the other vehicle.
It
must have a 12-
volt battery.
If the other system isn’t 12-volt, shorting
can damage both vehicles.
2. You could be injured if the vehicles move.
Set the
parking brake
firmly on each vehicle.
Put an automatic transmission in “P”
(PARK) or a manual transmission in “N”
(Neutral). Turn off the ignition switch. WARNING
l Turn off the ignition on
both vehicles be-
forehand.
Make sure that the cables or your clothes
cannot be caught by the fan or drive belt.
Personal injury could result.
NOTE l Turn
off all lamps, heater
and other electrical
loads. This will avoid sparks and help save
both batteries.
3. Make sure battery electrolyte is at the proper level.
Refer to “Battery” on page 8-10. WARNING
l If electrolyte fluid is
not
visible, or ap-
pears to be frozen, Do Not Attempt Jump
Starting!
A battery might rupture or explode if the
temperature is below the freezing point
or if it is not filled to the proper level.
4. Connect one end of one jumper cable to the
positive (+)
terminal of
the discharged bat-
tery (A), and the other end to the positive (+)
terminal of the booster battery (B).
For emergencies
6-02
6
OCRE12E1
Presented by http://mmc-manuals.ru/ \251
Page 272 of 369

2. Operate the hand pump (B) slowly 6 or 7
times in order to force the water out through
the drain plug (A). 3. Tighten the drain plug (A) when water no lon-
ger comes out.
4. Bleed the air in the fuel system. (Refer to “Bleeding
the fuel system” on page
6-05.)
5. Check to be sure that the fuel filter indication lamp illuminates when the ignition switch is
turned to “ON”, and that it goes off when the
engine is started. If in doubt, we recommend
you to consult a specialist for necessary infor-
mation. CAUTION
l
Do not smoke or
have
any other open
flame near the vehicle while bleeding the
fuel system.
l Be sure to carefully clean away any water
drained out because any fuel mixed with
the water could ignite and cause a fire. Type 3
Take your vehicle to a MITSUBISHI MOTORS Au-
thorized Service Point to
remove the water from
the fuel filter. Tools, jack and jack handle
E00800900819
Storage
The storage location of the
tools, jack and jack han-
dle should be remembered in case of an emergency.
Single cab
Type 1 A- Tool (wheel nut wrench)
B- Jack handle
C- Jack For emergencies
6-07 6
OCRE12E1
Presented by http://mmc-manuals.ru/ \251