Page 660 of 706
Vehicle care and maintenance
7-81
7
4. Push the connector (D) to disconnect and remove the fog
light.5. Remove the bulb assembly (E) by turning it counterclock-
wise.
BK0125300US.book 81 ページ 2010年5月18日 火曜日 午後1時53分
Page 661 of 706
7-82 Vehicle care and maintenance
7
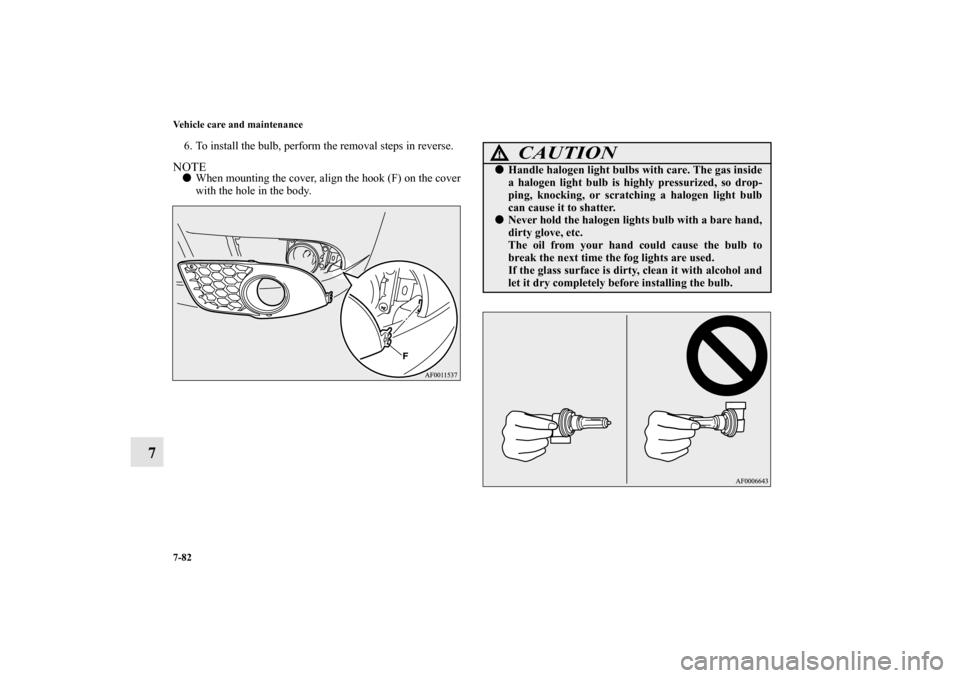
6. To install the bulb, perform the removal steps in reverse.NOTE�When mounting the cover, align the hook (F) on the cover
with the hole in the body.
CAUTION
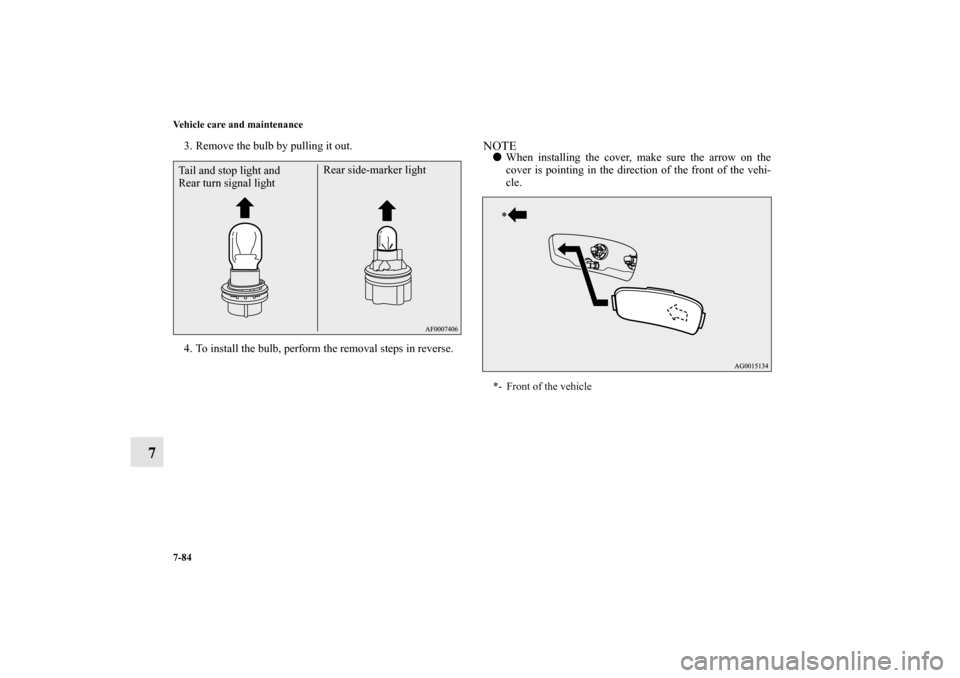
!�Handle halogen light bulbs with care. The gas inside
a halogen light bulb is highly pressurized, so drop-
ping, knocking, or scratching a halogen light bulb
can cause it to shatter.�Never hold the halogen lights bulb with a bare hand,
dirty glove, etc.
The oil from your hand could cause the bulb to
break the next time the fog lights are used.
If the glass surface is dirty, clean it with alcohol and
let it dry completely before installing the bulb.
BK0125300US.book 82 ページ 2010年5月18日 火曜日 午後1時53分
Page 662 of 706
Vehicle care and maintenance
7-83
7
Rear combination lights
N00943700429
Tail and stop lights, rear turn signal lights and rear
side-marker lights1. Insert a screwdriver at the edge of the cover and pry gen-
tly to remove the cover. NOTE�Wrap a cloth around the tip of the screwdriver to keep
from scratching the cover.2. Remove the socket and bulb assemblies by turning them
counterclockwise.
A- Rear side-marker light
B- Rear turn signal light
C- Tail and stop light
BK0125300US.book 83 ページ 2010年5月18日 火曜日 午後1時53分
Page 663 of 706
7-84 Vehicle care and maintenance
7
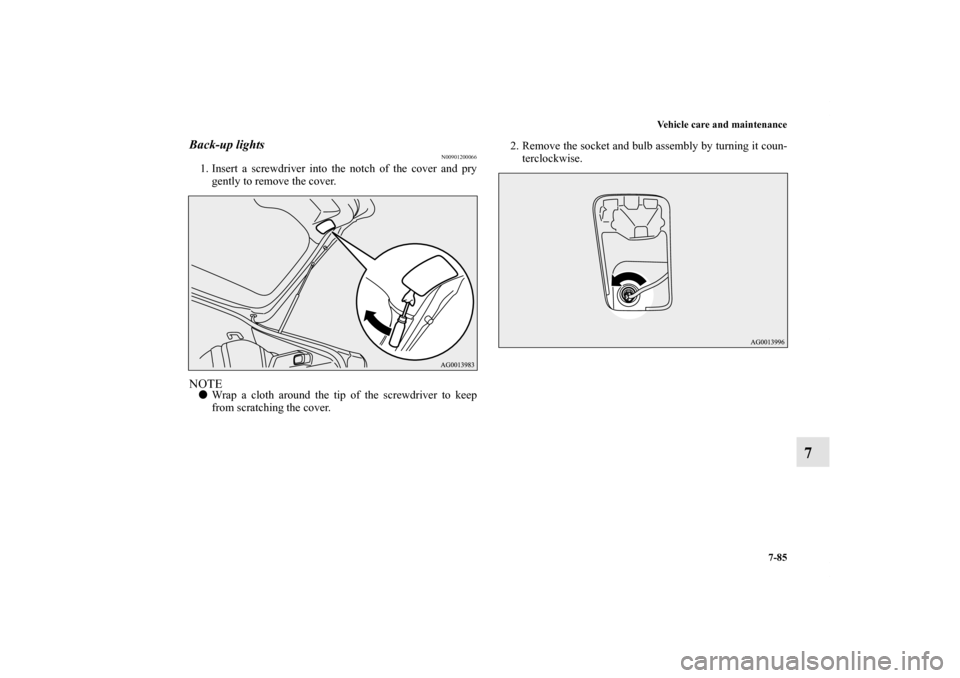
3. Remove the bulb by pulling it out.
4. To install the bulb, perform the removal steps in reverse.
NOTE�When installing the cover, make sure the arrow on the
cover is pointing in the direction of the front of the vehi-
cle.
Tail and stop light and
Rear turn signal lightRear side-marker light
*- Front of the vehicle
BK0125300US.book 84 ページ 2010年5月18日 火曜日 午後1時53分
Page 664 of 706
Vehicle care and maintenance
7-85
7
Back-up lights
N00901200066
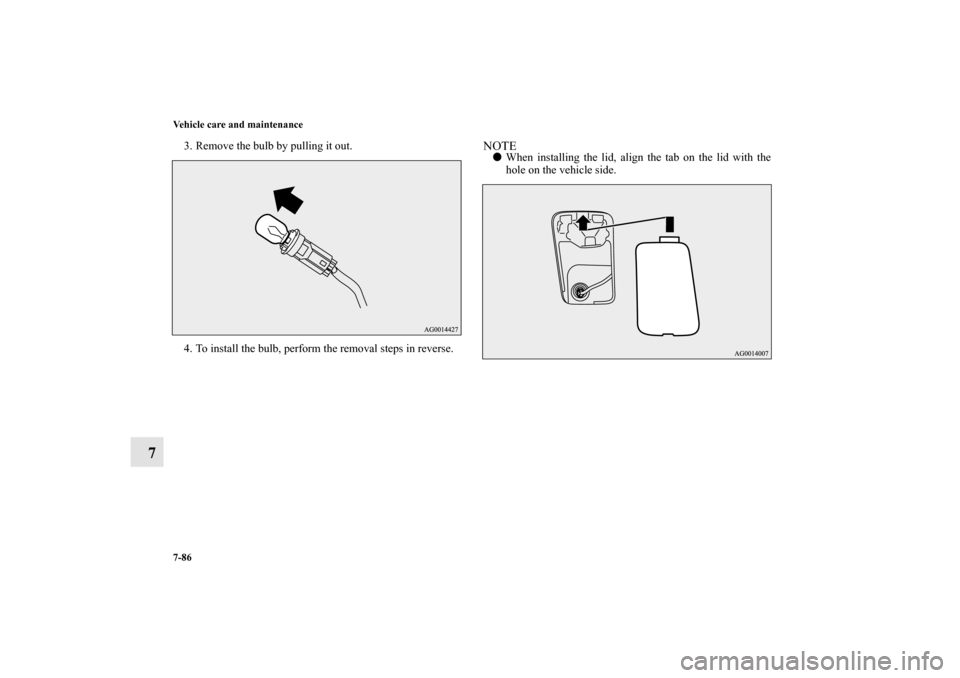
1. Insert a screwdriver into the notch of the cover and pry
gently to remove the cover.NOTE�Wrap a cloth around the tip of the screwdriver to keep
from scratching the cover.2. Remove the socket and bulb assembly by turning it coun-
terclockwise.
BK0125300US.book 85 ページ 2010年5月18日 火曜日 午後1時53分
Page 665 of 706
7-86 Vehicle care and maintenance
7
3. Remove the bulb by pulling it out.
4. To install the bulb, perform the removal steps in reverse.
NOTE�When installing the lid, align the tab on the lid with the
hole on the vehicle side.
BK0125300US.book 86 ページ 2010年5月18日 火曜日 午後1時53分
Page 667 of 706
7-88 Vehicle care and maintenance
7
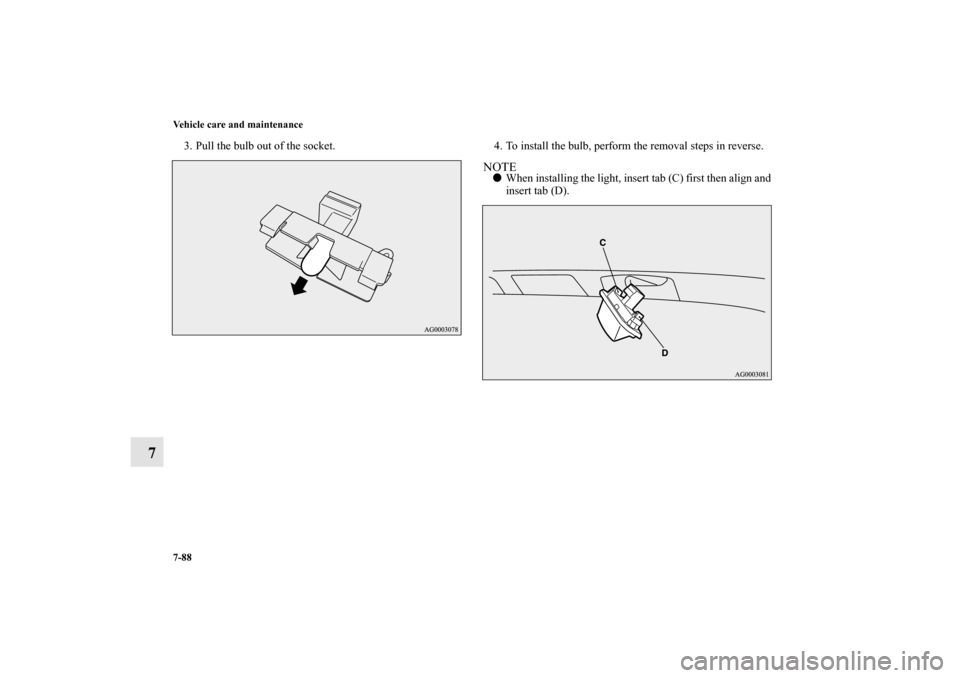
3. Pull the bulb out of the socket. 4. To install the bulb, perform the removal steps in reverse.
NOTE�When installing the light, insert tab (C) first then align and
insert tab (D).
BK0125300US.book 88 ページ 2010年5月18日 火曜日 午後1時53分
Page 668 of 706
Vehicle care and maintenance
7-89
7
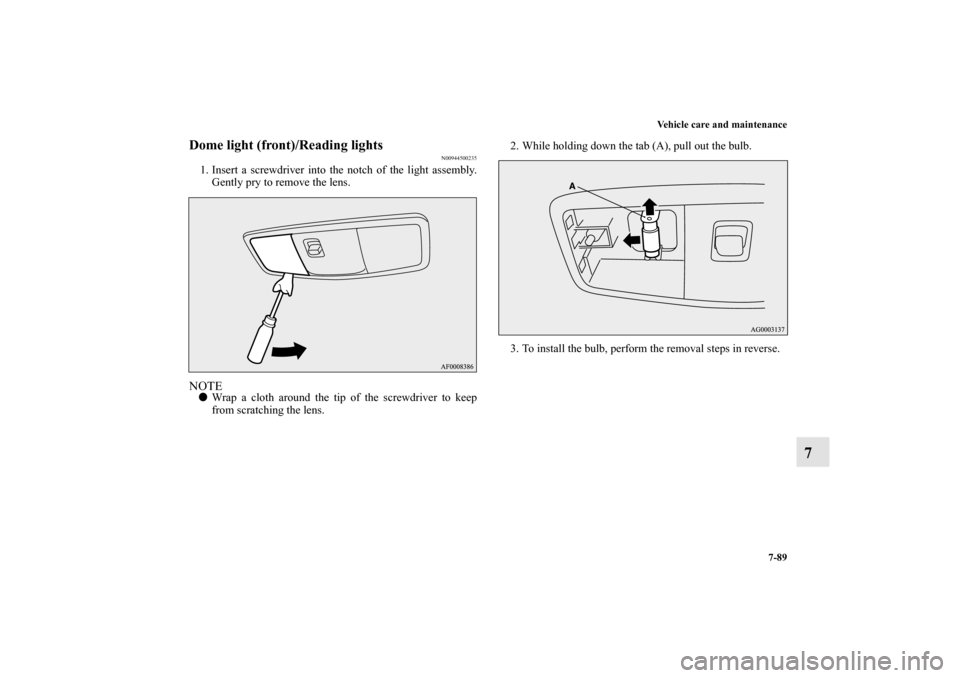
Dome light (front)/Reading lights
N00944500235
1. Insert a screwdriver into the notch of the light assembly.
Gently pry to remove the lens.NOTE�Wrap a cloth around the tip of the screwdriver to keep
from scratching the lens.2. While holding down the tab (A), pull out the bulb.
3. To install the bulb, perform the removal steps in reverse.
BK0125300US.book 89 ページ 2010年5月18日 火曜日 午後1時53分
 to disconnect and remove the fog
light.5. Remove the bulb assembly (E) by turning it counterclock-
wise.
BK0125300US.book 81 ページ �")