Page 253 of 424

5-16 Comfort controls
5
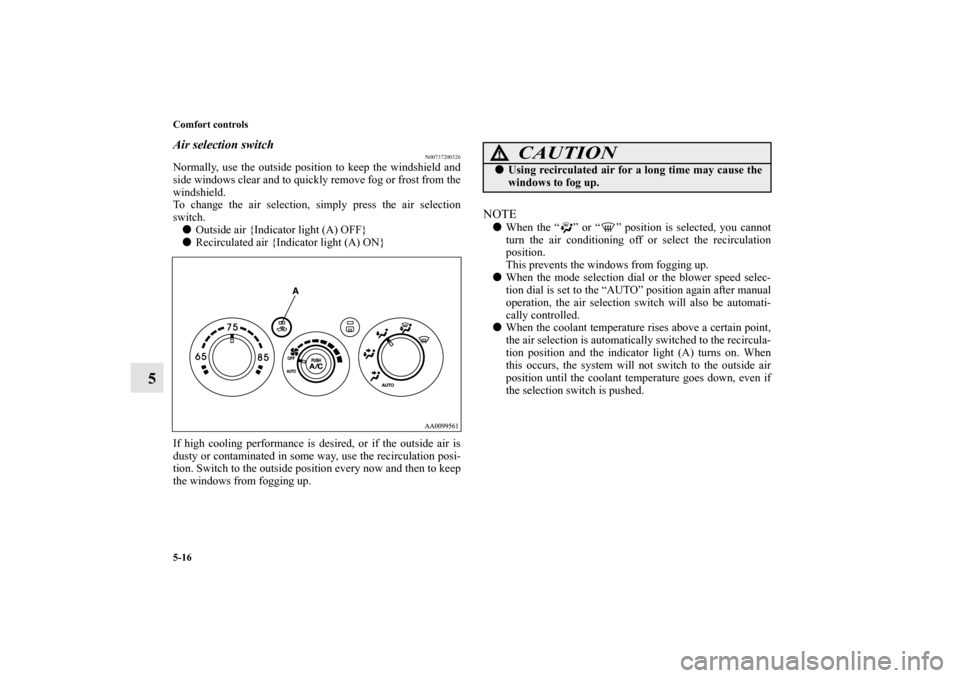
Air selection switch
N00737200326
Normally, use the outside position to keep the windshield and
side windows clear and to quickly remove fog or frost from the
windshield.
To change the air selection, simply press the air selection
switch.
�Outside air {Indicator light (A) OFF}
�Recirculated air {Indicator light (A) ON}
If high cooling performance is desired, or if the outside air is
dusty or contaminated in some way, use the recirculation posi-
tion. Switch to the outside position every now and then to keep
the windows from fogging up.
NOTE�When the “ ” or “ ” position is selected, you cannot
turn the air conditioning off or select the recirculation
position.
This prevents the windows from fogging up.
�When the mode selection dial or the blower speed selec-
tion dial is set to the “AUTO” position again after manual
operation, the air selection switch will also be automati-
cally controlled.
�When the coolant temperature rises above a certain point,
the air selection is automatically switched to the recircula-
tion position and the indicator light (A) turns on. When
this occurs, the system will not switch to the outside air
position until the coolant temperature goes down, even if
the selection switch is pushed.
CAUTION
!�Using recirculated air for a long time may cause the
windows to fog up.
BK0121200US.book 16 ページ 2010年4月14日 水曜日 午前11時24分
Page 257 of 424

5-20 Comfort controls
5
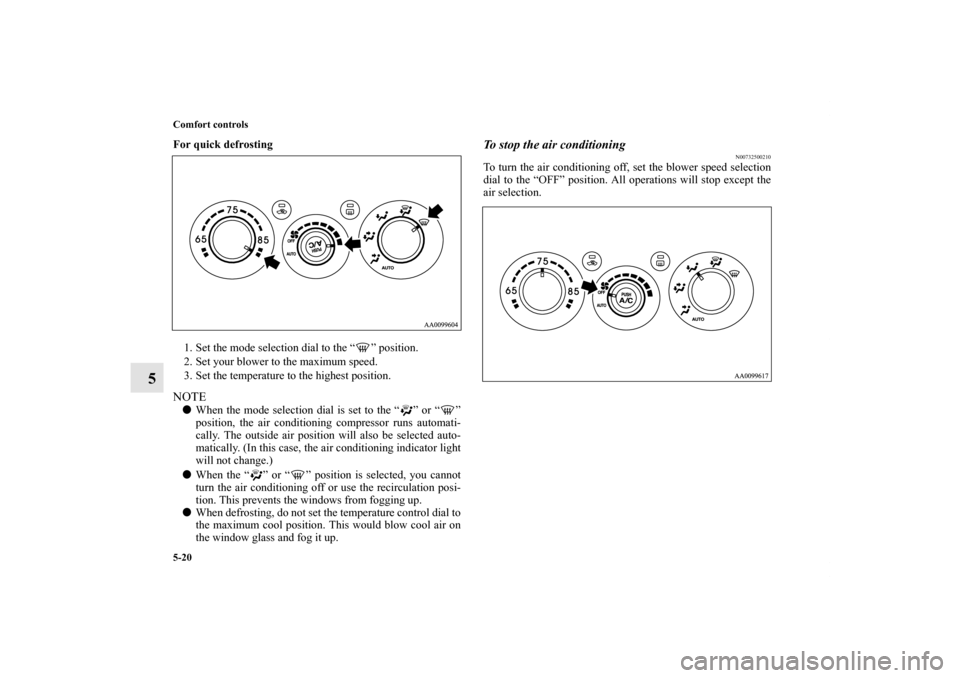
For quick defrosting
1. Set the mode selection dial to the “ ” position.
2. Set your blower to the maximum speed.
3. Set the temperature to the highest position.NOTE�When the mode selection dial is set to the “ ” or “ ”
position, the air conditioning compressor runs automati-
cally. The outside air position will also be selected auto-
matically. (In this case, the air conditioning indicator light
will not change.)
�When the “ ” or “ ” position is selected, you cannot
turn the air conditioning off or use the recirculation posi-
tion. This prevents the windows from fogging up.
�When defrosting, do not set the temperature control dial to
the maximum cool position. This would blow cool air on
the window glass and fog it up.
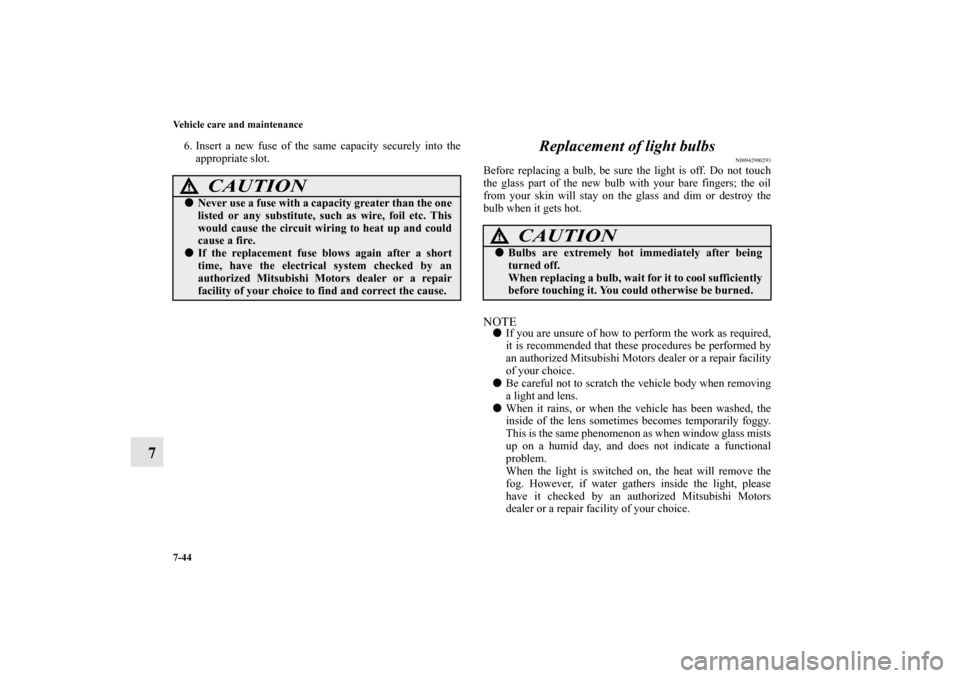
To stop the air conditioning
N00732500210
To turn the air conditioning off, set the blower speed selection
dial to the “OFF” position. All operations will stop except the
air selection.
BK0121200US.book 20 ページ 2010年4月14日 水曜日 午前11時24分
Page 373 of 424
7-38 Vehicle care and maintenance
7
Passenger compartment fuse location tablePassenger compartment fuse location
No.
Symbol
Electrical system
Capacity
1— — —
2— — —
3Radio 30 A
4 Sunroof 20 A
5 Rear window defogger 30 A
6 Heater 30 A
7— — —
8 — — —
9 Power outlet 15 A
10 Power door locks 15 A
11 — — —
12 — — —
13 Engine control 7.5 A
14 Outside rearview mirrors 7.5 A
15 — — —
16 Cigarette lighter 15 A
17 Engine control 7.5 A
18 — — —
19 Door mirror heater 7.5 A
20 Relay 7.5 A
21 — — —
BK0121200US.book 38 ページ 2010年4月14日 水曜日 午前11時24分
Page 375 of 424
7-40 Vehicle care and maintenance
7
*: Fusible link
�Some fuses may not be installed on your vehicle, depend-
ing on the vehicle model or specifications.
�The table above shows the main equipment corresponding
to each fuse.
4 Ignition switch 40 A*
5 Power window control 30 A*
6Front fog lights/
Daytime running lights15 A
7 Heated seat 20 A
8 Horn 15 A
9 Engine control 20 A
10 Air conditioning 10 A
11 Stop lights 15 A
12 Rear fog light 10 A
13 Alternator 7.5 A
14 Hazard warning flasher 10 A
15 Automatic transaxle 20 A
16 Headlight high beam (right) 10 A
17 Headlight high beam (left) 10 A
18 Headlight low beam (right) 10 A
19 Headlight low beam (left) 10 A
20 Tail light (right) 7.5 A
21 Tail light (left) 7.5 A
22 Dome light 10 A No.
Symbol
Electrical system
Capacity
23 Radio 10 A
24
Fuel pump 15 A
25 Windshield wiper 30 A No.
Symbol
Electrical system
Capacity
BK0121200US.book 40 ページ 2010年4月14日 水曜日 午前11時24分
Page 379 of 424

7-44 Vehicle care and maintenance
7
6. Insert a new fuse of the same capacity securely into the
appropriate slot.
Replacement of light bulbs
N00942900293
Before replacing a bulb, be sure the light is off. Do not touch
the glass part of the new bulb with your bare fingers; the oil
from your skin will stay on the glass and dim or destroy the
bulb when it gets hot.NOTE�If you are unsure of how to perform the work as required,
it is recommended that these procedures be performed by
an authorized Mitsubishi Motors dealer or a repair facility
of your choice.
�Be careful not to scratch the vehicle body when removing
a light and lens.
�When it rains, or when the vehicle has been washed, the
inside of the lens sometimes becomes temporarily foggy.
This is the same phenomenon as when window glass mists
up on a humid day, and does not indicate a functional
problem.
When the light is switched on, the heat will remove the
fog. However, if water gathers inside the light, please
have it checked by an authorized Mitsubishi Motors
dealer or a repair facility of your choice.
CAUTION
!�Never use a fuse with a capacity greater than the one
listed or any substitute, such as wire, foil etc. This
would cause the circuit wiring to heat up and could
cause a fire. �If the replacement fuse blows again after a short
time, have the electrical system checked by an
authorized Mitsubishi Motors dealer or a repair
facility of your choice to find and correct the cause.
CAUTION
!�Bulbs are extremely hot immediately after being
turned off.
When replacing a bulb, wait for it to cool sufficiently
before touching it. You could otherwise be burned.
BK0121200US.book 44 ページ 2010年4月14日 水曜日 午前11時24分
Page 380 of 424
Vehicle care and maintenance
7-45
7
Bulb capacity
N00943000044
The bulb should only be replaced with a new bulb with the
same rating and type. The type and rating are listed on the base
of the bulb.
Outside
N00950300746
Description
Wattage or
Candle power
ANSI Trade No.
or Bulb type
1 - Headlight —9007
HB5
2 - Front side-marker light 5 W WY5W
3 - Front fog light
(if so equipped)45 W H10
4 - Front turn-signal and
parking light32/3 cp 1157NA Front
BK0121200US.book 45 ページ 2010年4月14日 水曜日 午前11時24分
Page 386 of 424
Vehicle care and maintenance
7-51
7
Front fog lights
(if so equipped)
N00943600691
1. Remove the clips (A) and screws (B), then remove the
cover (C).2. Remove the socket and bulb assembly (D) by turning it
counterclockwise.
BK0121200US.book 51 ページ 2010年4月14日 水曜日 午前11時24分
Page 387 of 424
7-52 Vehicle care and maintenance
7
3. Pull part (E) in the direction of the arrow (F) to undo the
lock, thereby freeing the fog light bulb from the connec-
tor.
4. To install the bulb, perform the removal steps in reverse.
CAUTION
!�Handle halogen light bulb with care. The gas inside
a halogen light bulb is highly pressurized, so drop-
ping, knocking, or scratching a halogen light bulb
can cause it to shatter.�Never hold the halogen lights bulb with a bare hand,
dirty glove, etc. The oil from your hand could cause
the bulb to break the next time the fog lights are
used.
If the glass surface is dirty, clean it with alcohol and
let it dry completely before installing the bulb.
BK0121200US.book 52 ページ 2010年4月14日 水曜日 午前11時24分