Page 343 of 514
5-24 Comfort controls
5
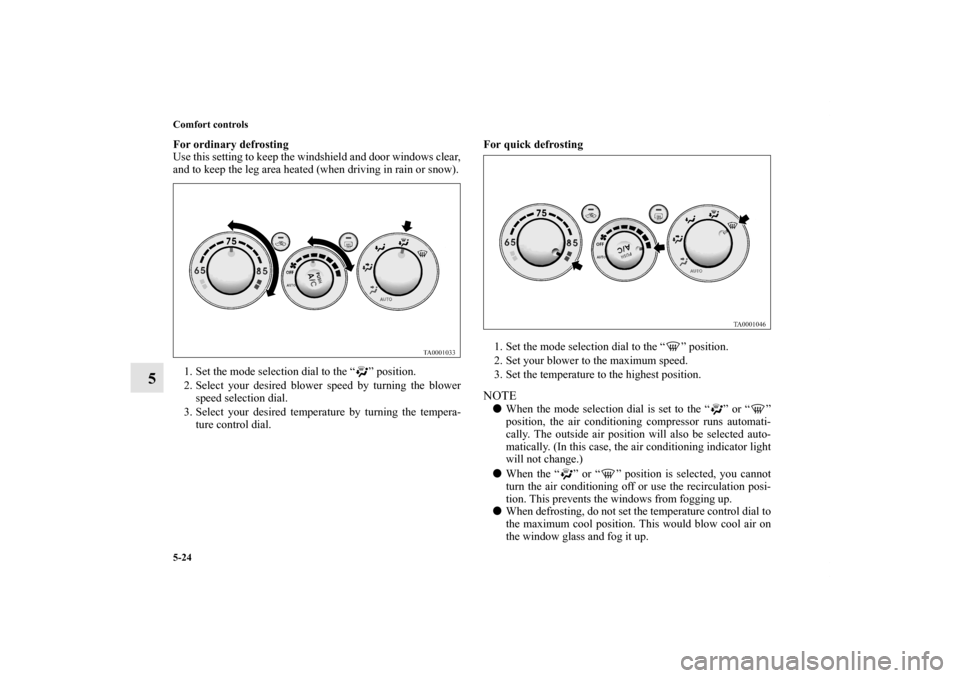
For ordinary defrosting
Use this setting to keep the windshield and door windows clear,
and to keep the leg area heated (when driving in rain or snow).
1. Set the mode selection dial to the “ ” position.
2. Select your desired blower speed by turning the blower
speed selection dial.
3. Select your desired temperature by turning the tempera-
ture control dial.For quick defrosting
1. Set the mode selection dial to the “ ” position.
2. Set your blower to the maximum speed.
3. Set the temperature to the highest position.
NOTE�When the mode selection dial is set to the “ ” or “ ”
position, the air conditioning compressor runs automati-
cally. The outside air position will also be selected auto-
matically. (In this case, the air conditioning indicator light
will not change.)
�When the “ ” or “ ” position is selected, you cannot
turn the air conditioning off or use the recirculation posi-
tion. This prevents the windows from fogging up.
�When defrosting, do not set the temperature control dial to
the maximum cool position. This would blow cool air on
the window glass and fog it up.
BK0121600US.book 24 ページ 2010年4月12日 月曜日 午前10時39分
Page 345 of 514
5-26 Comfort controls
5
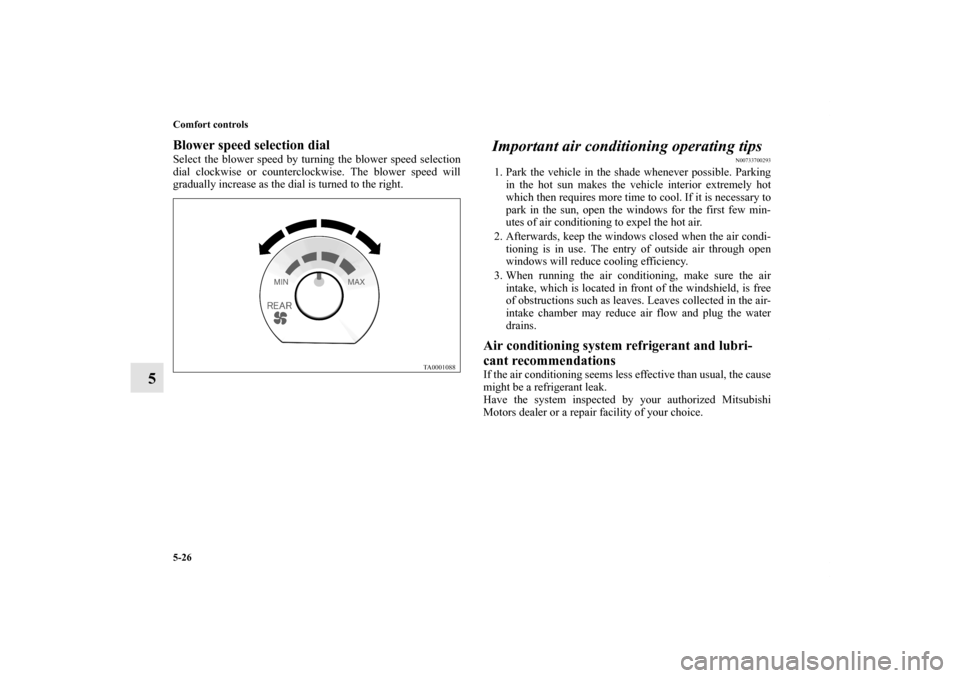
Blower speed selection dialSelect the blower speed by turning the blower speed selection
dial clockwise or counterclockwise. The blower speed will
gradually increase as the dial is turned to the right.
Important air conditioning operating tips
N00733700293
1. Park the vehicle in the shade whenever possible. Parking
in the hot sun makes the vehicle interior extremely hot
which then requires more time to cool. If it is necessary to
park in the sun, open the windows for the first few min-
utes of air conditioning to expel the hot air.
2. Afterwards, keep the windows closed when the air condi-
tioning is in use. The entry of outside air through open
windows will reduce cooling efficiency.
3. When running the air conditioning, make sure the air
intake, which is located in front of the windshield, is free
of obstructions such as leaves. Leaves collected in the air-
intake chamber may reduce air flow and plug the water
drains. Air conditioning system refrigerant and lubri-
cant recommendations If the air conditioning seems less effective than usual, the cause
might be a refrigerant leak.
Have the system inspected by your authorized Mitsubishi
Motors dealer or a repair facility of your choice.
BK0121600US.book 26 ページ 2010年4月12日 月曜日 午前10時39分
Page 347 of 514
5-28 Comfort controls
5Audio system
N00734300863
Your vehicle is equipped with the following audio system:
(1) AM/FM electronically tuned radio with CD player-Type 1 → P. 5 - 3 0
(2) AM/FM electronically tuned radio with CD autochanger-Type 2 → P. 5 - 4 3
(3) AM/FM/Satellite electronically tuned radio with CD autochanger-Type 3 → P. 5 - 4 3
The audio system can only be used when the ignition switch is in the “ON” or “ACC” position. Ty p e 1Type 2, Type 3A- Display window
B- Audio system
C- DISP button (if so equipped)
BK0121600US.book 28 ページ 2010年4月12日 月曜日 午前10時39分
Page 375 of 514
5-56 Comfort controls
5
To cancel skip settings
N00701500038
It is possible to cancel channel skip settings.
1. Push the AUDIO switch (6) for at least about two seconds
to select the MENU mode. Then select the SKIP setting
mode.
2. In the SKIP setting mode, turn the AUDIO switch (6) to
select “UNSKIP ALL”.
3. Push the AUDIO switch (6). All channel skip settings will
be canceled. Then, the system will return to the SKIP set-
ting mode. (The display will show “SKIP setting” after
showing “STORED”.)To lock a desired channel
N00701600039
It is possible to lock a desired channel so that it cannot be
selected.
1. Select the channel you wish to lock.
2. Push the AUDIO switch (6) for at least about two seconds
to select the MENU mode. Then select the LOCK setting
mode.
3. In the LOCK setting mode, turn the AUDIO switch (6) to
select “LOCK CH”.
4. Push the AUDIO switch (6). The channel currently being
received will be locked. Then, the system will return to
the LOCK setting mode.NOTE�If you attempt to select a locked channel, the display will
show “LOCKED” or “PARENTAL LOCK”.
�Channels stored in the preset memory are also locked.
To unlock locked channels
N00701700043
You can unlock one or all locked channels. Unlocking one or
more channels requires entry of the code.
1. If you wish to unlock a single desired channel, select the
channel you wish to unlock. (If you wish to unlock all
locked channels, it doesn’t matter which channel you
select.)
2. Push the AUDIO switch (6) for at least about two seconds
to select the MENU mode. Then select the LOCK setting
mode.
3. In the LOCK setting mode, turn the AUDIO switch (6) to
select “UNLOCK CH” if you wish to unlock a single
desired channel or “UNLOCK ALL” if you wish to
unlock all locked channels.
4. Push the AUDIO switch (6). The code entry window will
display.
BK0121600US.book 56 ページ 2010年4月12日 月曜日 午前10時39分
Page 376 of 514
Comfort controls
5-57
5
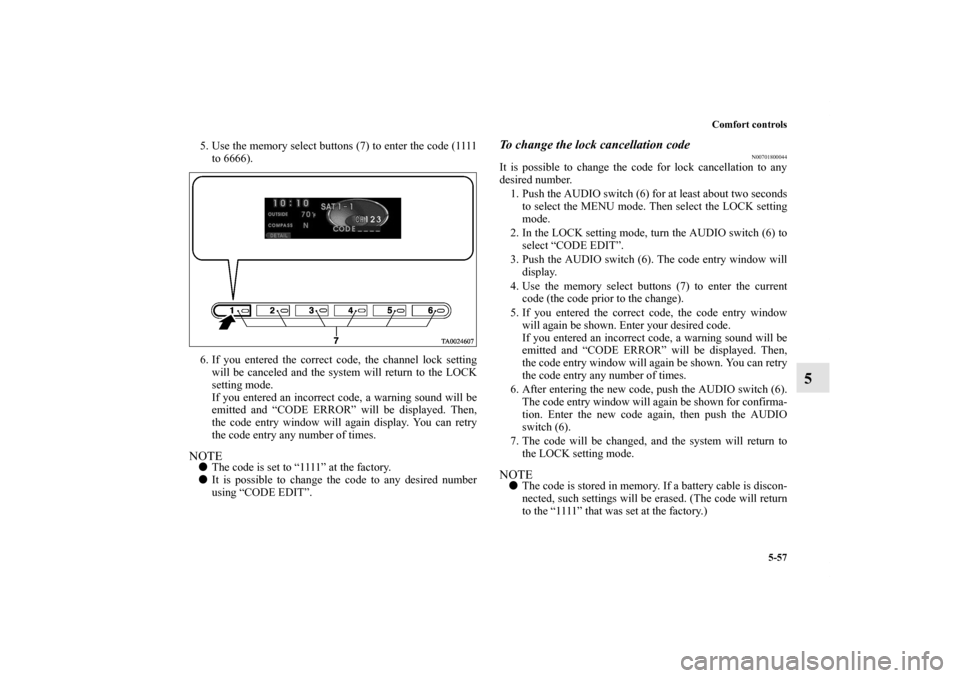
5. Use the memory select buttons (7) to enter the code (1111
to 6666).
6. If you entered the correct code, the channel lock setting
will be canceled and the system will return to the LOCK
setting mode.
If you entered an incorrect code, a warning sound will be
emitted and “CODE ERROR” will be displayed. Then,
the code entry window will again display. You can retry
the code entry any number of times.NOTE�The code is set to “1111” at the factory.
�It is possible to change the code to any desired number
using “CODE EDIT”.
To change the lock cancellation code
N00701800044
It is possible to change the code for lock cancellation to any
desired number.
1. Push the AUDIO switch (6) for at least about two seconds
to select the MENU mode. Then select the LOCK setting
mode.
2. In the LOCK setting mode, turn the AUDIO switch (6) to
select “CODE EDIT”.
3. Push the AUDIO switch (6). The code entry window will
display.
4. Use the memory select buttons (7) to enter the current
code (the code prior to the change).
5. If you entered the correct code, the code entry window
will again be shown. Enter your desired code.
If you entered an incorrect code, a warning sound will be
emitted and “CODE ERROR” will be displayed. Then,
the code entry window will again be shown. You can retry
the code entry any number of times.
6. After entering the new code, push the AUDIO switch (6).
The code entry window will again be shown for confirma-
tion. Enter the new code again, then push the AUDIO
switch (6).
7. The code will be changed, and the system will return to
the LOCK setting mode.NOTE�The code is stored in memory. If a battery cable is discon-
nected, such settings will be erased. (The code will return
to the “1111” that was set at the factory.)
BK0121600US.book 57 ページ 2010年4月12日 月曜日 午前10時39分
Page 433 of 514
7-6 Vehicle care and maintenance
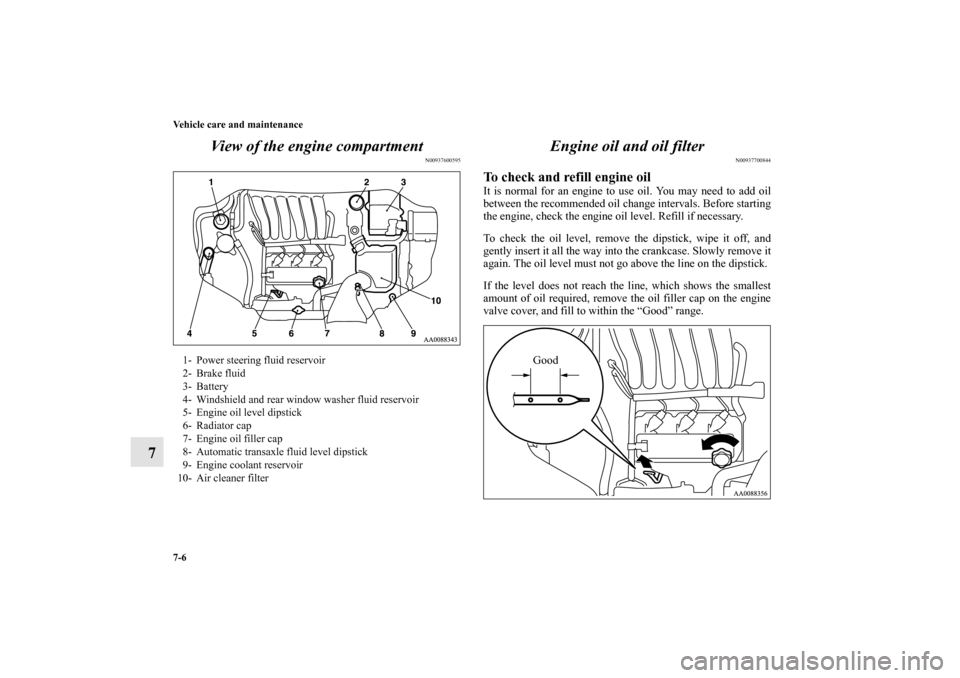
7View of the engine compartment
N00937600595
Engine oil and oil filter
N00937700844
To check and refill engine oil It is normal for an engine to use oil. You may need to add oil
between the recommended oil change intervals. Before starting
the engine, check the engine oil level. Refill if necessary.
To check the oil level, remove the dipstick, wipe it off, and
gently insert it all the way into the crankcase. Slowly remove it
again. The oil level must not go above the line on the dipstick.
If the level does not reach the line, which shows the smallest
amount of oil required, remove the oil filler cap on the engine
valve cover, and fill to within the “Good” range.
1- Power steering fluid reservoir
2- Brake fluid
3- Battery
4- Windshield and rear window washer fluid reservoir
5- Engine oil level dipstick
6- Radiator cap
7- Engine oil filler cap
8- Automatic transaxle fluid level dipstick
9- Engine coolant reservoir
10- Air cleaner filter
Good
BK0121600US.book 6 ページ 2010年4月12日 月曜日 午前10時39分
Page 441 of 514
7-14 Vehicle care and maintenance
7Rear axle oil (All-wheel drive models)
N00915200171
Whenever the oil level is checked, add oil as necessary to
maintain the proper level.
Fill or change oil according to the table.Oil type
Wa s h e r f l u i d
N00938600198
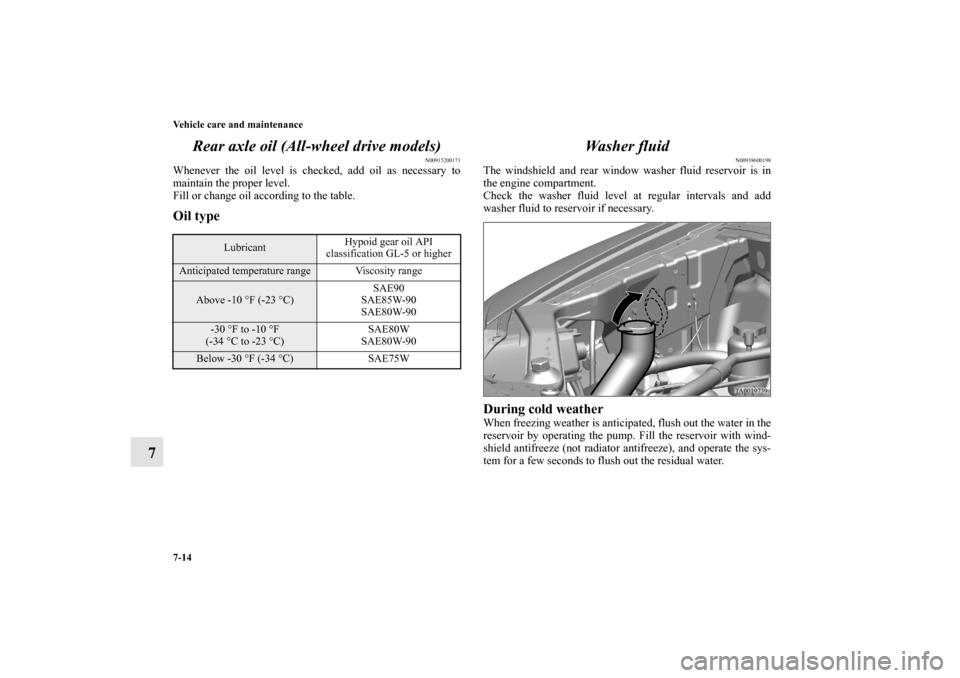
The windshield and rear window washer fluid reservoir is in
the engine compartment.
Check the washer fluid level at regular intervals and add
washer fluid to reservoir if necessary. During cold weatherWhen freezing weather is anticipated, flush out the water in the
reservoir by operating the pump. Fill the reservoir with wind-
shield antifreeze (not radiator antifreeze), and operate the sys-
tem for a few seconds to flush out the residual water.
LubricantHypoid gear oil API
classification GL-5 or higher
Anticipated temperature range Viscosity range
Above -10 °F (-23 °C)SAE90
SAE85W-90
SAE80W-90
-30 °F to -10 °F
(-34 °C to -23 °C)SAE80W
SAE80W-90
Below -30 °F (-34 °C) SAE75W
BK0121600US.book 14 ページ 2010年4月12日 月曜日 午前10時39分
Page 446 of 514
Vehicle care and maintenance
7-19
7
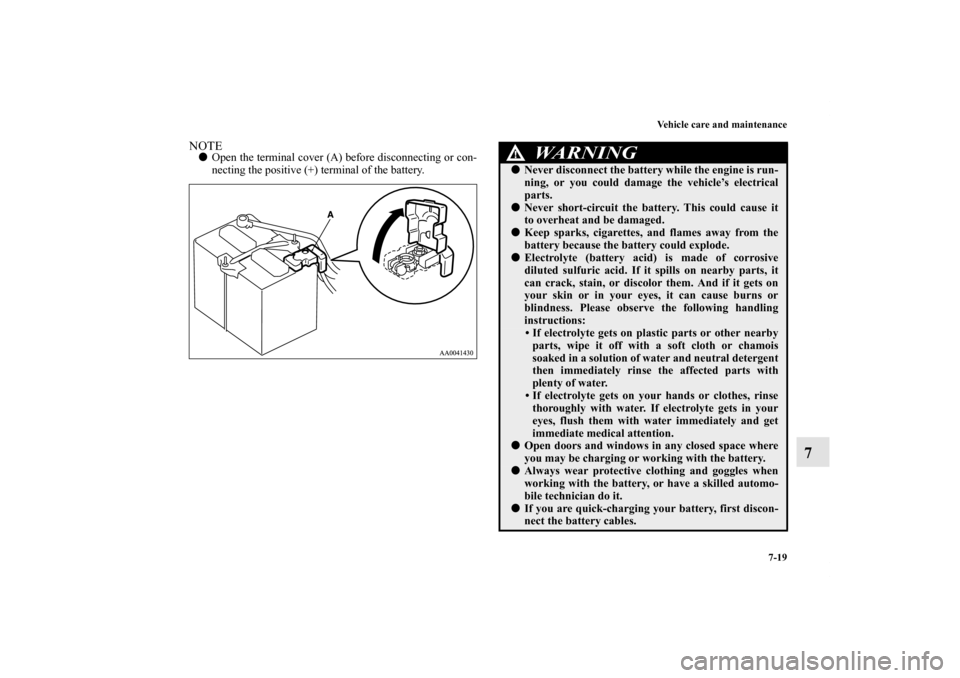
NOTE�Open the terminal cover (A) before disconnecting or con-
necting the positive (+) terminal of the battery.
WA R N I N G
!�Never disconnect the battery while the engine is run-
ning, or you could damage the vehicle’s electrical
parts. �Never short-circuit the battery. This could cause it
to overheat and be damaged. �Keep sparks, cigarettes, and flames away from the
battery because the battery could explode. �Electrolyte (battery acid) is made of corrosive
diluted sulfuric acid. If it spills on nearby parts, it
can crack, stain, or discolor them. And if it gets on
your skin or in your eyes, it can cause burns or
blindness. Please observe the following handling
instructions:
• If electrolyte gets on plastic parts or other nearby
parts, wipe it off with a soft cloth or chamois
soaked in a solution of water and neutral detergent
then immediately rinse the affected parts with
plenty of water.
• If electrolyte gets on your hands or clothes, rinse
thoroughly with water. If electrolyte gets in your
eyes, flush them with water immediately and get
immediate medical attention.
�Open doors and windows in any closed space where
you may be charging or working with the battery. �Always wear protective clothing and goggles when
working with the battery, or have a skilled automo-
bile technician do it. �If you are quick-charging your battery, first discon-
nect the battery cables.
BK0121600US.book 19 ページ 2010年4月12日 月曜日 午前10時39分