2011 MITSUBISHI COLT CD player
[x] Cancel search: CD playerPage 174 of 274

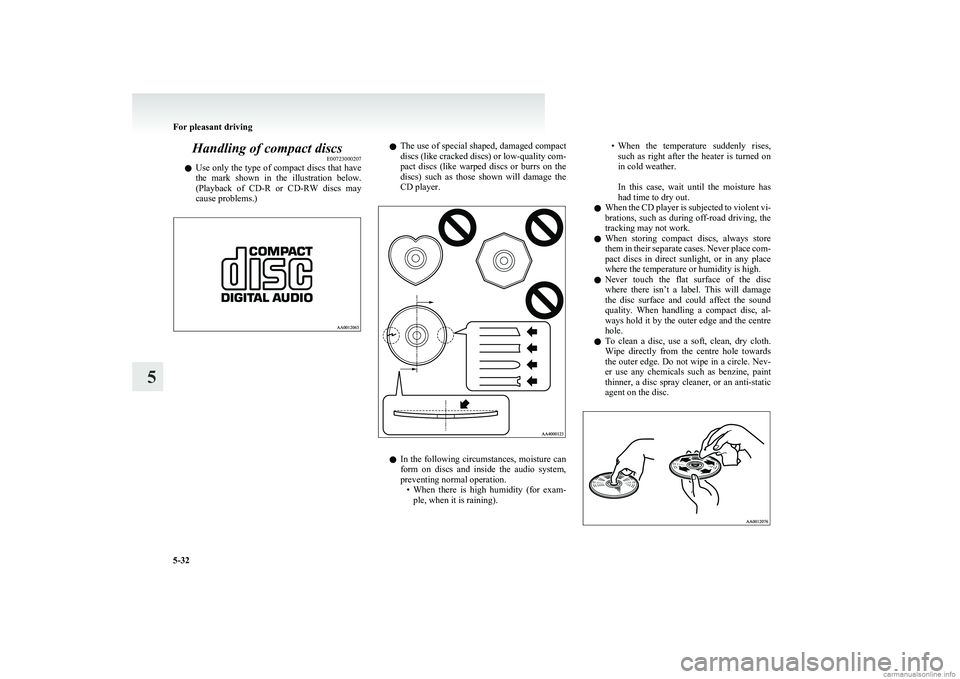
Handling of compact discsE00723000207
l Use only the type of compact discs that have
the mark shown in the illustration below.
(Playback of CD-R or CD-RW discs may
cause problems.)l The use of special shaped, damaged compact
discs (like cracked discs) or low-quality com-
pact discs (like warped discs or burrs on the
discs) such as those shown will damage the
CD player.
l In the following circumstances, moisture can
form on discs and inside the audio system,
preventing normal operation. •When there is high humidity (for exam-
ple, when it is raining).
• When the temperature suddenly rises,
such as right after the heater is turned on
in cold weather.
In this case, wait until the moisture has
had time to dry out.
l When the CD player is subjected to violent vi-
brations, such as during off-road driving, the
tracking may not work.
l When storing compact discs, always store
them in their separate cases. Never place com-
pact discs in direct sunlight, or in any place
where the temperature or humidity is high.
l Never touch the flat surface of the disc
where there isn’t a label. This will damage
the disc surface and could affect the sound
quality. When handling a compact disc, al-
ways hold it by the outer edge and the centre
hole.
l To clean a disc, use a soft, clean, dry cloth.
Wipe directly from the centre hole towards
the outer edge. Do not wipe in a circle. Nev-
er use any chemicals such as benzine, paint
thinner, a disc spray cleaner, or an anti-static
agent on the disc.
For pleasant driving
5-32
5
Page 175 of 274

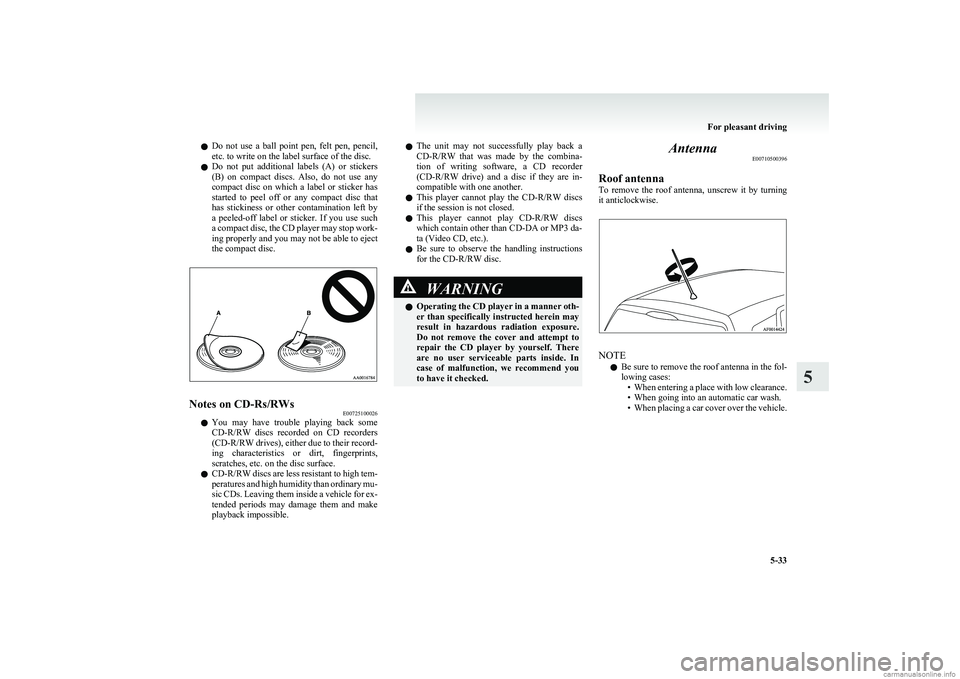
lDo not use a ball point pen, felt pen, pencil,
etc. to write on the label surface of the disc.
l Do not put additional labels (A) or stickers
(B) on compact discs. Also, do not use any
compact disc on which a label or sticker has
started to peel off or any compact disc that
has stickiness or other contamination left by
a peeled-off label or sticker. If you use such
a compact disc, the CD player may stop work-
ing properly and you may not be able to eject
the compact disc.Notes on CD-Rs/RWs E00725100026
lYou may have trouble playing back some
CD-R/RW discs recorded on CD recorders
(CD-R/RW drives), either due to their record-
ing characteristics or dirt, fingerprints,
scratches, etc. on the disc surface.
l CD-R/RW discs are less resistant to high tem-
peratures and high humidity than ordinary mu-
sic CDs. Leaving them inside a vehicle for ex-
tended periods may damage them and make
playback impossible.
l The unit may not successfully play back a
CD-R/RW that was made by the combina-
tion of writing software, a CD recorder
(CD-R/RW drive) and a disc if they are in-
compatible with one another.
l This player cannot play the
CD-R/RW discs
if the session is not closed.
l This player cannot play
CD-R/RW discs
which contain other than CD-DA or MP3 da-
ta (Video CD, etc.).
l Be sure to observe the handling instructions
for the CD-R/RW disc.WARNINGl Operating the CD player in a manner oth-
er than specifically instructed herein may
result in hazardous radiation exposure.
Do not remove the cover and attempt to
repair the CD player by yourself. There
are no user serviceable parts inside. In
case of malfunction, we recommend you
to have it checked.Antenna E00710500396
Roof antenna
To remove the roof antenna, unscrew it by turning
it anticlockwise.
NOTE
l Be sure to remove the roof antenna in the fol-
lowing cases: •When entering a place with low clearance.
• When going into an automatic car wash.
• When placing a car cover over the vehicle.
For pleasant driving
5-33
5
Page 176 of 274

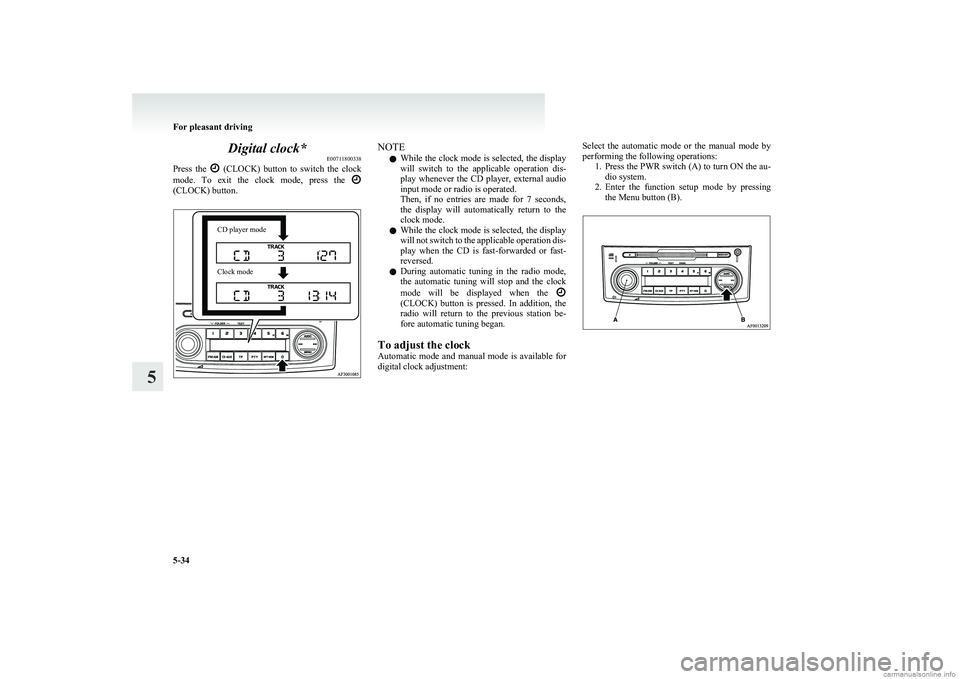
Digital clock*E00711800338
Press the
(CLOCK) button to switch the clock
mode. To exit the clock mode, press the
(CLOCK) button.
CD player modeClock modeNOTE
l While the clock mode is selected, the display
will switch to the applicable operation dis-
play whenever the CD player, external audio
input mode or radio is operated.
Then, if no entries are made for 7 seconds,
the display will automatically return to the
clock mode.
l While the clock mode is selected, the display
will not switch to the applicable operation dis-
play when the CD is fast-forwarded or fast-
reversed.
l During automatic tuning in the radio mode,
the automatic tuning will stop and the clock
mode will be displayed when the
(CLOCK) button is pressed. In addition, the
radio will return to the previous station be-
fore automatic tuning began.
To adjust the clock
Automatic mode and manual mode is available for
digital clock adjustment:
Select the automatic mode or the manual mode by
performing the following operations: 1.Press the PWR switch (A) to turn ON the au-
dio system.
2. Enter the function setup mode by pressing
the Menu button (B).
For pleasant driving
5-34
5
Page 265 of 274

A
Accessory (Installation) 04
Accessory socket 5-37
Active stability control system (ASC) 4-30 Indication lamp 4-31
Additional equipment 8-18
Air conditioning Automatic air conditioning 5-07
Important operation tips for the air condition-
ing 5-11
Air purifier 5-12
Airbag 2-22
Front passenger’s airbag OFF indication
lamp 2-25
Front passenger’s airbag ON-OFF switch 2-25
Antenna 5-33
Anti-lock brake system (ABS) 4-27 Warning lamp 4-28
Audio Error codes 5-30
Handling of compact discs 5-32
LW/MW/FM electronic tuning radio with CD
player 5-12
Auto Stop & Go (AS&G) system 4-13
Automated manual transmission 4-19 Oil 9-16
Automatic air conditioning 5-07
B
Battery 8-10Charge warning lamp 3-19
Discharged battery (Emergency starting) 6-02
Specification 9-11
Bonnet 8-03
Brake Anti-lock brake 4-27
Brake assist system 4-27
Braking 4-25
Fluid 8-09,9-16
Parking brake 4-06
Parking brake lever stroke 8-16
Pedal free play 8-16
Warning lamp 3-17
Bulb capacity 8-23
C
Capacities 9-16
Cargo loads 4-36
Catalytic converter 8-02
Central door locks 1-07
Changing a fuse 8-21
Charge warning lamp 3-19
Chassis number 9-02
Check engine warning lamp 3-18
Child restraint 2-13
Child-protection rear doors 1-09
Cleaning Exterior of your vehicle 7-03
Genuine leather 7-02
Interior of your vehicle 7-02
Plastic, vinyl leather, etc 7-02
Clock 5-34
Clutch Fluid 8-09
Pedal free play 8-15
Coat hooks 5-43
Combination headlamps and dipper switch 3-20
Coming home light 3-22
Compact spare wheel 6-13
Cool box 5-39
Coolant (engine) 8-07,9-16
Cruise control 4-32
Cup holder 5-42
D
Dead Lock System 1-07
Demister (rear window) 3-29
Digital clock 5-34
Dipper (High/Low beam change) 3-21
Door ajar warning lamp 3-19
Doors Central door locks 1-07
Child-protection 1-09
Dead Lock System 1-07
Lock and unlock 1-05
Driving, alcohol and drugs 4-02
E
Economical driving 4-02
Electric power steering system 4-29
Electric remote-controlled outside rear-view mir-
rors 4-09
Electric window control 1-11
Electrical system 9-11
Electronic immobilizer (Anti-theft starting sys-
tem) 1-02
Emergency starting 6-02
Emergency stop signal system 4-26
Engine
Coolant 8-07,9-16
High coolant temperature warning lamp 3-19
Number 9-03
Oil 8-05
Oil and filter 9-16
Overheating 6-04
Specifications 9-09
Used engine oils safety instructions and disposal
information 05
Error codes 5-30
Exterior and interior lamp operation 8-18
Alphabetical index
1
Page 267 of 274

Modification/alterations to the electrical or fuel sys-
tems 05
Multi-information display 3-04
O
Oil pressure warning lamp 3-19
Oil Automated manual transmission oil 9-16
Engine oil 8-05
Manual transmission oil 9-16
Operation under adverse driving conditions 6-22
Other specifications 9-13
Outside rear-view mirrors 4-08
Electric remote-controlled outside rear-view mir-
rors 4-09
Manual remote-controlled outside rear-view mir-
rors 4-09
Overheating 6-04
P
Parking 4-07Parking brake 4-06
Parking brake lever stroke 8-16
Position lamps Bulb capacity 8-24
Replacement 8-25
Power steering System 4-29
Precautions to observe when using wipers and wash-
ers 3-29
Pregnant women restraint 2-12
Puncture (Tyre changing) 6-15
R
Radio
LW/MW/FM electronic tuning radio with CD
player 5-12
Rain sensor 3-26
Rear combination lamps Bulb capacity 8-24
Replacement 8-27
Rear fog lamp Bulb capacity 8-24
Indication lamp 3-17
Replacement 8-27,8-29
Switch 3-24
Rear shelf panel 5-42
Rear turn-signal lamps Bulb capacity 8-24
Replacement 8-27
Rear window demister switch 3-29
Rear-view mirror Inside 4-08
Outside 4-08
Replacement of lamp bulbs 8-23
Reversing lamps Bulb capacity 8-24
Replacement 8-27,8-29
Room lamp 5-38
Room lamps & map lamps Bulb capacity 8-24
Replacement 8-31
Running-in recommendations 4-04
S
Safe driving techniques 4-03
Seat belt 2-10 Adjustable seat belt anchor 2-11
Child restraint 2-13
Inspection 2-22
Pregnant women restraint 2-12
Pretensioner 2-13
Seat belt reminder/warning lamp 2-11
Seat Adjustment 2-04
Arrangement 2-03
Front seat 2-04
Head restraints 2-06
Heated seats 2-06
Service precaution 8-02
Side turn-signal lamps Bulb capacity 8-24
Replacement 8-26
Snow tyres 8-14
Spare wheel 6-13
Spark plug 9-11
Specifications 9-02
Speedometer 3-03
Starting 4-11
Steering Power steering system 4-29
Steering wheel height adjustment 4-07
Steering wheel lock 4-11
Stop lamps Bulb capacity 8-23
Replacement 8-27
Storage spaces 5-39
Sun visors 5-36
Supplemental restraint system 2-22 Curtain airbag system 2-30
How the Supplemental Restraint System
works 2-25
Servicing 2-34
Side airbag system 2-30
Warning lamp 2-33
T
Tachometer 3-03
Tail lamp Bulb capacity 8-24
Replacement 8-27
Alphabetical index
3