Page 408 of 436

Rcollapsible wheel chock
Rjack
Rwheel wrench
Ralignment bolt
For information on where to find the
respective items, see “Where will I find ...?”
(Y page 362).
XPrevent the vehicle from rolling away by
blocking wheels with wheel chocks or other
sizeable objects.
One wheel chock is included with the
vehicle tool kit (Y page 362). For
information on setting up a collapsible
wheel chock, see (Y page 363).
GWarning!
Only jack up the vehicle on level ground or on
slight inclines/declines. Otherwise, the
vehicle could fall off the jack and injure you or
others.
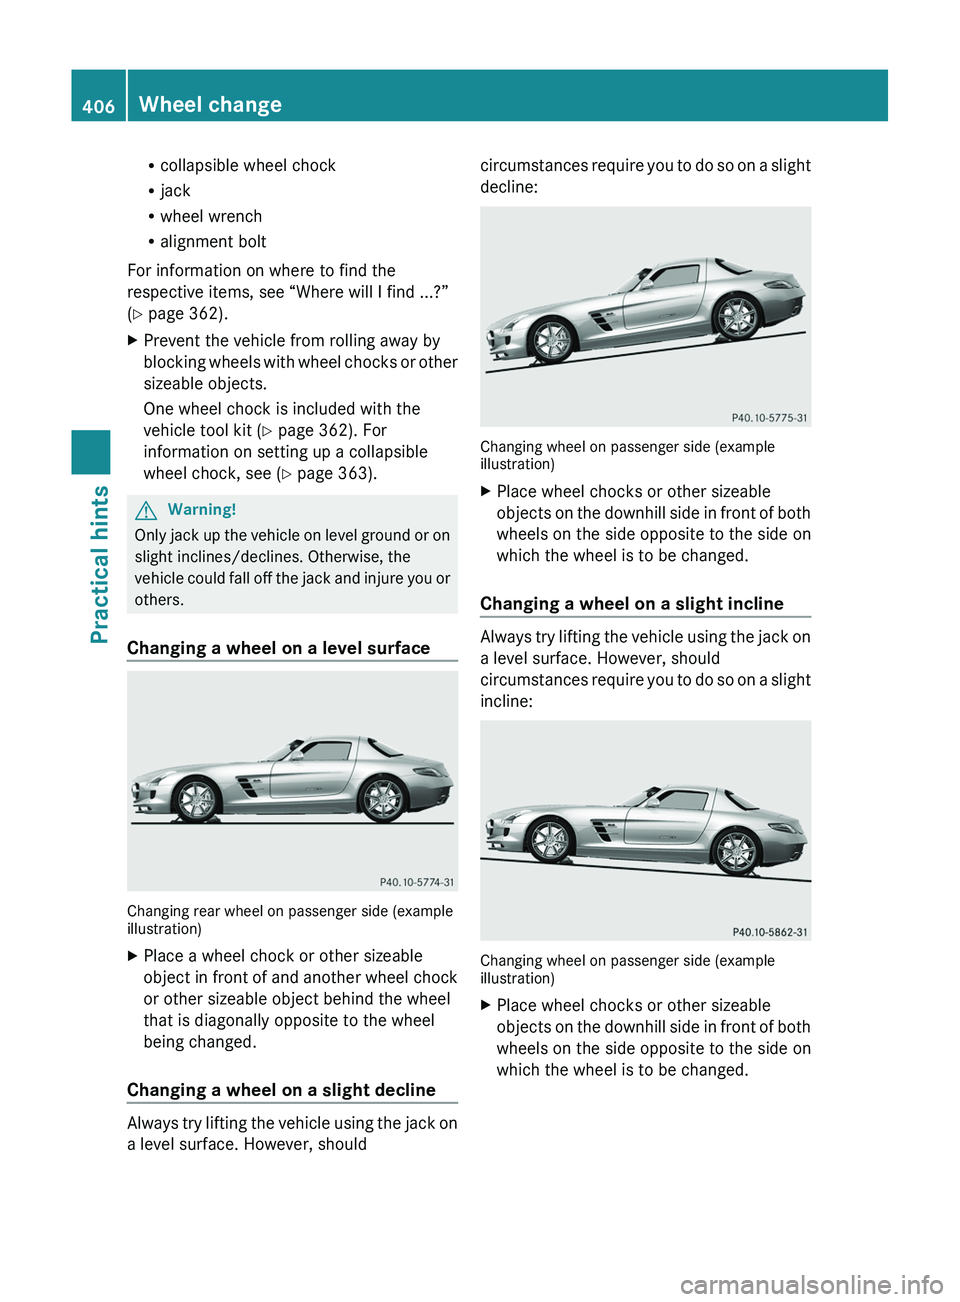
Changing a wheel on a level surface
Changing rear wheel on passenger side (exampleillustration)
XPlace a wheel chock or other sizeable
object in front of and another wheel chock
or other sizeable object behind the wheel
that is diagonally opposite to the wheel
being changed.
Changing a wheel on a slight decline
Always try lifting the vehicle using the jack on
a level surface. However, should
circumstances require you to do so on a slight
decline:
Changing wheel on passenger side (exampleillustration)
XPlace wheel chocks or other sizeable
objects on the downhill side in front of both
wheels on the side opposite to the side on
which the wheel is to be changed.
Changing a wheel on a slight incline
Always try lifting the vehicle using the jack on
a level surface. However, should
circumstances require you to do so on a slight
incline:
Changing wheel on passenger side (exampleillustration)
XPlace wheel chocks or other sizeable
objects on the downhill side in front of both
wheels on the side opposite to the side on
which the wheel is to be changed.
406Wheel changePractical hints
BA 197 USA, CA Edition A 2011; 1; 27, en-UShereepeVersion: 3.0.3.52010-03-24T15:31:10+01:00 - Seite 406
Page 411 of 436
\000FWheel boltXClean contact surfaces of wheel and wheel
hub.
! To avoid paint damage, place wheel flat
against hub and hold it there while
installing first wheel bolt.
! The rim could strike the ceramic
composite brake disk when removing and
attaching the wheel. The ceramic
composite brake disk could be damaged.
Exercise appropriate care and have a
second person assist you if possible or use
a second alignment bolt.
XGuide the wheel onto the alignment bolt
and push it on.
XInsert the wheel bolts and tighten them
slightly.
XUnscrew the alignment bolt.XInstall the last wheel bolt and tighten it
slightly.
XLower the vehicle by turning the crank
counterclockwise until the vehicle is
resting fully on its own weight.
XRemove the jack.
Tighten the five wheel bolts evenly, following
the diagonal sequence illustrated (\000F to \000
Page 417 of 436

Towing the vehicle
Safety notes
Mercedes-Benz recommends that the vehicle
be transported with all wheels off the ground
using flatbed or appropriate wheel lift/dolly
equipment. This method is preferable to other
types of towing.
! To prevent damage during transport, do
not tie down vehicle by its chassis or
suspension parts.
If circumstances do not permit the
recommended towing methods, the vehicle
may be towed with all wheels on the ground
or rear axle raised only so far as necessary to
have the vehicle moved to a safe location
where the recommended towing methods
can be employed.
! Before towing the vehicle observe the
following instructions:
RDo not tow-start the vehicle. You could
otherwise seriously damage the
transmission which is not covered by the
Mercedes-Benz Limited Warranty.
RDo not tow with sling-type equipment.
Towing with sling-type equipment over
bumpy roads will damage radiator and
supports.
RTowing of the vehicle should only be
done using the properly installed towing
eye bolt. Never attach a tow cable, tow
rope or tow rod to the vehicle chassis,
frame or suspension parts.
GWarning!
With the engine not running, there is no power
assistance for the brake and steering
systems. In this case, it is important to keep
in mind that a considerably higher degree of
effort is necessary to brake and steer the
vehicle. Adapt your driving accordingly.
! Avoid pulling the vehicle abruptly or
diagonally, since it could result in damage
to the chassis alignment.
! Do not use the towing eye bolt for
recovery, as this could damage the vehicle.
If in doubt, recover the vehicle with a crane.
iIf the battery is disconnected or
discharged
Rthe transmission will remain in park
position P
Rthe SmartKey will not turn in the starter
switch
For more information see “Battery”
(Y page 410) or “Jump starting”
(Y page 413).
Installing towing eye bolt
The towing eye bolt is supplied with the
vehicle tool kit, located in the storage
compartment underneath the trunk floor
(Y page 362).
XTake the towing eye bolt and the wheel
wrench out of the trunk.
Your vehicle is equipped with a front towing
eye bolt only. You cannot tow other vehicles
with your vehicle.
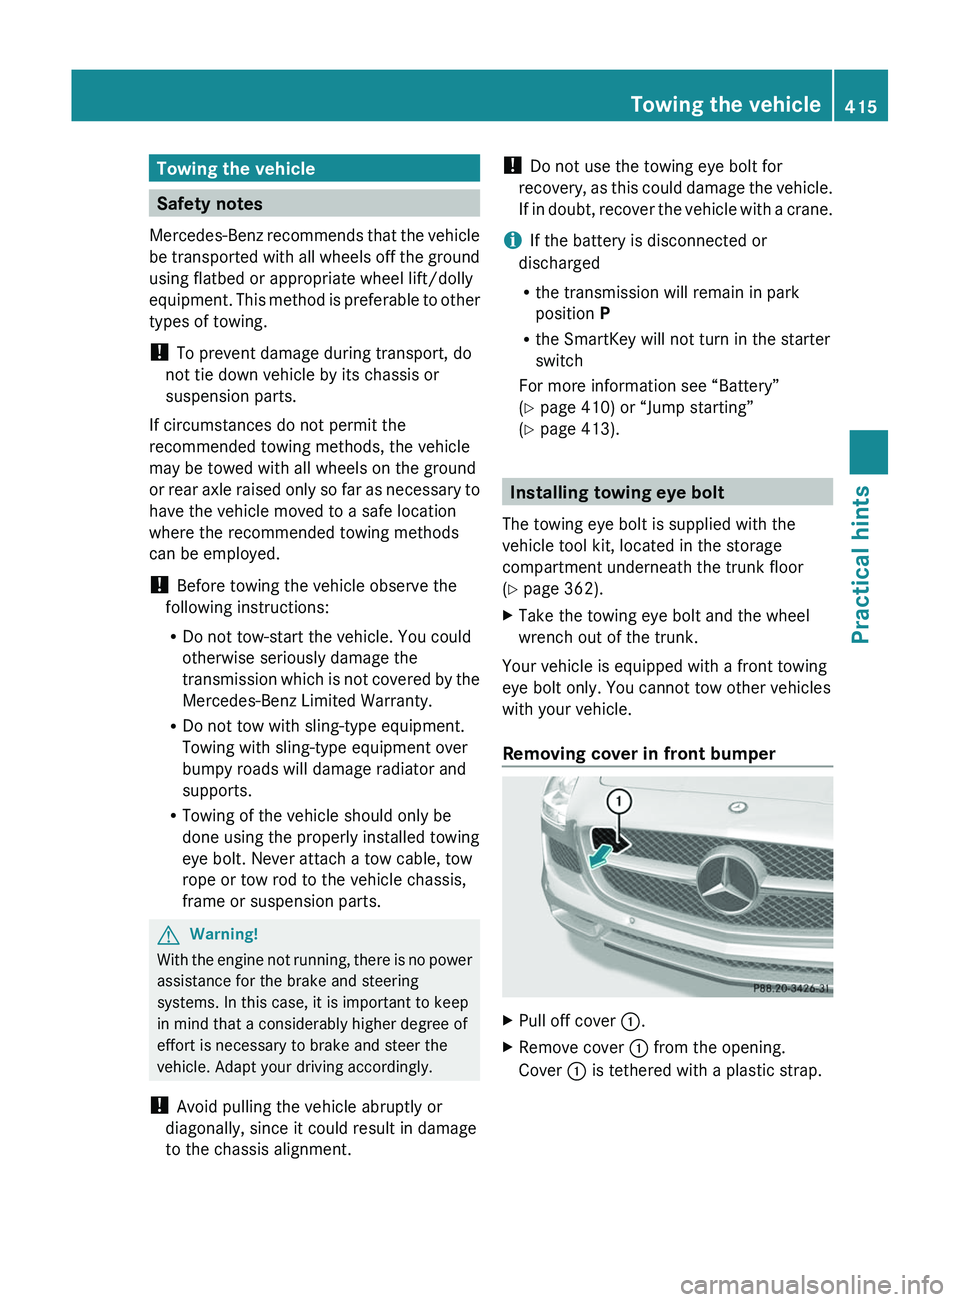
Removing cover in front bumper
XPull off cover \000F.XRemove cover \000F from the opening.
Cover \000F is tethered with a plastic strap.
Towing the vehicle415Practical hintsBA 197 USA, CA Edition A 2011; 1; 27, en-UShereepeVersion: 3.0.3.52010-03-24T15:31:10+01:00 - Seite 415Z