2011 MERCEDES-BENZ SLS AMG check engine
[x] Cancel search: check enginePage 248 of 436
The easy-entry/exit feature can be activated
or deactivated in the Convenience submenu
of the control system ( Y page 286).GWarning!
You must make sure no one can become
trapped or injured by the moving steering
wheel when the easy-entry/exit feature is
activated.
To stop steering wheel movement, move
steering wheel adjustment stalk or press one
of the memory position buttons.
Do not leave children unattended in the
vehicle, or with access to an unlocked vehicle.
Children could open the driver’s door and
unintentionally activate the easy-entry/exit
feature, which could result in an accident
and/or serious personal injury.
With the easy-entry/exit feature activated,
the steering wheel will return to its last set
position when
R you close the driver’s door with the ignition
switched on
R when you insert the SmartKey into the
starter switch or press the KEYLESS-GO
start/stop button once with the driver’s
door closed
i The last set steering wheel position is
stored when the ignition is switched off or
the position is stored in memory
( Y page 249).
With the easy-entry/exit feature activated,
the steering wheel tilts upwards when
R you remove the SmartKey from the starter
switch
R when you open the driver’s door with the
KEYLESS-GO start/stop button in position
1 or the SmartKey in starter switch position
0 or 1
i When the current position for the steering
wheel is in the uppermost tilt position, the
steering wheel will no longer be able to
move upward when the easy-entry/exit
feature is activated.
The adjustment procedure is briefly
interrupted when the engine is started.GWarning!
Let the system complete the adjustment
procedure before setting the vehicle in
motion. All steering wheel adjustment must
be completed before setting the vehicle in
motion. Driving off with the steering wheel
still adjusting could cause the driver to lose
control of the vehicle.
Crash-responsive exit aid
When you open the driver’s door after an
accident has occurred, the steering column
moves up. The position of the SmartKey in the
starter switch is insignificant. This function
facilitates exiting as well as rescue of vehicle
occupants.
The crash-responsive exit aid can only be
triggered when the easy-entry/exit feature is
activated via the control system.
Mirrors
Notes
Adjust the interior and exterior rear view
mirrors before driving so that you have a good
view of the road and traffic conditions.
Interior rear view mirror
XAdjust the interior rear view mirror
manually.
Exterior rear view mirrors
GWarning!
Exercise care when using the passenger-side
exterior rear view mirror. The mirror surface
is convex (outwardly curved surface for a
wider field of view). Objects in mirror are
closer than they appear. Check your interior
246MirrorsControls in detail
BA 197 USA, CA Edition A 2011; 1; 27, en-UShereepeVersion: 3.0.3.52010-03-24T15:31:10+01:00 - Seite 246
Page 257 of 436
For information on filling up the washer
reservoir, see “Washer system and headlamp
cleaning system” ( Y page 325).
For information on cleaning the headlamps
with washer fluid, see “Headlamp cleaning
system” ( Y page 252).
Problems with wipers
! If anything blocks the windshield wipers
(leaves, snow, etc.), switch them off
immediately.
For safety reasons, do the following before
attempting to remove any blockage:
R Stop the vehicle in a safe location.
R Turn off the engine by pressing the
KEYLESS-GO start/stop button and
open the driver’s door (with the driver’s
door open, starter switch is in position
0 , same as with SmartKey removed from
starter switch).
or
R Remove the SmartKey from the starter
switch.
R Engage the electronic parking brake.
R Remove blockage.
R Turn the windshield wipers on again.
If the windshield wipers fail to function at
all with the combination switch in position
0062 or 0063 ,
R set the combination switch to the next
higher wiper speed
R have the windshield wipers checked at
the nearest authorized Mercedes-Benz
Center
Power windows
Opening and closing
The door windows are opened and closed
electrically. The switches for all windows are
located on the driver’s door. The switch for
operating the passenger-side windows is
located on the passenger door.GObserve Safety notes, see page 57.GWarning!
When opening or closing the door windows,
make sure there is no danger of anyone being
harmed by the opening/closing procedure.
The door windows are equipped with the
express operation and automatic reversal
function. If in express operation mode a door
window encounters an obstruction that
blocks its path, the automatic reversal
function will stop the door window and open
it slightly.
The door windows operate differently when
the switch is pulled and held. See the “Closing
when a door window is blocked” section in
this chapter for details.
The closing of the door windows can be
immediately halted by releasing the switch or,
if the switch was pulled past the resistance
point and released, by either pressing or
pulling the respective switch.
If a door window encounters an obstruction
that blocks its path in a circumstance where
you are closing the door windows by pressing
and holding button 0037 on the SmartKey the
automatic reversal function will not operate.
i You can also open or close the door
windows using the SmartKey, see
“Summer opening feature” ( Y page 256)
and “Convenience closing feature”
( Y page 257).
i After switching off the ignition or
removing the SmartKey from the starter
switch, you can operate the door windows
until you open a door. If no door was
opened you can operate the door windows
for up to 5 minutes.
Power windows255Controls in detailBA 197 USA, CA Edition A 2011; 1; 27, en-UShereepeVersion: 3.0.3.52010-03-24T15:31:10+01:00 - Seite 255Z
Page 262 of 436
premature brake and drivetrain wear which
is not covered by the Mercedes-Benz
Limited Warranty.
i Once the vehicle is in motion, the
automatic central locking function engages
and the locking knobs in the doors move
down.
AMG SPEEDSHIFT DCT 7-SPEED
TransmissionGWarning!
It is dangerous to shift the transmission out
of park position P or neutral position N if the
engine speed is higher than idle speed. If your
foot is not firmly on the brake pedal, the
vehicle could accelerate quickly forward or in
reverse. You could lose control of the vehicle
and hit someone or something. Only shift into
gear when the engine is idling normally and
when your right foot is firmly on the brake
pedal.
! Only shift the transmission into reverse
gear R or park position P when the vehicle
is stopped. Otherwise the transmission
could be damaged.
XDepress the brake pedal.
The gear selector lever can now be used.XShift the transmission into drive position
D or reverse gear R.
i
Shifting the transmission out of park
position P is only possible with the brake
pedal depressed.
Only depressing the brake pedal releases
the gear selector lever lock.
XWait for the gear selection process to
complete before setting the vehicle in
motion.XRelease the brake pedal.XCarefully depress the accelerator pedal.
The electronic parking brake releases
automatically.The red indicator lamp 0049 (USA only)
or 0024 (Canada only) in the instrument
cluster goes out.
After a cold start, the transmission shifts at a
higher engine speed. This allows the catalytic
converter to reach its operating temperature
earlier.
For more information on driving, see “Driving
instructions” ( Y page 258).
Problems while driving
The engine runs erratically and misfires
R The engine electronics may not be
operating properly.
R Unburned gasoline may have entered the
catalytic converter and damaged it.
XGive very little gas.XHave the problem checked at an authorized
Mercedes-Benz Center as soon as possible.
The coolant temperature is above 248‡
(120†)
The coolant is too hot and is no longer cooling
the engine.
XStop the vehicle in a safe location as soon
as possible.XTurn off the engine immediately.XAllow the engine and coolant to cool off.XCheck the coolant level and add coolant if
necessary ( Y page 324).
In case of accident
If the vehicle is leaking fuel:
XDo not start the engine under any
circumstances.XExit the vehicle at a safe distance from the
roadway.XNotify local fire and/or police authorities.260Driving and parkingControls in detail
BA 197 USA, CA Edition A 2011; 1; 27, en-UShereepeVersion: 3.0.3.52010-03-24T15:31:10+01:00 - Seite 260
Page 284 of 436
RVehicle status message memory
( Y page 282)
R Checking tire inflation pressure
electronically with the Advanced TPMS
( Y page 329)
R Calling up the maintenance service
indicator display ( Y page 353)
Vehicle status message memory
Use the vehicle status message memory
function to scan malfunction and warning
messages that may be stored in the system.
Such messages appear in the multifunction
display and are based on conditions or
system status the vehicle’s system has
recorded.
GWarning!
Malfunction and warning messages are only
indicated for certain systems and are
intentionally not very detailed. The
malfunction and warning messages are
simply a reminder with respect to the
operation of certain systems. They do not
replace the owner’s and/or driver’s
responsibility to maintain the vehicle’s
operating safety. Have all required
maintenance and safety checks performed on
the vehicle. Bring the vehicle to an authorized
Mercedes-Benz Center to address the
malfunction and warning messages.
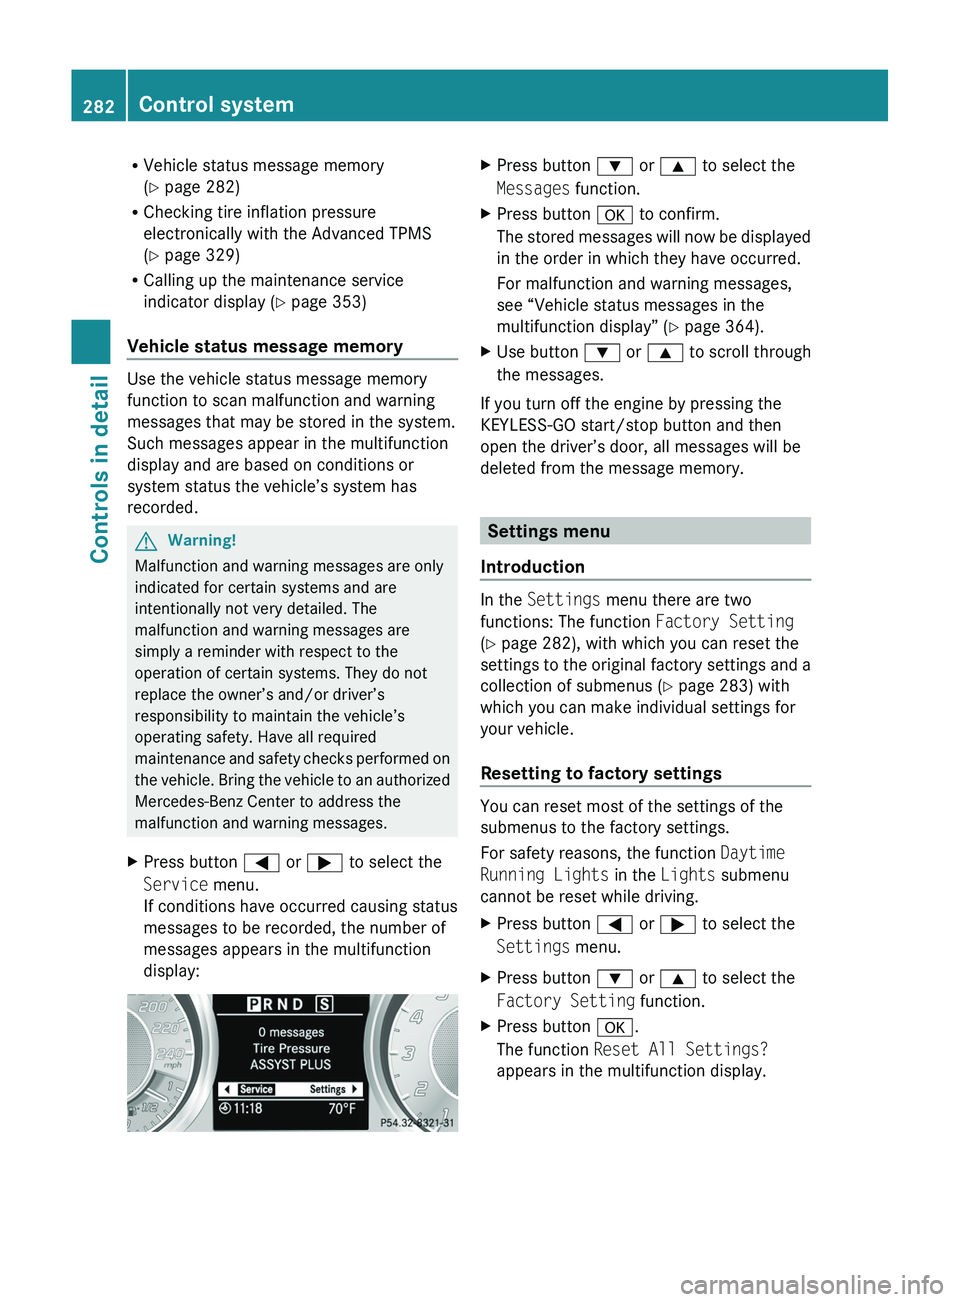
XPress button 0040 or 003E to select the
Service menu.
If conditions have occurred causing status
messages to be recorded, the number of
messages appears in the multifunction
display:XPress button 003D or 003C to select the
Messages function.XPress button 0064 to confirm.
The stored messages will now be displayed
in the order in which they have occurred.
For malfunction and warning messages,
see “Vehicle status messages in the
multifunction display” ( Y page 364).XUse button 003D or 003C to scroll through
the messages.
If you turn off the engine by pressing the
KEYLESS-GO start/stop button and then
open the driver’s door, all messages will be
deleted from the message memory.
Settings menu
Introduction
In the Settings menu there are two
functions: The function Factory Setting
( Y page 282), with which you can reset the
settings to the original factory settings and a
collection of submenus ( Y page 283) with
which you can make individual settings for
your vehicle.
Resetting to factory settings
You can reset most of the settings of the
submenus to the factory settings.
For safety reasons, the function Daytime
Running Lights in the Lights submenu
cannot be reset while driving.
XPress button 0040 or 003E to select the
Settings menu.XPress button 003D or 003C to select the
Factory Setting function.XPress button 0064.
The function Reset All Settings?
appears in the multifunction display.282Control systemControls in detail
BA 197 USA, CA Edition A 2011; 1; 27, en-UShereepeVersion: 3.0.3.52010-03-24T15:31:10+01:00 - Seite 282
Page 323 of 436
! To prevent damage to the catalytic
converters, only use premium unleaded
gasoline in this vehicle.
Any noticeable irregularities in engine
operation should be repaired promptly.
Otherwise, excessive unburned fuel may
reach the catalytic converter, causing it to
overheat and potentially start a fire.
i Only use premium unleaded gasoline with
a minimum Posted Octane Rating of 91
(average of 96 RON/86 MON).
Information on gasoline quality can
normally be found on the fuel pump. Please
contact gas station personnel in case
labels on the pump cannot be found.
For more information on gasoline, see
“Premium unleaded gasoline”
( Y page 425), see “Fuel requirements”
( Y page 427), or contact an authorized
Mercedes-Benz Center, or visit
http://www.MBUSA.com (USA only).
Locking/unlocking the vehicle with the
SmartKey automatically locks/unlocks the
fuel filler flap.
i In case the central locking system does
not release the fuel filler flap, or the
opening mechanism is clamping, contact
Roadside Assistance or an authorized
Mercedes-Benz Center.
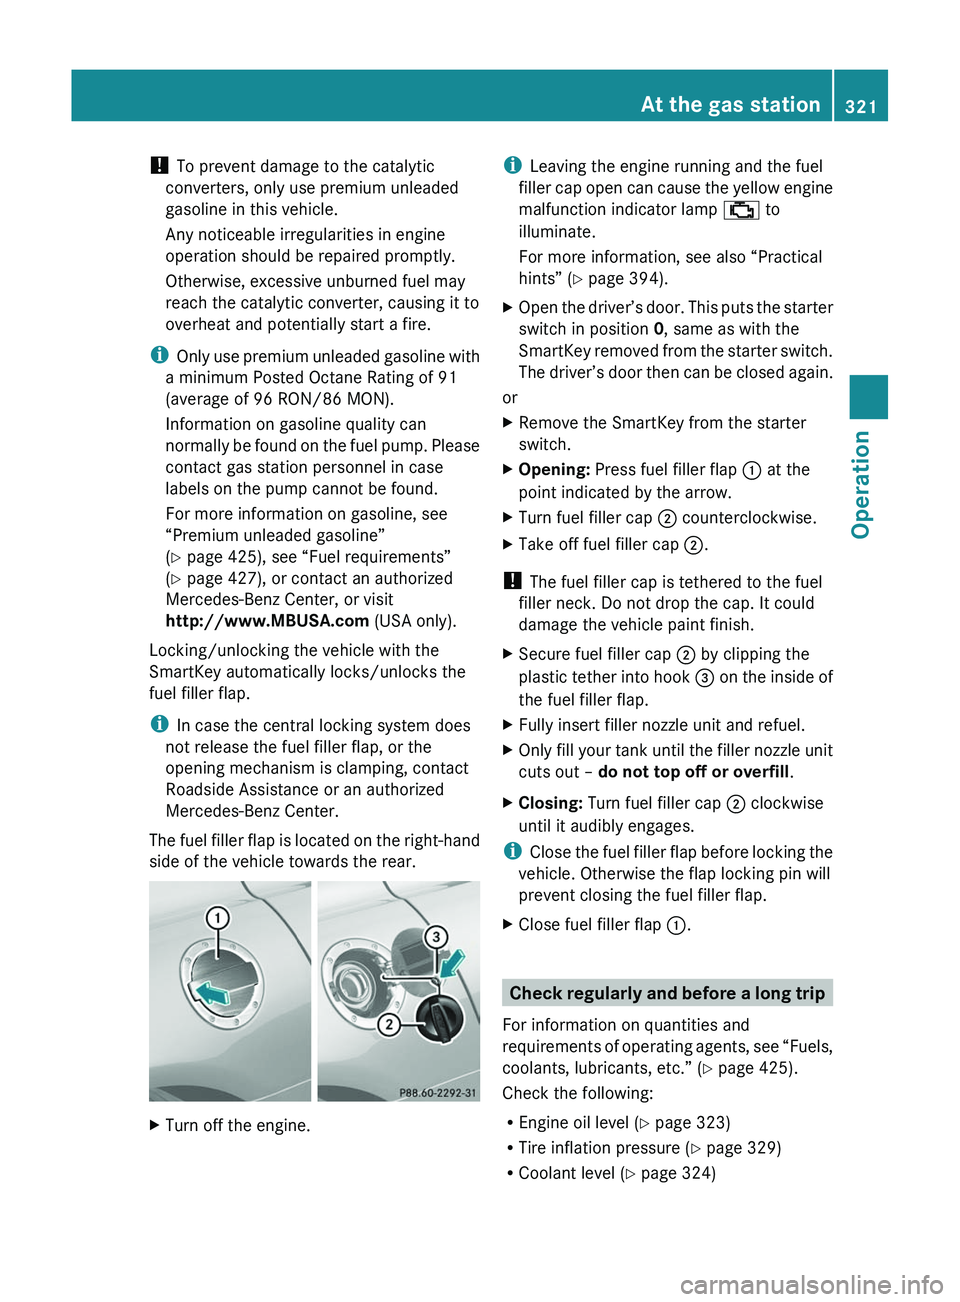
The fuel filler flap is located on the right-hand
side of the vehicle towards the rear. XTurn off the engine.i Leaving the engine running and the fuel
filler cap open can cause the yellow engine
malfunction indicator lamp 00BB to
illuminate.
For more information, see also “Practical
hints” ( Y page 394).XOpen the driver’s door. This puts the starter
switch in position 0, same as with the
SmartKey removed from the starter switch.
The driver’s door then can be closed again.
or
XRemove the SmartKey from the starter
switch.XOpening: Press fuel filler flap 0046 at the
point indicated by the arrow.XTurn fuel filler cap 0047 counterclockwise.XTake off fuel filler cap 0047.
!
The fuel filler cap is tethered to the fuel
filler neck. Do not drop the cap. It could
damage the vehicle paint finish.
XSecure fuel filler cap 0047 by clipping the
plastic tether into hook 008A on the inside of
the fuel filler flap.XFully insert filler nozzle unit and refuel.XOnly fill your tank until the filler nozzle unit
cuts out – do not top off or overfill .XClosing: Turn fuel filler cap 0047 clockwise
until it audibly engages.
i Close the fuel filler flap before locking the
vehicle. Otherwise the flap locking pin will
prevent closing the fuel filler flap.
XClose fuel filler flap 0046.
Check regularly and before a long trip
For information on quantities and
requirements of operating agents, see “Fuels,
coolants, lubricants, etc.” ( Y page 425).
Check the following:
R Engine oil level ( Y page 323)
R Tire inflation pressure ( Y page 329)
R Coolant level ( Y page 324)
At the gas station321OperationBA 197 USA, CA Edition A 2011; 1; 27, en-UShereepeVersion: 3.0.3.52010-03-24T15:31:10+01:00 - Seite 321Z
Page 325 of 436
ClosingGWarning!
When closing the hood, use extreme caution
not to catch hands or fingers. Be careful that
you do not close the hood on anyone.
Make sure the hood is securely engaged
before driving off. Do not continue driving if
the hood can no longer engage after an
accident, for example. The hood could
otherwise come loose while the vehicle is in
motion and injure you and/or others.
XLet the hood drop from a height of
approximately 8 in (20 cm).XCheck to make sure the hood is fully
closed.
If you can raise the hood at a point above
the headlamps, then it is not properly
closed. Open it again and let it drop with
somewhat greater force.
Engine oil
The amount of oil your engine consumes will
depend on a number of factors, including
driving style. Increased oil consumption can
occur when the vehicle is new or the vehicle
is driven frequently at higher engine speeds.
Engine oil consumption checks should only
be made after the vehicle break-in period.
! Do not use any special lubricant additives,
as these may damage the drive assemblies.
Using special additives not approved by
Mercedes-Benz may cause damage not
covered by the Mercedes-Benz Limited
Warranty.
For further information contact an
authorized Mercedes-Benz Center.
Notes on checking engine oil level
XPark the vehicle on level ground.XTurn off the engine at operating
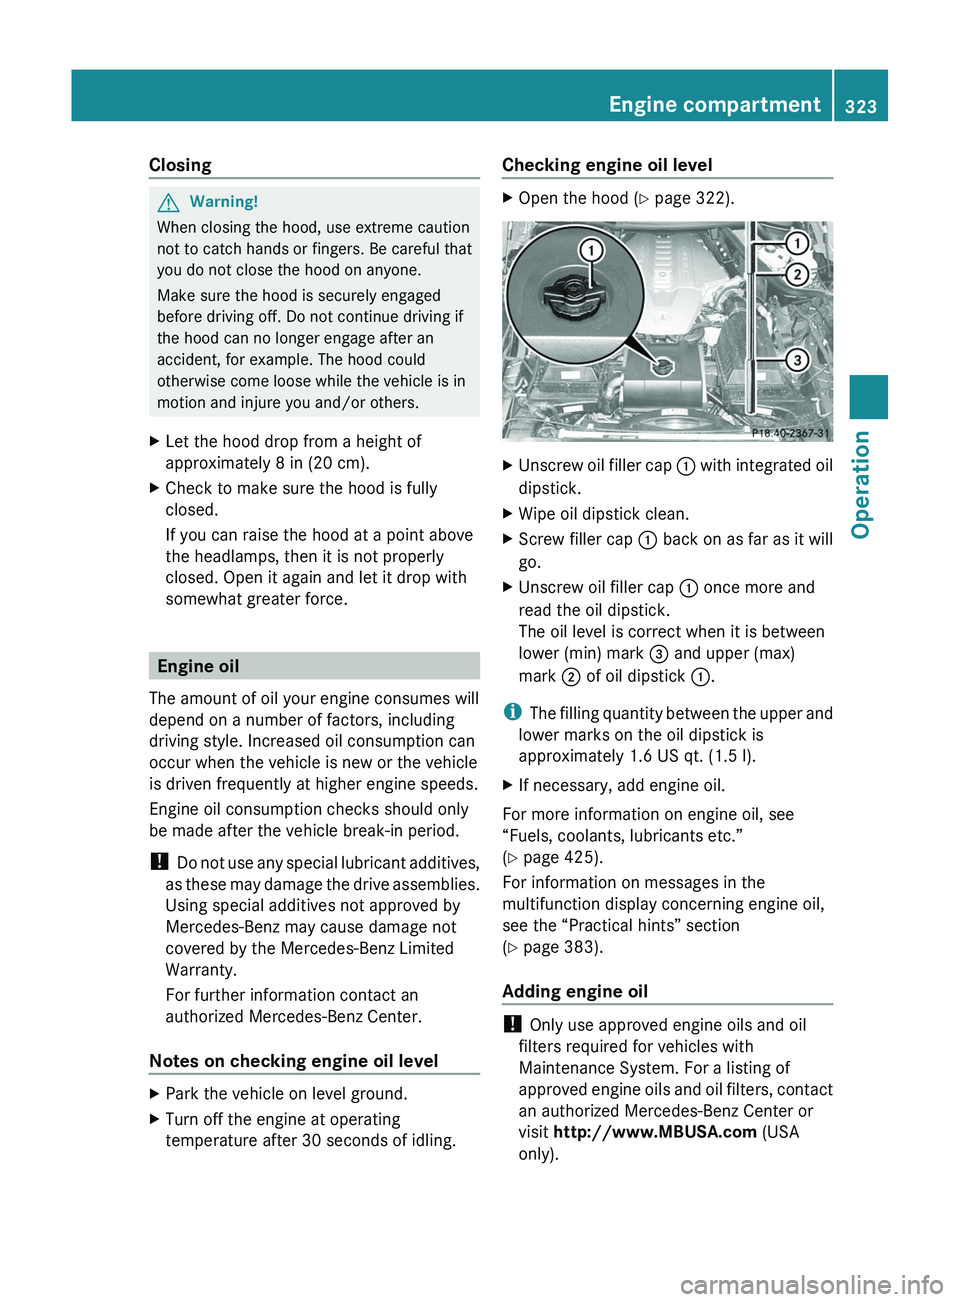
temperature after 30 seconds of idling.Checking engine oil level XOpen the hood ( Y page 322).XUnscrew oil filler cap 0046 with integrated oil
dipstick.XWipe oil dipstick clean.XScrew filler cap 0046 back on as far as it will
go.XUnscrew oil filler cap 0046 once more and
read the oil dipstick.
The oil level is correct when it is between
lower (min) mark 008A and upper (max)
mark 0047 of oil dipstick 0046.
i
The filling quantity between the upper and
lower marks on the oil dipstick is
approximately 1.6 US qt. (1.5 l).
XIf necessary, add engine oil.
For more information on engine oil, see
“Fuels, coolants, lubricants etc.”
( Y page 425).
For information on messages in the
multifunction display concerning engine oil,
see the “Practical hints” section
( Y page 383).
Adding engine oil
! Only use approved engine oils and oil
filters required for vehicles with
Maintenance System. For a listing of
approved engine oils and oil filters, contact
an authorized Mercedes-Benz Center or
visit http://www.MBUSA.com (USA
only).
Engine compartment323OperationBA 197 USA, CA Edition A 2011; 1; 27, en-UShereepeVersion: 3.0.3.52010-03-24T15:31:10+01:00 - Seite 323Z
Page 326 of 436
The following will result in engine or
emission control system damage not
covered by the Mercedes-Benz Limited
Warranty:
RUsing engine oils and oil filters of
specification other than those expressly
required for the Maintenance System.
RChanging of oil and oil filter at change
intervals longer than those called for by
the Maintenance System.
RUsing any oil additives.
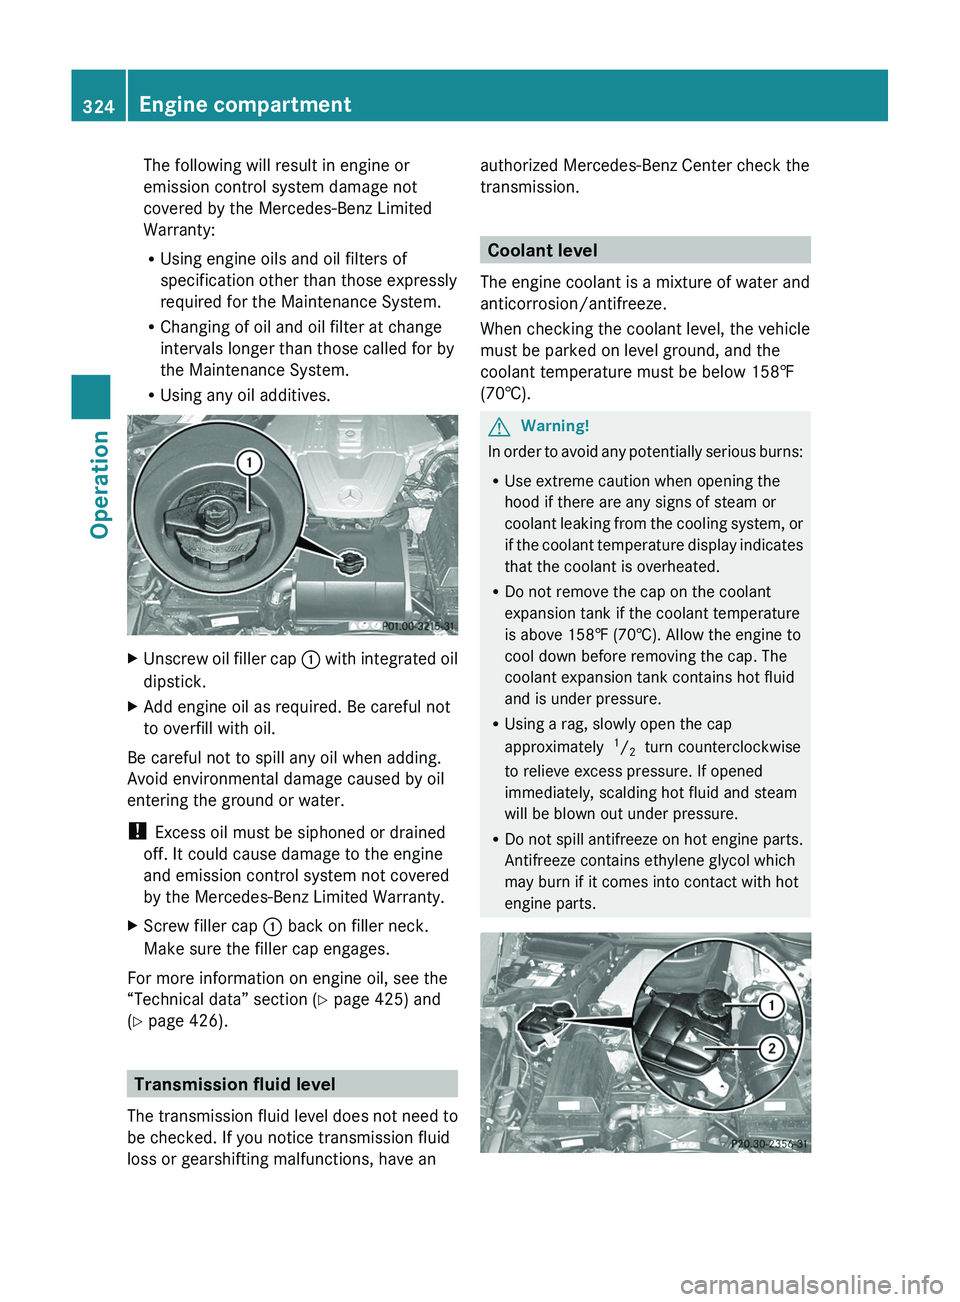
XUnscrew oil filler cap \000F with integrated oil
dipstick.
XAdd engine oil as required. Be careful not
to overfill with oil.
Be careful not to spill any oil when adding.
Avoid environmental damage caused by oil
entering the ground or water.
! Excess oil must be siphoned or drained
off. It could cause damage to the engine
and emission control system not covered
by the Mercedes-Benz Limited Warranty.
XScrew filler cap \000F back on filler neck.
Make sure the filler cap engages.
For more information on engine oil, see the
“Technical data” section (Y page 425) and
(Y page 426).
Transmission fluid level
The transmission fluid level does not need to
be checked. If you notice transmission fluid
loss or gearshifting malfunctions, have an
authorized Mercedes-Benz Center check the
transmission.
Coolant level
The engine coolant is a mixture of water and
anticorrosion/antifreeze.
When checking the coolant level, the vehicle
must be parked on level ground, and the
coolant temperature must be below 158‡
(70†).
GWarning!
In order to avoid any potentially serious burns:
RUse extreme caution when opening the
hood if there are any signs of steam or
coolant leaking from the cooling system, or
if the coolant temperature display indicates
that the coolant is overheated.
RDo not remove the cap on the coolant
expansion tank if the coolant temperature
is above 158‡ (70†). Allow the engine to
cool down before removing the cap. The
coolant expansion tank contains hot fluid
and is under pressure.
RUsing a rag, slowly open the cap
approximately 1/2 turn counterclockwise
to relieve excess pressure. If opened
immediately, scalding hot fluid and steam
will be blown out under pressure.
RDo not spill antifreeze on hot engine parts.
Antifreeze contains ethylene glycol which
may burn if it comes into contact with hot
engine parts.
324Engine compartmentOperation
BA 197 USA, CA Edition A 2011; 1; 27, en-UShereepeVersion: 3.0.3.52010-03-24T15:31:10+01:00 - Seite 324
Page 327 of 436
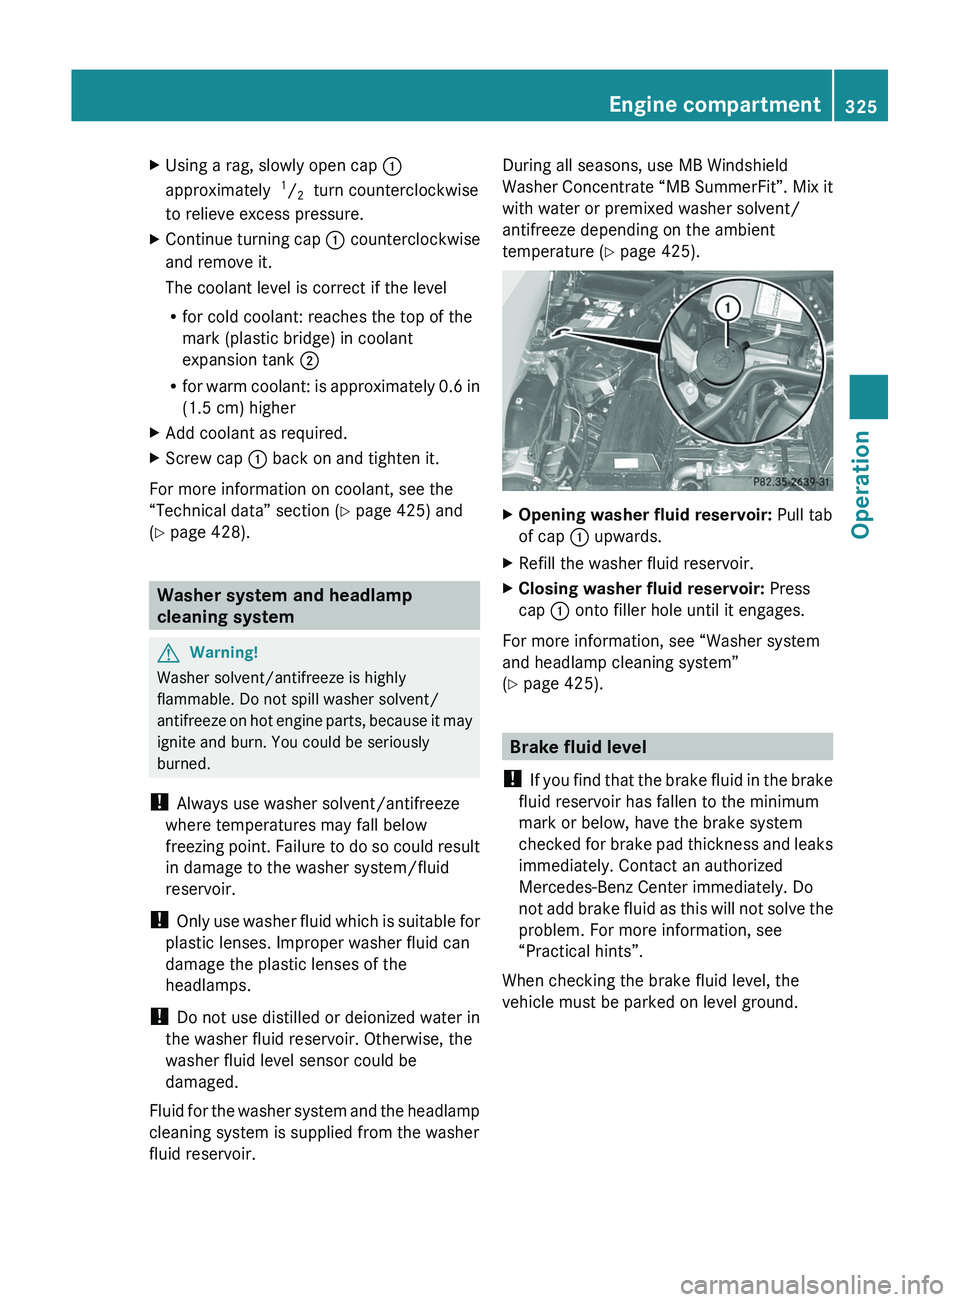
XUsing a rag, slowly open cap \000F
approximately 1/2 turn counterclockwise
to relieve excess pressure.
XContinue turning cap \000F counterclockwise
and remove it.
The coolant level is correct if the level
Rfor cold coolant: reaches the top of the
mark (plastic bridge) in coolant
expansion tank \000G
Rfor warm coolant: is approximately 0.6 in
(1.5 cm) higher
XAdd coolant as required.XScrew cap \000F back on and tighten it.
For more information on coolant, see the
“Technical data” section (Y page 425) and
(Y page 428).
Washer system and headlamp
cleaning system
GWarning!
Washer solvent/antifreeze is highly
flammable. Do not spill washer solvent/
antifreeze on hot engine parts, because it may
ignite and burn. You could be seriously
burned.
! Always use washer solvent/antifreeze
where temperatures may fall below
freezing point. Failure to do so could result
in damage to the washer system/fluid
reservoir.
! Only use washer fluid which is suitable for
plastic lenses. Improper washer fluid can
damage the plastic lenses of the
headlamps.
! Do not use distilled or deionized water in
the washer fluid reservoir. Otherwise, the
washer fluid level sensor could be
damaged.
Fluid for the washer system and the headlamp
cleaning system is supplied from the washer
fluid reservoir.
During all seasons, use MB Windshield
Washer Concentrate “MB SummerFit”. Mix it
with water or premixed washer solvent/
antifreeze depending on the ambient
temperature (Y page 425).
XOpening washer fluid reservoir: Pull tab
of cap \000F upwards.
XRefill the washer fluid reservoir.XClosing washer fluid reservoir: Press
cap \000F onto filler hole until it engages.
For more information, see “Washer system
and headlamp cleaning system”
(Y page 425).
Brake fluid level
! If you find that the brake fluid in the brake
fluid reservoir has fallen to the minimum
mark or below, have the brake system
checked for brake pad thickness and leaks
immediately. Contact an authorized
Mercedes-Benz Center immediately. Do
not add brake fluid as this will not solve the
problem. For more information, see
“Practical hints”.
When checking the brake fluid level, the
vehicle must be parked on level ground.
Engine compartment325OperationBA 197 USA, CA Edition A 2011; 1; 27, en-UShereepeVersion: 3.0.3.52010-03-24T15:31:10+01:00 - Seite 325Z