2011 MERCEDES-BENZ SLK55AMG ESP
[x] Cancel search: ESPPage 50 of 312

i
In winter operation, the maximum
effectiveness of most of the driving
systems described in this section is only
achieved with winter tires, or snow chains
as required.
Safety notes G
Warning!
The following factors increase the risk of
accidents:
R Excessive speed, especially in turns
R Wet and slippery road surfaces
R Following another vehicle too closely
The driving safety systems described in this
section cannot reduce these risks or prevent
the
natural laws of physics from acting on the
vehicle. They cannot increase braking or
steering efficiency beyond that afforded by
the condition of the vehicle brakes and tires
or the traction afforded.
Only a safe, attentive, and skillful driver can
prevent accidents.
The capabilities of a vehicle equipped with the
driving safety systems described in this
section must never be exploited in a reckless
or dangerous manner which could jeopardize
the user’s safety or the safety of others.
Always adjust your driving style to the
prevailing road and weather conditions and
keep a safe distance to other road users and
objects on the street.
If a driving system malfunctions, other driving
safety systems may also switch off. Observe
indicator and warning lamps that may come
on as well as messages in the multifunction
display that may appear. ABS
G
Observe Safety notes, see page 48. G
Warning!
Do not pump the brake pedal. Use firm, steady
brake pedal pressure instead. Pumping the
brake pedal defeats the purpose of the ABS
and significantly reduces braking
effectiveness.
The Antilock Brake System (ABS) regulates
the
brake pressure so that the wheels do not
lock during braking. This allows you to
maintain the ability to steer your vehicle.
The ABS is functional above a speed of
approximately 5 mph (8 km/h) independent
of road surface conditions.
On slippery road surfaces, the ABS will
respond even to light brake pressure.
The ABS indicator lamp ! in the
instrument cluster comes on when you switch
on the ignition. It goes out when the engine
is running.
Braking At the instant one of the wheels is about to
lock up, a slight pulsation can be felt in the
brake pedal. The pulsation indicates that the
ABS is in the regulating mode.
X
Keep firm and steady pressure on the brake
pedal while you feel the pulsation.
Continuous, steady brake pedal pressure
yields the advantages provided by the ABS,
namely
braking power and the ability to steer
the vehicle.
The pulsating brake pedal can be an
indication of hazardous road conditions and
functions as a reminder to take extra care
while driving.
Emergency brake maneuver X
Keep continuous full pressure on the brake
pedal. 48
Driving safety systems
Safety and security
171_AKB; 3; 60, en-US
d2ureepe,
Version: 2.11.8.1 2009-05-11T16:00:23+02:00 - Seite 48
Page 51 of 312
G
Warning!
If the ABS malfunctions, other driving safety
systems such as the BAS or the ESP ®
are also
switched off. Observe indicator and warning
lamps that may come on as well as messages
in the multifunction display that may appear.
If the ABS malfunctions, the wheels may lock
during hard braking, reducing steering
capability and extending the braking distance. BAS
G
Observe Safety notes, see page 48.
The Brake Assist System (BAS) operates in
emergency
situations. If you apply the brakes
very quickly, the BAS provides full brake
boost automatically, thereby potentially
reducing the braking distance.
X Apply continuous full braking pressure until
the emergency braking situation is over.
The ABS will prevent the wheels from
locking.
When you release the brake pedal, the brakes
function again as normal. The BAS is then
deactivated. G
Warning!
If the BAS malfunctions, the brake system still
functions, but without the additional brake
boost available that the BAS would normally
provide in an emergency braking maneuver.
Therefore,
the braking distance may increase. ESP
® G
Observe Safety notes, see page 48.
The Electronic Stability Program (ESP ®
) is
operational
as soon as the engine is running.
It monitors the vehicle’s traction (force of
adhesive friction between the tires and the
road surface) and handling.
The ESP ®
recognizes that the vehicle deviates
from the direction of travel as intended by the
driver. By applying brakes to individual wheels and by limiting the engine output, the
ESP
®
works to stabilize the vehicle. The
ESP ®
is especially useful while driving off and
on wet or slippery road surfaces. The ESP ®
also stabilizes the vehicle during braking and
steering maneuvers.
The ESP ®
warning lamp d in the
instrument cluster comes on when you switch
on the ignition. It goes out when the engine
is running.
The ESP ®
warning lamp d in the
instrument cluster flashes when the ESP ®
is
engaged. G
Warning!
Never switch off the ESP ®
when you see the
ESP ®
warning lamp d flashing in the
instrument cluster. In this case proceed as
follows:
R When driving off, apply as little throttle as
possible.
R While driving, ease up on the accelerator
pedal.
R Adapt your speed and driving style to the
prevailing road conditions.
Failure to observe these guidelines could
cause the vehicle to skid. The ESP ®
cannot
prevent accidents resulting from excessive
speed.
! Because the ESP ®
operates
automatically,
the engine and ignition must
be shut off (SmartKey in starter switch
position 0 or 1) when the parking brake is
being tested on a brake test dynamometer
or when the vehicle is being towed with the
front axle raised.
Active braking action through the ESP ®
may otherwise seriously damage the brake
system which is not covered by the
Mercedes-Benz Limited Warranty.
! The ESP ®
will only function properly if you
use wheels of the recommended tire size Driving safety systems
49
Safety and security
171_AKB; 3; 60, en-US
d2ureepe, Version: 2.11.8.1 2009-05-11T16:00:23+02:00 - Seite 49 Z
Page 52 of 312

as specified in the “Technical data” section
of this Operator’s Manual.
i The cruise control switches off
automatically when the ESP ®
engages.
Electronic Traction System (ETS) G
Observe Safety notes, see page 48.
The ETS (Electronic Traction System) is a
component of the ESP ®
. The ETS improves
the vehicle’s ability to utilize available
traction, especially under slippery road
conditions by applying the brakes to a
spinning wheel.
When you switch off the ESP ®
, the ETS is still
enabled.
Switching off the ESP ®G
Warning!
The ESP ®
should not be switched off during
normal driving other than in the
circumstances described below. Disabling
the system will reduce vehicle stability in
driving maneuvers.
Do not switch off the ESP ®
when a spare
wheel is mounted.
To improve the vehicle’s traction, switch off
the ESP ®
. This allows the drive wheels to spin
and thus cut into surfaces for better grip, for
example
R when driving with snow chains
R in deep snow
R in sand or gravel G
Warning!
Switch on the ESP ®
immediately if the
aforementioned circumstances do not apply
anymore. Otherwise the ESP ®
will not
stabilize the vehicle when it is starting to skid
or a wheel is spinning. When you switch off the ESP
®
,
R the ESP ®
does not stabilize the vehicle
R the engine output is not limited, which
allows the drive wheels to spin and thus cut
into surfaces for better grip
R the ETS will still apply the brakes to a
spinning wheel
R the ESP ®
continues to operate when you
are braking
R the cruise control cannot be activated
R the cruise control switches off if activated
i When the ESP ®
is switched off and one or
more drive wheels are spinning, the ESP ®
warning lamp d in the instrument
cluster flashes. However, the ESP ®
will
then not stabilize the vehicle. X
With the engine running, press ESP ®
switch : until the ESP ®
warning lamp
d in the instrument cluster comes on.
The ESP ®
is switched off. G
Warning!
When the ESP ®
warning lamp d is
illuminated continuously, the ESP ®
is
switched off or is not operational due to a
malfunction. Vehicle stability in standard
driving maneuvers is reduced.
Adapt your speed and driving to the prevailing
road conditions and to the non-operating
status of the ESP ®
. 50
Driving safety systemsSafety and security
171_AKB; 3; 60, en-US
d2ureepe,
Version: 2.11.8.1 2009-05-11T16:00:23+02:00 - Seite 50
Page 53 of 312
!
Avoid spinning of a drive wheel for an
extended period with the ESP ®
switched
off. This may cause serious damage to the
drivetrain which is not covered by the
Mercedes-Benz Limited Warranty.
Switching on the ESP ®X
Press ESP ®
switch : until the ESP ®
warning lamp d in the instrument
cluster goes out.
You are now again in normal driving mode
with the ESP ®
switched on. Anti-theft systems
Immobilizer
The immobilizer prevents unauthorized
persons from starting your vehicle.
When leaving the vehicle, always take the
SmartKey with you and lock the vehicle. The
engine can be started by anyone with a valid
SmartKey that is left inside the vehicle.
Activating X
Remove the SmartKey from the starter
switch.
Deactivating X
Switch on the ignition.
i Starting the engine will also deactivate
the immobilizer.
In the event that the engine cannot be
started (yet the vehicle’s battery is
charged), the system is not operational.
Contact an authorized Mercedes-Benz
Center
or call 1-800-FOR-MERCedes (in the
USA) or 1-800-387-0100 (in Canada). Anti-theft alarm system
Once the alarm system has been armed, a
visual and audible alarm is triggered when
someone opens
R a door
R the trunk
R the hood
R the glove box
R the storage compartment under the
armrest
The alarm will stay on even if the activating
element, a door, for example, is closed
immediately.
The
alarm system will also be triggered when
R the vehicle is raised (tow-away alarm)
R the vehicle is opened with the mechanical
key
R a door is opened from the inside
R the trunk is opened with the emergency
release button
To cancel the alarm after it has been
triggered, see “Canceling the alarm”
(Y page 53).
i If the alarm stays on for more than
30 seconds, the Tele Aid system initiates a
call to the Customer Assistance Center
automatically. The Tele Aid system will
initiate the call provided that
R you have subscribed to the Tele Aid
service
R the Tele Aid service has been activated
properly
R the necessary mobile phone, power
supply and GPS coverage are available Anti-theft systems
51
Safety and security
171_AKB; 3; 60, en-US
d2ureepe, Version: 2.11.8.1 2009-05-11T16:00:23+02:00 - Seite 51 Z
Page 54 of 312
X
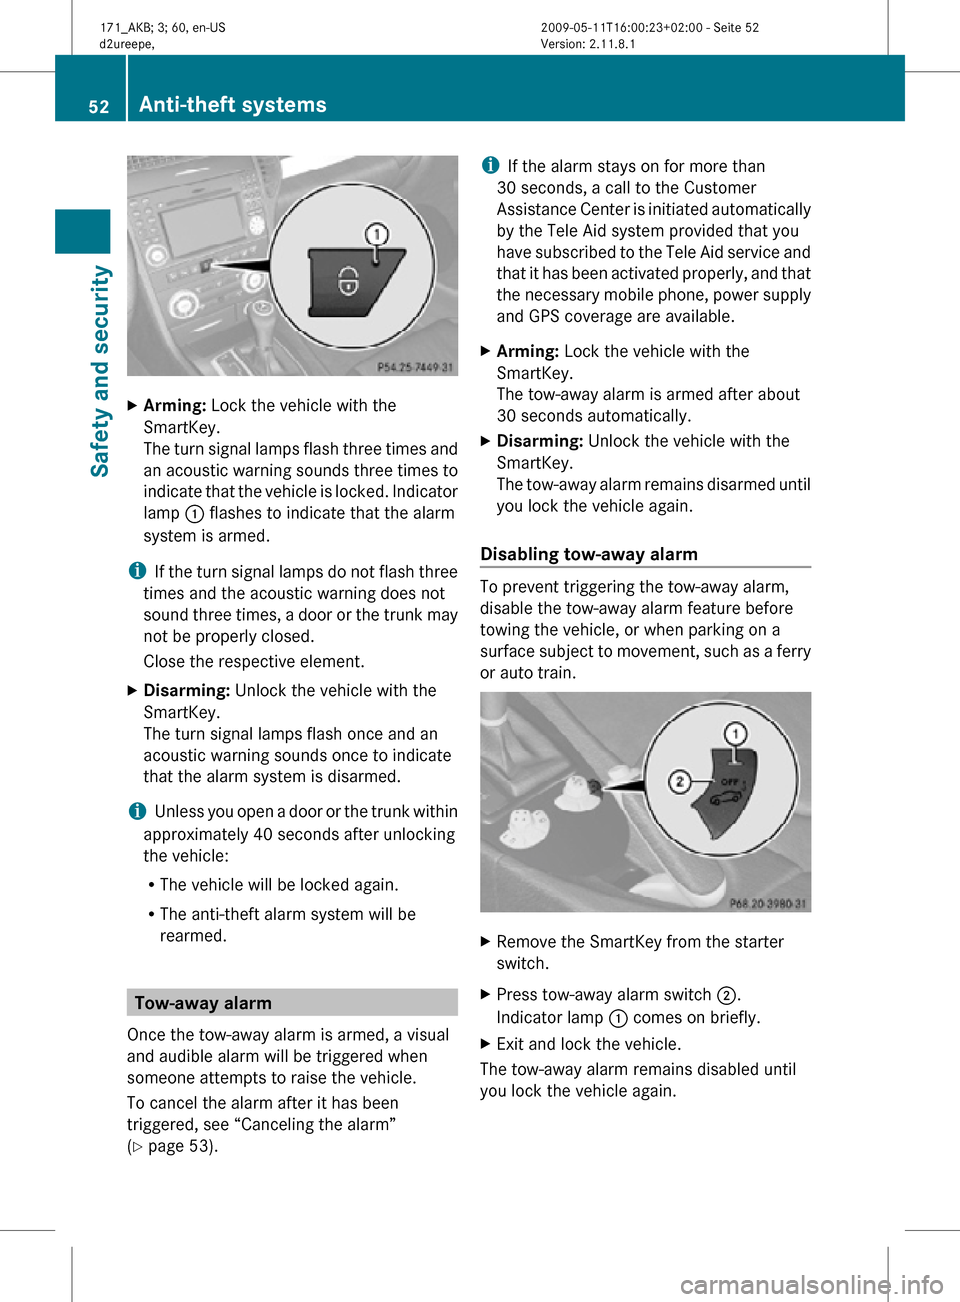
Arming: Lock the vehicle with the
SmartKey.
The turn signal lamps flash three times and
an acoustic warning sounds three times to
indicate that the vehicle is locked. Indicator
lamp : flashes to indicate that the alarm
system is armed.
i If the turn signal lamps do not flash three
times and the acoustic warning does not
sound three times, a door or the trunk may
not be properly closed.
Close the respective element.
X Disarming: Unlock the vehicle with the
SmartKey.
The turn signal lamps flash once and an
acoustic warning sounds once to indicate
that the alarm system is disarmed.
i Unless you open a door or the trunk within
approximately 40 seconds after unlocking
the vehicle:
R The vehicle will be locked again.
R The anti-theft alarm system will be
rearmed. Tow-away alarm
Once the tow-away alarm is armed, a visual
and audible alarm will be triggered when
someone attempts to raise the vehicle.
To cancel the alarm after it has been
triggered, see “Canceling the alarm”
(Y page 53). i
If the alarm stays on for more than
30 seconds, a call to the Customer
Assistance Center is initiated automatically
by the Tele Aid system provided that you
have subscribed to the Tele Aid service and
that it has been activated properly, and that
the necessary mobile phone, power supply
and GPS coverage are available.
X Arming: Lock the vehicle with the
SmartKey.
The tow-away alarm is armed after about
30 seconds automatically.
X Disarming: Unlock the vehicle with the
SmartKey.
The tow-away alarm remains disarmed until
you lock the vehicle again.
Disabling tow-away alarm To prevent triggering the tow-away alarm,
disable the tow-away alarm feature before
towing the vehicle, or when parking on a
surface subject to movement, such as a ferry
or auto train.
X
Remove the SmartKey from the starter
switch.
X Press tow-away alarm switch ;.
Indicator lamp : comes on briefly.
X Exit and lock the vehicle.
The tow-away alarm remains disabled until
you lock the vehicle again. 52
Anti-theft systemsSafety and security
171_AKB; 3; 60, en-US
d2ureepe,
Version: 2.11.8.1 2009-05-11T16:00:23+02:00 - Seite 52
Page 60 of 312
If the battery check lamp does not come on
briefly during check, the SmartKey batteries
are discharged.
X
Replace the batteries ( Y page 266).
i You can obtain the required batteries at
any authorized Mercedes-Benz Center.
i If the batteries are checked within signal
range of the vehicle, pressing button
& or % will lock or unlock the vehicle
accordingly. Loss of the SmartKey
If you lose your SmartKey or mechanical key,
you should do the following:
X Have the SmartKey deactivated by an
authorized Mercedes-Benz Center.
X Report the loss of the SmartKey or the
mechanical key to your car insurance
company immediately.
X Have the mechanical lock replaced if
necessary.
Any authorized Mercedes-Benz Center will be
glad to supply you with a replacement. For
information on replacing the SmartKey, see
“Replacing the SmartKey” ( Y page 58).Replacing the SmartKey
Only you, or someone authorized by you can
order a replacement key from any Mercedes-
Benz Center. In order to do so, the Mercedes-
Benz Center will require proof of identity and
vehicle ownership with original documents,
including the following:
If you are the current owner of the vehicle:
R the vehicle’s current state registration
R a current identity card, passport, or drivers
license If you are an authorized person:
R
the vehicle’s current state registration
R a current identity card, passport, or drivers
license for the authorized individual
R signed and dated authorization from the
owner of the vehicle for which the key is
being requested
i Duplicated or photocopied
documentation will not be accepted.
Activating the key Once you, or an authorized person, has
provided the appropriate documents, the
Mercedes-Benz Center will need to
synchronize the key to your vehicle before it
can be used. In order to do so, the Mercedes-
Benz Center need access to your vehicle.
Opening the doors from the inside
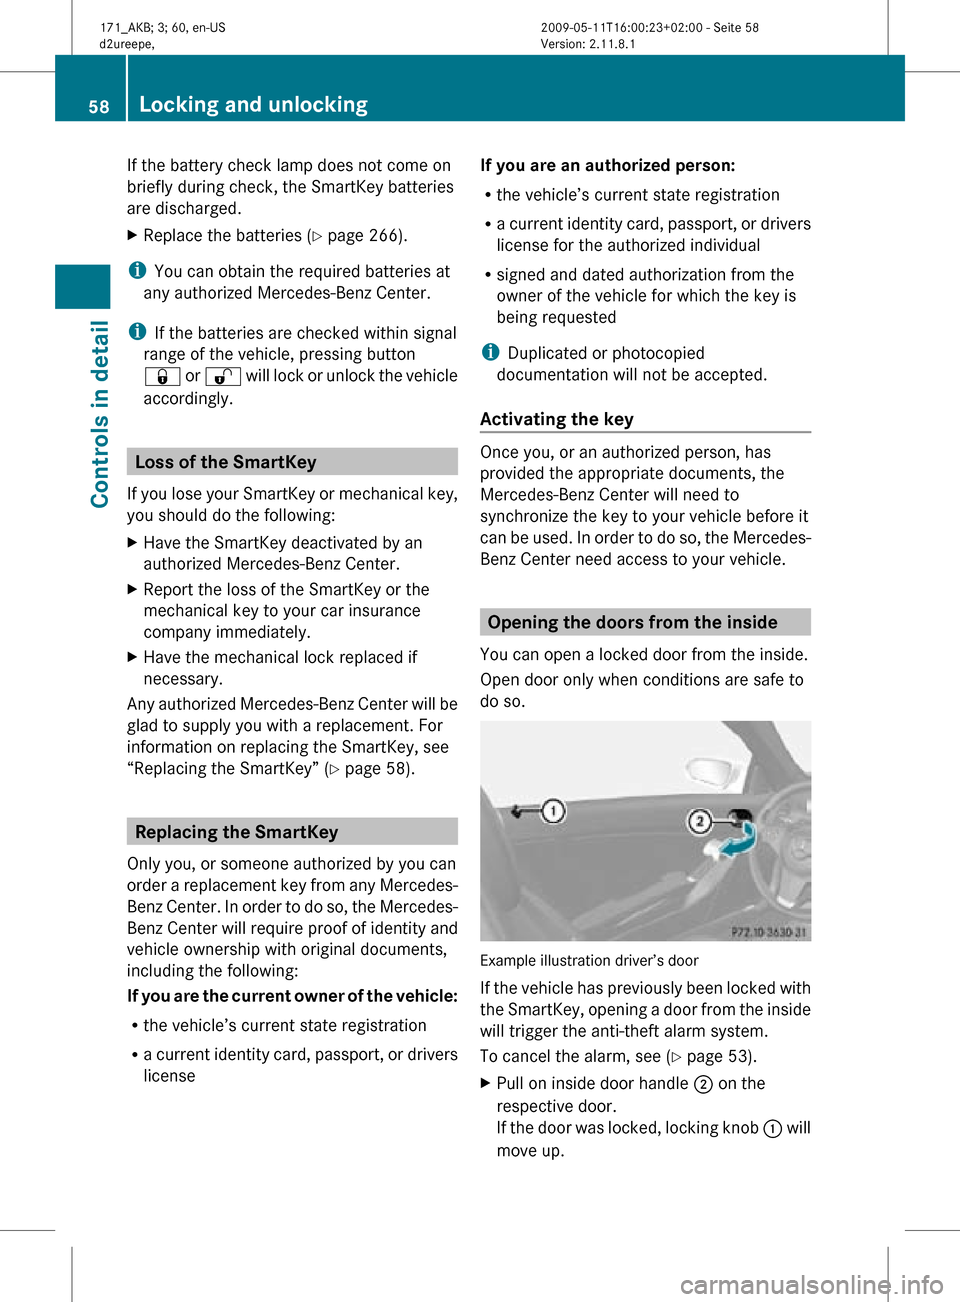
You can open a locked door from the inside.
Open door only when conditions are safe to
do so. Example illustration driver’s door
If the vehicle has previously been locked with
the SmartKey, opening a door from the inside
will trigger the anti-theft alarm system.
To cancel the alarm, see (
Y page 53).
X Pull on inside door handle ; on the
respective door.
If the door was locked, locking knob : will
move up. 58
Locking and unlockingControls in detail
171_AKB; 3; 60, en-US
d2ureepe,
Version: 2.11.8.1 2009-05-11T16:00:23+02:00 - Seite 58
Page 62 of 312
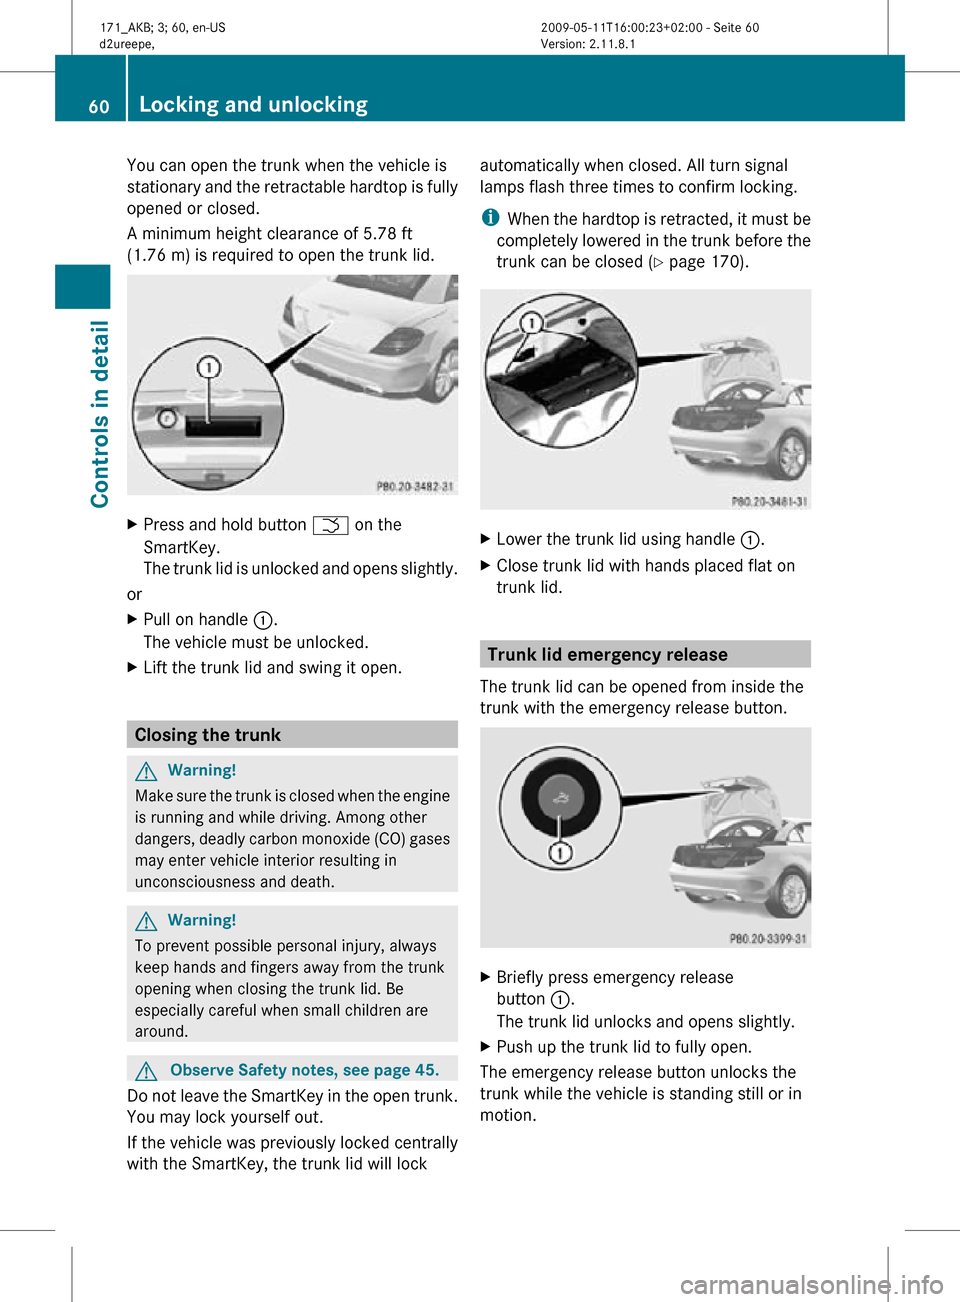
You can open the trunk when the vehicle is
stationary and the retractable hardtop is fully
opened or closed.
A minimum height clearance of 5.78 ft
(1.76 m) is required to open the trunk lid.
X
Press and hold button F on the
SmartKey.
The trunk lid is unlocked and opens slightly.
or
X Pull on handle :.
The vehicle must be unlocked.
X Lift the trunk lid and swing it open. Closing the trunk
G
Warning!
Make sure the trunk is closed when the engine
is running and while driving. Among other
dangers, deadly carbon monoxide (CO) gases
may enter vehicle interior resulting in
unconsciousness and death. G
Warning!
To prevent possible personal injury, always
keep hands and fingers away from the trunk
opening when closing the trunk lid. Be
especially careful when small children are
around. G
Observe Safety notes, see page 45.
Do not leave the SmartKey in the open trunk.
You may lock yourself out.
If the vehicle was previously locked centrally
with the SmartKey, the trunk lid will lock automatically when closed. All turn signal
lamps flash three times to confirm locking.
i
When the hardtop is retracted, it must be
completely lowered in the trunk before the
trunk can be closed ( Y page 170). X
Lower the trunk lid using handle :.
X Close trunk lid with hands placed flat on
trunk lid. Trunk lid emergency release
The trunk lid can be opened from inside the
trunk with the emergency release button. X
Briefly press emergency release
button :.
The trunk lid unlocks and opens slightly.
X Push up the trunk lid to fully open.
The emergency release button unlocks the
trunk while the vehicle is standing still or in
motion. 60
Locking and unlockingControls in detail
171_AKB; 3; 60, en-US
d2ureepe,
Version: 2.11.8.1 2009-05-11T16:00:23+02:00 - Seite 60
Page 67 of 312
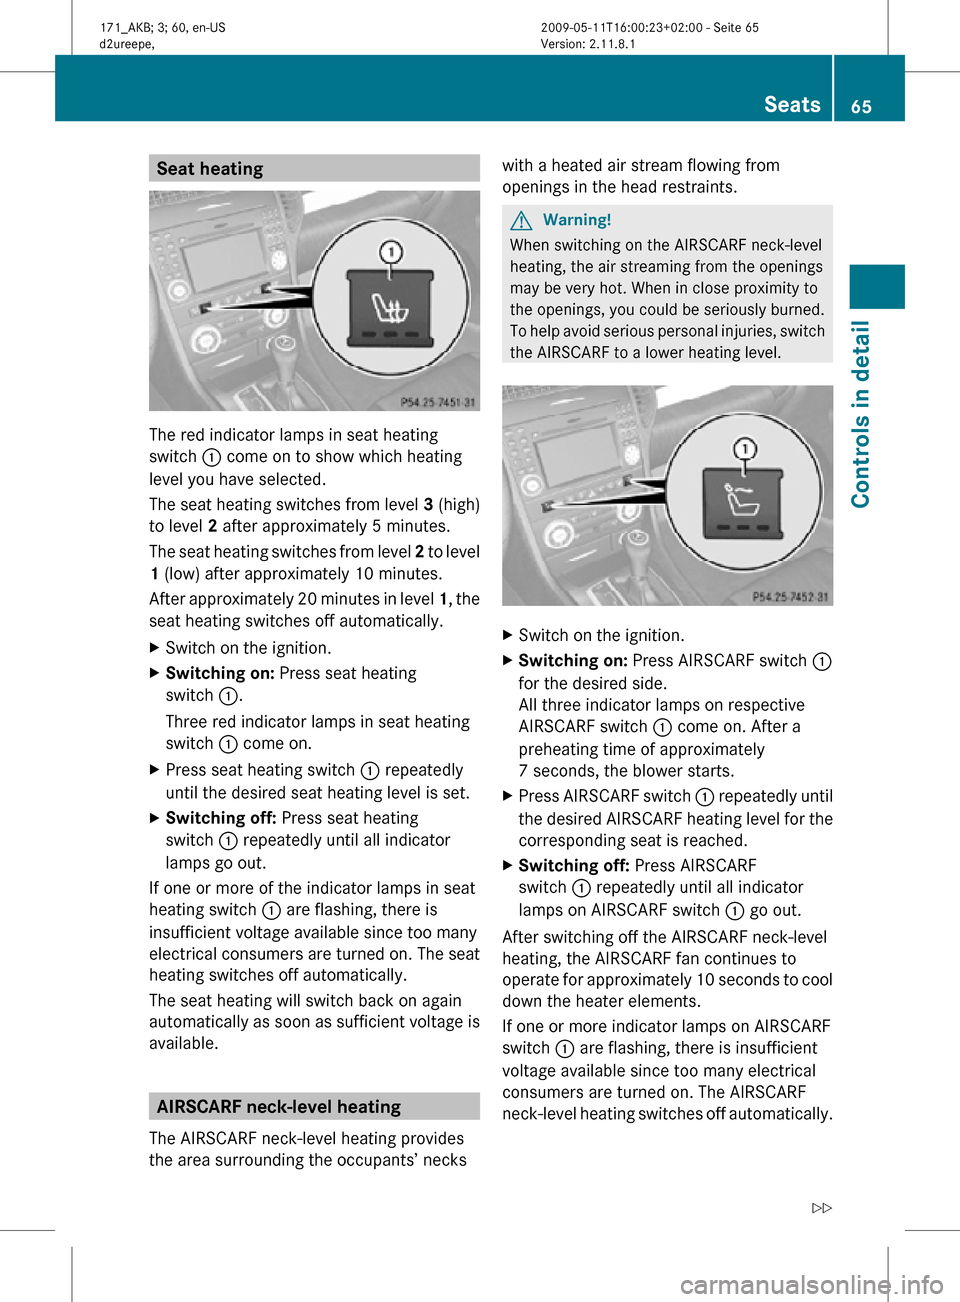
Seat heating
The red indicator lamps in seat heating
switch : come on to show which heating
level you have selected.
The seat heating switches from level
3 (high)
to level 2 after approximately 5 minutes.
The seat heating switches from level 2 to level
1 (low) after approximately 10 minutes.
After approximately 20 minutes in level 1, the
seat heating switches off automatically.
X Switch on the ignition.
X Switching on: Press seat heating
switch :.
Three red indicator lamps in seat heating
switch : come on.
X Press seat heating switch : repeatedly
until the desired seat heating level is set.
X Switching off: Press seat heating
switch : repeatedly until all indicator
lamps go out.
If one or more of the indicator lamps in seat
heating switch : are flashing, there is
insufficient voltage available since too many
electrical consumers are turned on. The seat
heating switches off automatically.
The seat heating will switch back on again
automatically as soon as sufficient voltage is
available. AIRSCARF neck-level heating
The AIRSCARF neck-level heating provides
the area surrounding the occupants’ necks with a heated air stream flowing from
openings in the head restraints. G
Warning!
When switching on the AIRSCARF neck-level
heating, the air streaming from the openings
may be very hot. When in close proximity to
the openings, you could be seriously burned.
To help avoid serious personal injuries, switch
the AIRSCARF to a lower heating level. X
Switch on the ignition.
X Switching on: Press AIRSCARF switch :
for the desired side.
All three indicator lamps on respective
AIRSCARF switch : come on. After a
preheating time of approximately
7 seconds, the blower starts.
X Press AIRSCARF switch : repeatedly until
the desired AIRSCARF heating level for the
corresponding seat is reached.
X Switching off: Press AIRSCARF
switch : repeatedly until all indicator
lamps on AIRSCARF switch : go out.
After switching off the AIRSCARF neck-level
heating, the AIRSCARF fan continues to
operate for approximately 10 seconds to cool
down the heater elements.
If one or more indicator lamps on AIRSCARF
switch : are flashing, there is insufficient
voltage available since too many electrical
consumers are turned on. The AIRSCARF
neck-level heating switches off automatically. Seats
65Controls in detail
171_AKB; 3; 60, en-US
d2ureepe, Version: 2.11.8.1 2009-05-11T16:00:23+02:00 - Seite 65 Z