2011 MERCEDES-BENZ SLK55AMG phone
[x] Cancel search: phonePage 32 of 312
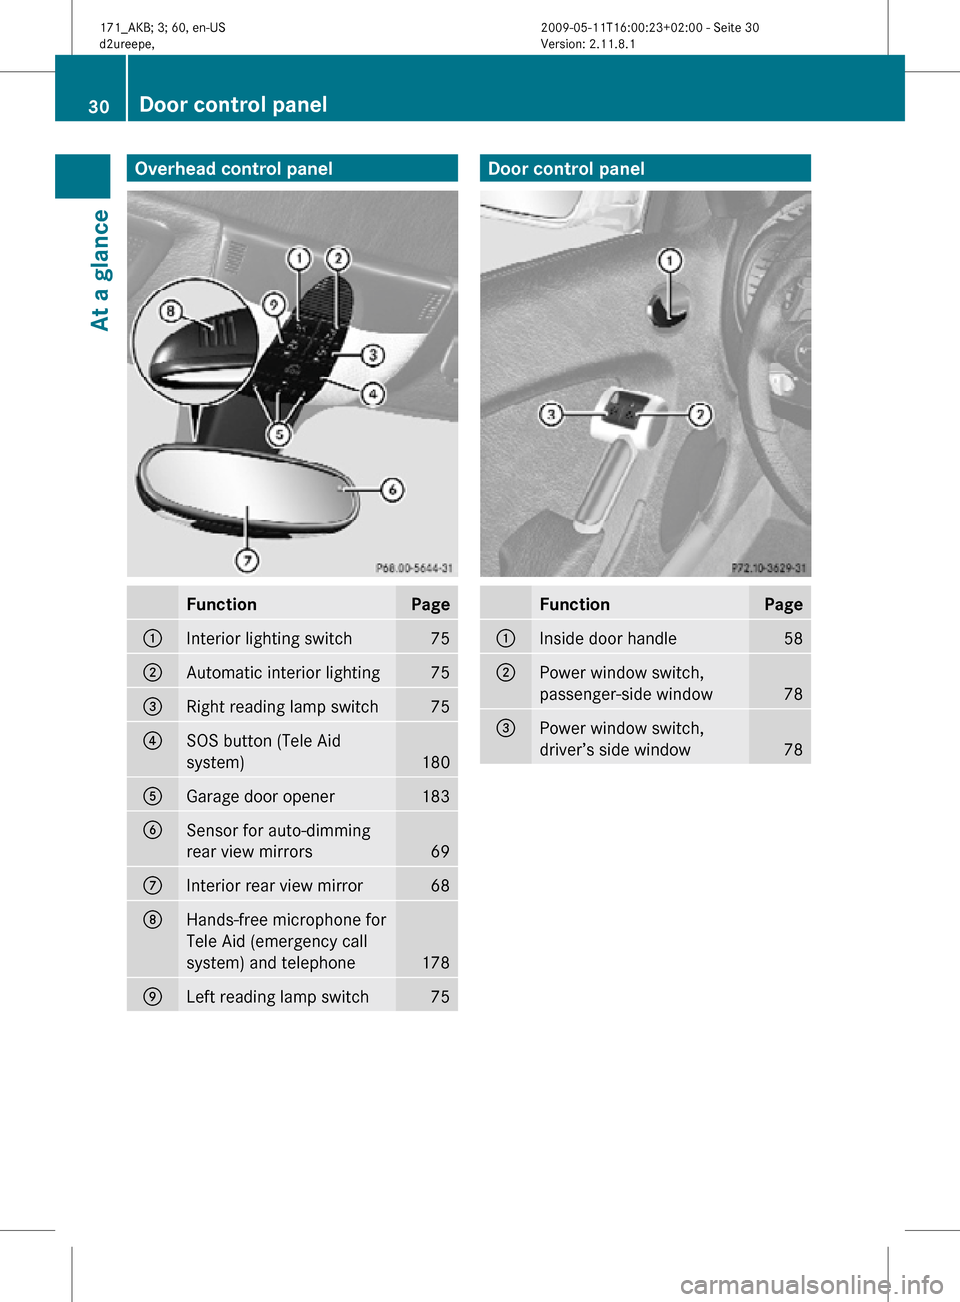
Overhead control panel
Function Page
:
Interior lighting switch 75
;
Automatic interior lighting 75
=
Right reading lamp switch 75
?
SOS button (Tele Aid
system)
180
A
Garage door opener 183
B
Sensor for auto-dimming
rear view mirrors
69
C
Interior rear view mirror 68
D
Hands-free microphone for
Tele Aid (emergency call
system) and telephone
178
E
Left reading lamp switch 75 Door control panel
Function Page
:
Inside door handle 58
;
Power window switch,
passenger-side window
78
=
Power window switch,
driver’s side window
7830
Door control panelAt a glance
171_AKB; 3; 60, en-US
d2ureepe,
Version: 2.11.8.1 2009-05-11T16:00:23+02:00 - Seite 30
Page 53 of 312
!
Avoid spinning of a drive wheel for an
extended period with the ESP ®
switched
off. This may cause serious damage to the
drivetrain which is not covered by the
Mercedes-Benz Limited Warranty.
Switching on the ESP ®X
Press ESP ®
switch : until the ESP ®
warning lamp d in the instrument
cluster goes out.
You are now again in normal driving mode
with the ESP ®
switched on. Anti-theft systems
Immobilizer
The immobilizer prevents unauthorized
persons from starting your vehicle.
When leaving the vehicle, always take the
SmartKey with you and lock the vehicle. The
engine can be started by anyone with a valid
SmartKey that is left inside the vehicle.
Activating X
Remove the SmartKey from the starter
switch.
Deactivating X
Switch on the ignition.
i Starting the engine will also deactivate
the immobilizer.
In the event that the engine cannot be
started (yet the vehicle’s battery is
charged), the system is not operational.
Contact an authorized Mercedes-Benz
Center
or call 1-800-FOR-MERCedes (in the
USA) or 1-800-387-0100 (in Canada). Anti-theft alarm system
Once the alarm system has been armed, a
visual and audible alarm is triggered when
someone opens
R a door
R the trunk
R the hood
R the glove box
R the storage compartment under the
armrest
The alarm will stay on even if the activating
element, a door, for example, is closed
immediately.
The
alarm system will also be triggered when
R the vehicle is raised (tow-away alarm)
R the vehicle is opened with the mechanical
key
R a door is opened from the inside
R the trunk is opened with the emergency
release button
To cancel the alarm after it has been
triggered, see “Canceling the alarm”
(Y page 53).
i If the alarm stays on for more than
30 seconds, the Tele Aid system initiates a
call to the Customer Assistance Center
automatically. The Tele Aid system will
initiate the call provided that
R you have subscribed to the Tele Aid
service
R the Tele Aid service has been activated
properly
R the necessary mobile phone, power
supply and GPS coverage are available Anti-theft systems
51
Safety and security
171_AKB; 3; 60, en-US
d2ureepe, Version: 2.11.8.1 2009-05-11T16:00:23+02:00 - Seite 51 Z
Page 54 of 312
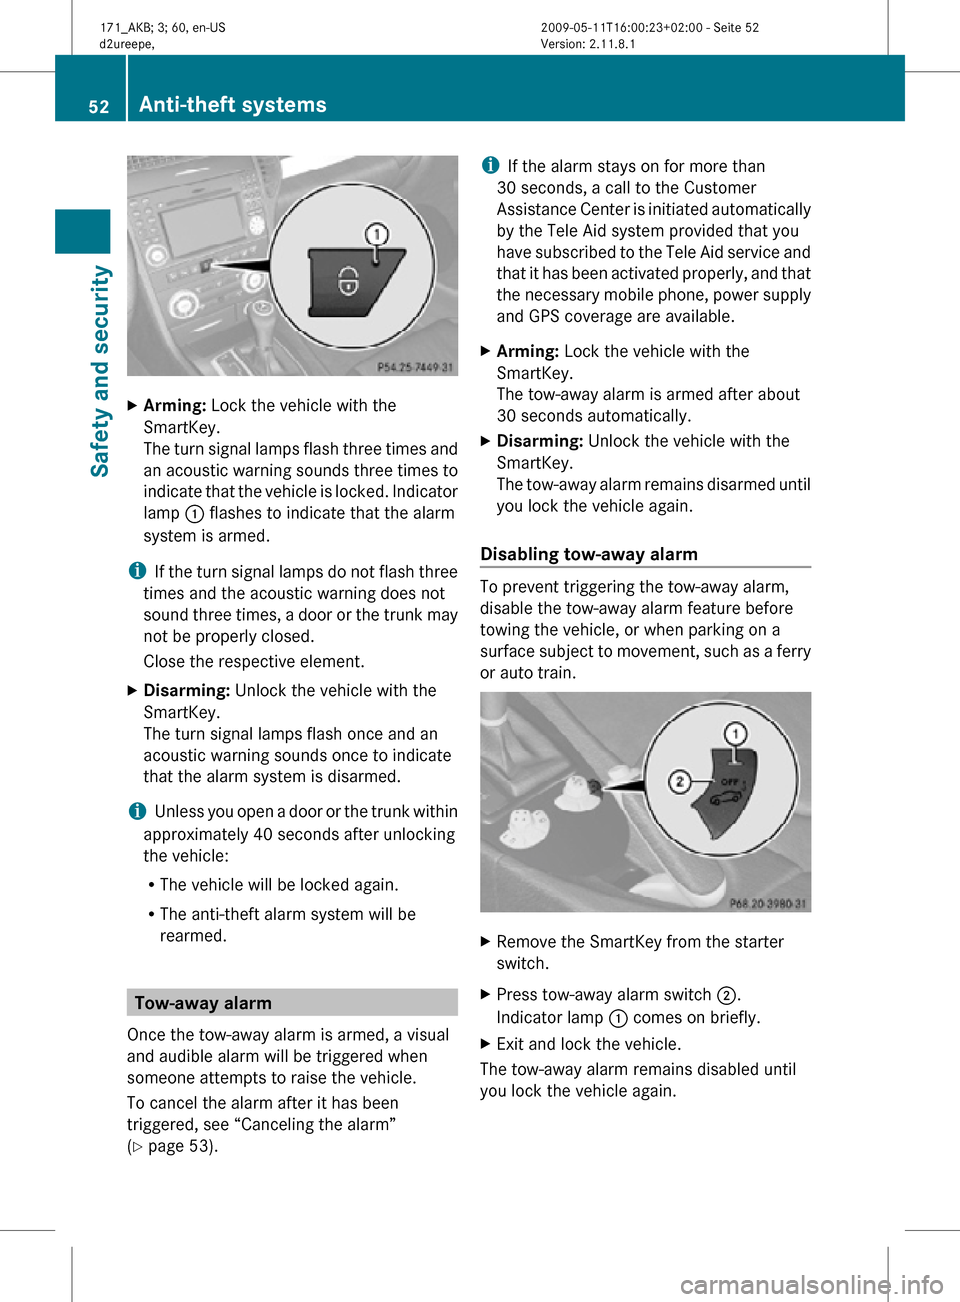
X
Arming: Lock the vehicle with the
SmartKey.
The turn signal lamps flash three times and
an acoustic warning sounds three times to
indicate that the vehicle is locked. Indicator
lamp : flashes to indicate that the alarm
system is armed.
i If the turn signal lamps do not flash three
times and the acoustic warning does not
sound three times, a door or the trunk may
not be properly closed.
Close the respective element.
X Disarming: Unlock the vehicle with the
SmartKey.
The turn signal lamps flash once and an
acoustic warning sounds once to indicate
that the alarm system is disarmed.
i Unless you open a door or the trunk within
approximately 40 seconds after unlocking
the vehicle:
R The vehicle will be locked again.
R The anti-theft alarm system will be
rearmed. Tow-away alarm
Once the tow-away alarm is armed, a visual
and audible alarm will be triggered when
someone attempts to raise the vehicle.
To cancel the alarm after it has been
triggered, see “Canceling the alarm”
(Y page 53). i
If the alarm stays on for more than
30 seconds, a call to the Customer
Assistance Center is initiated automatically
by the Tele Aid system provided that you
have subscribed to the Tele Aid service and
that it has been activated properly, and that
the necessary mobile phone, power supply
and GPS coverage are available.
X Arming: Lock the vehicle with the
SmartKey.
The tow-away alarm is armed after about
30 seconds automatically.
X Disarming: Unlock the vehicle with the
SmartKey.
The tow-away alarm remains disarmed until
you lock the vehicle again.
Disabling tow-away alarm To prevent triggering the tow-away alarm,
disable the tow-away alarm feature before
towing the vehicle, or when parking on a
surface subject to movement, such as a ferry
or auto train.
X
Remove the SmartKey from the starter
switch.
X Press tow-away alarm switch ;.
Indicator lamp : comes on briefly.
X Exit and lock the vehicle.
The tow-away alarm remains disabled until
you lock the vehicle again. 52
Anti-theft systemsSafety and security
171_AKB; 3; 60, en-US
d2ureepe,
Version: 2.11.8.1 2009-05-11T16:00:23+02:00 - Seite 52
Page 96 of 312
Bear in mind that at a speed of just 30 mph
(approximately 50 km/h), your vehicle is
covering a distance of 44 feet (approximately
14 m) every second.
The control system relays information to the
multifunction display. Multifunction steering wheel
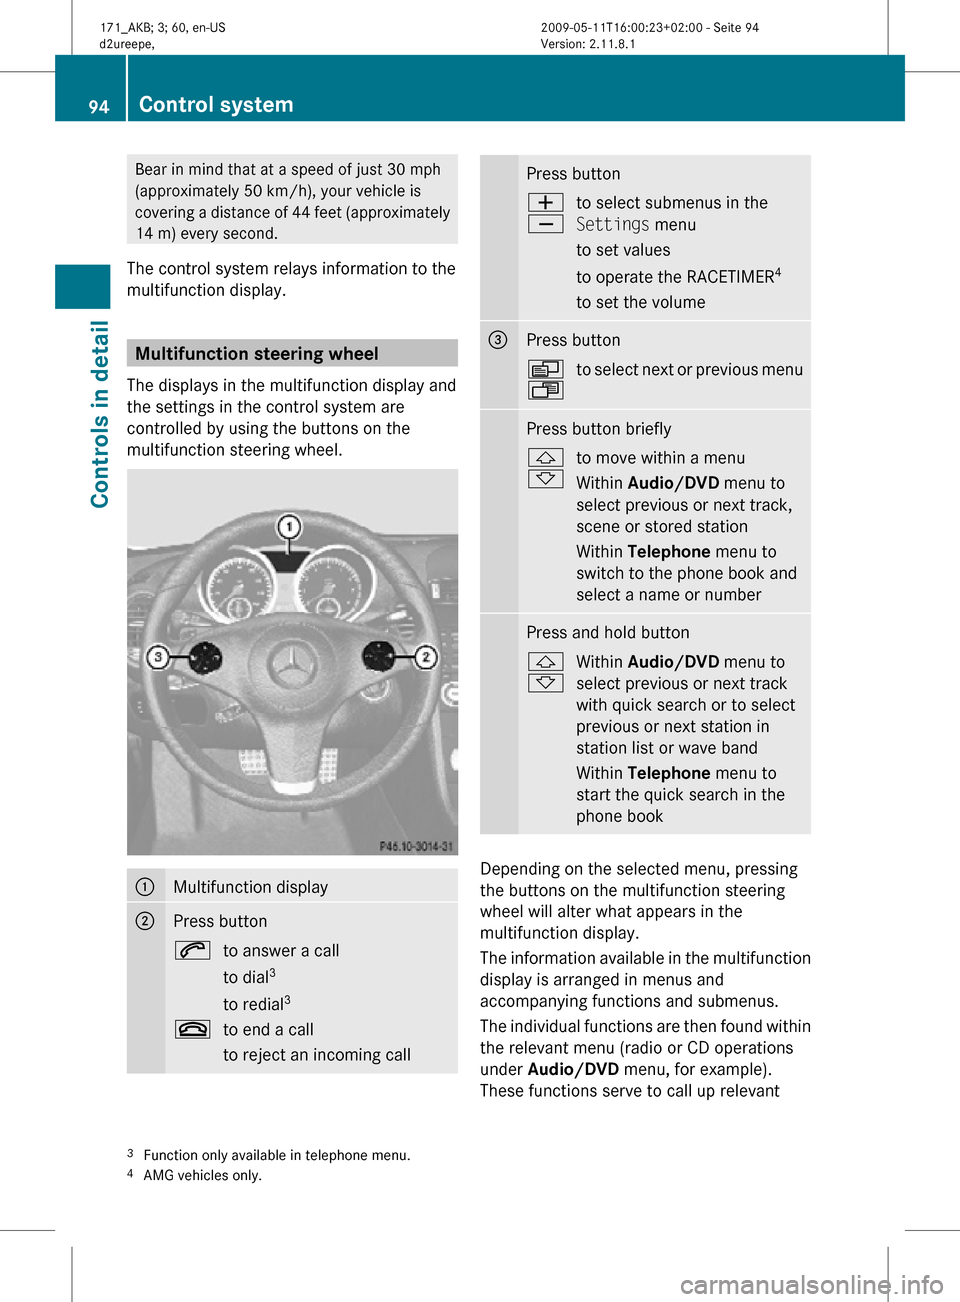
The displays in the multifunction display and
the settings in the control system are
controlled by using the buttons on the
multifunction steering wheel. :
Multifunction display
;
Press button
6
to answer a call
to dial3
to redial 3
~ to end a call
to reject an incoming call Press button
W
X
to select submenus in the
Settings menu
to set values
to operate the RACETIMER
4
to set the volume =
Press button
V
U
to select next or previous menu Press button briefly
&
*
to move within a menu
Within Audio/DVD
menu to
select previous or next track,
scene or stored station
Within Telephone menu to
switch to the phone book and
select a name or number Press and hold button
&
*
Within Audio/DVD
menu to
select previous or next track
with quick search or to select
previous or next station in
station list or wave band
Within Telephone menu to
start the quick search in the
phone book Depending on the selected menu, pressing
the buttons on the multifunction steering
wheel will alter what appears in the
multifunction display.
The information available in the multifunction
display is arranged in menus and
accompanying functions and submenus.
The individual functions are then found within
the relevant menu (radio or CD operations
under Audio/DVD
menu, for example).
These functions serve to call up relevant
3 Function only available in telephone menu.
4 AMG vehicles only. 94
Control systemControls in detail
171_AKB; 3; 60, en-US
d2ureepe,
Version: 2.11.8.1 2009-05-11T16:00:23+02:00 - Seite 94
Page 98 of 312

Menus and submenus
i
The headings used in the menus table are
designed to facilitate navigation within the
system and are not necessarily identical to
those shown in the multifunction display.
The first function displayed in each menu
will automatically show you which part of
the system you are in. Function
:
Standard display
menu
(Y page 96) ;
AMG
6
menu (Y page 97) =
Audio/DVD
menu (Y page 100) ?
Navigation menu (Y page 101)
A
Vehicle status message memory
7
menu (Y page 101) B
Settings menu (Y page 102)
C
Trip computer
menu (Y page 109) D
Telephone
menu (Y page 110) Standard display menu
Standard display
In the standard display, main odometer
:
and trip odometer ; appear in the
multifunction display.
X If you see another display, press button
V or U repeatedly until the standard
display appears.
X Press button & or * to select the
functions in the Standard display menu.
6 AMG vehicles only.
7 The vehicle status message memory menu is only displayed if there is a message stored. 96
Control systemControls in detail
171_AKB; 3; 60, en-US
d2ureepe,
Version: 2.11.8.1 2009-05-11T16:00:23+02:00 - Seite 96
Page 112 of 312
Resetting fuel consumption statistics
X
Press button U or V repeatedly until
the message From Start appears in the
multifunction display.
X Press button & or * repeatedly until
the reading that you want to reset appears
in the multifunction display.
X Press and hold the reset button . in the
instrument cluster until the respective
values are reset to 0.
The fuel consumption statistics reset
automatically to 0 after 99 999 miles or
9 999 hours, whichever occurs first.
Distance to empty X
Press button U or V repeatedly until
the message From Start appears in the
multifunction display.
X Press button & or * repeatedly until
the message Range: appears in the
multifunction display.
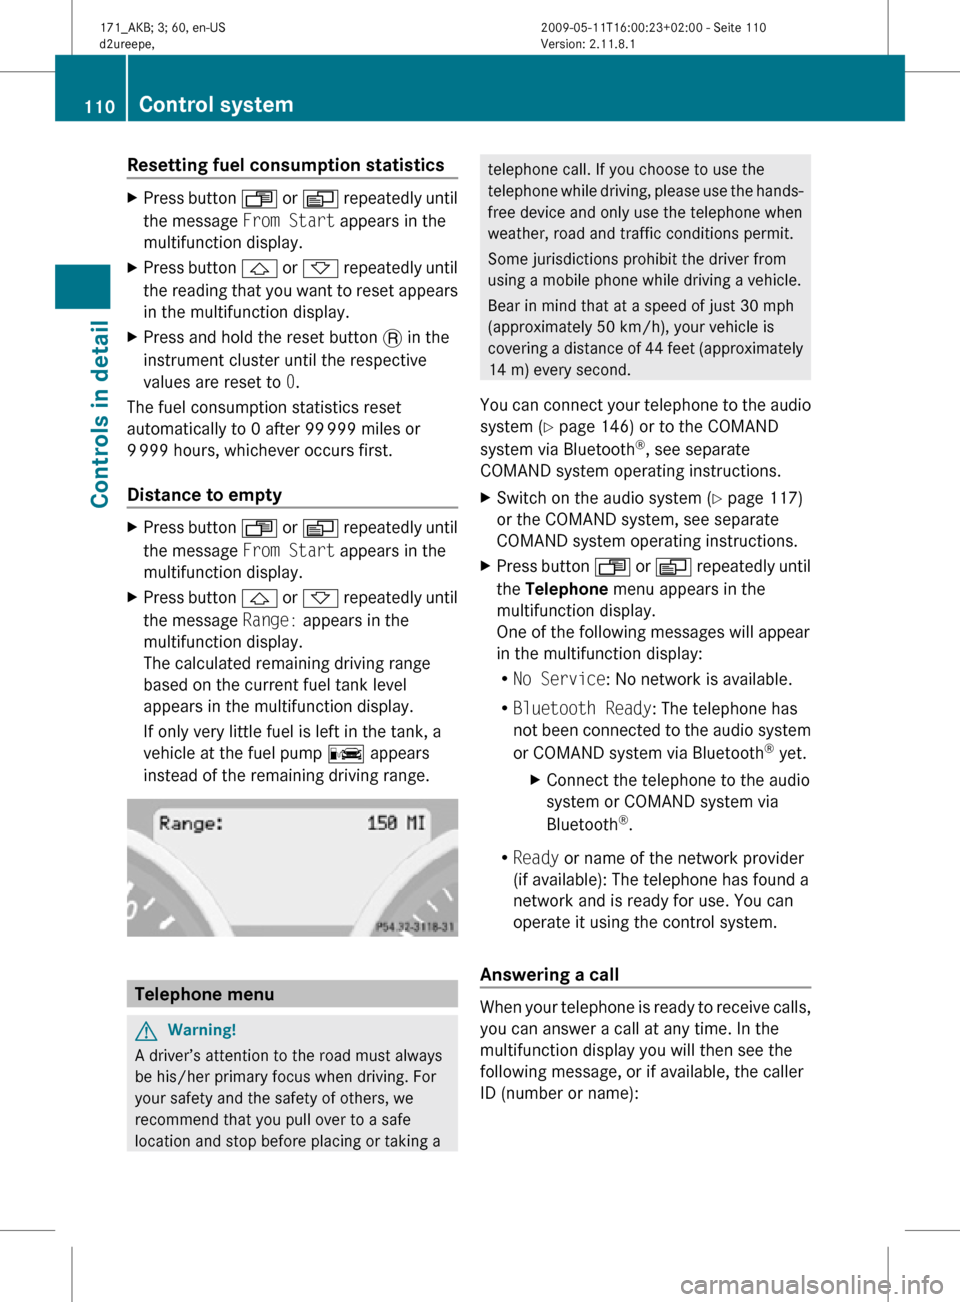
The calculated remaining driving range
based on the current fuel tank level
appears in the multifunction display.
If only very little fuel is left in the tank, a
vehicle at the fuel pump C appears
instead of the remaining driving range. Telephone menu
G
Warning!
A driver’s attention to the road must always
be his/her primary focus when driving. For
your safety and the safety of others, we
recommend that you pull over to a safe
location and stop before placing or taking a telephone call. If you choose to use the
telephone while driving, please use the hands-
free device and only use the telephone when
weather, road and traffic conditions permit.
Some jurisdictions prohibit the driver from
using a mobile phone while driving a vehicle.
Bear in mind that at a speed of just 30 mph
(approximately 50 km/h), your vehicle is
covering a distance of 44 feet (approximately
14 m) every second.
You can connect your telephone to the audio
system (Y page 146) or to the COMAND
system via Bluetooth ®
, see separate
COMAND system operating instructions.
X Switch on the audio system ( Y page 117)
or the COMAND system, see separate
COMAND system operating instructions.
X Press button U or V repeatedly until
the Telephone menu appears in the
multifunction display.
One of the following messages will appear
in the multifunction display:
R No Service: No network is available.
R Bluetooth Ready: The telephone has
not been connected to the audio system
or COMAND system via Bluetooth ®
yet.
X Connect the telephone to the audio
system or COMAND system via
Bluetooth ®
.
R Ready or name of the network provider
(if available): The telephone has found a
network and is ready for use. You can
operate it using the control system.
Answering a call When your telephone is ready to receive calls,
you can answer a call at any time. In the
multifunction display you will then see the
following message, or if available, the caller
ID (number or name):110
Control systemControls in detail
171_AKB; 3; 60, en-US
d2ureepe,
Version: 2.11.8.1 2009-05-11T16:00:23+02:00 - Seite 110
Page 113 of 312
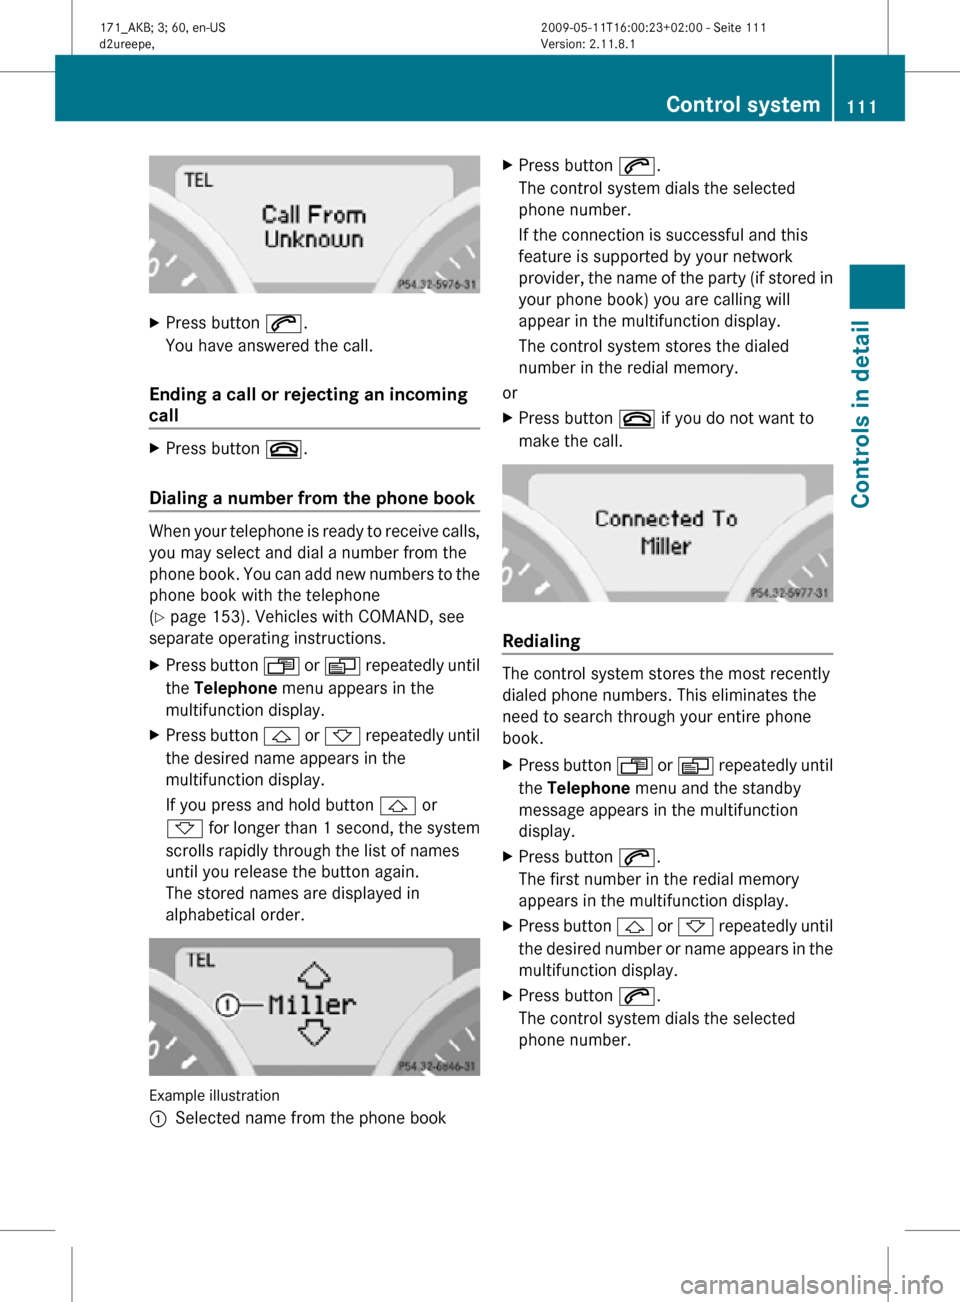
X
Press button 6.
You have answered the call.
Ending a call or rejecting an incoming
call X
Press button ~.
Dialing a number from the phone book When your telephone is ready to receive calls,
you may select and dial a number from the
phone book. You can add new numbers to the
phone book with the telephone
(Y page 153). Vehicles with COMAND, see
separate operating instructions.
X
Press button U or V repeatedly until
the Telephone menu appears in the
multifunction display.
X Press button & or * repeatedly until
the desired name appears in the
multifunction display.
If you press and hold button & or
* for longer than 1 second, the system
scrolls rapidly through the list of names
until you release the button again.
The stored names are displayed in
alphabetical order. Example illustration
:
Selected name from the phone book X
Press button 6.
The control system dials the selected
phone number.
If the connection is successful and this
feature is supported by your network
provider, the name of the party (if stored in
your phone book) you are calling will
appear in the multifunction display.
The control system stores the dialed
number in the redial memory.
or
X Press button ~ if you do not want to
make the call. Redialing
The control system stores the most recently
dialed phone numbers. This eliminates the
need to search through your entire phone
book.
X
Press button U or V repeatedly until
the Telephone menu and the standby
message appears in the multifunction
display.
X Press button 6.
The first number in the redial memory
appears in the multifunction display.
X Press button & or * repeatedly until
the desired number or name appears in the
multifunction display.
X Press button 6.
The control system dials the selected
phone number. Control system
111Controls in detail
171_AKB; 3; 60, en-US
d2ureepe, Version: 2.11.8.1 2009-05-11T16:00:23+02:00 - Seite 111 Z
Page 114 of 312
Audio system
Audio and telephone operation
These instructions are intended to help you
become familiar with your Mercedes-Benz
audio system. They contain useful tips and a
detailed description of the user functions. G
Warning!
In order to avoid distraction which could lead
to an accident, the driver should enter system
settings with the vehicle at a standstill and
operate the system only when road and traffic
conditions permit. Always pay full attention to
traffic conditions first before operating
system controls while driving.
Bear in mind that at a speed of just 30 mph
(approximately 50 km/h), your vehicle is
covering a distance of 44 feet (approximately
14 m) every second. Operating safety
G
Warning!
Any alterations made to electronic
components can cause malfunctions.
The radio, amplifier, CD changer, satellite
radio, and telephone are interconnected.
When one of the components is not
operational or has not been removed/
replaced properly, the function of other
components may be impaired.
This condition might seriously impair the
operating safety of your vehicle. We recommend that you have any service
work
on electronic components carried out at
an authorized Mercedes-Benz Center. Audio system components
With the audio system you can operate the
following main functions:
R Audio function with the radio, Satellite
radio,
disc (CD audio or MP3 mode), Audio
AUX and external audio devices
R the mobile phone with the phone book
R various system settings
In addition, the audio system can also be
operated with the multifunction steering
wheel (Y page 94).
In these instructions, the keypad (right side
of audio control unit) and the function buttons
are referred to as “buttons”.
Audio control unit With the audio control unit you can
R
switch the audio system on/off
R adjust the volume
R select the operating modes
R enter telephone numbers and accept,
reject, initiate and end telephone calls
R load and eject CDs 112
Audio system
Controls in detail
171_AKB; 3; 60, en-US
d2ureepe,
Version: 2.11.8.1 2009-05-11T16:00:23+02:00 - Seite 112