2011 MERCEDES-BENZ SLK300 roof
[x] Cancel search: roofPage 15 of 312

Rear lamps
see Tail lamps
Rear window defroster ..................... 170
Recommended tire inflation
pressure ..................................... 198, 218
Refrigerant, air conditioning ............ 303
Refueling ............................................ 190
Regular checks .................................. 191
Reminder, Seat belt see Seat belts, Telltale
Remote control
see Key, SmartKey
Remote door unlock (Tele Aid) .........182
Replacing
Key .................................................. 58
Replacing bulbs ................................. 267
Reporting safety defects .................... 21
Research Octane Number see RON
Reserve fuel
Messages in the multifunction
display ........................................... 251
Warning lamp ........................... 26, 261
Reset button .................................. 27, 92
Restraint systems see Occupant safety
Retractable hardtop ..........................170
Locking .......................................... 172
Luggage cover ............................... 173
Messages in the multifunction
display ........................................... 246
Operating manually ........................ 266
Wind screen ................................... 173
Rims ........................................... 218, 297
Roadside Assistance ...................19, 180
RON (Research Octane Number) ..... 303
Roof see Retractable hardtop
Rubber parts, cleaning ...................... 230 S
Safety Driving safety systems ..................... 47
Occupant safety ...............................
32
Reporting defects ............................ 21
Safety belts
see Seat belts Satellite radio ....................................
125
Seat belt force limiter ......................... 43
Seat belts ............................................. 40
Children in the vehicle .....................45
Cleaning .........................................
231
Fastening ......................................... 42
Proper use of ................................... 41
Safety guidelines ............................. 34
Safety notes ..................................... 40
Telltale ..................................... 26, 259
Seat heating ......................................... 65
Seating capacity ................................ 206
Seats ..................................................... 62 Adjustment ...................................... 62
Easy-entry/exit feature ....................67
Heating ............................................ 65
Memory function .............................. 70
Selective setting
see Key, SmartKey
Selector lever
see Gear selector lever
Self-test
OCS (Occupant Classification
System) ........................................... 39
Tele Aid .......................................... 178
Service
see Maintenance
Service, parts .................................... 292
Service and warranty information .....18
Service intervals see Maintenance System, Service
indicator message
Service life (tires) .............................. 210
Settings Factory setting (SmartKey) ..............57
Memory function .............................. 70
Menu ............................................. 102
Selective setting (SmartKey) ............57
Shelf behind roll bars ........................ 175
Side marker lamps
Cleaning lenses ............................. 229
Messages in the multifunction
display ........................................... 252
Sidewall (tires) .................................. 219
Side windows see Power windows Index
13 171_AKB; 3; 60, en-US
d2ureepe,
Version: 2.11.8.1 2009-05-11T16:00:23+02:00 - Seite 13
Page 60 of 312
If the battery check lamp does not come on
briefly during check, the SmartKey batteries
are discharged.
X
Replace the batteries ( Y page 266).
i You can obtain the required batteries at
any authorized Mercedes-Benz Center.
i If the batteries are checked within signal
range of the vehicle, pressing button
& or % will lock or unlock the vehicle
accordingly. Loss of the SmartKey
If you lose your SmartKey or mechanical key,
you should do the following:
X Have the SmartKey deactivated by an
authorized Mercedes-Benz Center.
X Report the loss of the SmartKey or the
mechanical key to your car insurance
company immediately.
X Have the mechanical lock replaced if
necessary.
Any authorized Mercedes-Benz Center will be
glad to supply you with a replacement. For
information on replacing the SmartKey, see
“Replacing the SmartKey” ( Y page 58).Replacing the SmartKey
Only you, or someone authorized by you can
order a replacement key from any Mercedes-
Benz Center. In order to do so, the Mercedes-
Benz Center will require proof of identity and
vehicle ownership with original documents,
including the following:
If you are the current owner of the vehicle:
R the vehicle’s current state registration
R a current identity card, passport, or drivers
license If you are an authorized person:
R
the vehicle’s current state registration
R a current identity card, passport, or drivers
license for the authorized individual
R signed and dated authorization from the
owner of the vehicle for which the key is
being requested
i Duplicated or photocopied
documentation will not be accepted.
Activating the key Once you, or an authorized person, has
provided the appropriate documents, the
Mercedes-Benz Center will need to
synchronize the key to your vehicle before it
can be used. In order to do so, the Mercedes-
Benz Center need access to your vehicle.
Opening the doors from the inside
You can open a locked door from the inside.
Open door only when conditions are safe to
do so. Example illustration driver’s door
If the vehicle has previously been locked with
the SmartKey, opening a door from the inside
will trigger the anti-theft alarm system.
To cancel the alarm, see (
Y page 53).
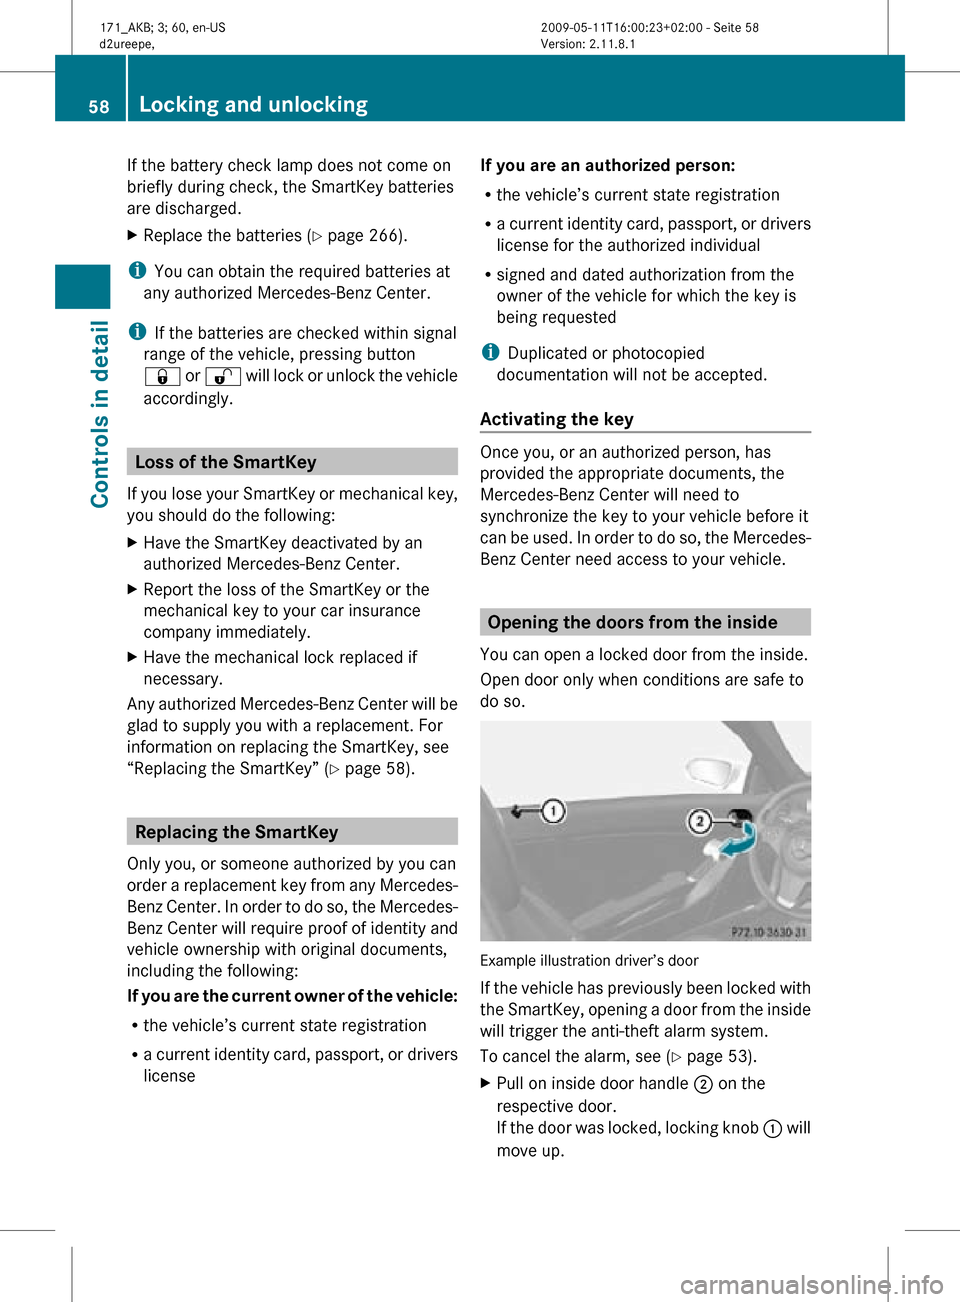
X Pull on inside door handle ; on the
respective door.
If the door was locked, locking knob : will
move up. 58
Locking and unlockingControls in detail
171_AKB; 3; 60, en-US
d2ureepe,
Version: 2.11.8.1 2009-05-11T16:00:23+02:00 - Seite 58
Page 172 of 312
X
Activating: Switch off the ignition.
X Press button Á 13
/Ì 14
.
The indicator lamp in the button comes on.
X Deactivating: Press button Á 13
/
Ì 14
.
The indicator lamp in the button goes out.
The residual heat is deactivated
automatically:
R when the ignition is switched on
R after approximately 30 minutes
R if the battery voltage drops
R if the coolant temperature is too low Rear window defroster
G
Warning!
Any accumulation of snow and ice should be
removed
from the rear window before driving.
Visibility could otherwise be impaired,
endangering you and others.
The rear window defroster uses a large
amount of power. To keep the battery drain
to a minimum, switch off the defroster as
soon as the rear window is clear. The
defroster is switched off automatically after
some time of operation depending on the
outside temperature.
X Switch on the ignition.
X Switching on: Press button ¤ on the
respective climate control panel.
The
indicator lamp in the button comes on.
! The rear window defroster cannot be
switched on when the retractable hardtop
is open. The indicator lamp will start
flashing if the hardtop is open.
R Close the retractable hardtop.
The rear window defroster can then be
switched on. X
Switching off: Press button ¤ again.
The rear window defroster switches off when
the battery voltage is too low. The indicator
lamp in button ¤ flashes. Too many
electrical consumers may be operating
simultaneously.
X Switch off consumers that are currently not
needed if required. Retractable hardtop
Safety notes
For safety reasons, the retractable hardtop
can only be opened and closed when the
vehicle is standing still. G
Observe Safety notes, see page 45. G
Warning!
To prevent possible accidents, only drive the
vehicle with the retractable hardtop either
completely
closed and locked, or fully lowered
into its storage compartment.
If the retractable hardtop does not completely
open or close, the roof hydraulics will lose
pressure and the retractable hardtop is
lowered
R after approximately 7 minutes when the
ignition is switched on
R after approximately 15 seconds when the
ignition is switched off
Shortly before the retractable hardtop is
lowered, a warning will sound. In the
multifunction display you will see K and
the message Retractable Roof Lowering .
Properly lock the retractable hardtop before
continuing to drive. Otherwise, the unlocked
hardtop could open while the vehicle is in
motion and cause you to lose control of the
vehicle. You or others could be injured as a
result.
13 Vehicles with climate control
14 Vehicles with automatic climate control 170
Retractable hardtop
Controls in detail
171_AKB; 3; 60, en-US
d2ureepe,
Version: 2.11.8.1 2009-05-11T16:00:23+02:00 - Seite 170
Page 173 of 312
G
Warning!
Before operating the retractable hardtop,
make sure there is no danger of anyone being
injured by the moving parts (retractable
hardtop, roof frame, and trunk lid).
Hands must never be placed near the roof
frame, upper windshield area, hardtop, shelf
behind roll bars, or trunk lid while the
retractable hardtop is being raised or
lowered. Serious personal injury may occur.
If potential danger exists, release the
retractable hardtop switch or button % or
& on the SmartKey. This immediately
interrupts the raising or lowering procedure.
You then can operate the retractable hardtop
switch or press button % or & on the
SmartKey to raise or lower the retractable
hardtop away from the danger zone
! Never sit or place heavy objects on the
rear shelf. Doing so could cause damage to
the retractable hardtop and the rear shelf.
! Please keep in mind that weather
conditions can sometimes change rapidly.
Make sure to close the retractable hardtop
when leaving the vehicle. If water enters
the vehicle interior, vehicle electronics
could be damaged which is not covered by
the Mercedes-Benz Limited Warranty.
! When opening and closing the retractable
hardtop, make sure
R there is sufficient clearance for the
retractable hardtop to move up and for
the trunk lid to move back
R the luggage cover is installed, extended
and closed
R the trunk is loaded only to the height of
the luggage cover
R the luggage/cargo does not push up the
closed luggage cover R
the trunk lid is closed
R the outside temperature is above +5‡
(-15†)
Otherwise the retractable hardtop and
trunk as well as other parts of the vehicle
could be damaged. Opening and closing
With the retractable hardtop switch G
Observe Safety notes, see page 170.
X Engage the parking brake.
X Close the luggage cover ( Y page 173).
X Close the trunk lid.
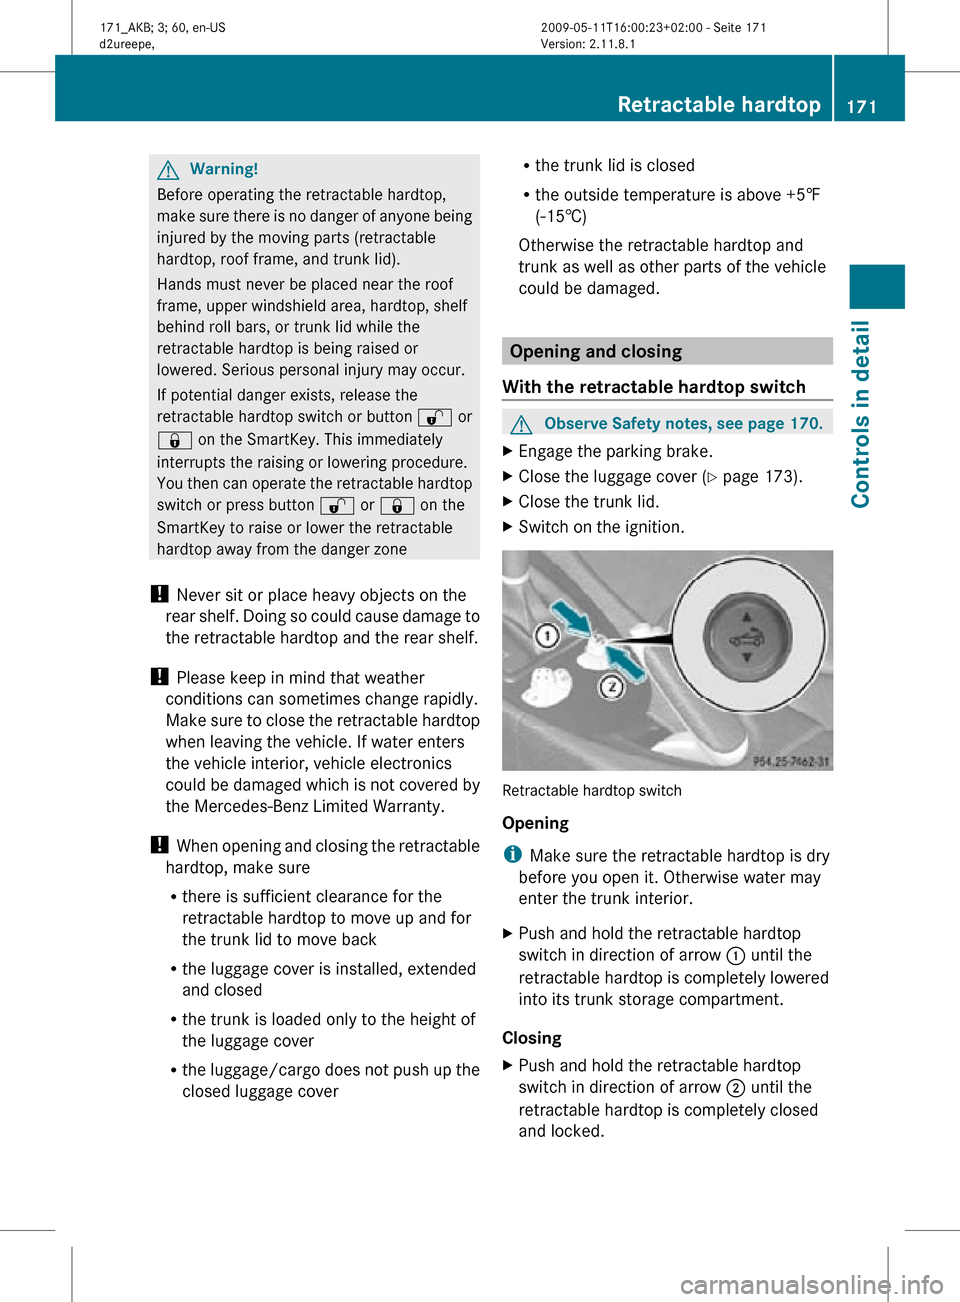
X Switch on the ignition. Retractable hardtop switch
Opening
i
Make sure the retractable hardtop is dry
before you open it. Otherwise water may
enter the trunk interior.
X Push and hold the retractable hardtop
switch in direction of arrow : until the
retractable hardtop is completely lowered
into its trunk storage compartment.
Closing
X Push and hold the retractable hardtop
switch in direction of arrow ; until the
retractable hardtop is completely closed
and locked. Retractable hardtop
171Controls in detail
171_AKB; 3; 60, en-US
d2ureepe, Version: 2.11.8.1 2009-05-11T16:00:23+02:00 - Seite 171 Z
Page 174 of 312
With the SmartKey
G
Observe Safety notes, see page 170. X
Close the luggage cover ( Y page 173).
X Close the trunk lid.
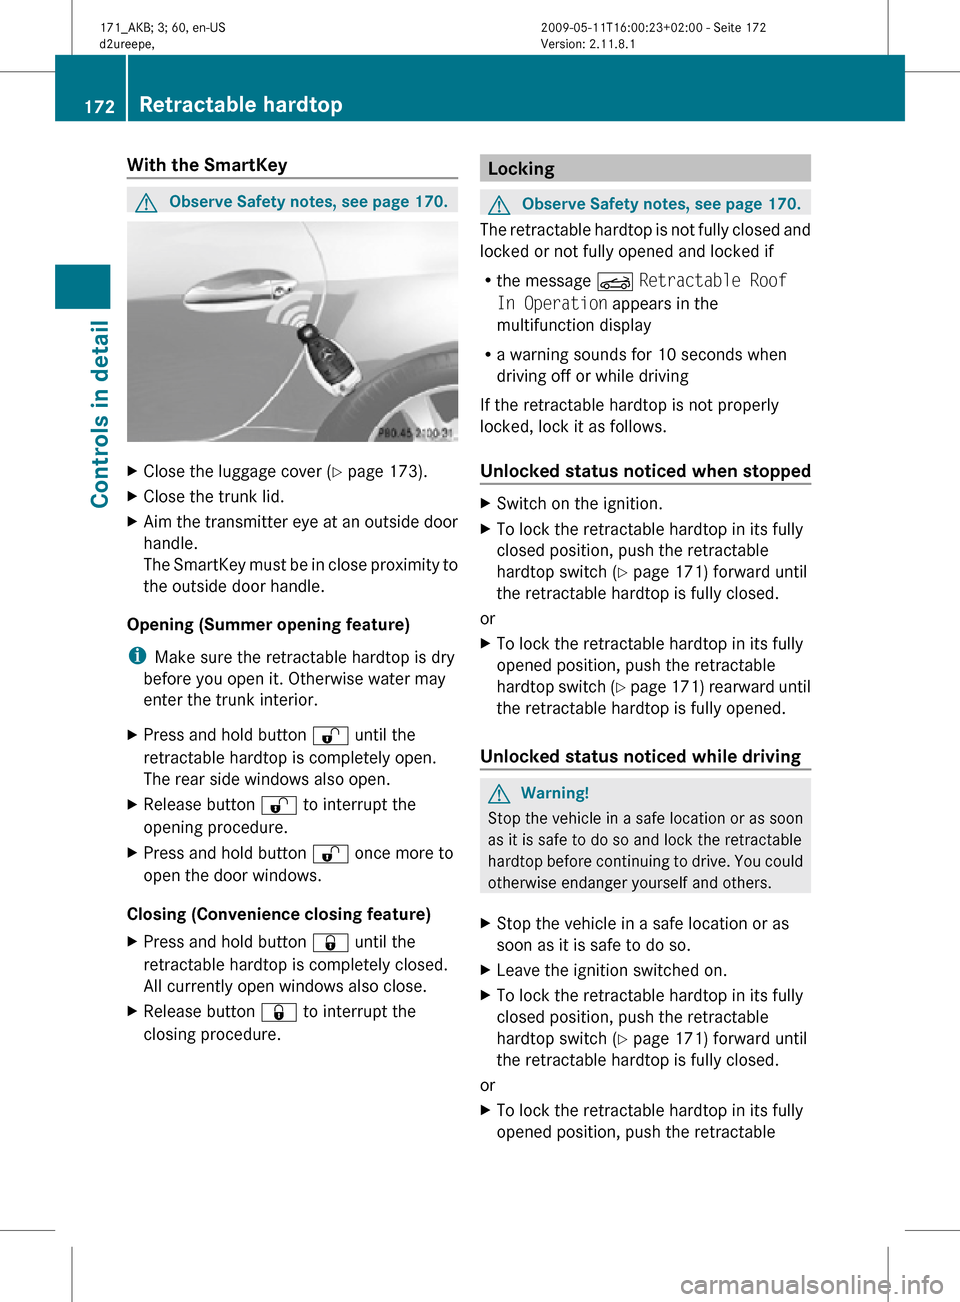
X Aim the transmitter eye at an outside door
handle.
The SmartKey must be in close proximity to
the outside door handle.
Opening (Summer opening feature)
i Make sure the retractable hardtop is dry
before you open it. Otherwise water may
enter the trunk interior.
X Press and hold button % until the
retractable hardtop is completely open.
The rear side windows also open.
X Release button % to interrupt the
opening procedure.
X Press and hold button % once more to
open the door windows.
Closing (Convenience closing feature)
X Press and hold button & until the
retractable hardtop is completely closed.
All currently open windows also close.
X Release button & to interrupt the
closing procedure. Locking
G
Observe Safety notes, see page 170.
The retractable hardtop is not fully closed and
locked or not fully opened and locked if
R the message K Retractable Roof
In Operation appears in the
multifunction display
R a warning sounds for 10 seconds when
driving off or while driving
If the retractable hardtop is not properly
locked, lock it as follows.
Unlocked status noticed when stopped X
Switch on the ignition.
X To lock the retractable hardtop in its fully
closed position, push the retractable
hardtop switch ( Y page 171) forward until
the retractable hardtop is fully closed.
or
X To lock the retractable hardtop in its fully
opened position, push the retractable
hardtop switch (Y page 171) rearward until
the retractable hardtop is fully opened.
Unlocked status noticed while driving G
Warning!
Stop the vehicle in a safe location or as soon
as it is safe to do so and lock the retractable
hardtop before continuing to drive. You could
otherwise endanger yourself and others.
X Stop the vehicle in a safe location or as
soon as it is safe to do so.
X Leave the ignition switched on.
X To lock the retractable hardtop in its fully
closed position, push the retractable
hardtop switch ( Y page 171) forward until
the retractable hardtop is fully closed.
or
X To lock the retractable hardtop in its fully
opened position, push the retractable 172
Retractable hardtopControls in detail
171_AKB; 3; 60, en-US
d2ureepe,
Version: 2.11.8.1 2009-05-11T16:00:23+02:00 - Seite 172
Page 176 of 312
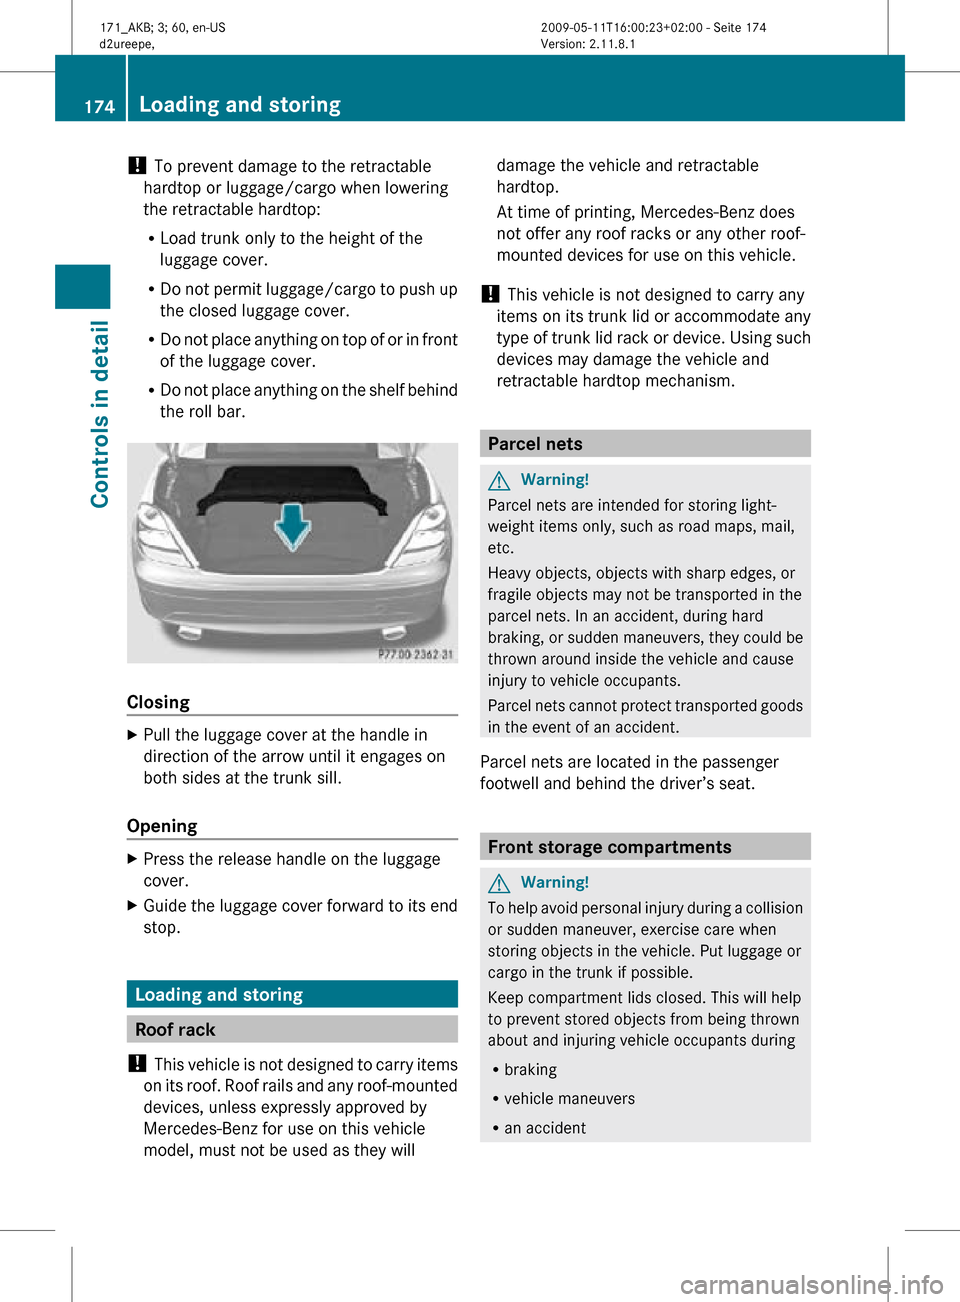
!
To prevent damage to the retractable
hardtop or luggage/cargo when lowering
the retractable hardtop:
R Load trunk only to the height of the
luggage cover.
R Do not permit luggage/cargo to push up
the closed luggage cover.
R Do not place anything on top of or in front
of the luggage cover.
R Do not place anything on the shelf behind
the roll bar. Closing
X
Pull the luggage cover at the handle in
direction of the arrow until it engages on
both sides at the trunk sill.
Opening X
Press the release handle on the luggage
cover.
X Guide the luggage cover forward to its end
stop. Loading and storing
Roof rack
! This vehicle is not designed to carry items
on its roof. Roof rails and any roof-mounted
devices, unless expressly approved by
Mercedes-Benz for use on this vehicle
model, must not be used as they will damage the vehicle and retractable
hardtop.
At time of printing, Mercedes-Benz does
not offer any roof racks or any other roof-
mounted devices for use on this vehicle.
! This vehicle is not designed to carry any
items on its trunk lid or accommodate any
type of trunk lid rack or device. Using such
devices may damage the vehicle and
retractable hardtop mechanism. Parcel nets
G
Warning!
Parcel nets are intended for storing light-
weight items only, such as road maps, mail,
etc.
Heavy objects, objects with sharp edges, or
fragile objects may not be transported in the
parcel nets. In an accident, during hard
braking, or sudden maneuvers, they could be
thrown around inside the vehicle and cause
injury to vehicle occupants.
Parcel nets cannot protect transported goods
in the event of an accident.
Parcel nets are located in the passenger
footwell and behind the driver’s seat. Front storage compartments
G
Warning!
To help avoid personal injury during a collision
or sudden maneuver, exercise care when
storing objects in the vehicle. Put luggage or
cargo in the trunk if possible.
Keep compartment lids closed. This will help
to prevent stored objects from being thrown
about and injuring vehicle occupants during
R braking
R vehicle maneuvers
R an accident 174
Loading and storingControls in detail
171_AKB; 3; 60, en-US
d2ureepe,
Version: 2.11.8.1 2009-05-11T16:00:23+02:00 - Seite 174
Page 220 of 312
GAWR (Gross Axle Weight Rating)
The GAWR is the maximum permissible axle
weight.
The gross vehicle weight on each axle
must never exceed the GAWR for the front
and rear axle indicated on the certification
label located on the driver’s door B-pillar.
GVW (Gross Vehicle Weight) The GVW comprises the weight of the vehicle
including fuel, tools, spare wheel, installed
accessories, passengers and cargo and, if
applicable,
trailer tongue load. The GVW must
never exceed the GVWR indicated on the
certification label located on the driver’s door
B-pillar.
GVWR (Gross Vehicle Weight Rating) This is the maximum permissible vehicle
weight of the fully loaded vehicle (weight of
the
vehicle including all options, passengers,
fuel, and cargo and, if applicable, trailer
tongue load). It is indicated on the
certification label located on the driver’s door
B-pillar.
Kilopascal (kPa) Metric unit for air pressure. There are 6.9 kPa
to 1 psi; another metric unit for air pressure
is bar. There are 100 kilopascals (kPa) to
1 bar.
Load index
Numerical code associated with the
maximum load a tire can support.
Maximum load rating
The maximum load in kilograms and pounds
that can be carried by the tire.
Maximum loaded vehicle weight
The sum of curb weight, accessory weight,
total load limit, and production options
weight. Maximum permissible tire inflation
pressure This number is the greatest amount of air
pressure that should ever be put in the tire.
Normal occupant weight
The number of occupants the vehicle is
designed to seat, multiplied by 68 kilograms
(150 lb).
Occupant distribution
The distribution of occupants in a vehicle at
their designated seating positions.
Production options weight
The combined weight of those installed
regular production options weighing over
5 lbs (2.3 kilograms) in excess of those
standard items which they replace, not
previously considered in curb weight or
accessory weight, including heavy duty
brakes, ride levelers, roof rack, heavy duty
battery, and special trim.
PSI (Pounds per square inch)
A standard unit of measure for air pressure.
Recommended tire inflation pressure
The recommended tire inflation pressure for
normal
driving conditions is listed on the Tire
and Loading Information placard located on
the driver’s door B-pillar. It provides best
handling, tread life and riding comfort.
Supplemental information pertaining to
special driving situations can be found on the
tire inflation pressure label on the inside of
the fuel filler flap.
Rim A metal support for a tire or a tire and tube
assembly upon which the tire beads are
seated.218
Tires and wheels
Operation
171_AKB; 3; 60, en-US
d2ureepe,
Version: 2.11.8.1 2009-05-11T16:00:23+02:00 - Seite 218
Page 229 of 312
in the Maintenance Booklet will result in
engine damage and/or other vehicle
damage
not covered by the Mercedes-Benz
Limited Warranty. Vehicle care
Cleaning and care of the vehicle
Notes Regular and proper care will help to maintain
the value of your vehicle.
G
Warning!
Many cleaning products can be hazardous.
Some are poisonous, others are flammable.
Always follow the instructions on the
particular container. Always open your
vehicle’s
doors or windows when cleaning the
inside.
Never use fluids or solvents that are not
designed for cleaning your vehicle.
Always lock away cleaning products and keep
them out of reach of children.
! When cleaning the vehicle, do not use
scouring agents. Never apply strong force
and only use a soft, wet cloth or sponge.
Otherwise you may scratch or damage the
surface to be cleaned.
While in operation, even while parked, your
vehicle is subjected to varying external
influences which, if gone unchecked, can
attack the paintwork as well as the vehicle
underbody and cause lasting damage.
Such damage is caused not only by extreme
and varying climatic conditions, but also by:
R Air pollution
R Road salt
R Tar
R Gravel and stone chipping To avoid paint damage, you should
immediately remove:
R
Grease and oil
R Fuel
R Coolant
R Brake fluid
R Bird droppings
R Insects
R Tree resins etc.
Frequent
washing reduces and/or eliminates
the aggressiveness and potency of the above
adverse influences.
More frequent washings are necessary to
deal with unfavorable conditions:
R near the ocean
R in industrial areas (smoke, exhaust
emissions)
R during winter operation
You should check your vehicle from time to
time for stone chipping or other damage. Any
damage should be repaired as soon as
possible to prevent corrosion.
In doing so, do not neglect the underbody of
the vehicle. A prerequisite for a thorough
check is a washing of the underbody followed
by a thorough inspection. Damaged areas
need to be re-undercoated.
Your vehicle has been treated at the factory
with a wax-base rustproofing in the body
cavities which will last for the lifetime of the
vehicle. Post-production treatment is neither
necessary nor recommended by Mercedes-
Benz because of the possibility of
incompatibility between materials used in the
production process and others applied later.
We have selected vehicle-care products and
compiled recommendations which are
specially matched to our vehicles and which
always reflect the latest technology. You can
obtain Mercedes-Benz approved vehicle-care
products at an authorized Mercedes-Benz
Center. Vehicle care
227
Operation
171_AKB; 3; 60, en-US
d2ureepe, Version: 2.11.8.1 2009-05-11T16:00:23+02:00 - Seite 227 Z