2011 MERCEDES-BENZ SLK300 ECU
[x] Cancel search: ECUPage 55 of 312

Canceling the alarm
To cancel the alarm, do one of the following:
X Insert the SmartKey into the starter switch.
X Press button % or & on the
SmartKey. Anti-theft systems
53Safety and security
171_AKB; 3; 60, en-US
d2ureepe, Version: 2.11.8.1 2009-05-11T16:00:23+02:00 - Seite 53 Z
Page 64 of 312
driving, refer to “Lamps in instrument cluster”
(Y page 256).
If the SmartKey is left in starter switch
position 0 for an extended period of time, it
can
no longer be turned in the starter switch.
In this case, the steering is locked. To unlock,
remove SmartKey from the starter switch and
reinsert.
The steering is locked when the SmartKey is
removed from the starter switch.
X Always remove the SmartKey from the
starter switch when the engine is not in
operation.
This
will help to prevent accelerated vehicle
battery discharge or a completely
discharged vehicle battery.
If the SmartKey cannot be turned in the
starter
switch, the vehicle battery may not be
sufficiently charged.
X Check the vehicle battery and charge it if
necessary ( Y page 283).
or
X Get a jump start (Y page 283). Seats
Safety notes
G
Warning!
In order to avoid possible loss of vehicle
control
the following must be done before the
vehicle is put into motion:
R seat adjustment
R head restraint adjustment
R steering wheel adjustment
R rear view mirror adjustment
R fastening of seat belts G
Warning!
Do not adjust the driver’s seat while driving.
Adjusting the seat while driving could cause
the driver to lose control of the vehicle. Never ride in a moving vehicle with the seat
backrest
in an excessively reclined position as
this can be dangerous. You could slide under
the seat belt in a collision. If you slide under
it, the seat belt would apply force at the
abdomen or neck. That could cause serious
or fatal injuries. The seat backrest and seat
belts provide the best restraint when the
wearer is in a position that is as upright as
possible and seat belts are properly
positioned on the body. G
Warning!
Your seat must be adjusted so that you can
correctly fasten your seat belt.
Observe the following points:
R Adjust
the seat backrest until your arms are
slightly angled when holding the steering
wheel.
R Adjust the seat to a comfortable seating
position that still allows you to reach the
accelerator/brake pedal safely. The
position should be as far back as possible
with the driver still able to operate the
controls properly.
R Adjust the head restraint so that it is as
close to the head as possible. The center of
the head restraint must support the back of
the head at eye level.
R Never place hands under the seat or near
any moving parts while a seat is being
adjusted.
Failure to do so could result in an accident
and/or serious personal injury. G
Warning!
Children 12 years old and under must be
seated and properly secured in an
appropriately sized infant restraint, toddler
restraint, or booster seat recommended for
the
size and weight of the child. For additional
information, see section “Children in the
vehicle”.
A child’s risk of serious or fatal injuries is
significantly increased if the child restraints 62
Seats
Controls in detail
171_AKB; 3; 60, en-US
d2ureepe,
Version: 2.11.8.1 2009-05-11T16:00:23+02:00 - Seite 62
Page 65 of 312
are not properly secured in the vehicle and/
or the child is not properly secured in the child
restraint.
G
Warning!
For your protection, drive only with properly
positioned head restraints.
Adjust the head restraint so that it is as close
to the head as possible and the center of the
head restraint supports the back of the head
at eye level. This will reduce the potential for
injury to the head and neck in the event of an
accident or similar situation.
Do not drive the vehicle without the seat head
restraints. Head restraints are intended to
help reduce injuries during an accident. Seat adjustment
The seats can be adjusted either manually or
electrically, depending on the vehicle’s
equipment.
! When moving the seats, make sure there
are no items in the footwell or behind the
seats. Otherwise, you could damage the
seats and/or the items.
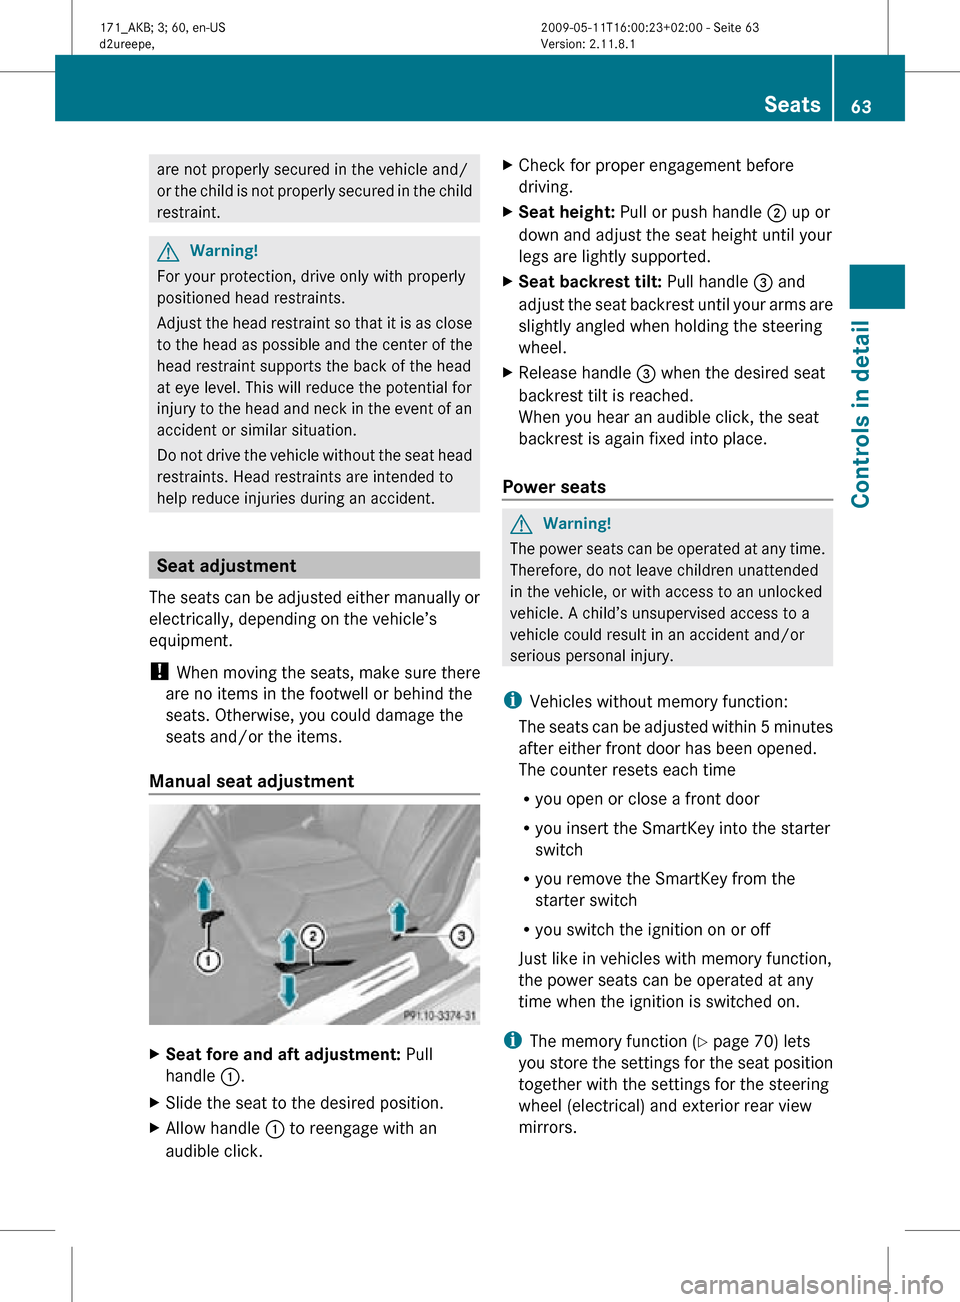
Manual seat adjustment X
Seat fore and aft adjustment: Pull
handle :.
X Slide the seat to the desired position.
X Allow handle : to reengage with an
audible click. X
Check for proper engagement before
driving.
X Seat height: Pull or push handle ; up or
down and adjust the seat height until your
legs are lightly supported.
X Seat backrest tilt: Pull handle = and
adjust the seat backrest until your arms are
slightly angled when holding the steering
wheel.
X Release handle = when the desired seat
backrest tilt is reached.
When you hear an audible click, the seat
backrest is again fixed into place.
Power seats G
Warning!
The power seats can be operated at any time.
Therefore, do not leave children unattended
in the vehicle, or with access to an unlocked
vehicle. A child’s unsupervised access to a
vehicle could result in an accident and/or
serious personal injury.
i Vehicles without memory function:
The seats can be adjusted within 5 minutes
after either front door has been opened.
The counter resets each time
R you open or close a front door
R you insert the SmartKey into the starter
switch
R you remove the SmartKey from the
starter switch
R you switch the ignition on or off
Just like in vehicles with memory function,
the power seats can be operated at any
time when the ignition is switched on.
i The memory function (Y page 70) lets
you store the settings for the seat position
together with the settings for the steering
wheel (electrical) and exterior rear view
mirrors. Seats
63Controls in detail
171_AKB; 3; 60, en-US
d2ureepe, Version: 2.11.8.1 2009-05-11T16:00:23+02:00 - Seite 63 Z
Page 68 of 312
The AIRSCARF neck-level heating will switch
back on again automatically as soon as
sufficient voltage is available.
Multifunction steering wheel
Safety notes
G
Warning!
Do not adjust the steering wheel while driving.
Adjusting the steering wheel while driving, or
driving without the steering wheel adjustment
feature locked could cause the driver to lose
control of the vehicle.
The electrical steering wheel adjustment
feature can be operated at any time.
Therefore, do not leave children unattended
in the vehicle, or with access to an unlocked
vehicle. A child’s unsupervised access to a
vehicle could result in an accident and/or
serious personal injury.
Make sure
R you can reach the steering wheel with your
arms slightly bent at the elbows
R you can move your legs freely
R all displays (including malfunction and
indicator lamps) on the instrument cluster
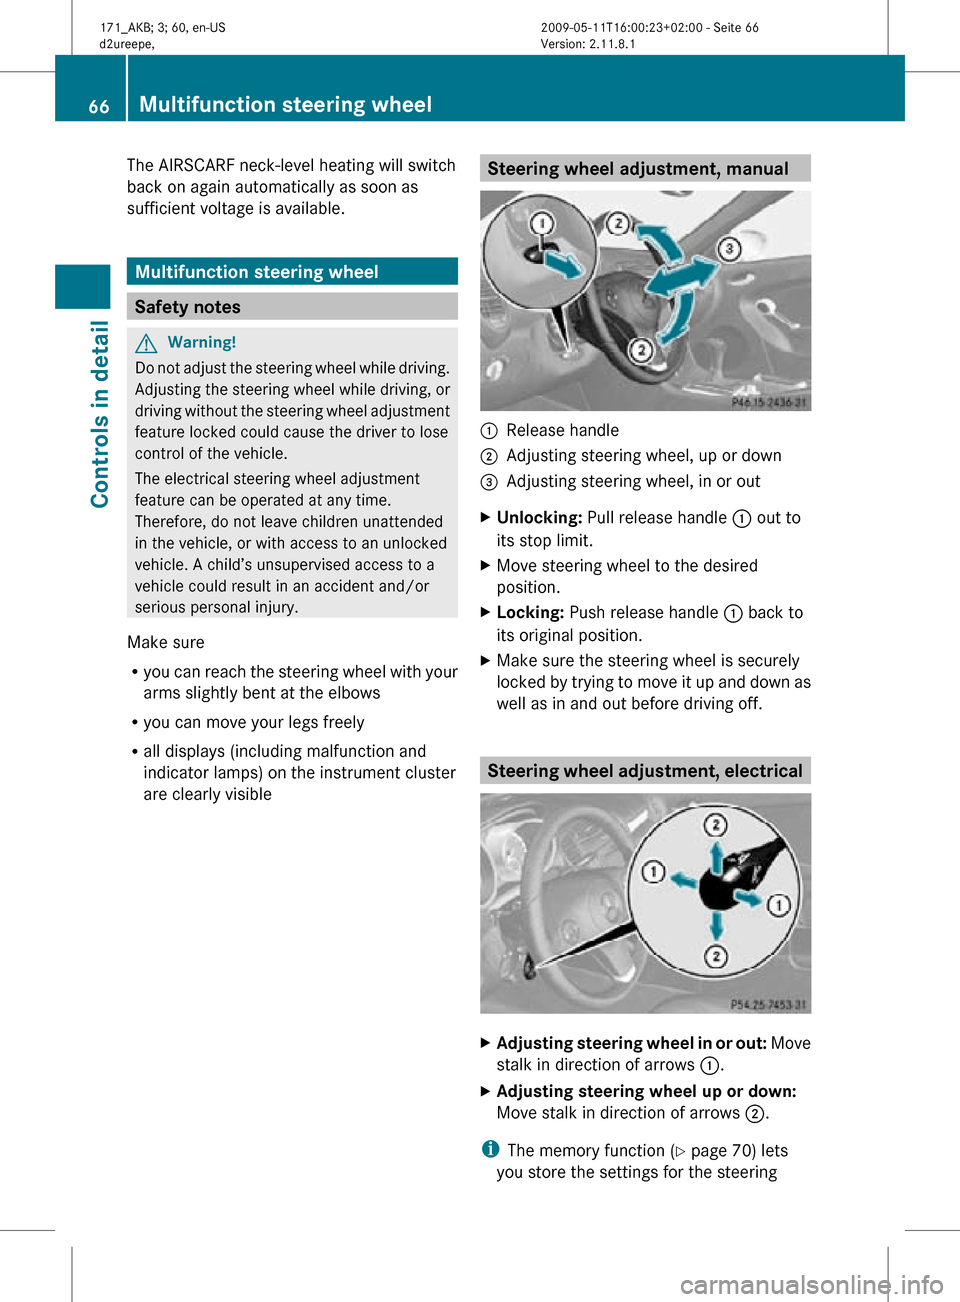
are clearly visible Steering wheel adjustment, manual
:
Release handle
; Adjusting steering wheel, up or down
= Adjusting steering wheel, in or out
X Unlocking: Pull release handle : out to
its stop limit.
X Move steering wheel to the desired
position.
X Locking: Push release handle : back to
its original position.
X Make sure the steering wheel is securely
locked by trying to move it up and down as
well as in and out before driving off. Steering wheel adjustment, electrical
X
Adjusting steering wheel in or out: Move
stalk in direction of arrows :.
X Adjusting steering wheel up or down:
Move stalk in direction of arrows ;.
i The memory function (Y page 70) lets
you store the settings for the steering 66
Multifunction steering wheelControls in detail
171_AKB; 3; 60, en-US
d2ureepe,
Version: 2.11.8.1 2009-05-11T16:00:23+02:00 - Seite 66
Page 75 of 312
USA only
With the exterior lamp switch in position
$ or
Ã, you cannot switch on the high-
beam headlamps.
The high-beam flasher is available at all times.
X For nighttime driving turn the exterior lamp
switch to position L to permit activation
of the high-beam headlamps.
When the engine is running, and you turn the
exterior lamp switch to position T or
L, the manual headlamp mode has
priority over the daytime running lamp mode.
The corresponding exterior lamps come on
(Y page 71).
Fog lamps Fog lamps cannot be switched on with the
exterior lamp switch in position Ã.
G
Warning!
In low ambient lighting or foggy conditions,
only switch from position à to L with
the vehicle at a standstill in a safe location.
Switching from à to L will briefly
switch off the headlamps. Doing so while
driving in low ambient lighting conditions may
result in an accident.
Fog lamps will operate with the parking lamps
and/or the low-beam headlamps on. Fog
lamps should only be used in conjunction with
low-beam headlamps. Consult your State or
Province Motor Vehicle Regulations
regarding permissible lamp operation.
X Turn the exterior lamp switch to position
T or L (Y page 71).
X Switching on front fog lamps: Pull out the
exterior lamp switch to first stop.
The green indicator lamp N in the
exterior lamp switch comes on. X
Switching on rear fog lamp: Pull out the
exterior lamp switch to second stop.
The rear fog lamp, the front fog lamps, the
green N and the yellow indicator lamp
R in the exterior lamp switch come on.
X Switching off front fog lamps/rear fog
lamp: Push in the exterior lamp switch to
its stop.
Locator lighting and night security
illumination Locator lighting and night security
illumination are described in the “Control
system” section, see “Switching locator
lighting on or off” (Y page 106) and
“Switching night security illumination
(Headlamps delayed shut-off feature) on or
off” (Y page 107). Combination switch
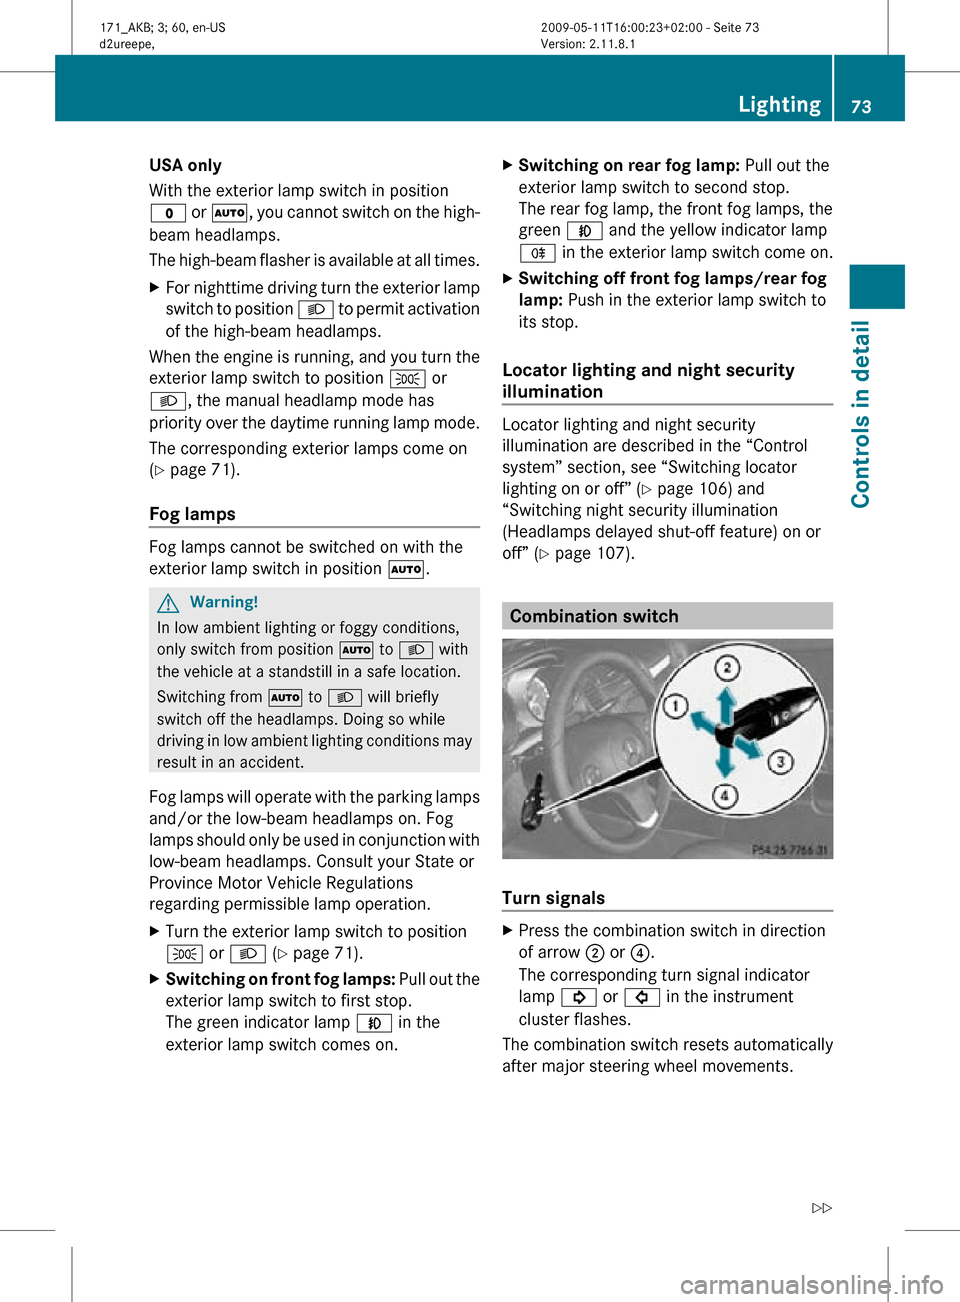
Turn signals
X
Press the combination switch in direction
of arrow ; or ?.
The corresponding turn signal indicator
lamp ! or # in the instrument
cluster flashes.
The combination switch resets automatically
after major steering wheel movements. Lighting
73Controls in detail
171_AKB; 3; 60, en-US
d2ureepe, Version: 2.11.8.1 2009-05-11T16:00:23+02:00 - Seite 73 Z
Page 89 of 312
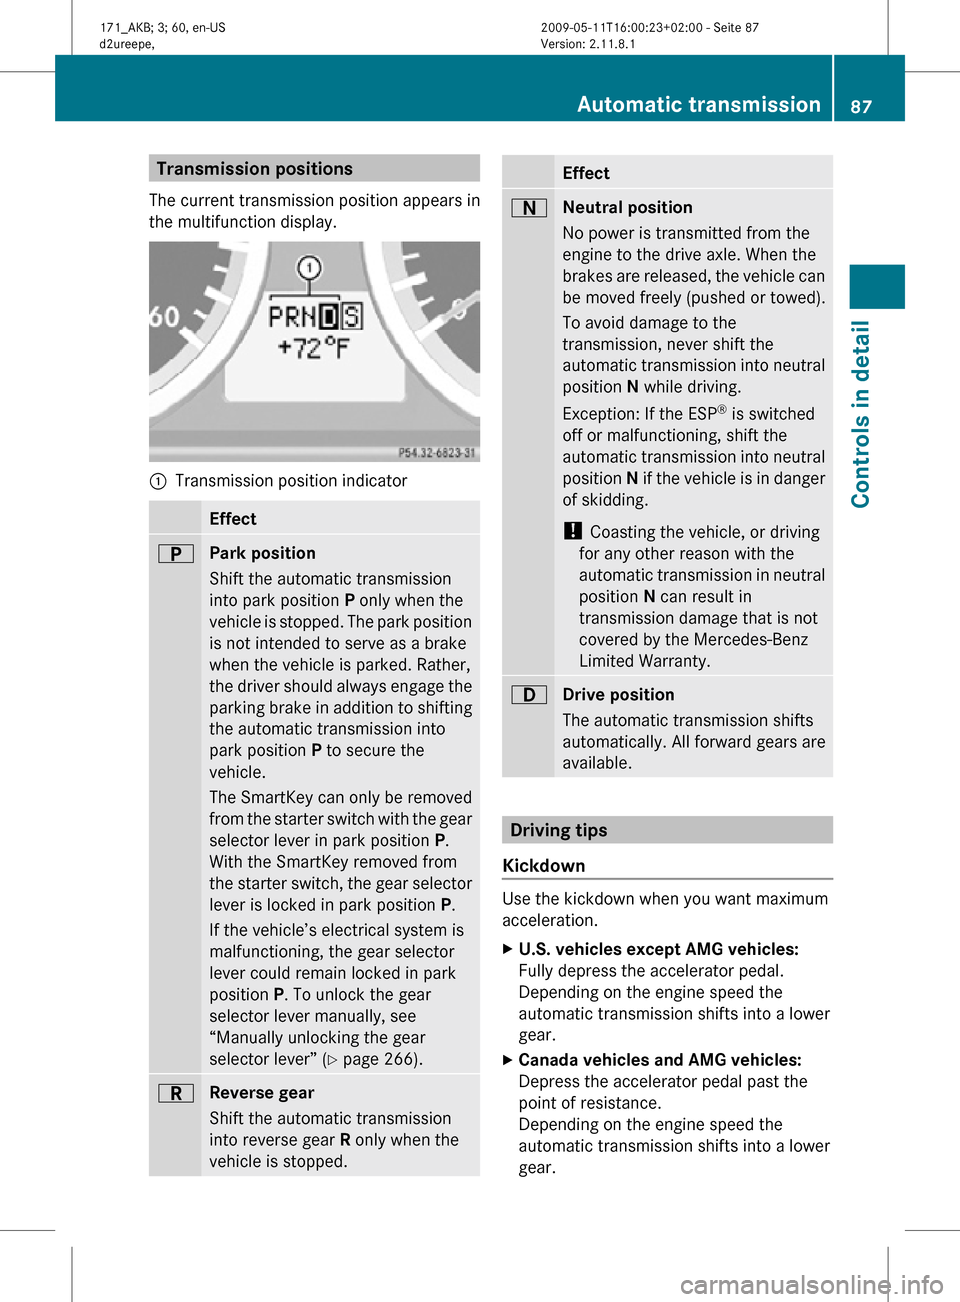
Transmission positions
The current transmission position appears in
the multifunction display. :
Transmission position indicator Effect
B
Park position
Shift the automatic transmission
into park position P only when the
vehicle is stopped. The park position
is not intended to serve as a brake
when the vehicle is parked. Rather,
the driver should always engage the
parking brake in addition to shifting
the automatic transmission into
park position P to secure the
vehicle.
The SmartKey can only be removed
from the starter switch with the gear
selector lever in park position P.
With the SmartKey removed from
the starter switch, the gear selector
lever is locked in park position
P.
If the vehicle’s electrical system is
malfunctioning, the gear selector
lever could remain locked in park
position P. To unlock the gear
selector lever manually, see
“Manually unlocking the gear
selector lever” ( Y page 266). C
Reverse gear
Shift the automatic transmission
into reverse gear R only when the
vehicle is stopped. Effect
A
Neutral position
No power is transmitted from the
engine to the drive axle. When the
brakes are released, the vehicle can
be moved freely (pushed or towed).
To avoid damage to the
transmission, never shift the
automatic transmission into neutral
position N while driving.
Exception: If the ESP ®
is switched
off or malfunctioning, shift the
automatic transmission into neutral
position N if the vehicle is in danger
of skidding.
! Coasting the vehicle, or driving
for any other reason with the
automatic transmission in neutral
position N can result in
transmission damage that is not
covered by the Mercedes-Benz
Limited Warranty. 7
Drive position
The automatic transmission shifts
automatically. All forward gears are
available.
Driving tips
Kickdown Use the kickdown when you want maximum
acceleration.
X
U.S. vehicles except AMG vehicles:
Fully depress the accelerator pedal.
Depending on the engine speed the
automatic transmission shifts into a lower
gear.
X Canada vehicles and AMG vehicles:
Depress the accelerator pedal past the
point of resistance.
Depending on the engine speed the
automatic transmission shifts into a lower
gear. Automatic transmission
87Controls in detail
171_AKB; 3; 60, en-US
d2ureepe, Version: 2.11.8.1 2009-05-11T16:00:23+02:00 - Seite 87 Z
Page 105 of 312
X
Press the reset button . in the instrument
cluster for approximately 3 seconds.
The message Reset to factory
settings? Push reset button to
confirm appears in the multifunction
display.
X Press the reset button . once more.
The settings of all the submenus will be
reset to factory settings.
The settings you have changed will not be
reset unless you confirm the action by
pressing the reset button . a second time.
After approximately 5 seconds, the
Settings menu reappears in the
multifunction display.
Submenus in the Settings menu X
Press button V or U repeatedly until
the Settings menu appears in the
multifunction display.
X Press button &.
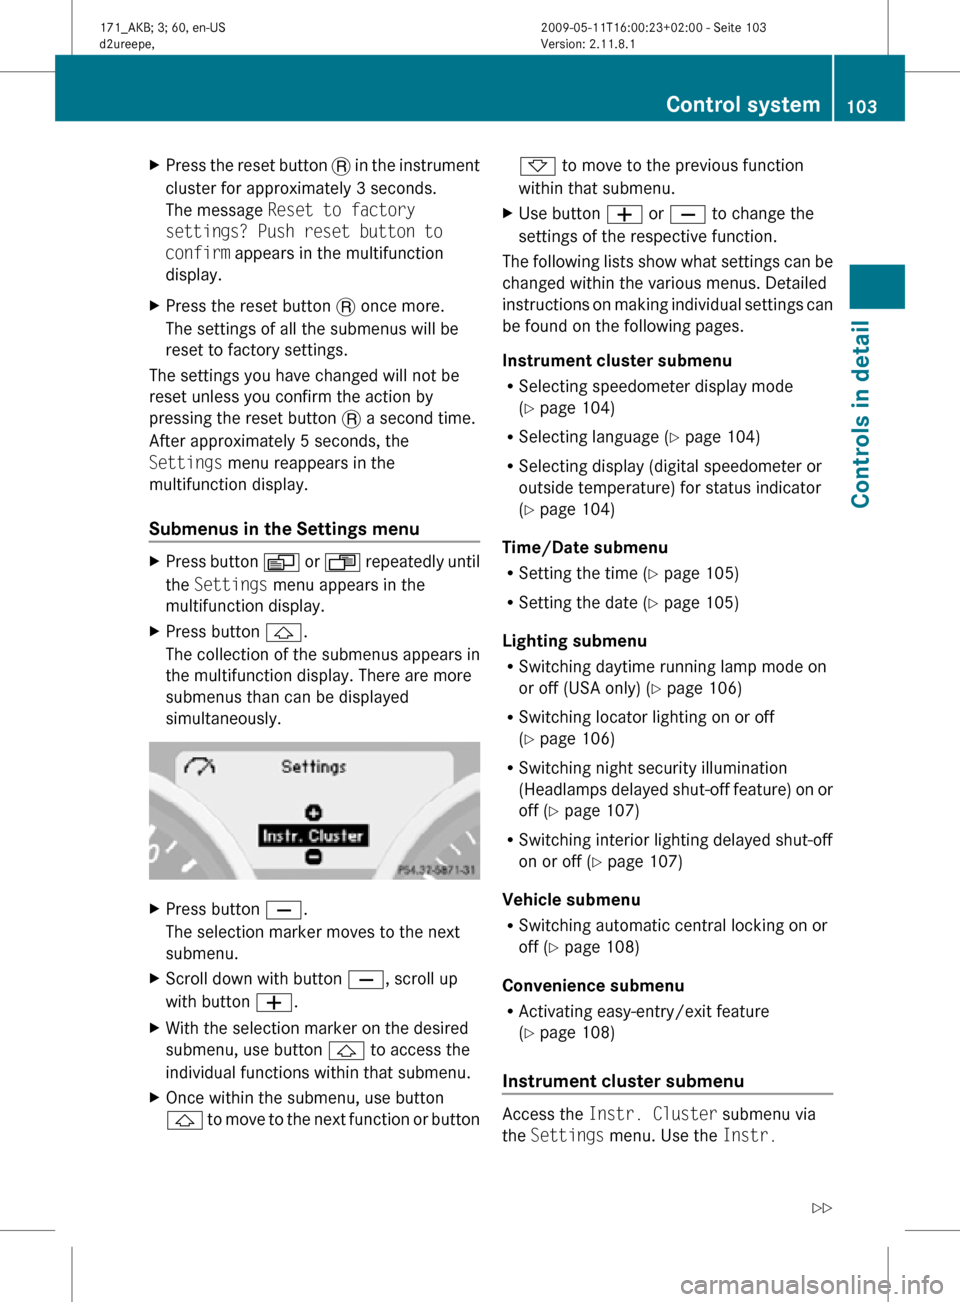
The collection of the submenus appears in
the multifunction display. There are more
submenus than can be displayed
simultaneously. X
Press button X.
The selection marker moves to the next
submenu.
X Scroll down with button X, scroll up
with button W.
X With the selection marker on the desired
submenu, use button & to access the
individual functions within that submenu.
X Once within the submenu, use button
& to move to the next function or button * to move to the previous function
within that submenu.
X Use button W or X to change the
settings of the respective function.
The following lists show what settings can be
changed within the various menus. Detailed
instructions on making individual settings can
be found on the following pages.
Instrument cluster submenu
R Selecting speedometer display mode
(Y page 104)
R Selecting language ( Y page 104)
R Selecting display (digital speedometer or
outside temperature) for status indicator
(Y page 104)
Time/Date submenu
R Setting the time ( Y page 105)
R Setting the date (Y page 105)
Lighting submenu
R Switching daytime running lamp mode on
or off (USA only) (Y page 106)
R Switching locator lighting on or off
(Y page 106)
R Switching night security illumination
(Headlamps delayed shut-off feature) on or
off (Y page 107)
R Switching interior lighting delayed shut-off
on or off ( Y page 107)
Vehicle submenu
R Switching automatic central locking on or
off (Y page 108)
Convenience submenu
R Activating easy-entry/exit feature
(Y page 108)
Instrument cluster submenu Access the
Instr. Cluster submenu via
the Settings menu. Use the Instr. Control system
103Controls in detail
171_AKB; 3; 60, en-US
d2ureepe, Version: 2.11.8.1 2009-05-11T16:00:23+02:00 - Seite 103 Z
Page 108 of 312
The following functions are available:
R
Switching daytime running lamp mode on
or off (USA only) (Y page 106)
R Switching locator lighting on or off
(Y page 106)
R Switching night security illumination
(Headlamps delayed shut-off feature) on or
off (Y page 107)
R Switching interior lighting delayed shut-off
on or off ( Y page 107)
Switching daytime running lamp mode on
or off (USA only)
X Press button V or U repeatedly until
the Settings menu appears in the
multifunction display.
X Press button &.
X Move the selection marker with button
W or X to the Lighting submenu.
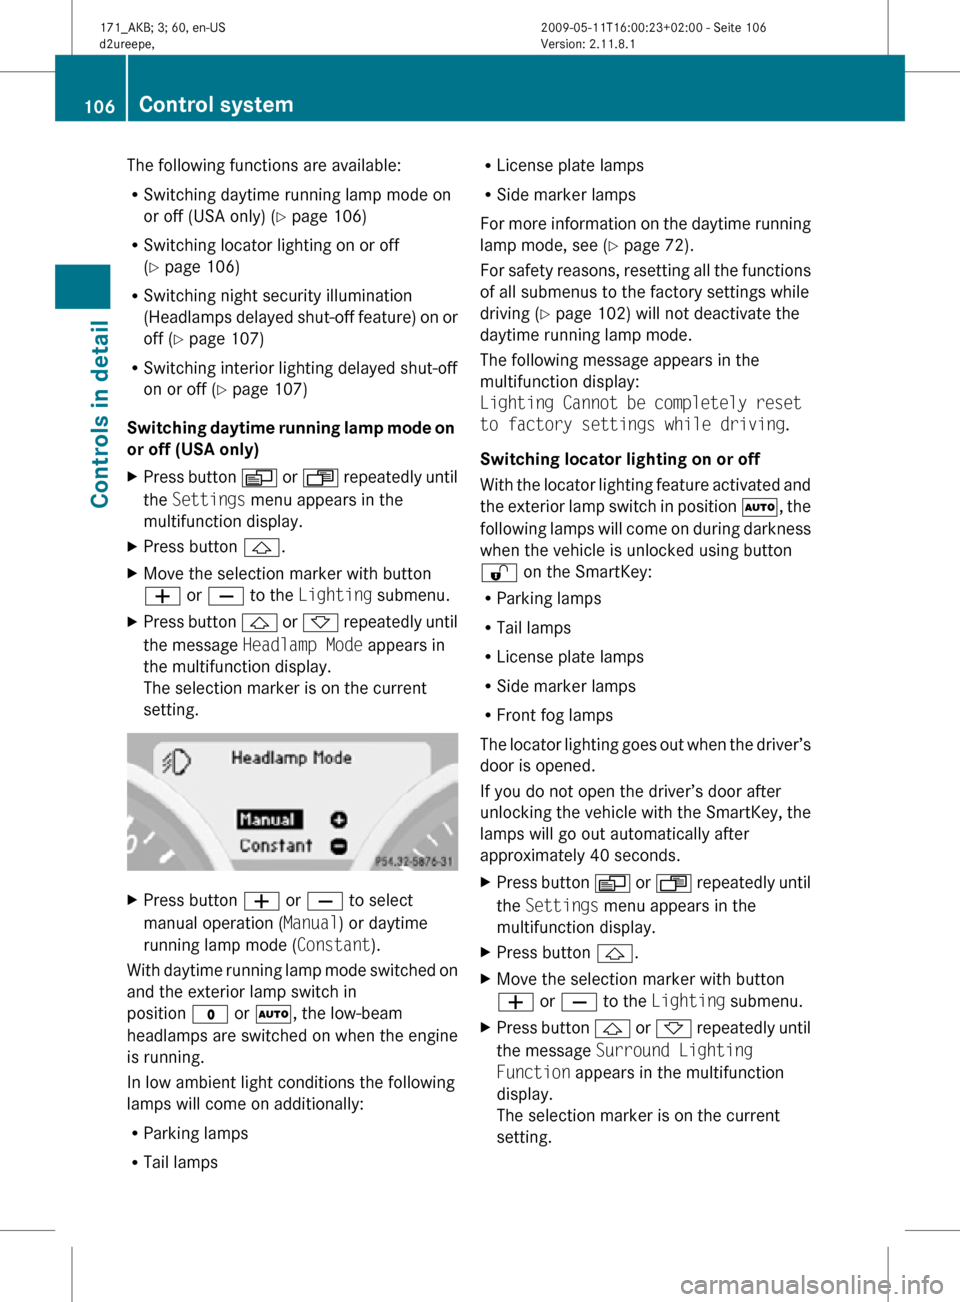
X Press button & or * repeatedly until
the message Headlamp Mode appears in
the multifunction display.
The selection marker is on the current
setting. X
Press button W or X to select
manual operation ( Manual) or daytime
running lamp mode ( Constant).
With daytime running lamp mode switched on
and the exterior lamp switch in
position $ or Ã, the low-beam
headlamps are switched on when the engine
is running.
In low ambient light conditions the following
lamps will come on additionally:
R Parking lamps
R Tail lamps R
License plate lamps
R Side marker lamps
For more information on the daytime running
lamp mode, see ( Y page 72).
For safety reasons, resetting all the functions
of all submenus to the factory settings while
driving ( Y page 102) will not deactivate the
daytime running lamp mode.
The following message appears in the
multifunction display:
Lighting Cannot be completely reset
to factory settings while driving.
Switching locator lighting on or off
With the locator lighting feature activated and
the exterior lamp switch in position Ã, the
following lamps will come on during darkness
when the vehicle is unlocked using button
% on the SmartKey:
R Parking lamps
R Tail lamps
R License plate lamps
R Side marker lamps
R Front fog lamps
The locator lighting goes out when the driver’s
door is opened.
If you do not open the driver’s door after
unlocking the vehicle with the SmartKey, the
lamps will go out automatically after
approximately 40 seconds.
X Press button V or U repeatedly until
the Settings menu appears in the
multifunction display.
X Press button &.
X Move the selection marker with button
W or X to the Lighting submenu.
X Press button & or * repeatedly until
the message Surround Lighting
Function appears in the multifunction
display.
The selection marker is on the current
setting. 106
Control systemControls in detail
171_AKB; 3; 60, en-US
d2ureepe,
Version: 2.11.8.1 2009-05-11T16:00:23+02:00 - Seite 106