2011 MERCEDES-BENZ SLK300 fuel
[x] Cancel search: fuelPage 93 of 312
Activating manual shift program
X
Press the program mode selector switch
repeatedly until M appears in the
multifunction display.
The automatic transmission switches to
manual program mode M. Automatic
shifting is switched off. The gear range is
not limited.
You can change the gears manually with drive
position D selected. You can upshift or
downshift through the gears in succession.
i Manual program mode M will not be
stored. When the engine is turned off with
manual program mode M selected, the
automatic transmission will go to
automatic program mode C when the
engine is restarted.
Upshifting !
In manual program mode M, the
automatic transmission will not upshift,
even if the engine has reached its
overrevving range. Shift up into the next
gear before the engine has reached its
overrevving range. Make absolutely certain
that the engine speed does not reach the
red marking on the tachometer. Otherwise
the engine could be damaged which is not
covered by the Mercedes-Benz Limited
Warranty.
X Briefly press the gear selector lever to the
right in the D+ direction.
or
X Briefly pull right gearshift control ;
(Y page 89).
The automatic transmission shifts into the
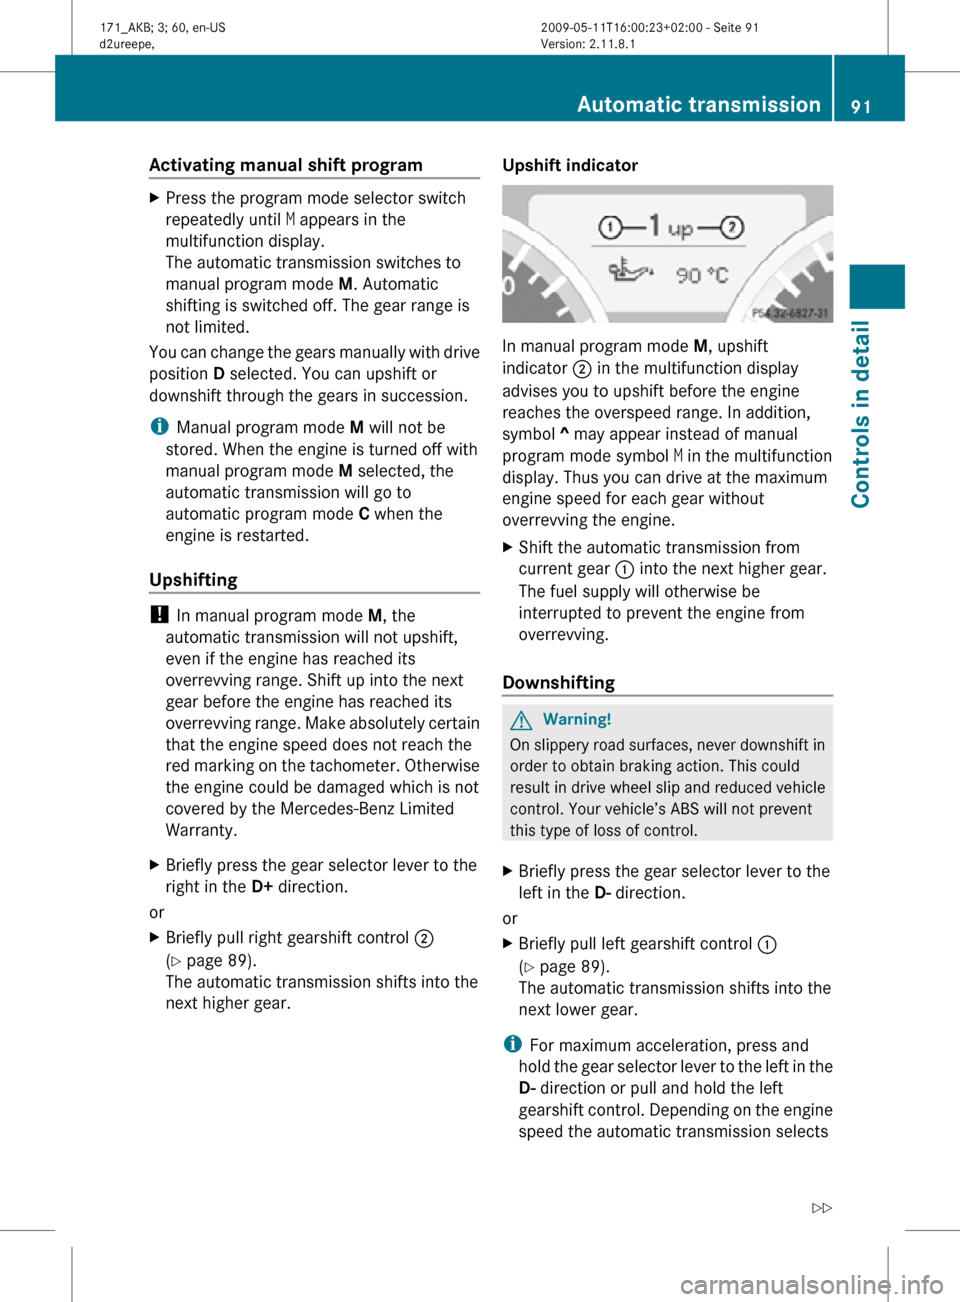
next higher gear. Upshift indicator In manual program mode
M, upshift
indicator ; in the multifunction display
advises you to upshift before the engine
reaches the overspeed range. In addition,
symbol ^ may appear instead of manual
program mode symbol M in the multifunction
display. Thus you can drive at the maximum
engine speed for each gear without
overrevving the engine.
X Shift the automatic transmission from
current gear : into the next higher gear.
The fuel supply will otherwise be
interrupted to prevent the engine from
overrevving.
Downshifting G
Warning!
On slippery road surfaces, never downshift in
order to obtain braking action. This could
result in drive wheel slip and reduced vehicle
control. Your vehicle’s ABS will not prevent
this type of loss of control.
X Briefly press the gear selector lever to the
left in the D- direction.
or
X Briefly pull left gearshift control :
(Y page 89).
The automatic transmission shifts into the
next lower gear.
i For maximum acceleration, press and
hold the gear selector lever to the left in the
D- direction or pull and hold the left
gearshift control. Depending on the engine
speed the automatic transmission selects Automatic transmission
91Controls in detail
171_AKB; 3; 60, en-US
d2ureepe, Version: 2.11.8.1 2009-05-11T16:00:23+02:00 - Seite 91 Z
Page 95 of 312
Activating the instrument cluster
The instrument cluster is activated when you
R open the driver’s door
R switch on the ignition
R press reset button .
R switch on the exterior lamps
i Opening the driver’s door or pressing the
reset button . without switching on the
ignition or the exterior lamps activates the
instrument cluster illumination only for
30 seconds. Adjusting the instrument cluster
illumination
X To brighten illumination: Press knob :
briefly.
X To dim illumination: Press knob ;
briefly.
The illumination brightness for the instrument
cluster changes each time you press
knob :
or ;. Several settings are possible.
i The instrument cluster illumination is
dimmed or brightened automatically to suit
ambient light conditions.
You can only adjust the brightness of the
instrument cluster illumination when it is
dark outside.
i With the exterior lighting switched on, the
brightness of the switches in the center
console will also be adjusted when using
knob : or ;. Resetting trip odometer
X Make sure you are viewing the standard
display
(Y page 96) in the multifunction
display.
X Press and hold reset button .
until the trip
odometer is reset. Tachometer
The red marking on the tachometer
(Y
page 26) denotes excessive engine speed.
! Avoid driving at excessive engine speeds,
as it may result in serious engine damage
that is not covered by the Mercedes-Benz
Limited Warranty.
To help protect the engine, the fuel supply is
interrupted if the engine is operated within
the red marking. Clock
In vehicles with the audio system, the clock
can be set via the control system
(Y page 105).
For setting the time with the COMAND
system, see separate COMAND system
operating instructions. Control system
Introduction
The
control system is activated as soon as the
starter switch is in position 1.
The control system enables you to call up
information about your vehicle and to change
vehicle settings.
For example, you can use the control system
to find out when your vehicle is next due for
maintenance service, to set the language for
messages in the instrument cluster display,
and much more. G
Warning!
A driver’s attention to the road and traffic
conditions must always be his/her primary
focus when driving.
For your safety and the safety of others,
selecting features through the multifunction
steering wheel should only be done by the
driver
when traffic and road conditions permit
it to be done safely. Control system
93
Controls in detail
171_AKB; 3; 60, en-US
d2ureepe, Version: 2.11.8.1 2009-05-11T16:00:23+02:00 - Seite 93 Z
Page 111 of 312
X
Move the selection marker with button
W or X to the Convenience
submenu.
X Press button & or * repeatedly until
the message Easy-entry Function
appears in the multifunction display.
The selection marker is on the current
setting. X
Press button W or X to activate ( On)
or deactivate (Off) the easy-entry/exit
feature. Trip computer menu
Use the Trip computer menu to call up
statistical data on your vehicle.
The following information is available:
R Fuel consumption statistics since start
(Y page 109)
R Fuel consumption statistics since last reset
(Y page 109)
R Resetting fuel consumption statistics
(Y page 110)
R Distance to empty ( Y page 110)
Fuel consumption statistics since start X
Press button U or V repeatedly until
the message From Start appears in the
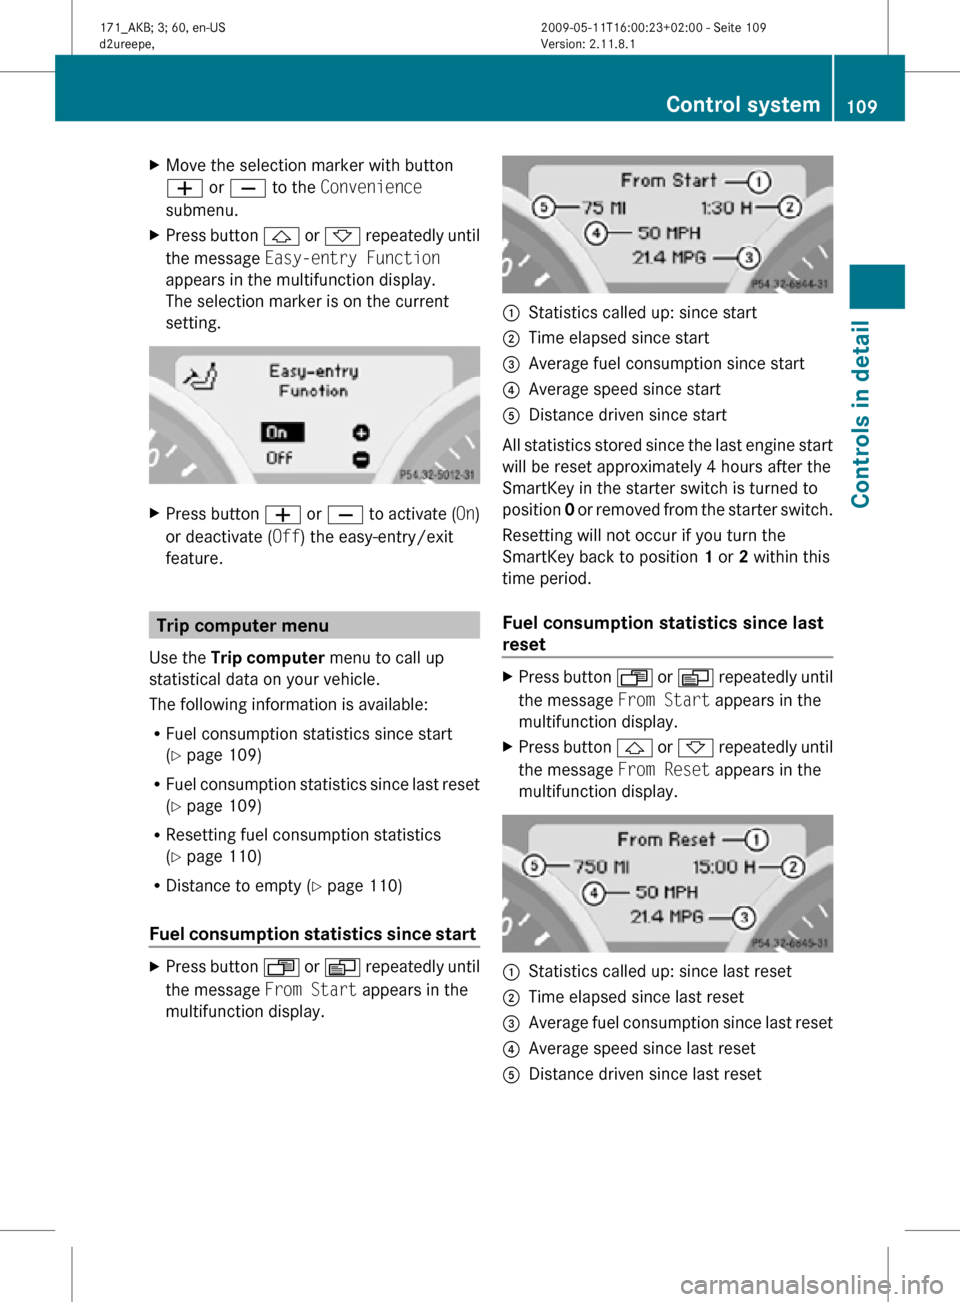
multifunction display. :
Statistics called up: since start
; Time elapsed since start
= Average fuel consumption since start
? Average speed since start
A Distance driven since start
All statistics stored since the last engine start
will be reset approximately 4 hours after the
SmartKey in the starter switch is turned to
position 0 or removed from the starter switch.
Resetting will not occur if you turn the
SmartKey back to position 1 or 2 within this
time period.
Fuel consumption statistics since last
reset X
Press button U or V repeatedly until
the message From Start appears in the
multifunction display.
X Press button & or * repeatedly until
the message From Reset appears in the
multifunction display. :
Statistics called up: since last reset
; Time elapsed since last reset
= Average fuel consumption since last reset
? Average speed since last reset
A Distance driven since last reset Control system
109Controls in detail
171_AKB; 3; 60, en-US
d2ureepe, Version: 2.11.8.1 2009-05-11T16:00:23+02:00 - Seite 109 Z
Page 112 of 312
Resetting fuel consumption statistics
X
Press button U or V repeatedly until
the message From Start appears in the
multifunction display.
X Press button & or * repeatedly until
the reading that you want to reset appears
in the multifunction display.
X Press and hold the reset button . in the
instrument cluster until the respective
values are reset to 0.
The fuel consumption statistics reset
automatically to 0 after 99 999 miles or
9 999 hours, whichever occurs first.
Distance to empty X
Press button U or V repeatedly until
the message From Start appears in the
multifunction display.
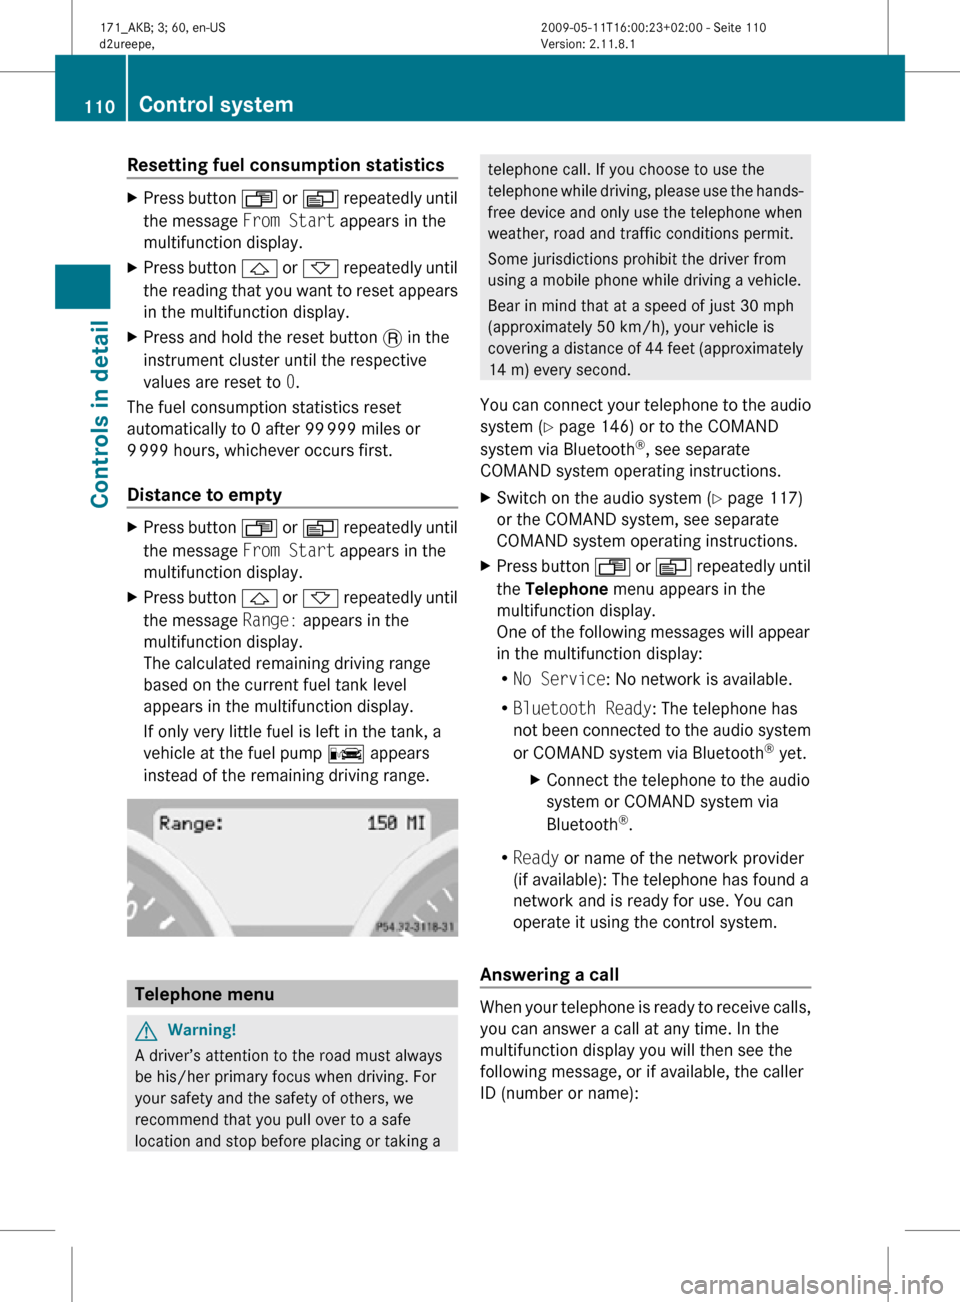
X Press button & or * repeatedly until
the message Range: appears in the
multifunction display.
The calculated remaining driving range
based on the current fuel tank level
appears in the multifunction display.
If only very little fuel is left in the tank, a
vehicle at the fuel pump C appears
instead of the remaining driving range. Telephone menu
G
Warning!
A driver’s attention to the road must always
be his/her primary focus when driving. For
your safety and the safety of others, we
recommend that you pull over to a safe
location and stop before placing or taking a telephone call. If you choose to use the
telephone while driving, please use the hands-
free device and only use the telephone when
weather, road and traffic conditions permit.
Some jurisdictions prohibit the driver from
using a mobile phone while driving a vehicle.
Bear in mind that at a speed of just 30 mph
(approximately 50 km/h), your vehicle is
covering a distance of 44 feet (approximately
14 m) every second.
You can connect your telephone to the audio
system (Y page 146) or to the COMAND
system via Bluetooth ®
, see separate
COMAND system operating instructions.
X Switch on the audio system ( Y page 117)
or the COMAND system, see separate
COMAND system operating instructions.
X Press button U or V repeatedly until
the Telephone menu appears in the
multifunction display.
One of the following messages will appear
in the multifunction display:
R No Service: No network is available.
R Bluetooth Ready: The telephone has
not been connected to the audio system
or COMAND system via Bluetooth ®
yet.
X Connect the telephone to the audio
system or COMAND system via
Bluetooth ®
.
R Ready or name of the network provider
(if available): The telephone has found a
network and is ready for use. You can
operate it using the control system.
Answering a call When your telephone is ready to receive calls,
you can answer a call at any time. In the
multifunction display you will then see the
following message, or if available, the caller
ID (number or name):110
Control systemControls in detail
171_AKB; 3; 60, en-US
d2ureepe,
Version: 2.11.8.1 2009-05-11T16:00:23+02:00 - Seite 110
Page 183 of 312

system. Spoken commands are not
available.
A voice connection between the Roadside
Assistance dispatcher and the occupants of
the vehicle will be established.
X Describe the nature of the need for
assistance.
The Mercedes-Benz Roadside Assistance
dispatcher will either dispatch a qualified
Mercedes-Benz technician or arrange to tow
your vehicle to the nearest authorized
Mercedes-Benz Center. For services such as
labor and/or towing, charges may apply.
Refer to the Roadside Assistance manual for
more information.
Sign and Drive services (USA only):
Services such as a jump start, a few gallons
of fuel or the replacement of a flat tire with
the vehicle spare wheel are obtainable at no
charge.
i If the indicator lamp in Roadside
Assistance button : is flashing
continuously and there was no voice
connection to the Customer Assistance
Center established, then the Tele Aid
system could not initiate a Roadside
Assistance call (e.g. the relevant cellular
phone network is not available). The
message Call Failed appears in the
multifunction display.
X Terminating calls: Press button ~ on
the multifunction steering wheel.
or
X Press the respective button for ending a
telephone call on the audio system or the
COMAND system.
Information button X
Open the storage compartment under the
armrest (Y page 175). X
Press and hold Information button : for
longer than 2 seconds.
A call to the Customer Assistance Center
will be initiated. The indicator lamp in
Information button : will flash while the
call is in progress. The message
Connecting Call will appear in the
multifunction display and the COMAND
system is muted.
When the connection is established, the
message Call Connected appears in the
multifunction display. The Tele Aid system will
transmit data generating the vehicle
identification number, model, color and
location (subject to availability of cellular and
GPS signals).
i The audio system or COMAND system
display indicates that a Tele Aid call is in
progress. While the call is connected you
can change to the navigation menu by
pressing the NAVI button on the COMAND
system. Spoken commands are not
available.
A voice connection between the Customer
Assistance Center representative and the
occupants of the vehicle will be established.
Information regarding the operation of your
vehicle, the nearest authorized Mercedes-
Benz Center or Mercedes-Benz USA products
and services is available to you.
For more details concerning the Tele Aid
system, please visit www.mbusa.com (USA
only), log in to “Owner’s Online” and visit the
“My Tele Aid” section to learn more. Useful features
181Controls in detail
171_AKB; 3; 60, en-US
d2ureepe, Version: 2.11.8.1 2009-05-11T16:00:23+02:00 - Seite 181 Z
Page 192 of 312
Vehicle equipment
i This Operator’s Manual describes all
features, standard or optional, potentially
available for your vehicle at the time of
purchase. Please be aware that your
vehicle might not be equipped with all
features described in this manual. The first 1000 miles (1500 km)
The more cautiously you treat your vehicle
during
the break-in period, the more satisfied
you will be with its performance later on.
R Drive your vehicle during the first
1 000 miles (1 500 km) at varying but
moderate vehicle and engine speeds.
R During this period, avoid heavy loads (full
throttle driving) and excessive engine
speeds (no more than 2
/ 3 of maximum rpm
in each gear).
R Vehicles with automatic transmission:
-Select C as the preferred shift program
(Y page 88) for the first 1 000 miles
(1 500 km).
- Do not attempt to slow the vehicle down
by shifting to a lower gear using the gear
selector lever.
- Select gear ranges 3, 2 or 1
(Y page 88) only when driving at
moderate speeds (for hill driving).
- Avoid accelerating by kickdown.
R Vehicles with manual transmission:
Shift gears in a timely manner.
After 1 000 miles (1 500 km) you may
gradually increase vehicle and engine speeds
to the permissible maximum. !
Additional instructions for AMG vehicles:
R During the first 1 000 miles (1 500 km),
do not exceed a speed of 85 mph
(140 km/h).
R During this period, avoid engine speeds
above 4 500 rpm in each gear.
R Shift gears in a timely manner.
All
of the above instructions, as may apply to
your vehicle type, also apply when driving the
first 1 000 miles (1 500 km) after the engine
or the rear differential has been replaced.
i Always obey applicable speed limits. At the gas station
Refueling
G
Warning!
Gasoline is highly flammable and poisonous.
It burns violently and can cause serious
personal injury.
Never allow sparks, flames or smoking
materials near gasoline!
Turn off the engine before refueling.
Whenever you are around gasoline, avoid
inhaling fumes and any skin or clothing
contact. Extinguish all smoking materials.
Direct skin contact with fuels and the
inhalation of fuel vapors are damaging your
health. G
Warning!
Overfilling of the fuel tank may create
pressure in the system which could cause a
gas discharge. This could cause the gas to
spray
back out when removing the fuel pump
nozzle, which could cause personal injury.
! Never refuel vehicles with gasoline engine
with diesel fuel. Even small amounts of
diesel fuel will damage the fuel system and
engine. Damage resulting from the use of
non-approved fuels or fuel additives or
resulting from mixing gasoline with diesel 190
At the gas station
Operation
171_AKB; 3; 60, en-US
d2ureepe,
Version: 2.11.8.1 2009-05-11T16:00:23+02:00 - Seite 190
Page 193 of 312
fuel is not covered by the Mercedes-Benz
Limited Warranty.
! If you have accidentally filled the tank
with incorrect or non-approved fuel, do not
switch on the ignition. Otherwise the
incorrect or non-approved fuel will get into
the fuel lines. The fuel system must be
drained completely. Contact an authorized
Mercedes-Benz Center to have the fuel
system drained completely.
! To prevent damage to the catalytic
converters, only use premium unleaded
gasoline in this vehicle.
Any noticeable irregularities in engine
operation should be repaired promptly.
Otherwise, excessive unburned fuel may
reach the catalytic converter, causing it to
overheat and potentially start a fire.
i Only use premium unleaded gasoline with
a minimum Posted Octane Rating of 91
(average of 96 RON/86 MON).
Information on gasoline quality can
normally be found on the fuel pump. Please
contact gas station personnel in case
labels on the pump cannot be found.
For more information on gasoline, see
“Premium unleaded gasoline”
(Y page 303), see “Fuel requirements”
(Y page 303), or contact an authorized
Mercedes-Benz Center, or visit
www.mbusa.com (USA only).
Locking/unlocking the vehicle with the
SmartKey automatically locks/unlocks the
fuel filler flap.
i In case the central locking system does
not release the fuel filler flap, or the
opening mechanism is clamping, contact
Roadside Assistance or an authorized
Mercedes-Benz Center.
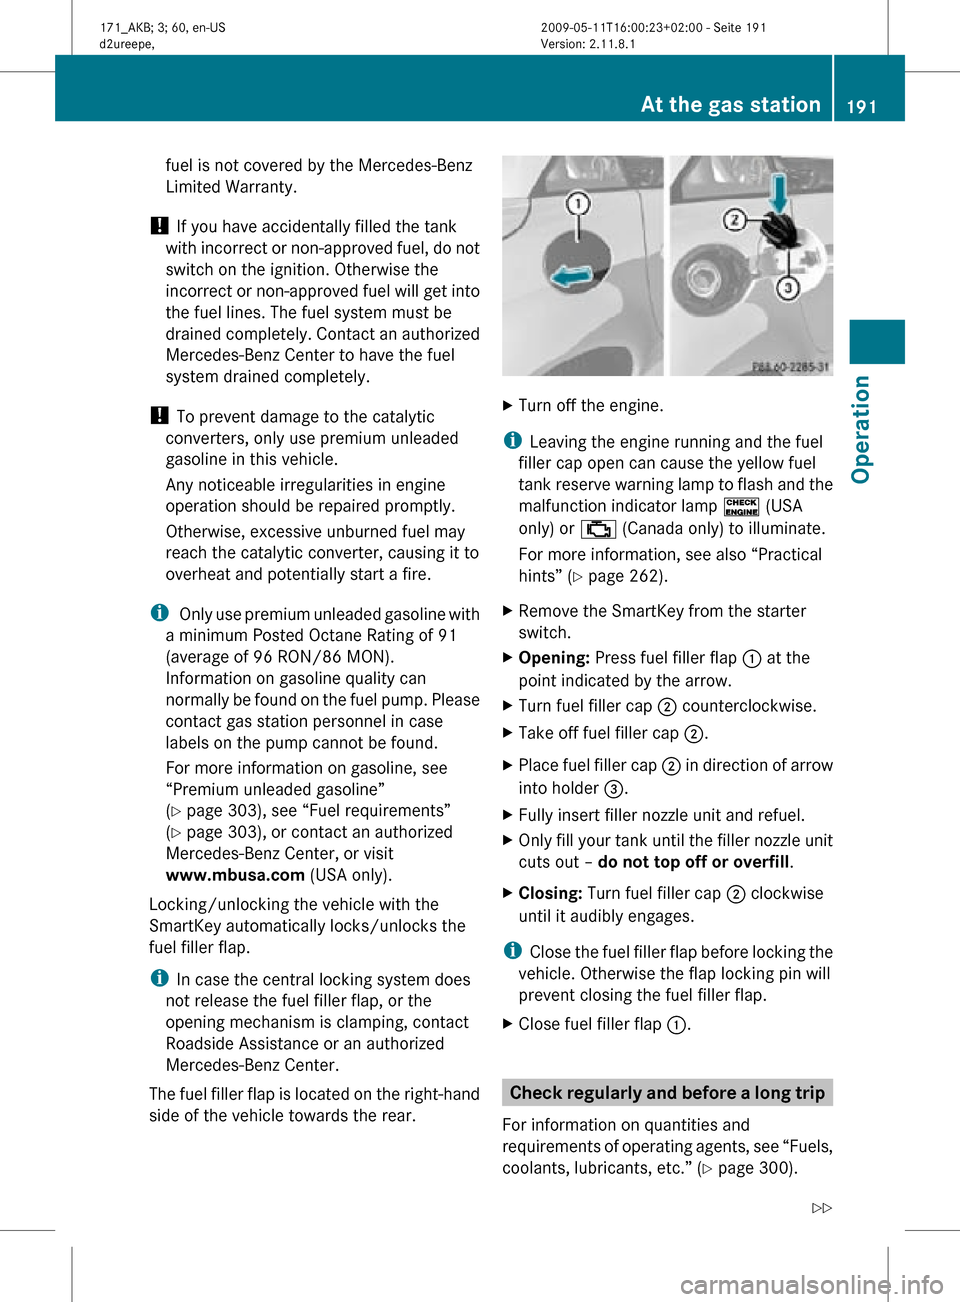
The fuel filler flap is located on the right-hand
side of the vehicle towards the rear. X
Turn off the engine.
i Leaving the engine running and the fuel
filler cap open can cause the yellow fuel
tank reserve warning lamp to flash and the
malfunction indicator lamp ! (USA
only) or ; (Canada only) to illuminate.
For more information, see also “Practical
hints” (Y page 262).
X Remove the SmartKey from the starter
switch.
X Opening: Press fuel filler flap : at the
point indicated by the arrow.
X Turn fuel filler cap ; counterclockwise.
X Take off fuel filler cap ;.
X Place fuel filler cap ; in direction of arrow
into holder =.
X Fully insert filler nozzle unit and refuel.
X Only fill your tank until the filler nozzle unit
cuts out – do not top off or overfill .
X Closing: Turn fuel filler cap ; clockwise
until it audibly engages.
i Close the fuel filler flap before locking the
vehicle. Otherwise the flap locking pin will
prevent closing the fuel filler flap.
X Close fuel filler flap :. Check regularly and before a long trip
For information on quantities and
requirements of operating agents, see “Fuels,
coolants, lubricants, etc.” (Y page 300). At the gas station
191Operation
171_AKB; 3; 60, en-US
d2ureepe, Version: 2.11.8.1 2009-05-11T16:00:23+02:00 - Seite 191 Z
Page 196 of 312
X
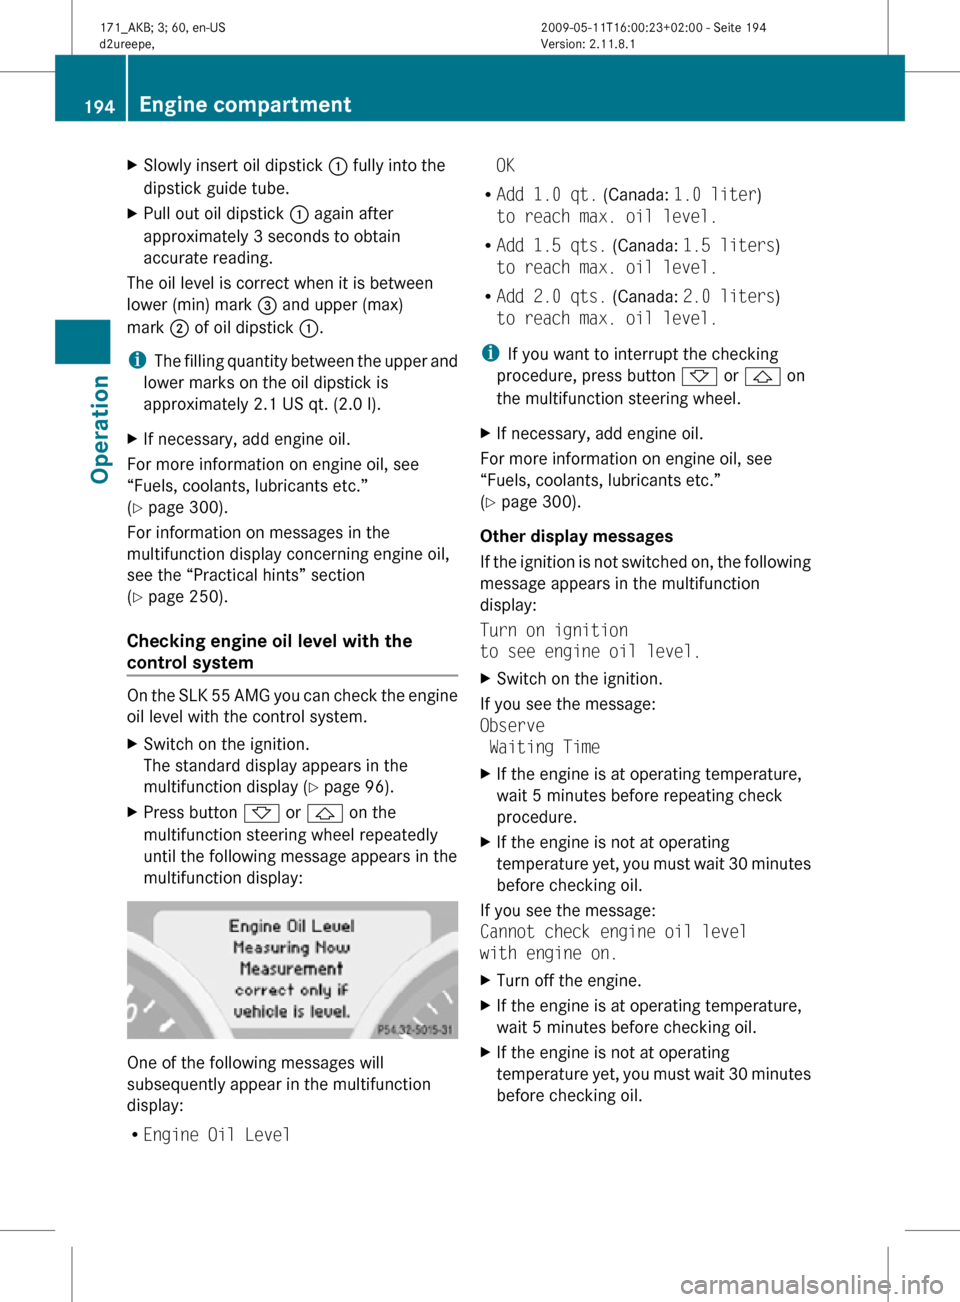
Slowly insert oil dipstick : fully into the
dipstick guide tube.
X Pull out oil dipstick : again after
approximately 3 seconds to obtain
accurate reading.
The oil level is correct when it is between
lower (min) mark = and upper (max)
mark ; of oil dipstick :.
i The filling quantity between the upper and
lower marks on the oil dipstick is
approximately 2.1 US qt. (2.0 l).
X If necessary, add engine oil.
For more information on engine oil, see
“Fuels, coolants, lubricants etc.”
(Y page 300).
For information on messages in the
multifunction display concerning engine oil,
see the “Practical hints” section
(Y page 250).
Checking engine oil level with the
control system On the SLK 55 AMG you can check the engine
oil level with the control system.
X
Switch on the ignition.
The standard display appears in the
multifunction display ( Y page 96).
X Press button * or & on the
multifunction steering wheel repeatedly
until the following message appears in the
multifunction display: One of the following messages will
subsequently appear in the multifunction
display:
R
Engine Oil Level OK
R Add 1.0 qt. (Canada: 1.0 liter)
to reach max. oil level.
R Add 1.5 qts. (Canada: 1.5 liters)
to reach max. oil level.
R Add 2.0 qts. (Canada: 2.0 liters)
to reach max. oil level.
i If you want to interrupt the checking
procedure, press button * or & on
the multifunction steering wheel.
X If necessary, add engine oil.
For more information on engine oil, see
“Fuels, coolants, lubricants etc.”
(Y page 300).
Other display messages
If the ignition is not switched on, the following
message appears in the multifunction
display:
Turn on ignition
to see engine oil level.
X Switch on the ignition.
If you see the message:
Observe
Waiting Time
X If the engine is at operating temperature,
wait 5 minutes before repeating check
procedure.
X If the engine is not at operating
temperature yet, you must wait 30 minutes
before checking oil.
If you see the message:
Cannot check engine oil level
with engine on.
X Turn off the engine.
X If the engine is at operating temperature,
wait 5 minutes before checking oil.
X If the engine is not at operating
temperature yet, you must wait 30 minutes
before checking oil. 194
Engine compartmentOperation
171_AKB; 3; 60, en-US
d2ureepe,
Version: 2.11.8.1 2009-05-11T16:00:23+02:00 - Seite 194