2011 MERCEDES-BENZ SLK300 stop start
[x] Cancel search: stop startPage 89 of 312
Transmission positions
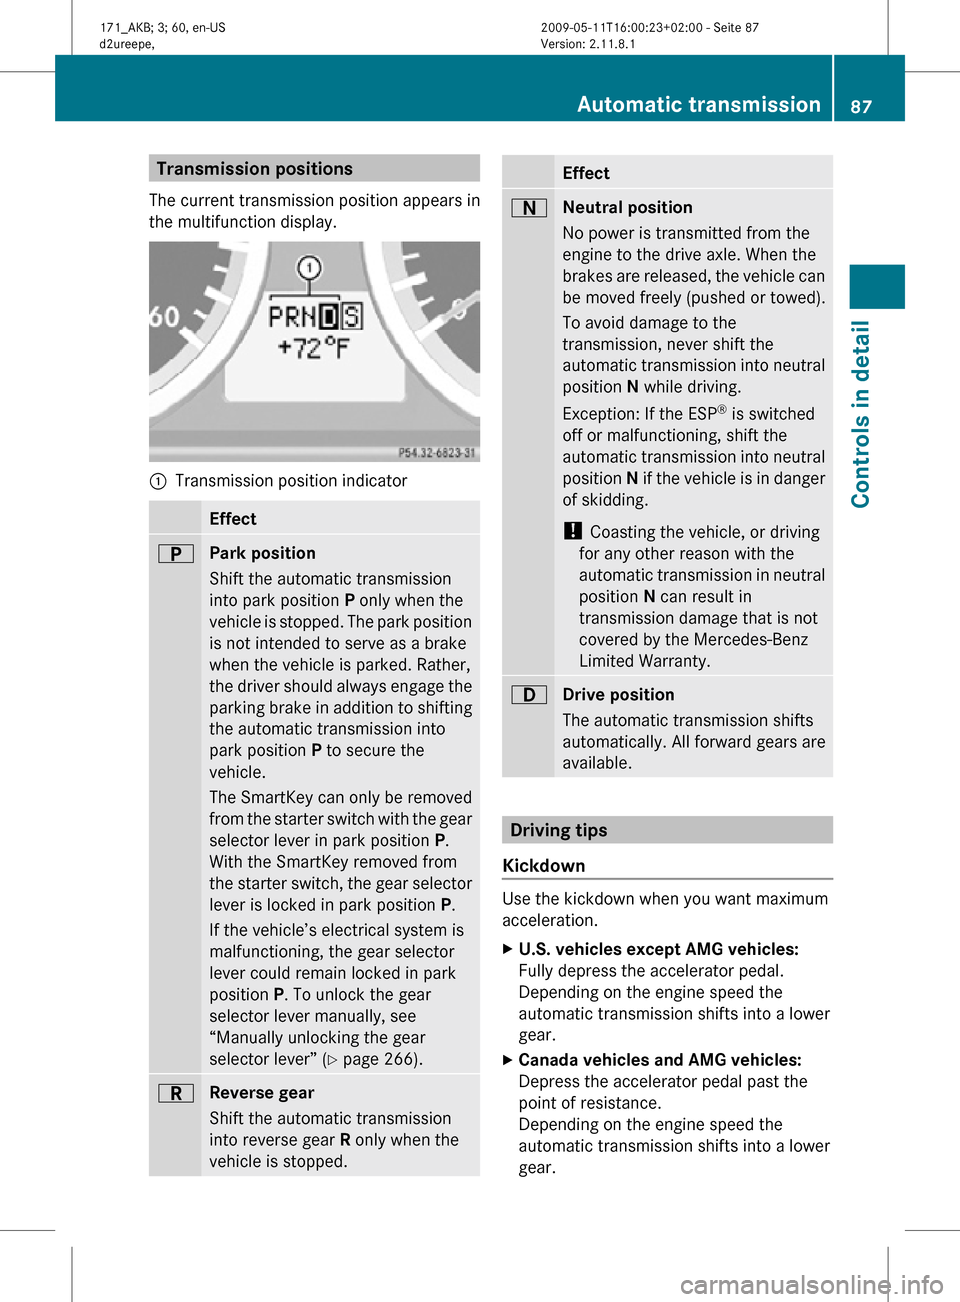
The current transmission position appears in
the multifunction display. :
Transmission position indicator Effect
B
Park position
Shift the automatic transmission
into park position P only when the
vehicle is stopped. The park position
is not intended to serve as a brake
when the vehicle is parked. Rather,
the driver should always engage the
parking brake in addition to shifting
the automatic transmission into
park position P to secure the
vehicle.
The SmartKey can only be removed
from the starter switch with the gear
selector lever in park position P.
With the SmartKey removed from
the starter switch, the gear selector
lever is locked in park position
P.
If the vehicle’s electrical system is
malfunctioning, the gear selector
lever could remain locked in park
position P. To unlock the gear
selector lever manually, see
“Manually unlocking the gear
selector lever” ( Y page 266). C
Reverse gear
Shift the automatic transmission
into reverse gear R only when the
vehicle is stopped. Effect
A
Neutral position
No power is transmitted from the
engine to the drive axle. When the
brakes are released, the vehicle can
be moved freely (pushed or towed).
To avoid damage to the
transmission, never shift the
automatic transmission into neutral
position N while driving.
Exception: If the ESP ®
is switched
off or malfunctioning, shift the
automatic transmission into neutral
position N if the vehicle is in danger
of skidding.
! Coasting the vehicle, or driving
for any other reason with the
automatic transmission in neutral
position N can result in
transmission damage that is not
covered by the Mercedes-Benz
Limited Warranty. 7
Drive position
The automatic transmission shifts
automatically. All forward gears are
available.
Driving tips
Kickdown Use the kickdown when you want maximum
acceleration.
X
U.S. vehicles except AMG vehicles:
Fully depress the accelerator pedal.
Depending on the engine speed the
automatic transmission shifts into a lower
gear.
X Canada vehicles and AMG vehicles:
Depress the accelerator pedal past the
point of resistance.
Depending on the engine speed the
automatic transmission shifts into a lower
gear. Automatic transmission
87Controls in detail
171_AKB; 3; 60, en-US
d2ureepe, Version: 2.11.8.1 2009-05-11T16:00:23+02:00 - Seite 87 Z
Page 94 of 312

the optimal gear for maximum
acceleration.
i When you brake or stop, the automatic
transmission shifts down into a gear from
which you can easily accelerate or take off.
Kickdown Using the kickdown while driving in manual
program mode
M is not possible.
Deactivating manual shift program X
Press the program mode selector switch
repeatedly until C or S appears in the
multifunction display.
or
X Restart the engine.
The automatic transmission will go to
automatic program mode C.
Manual program mode M is not stored.Emergency operation (limp-home
mode)
If vehicle acceleration becomes less
responsive or sluggish or the automatic
transmission no longer shifts, the automatic
transmission is most likely operating in limp-
home (emergency operation) mode. In this
mode only second gear and reverse gear R
can be selected.
X Stop the vehicle in a safe location.
X Shift the automatic transmission into park
position P.
X Turn off the engine.
X Wait at least 10 seconds before restarting.
X Restart the engine.
X Shift the automatic transmission into drive
position D (for second gear) or reverse gear
R.
X Have the automatic transmission checked
at an authorized Mercedes-Benz Center as
soon as possible. Instrument cluster
Introduction
For a full view illustration of the instrument
cluster, see “Instrument cluster”
(Y page 26). G
Warning!
No messages will be displayed if either the
instrument cluster or the multifunction
display is inoperative.
As a result, you will not be able to see
information about your driving conditions,
such as
R speed
R outside temperature
R warning/indicator lamps
R malfunction/warning messages
R failure of any systems
Driving characteristics may be impaired.
If you must continue to drive, do so with added
caution. Contact an authorized Mercedes-
Benz Center as soon as possible. :
To brighten instrument cluster
illumination (knob +)
; To dim instrument cluster illumination
(knob -)
= Reset button .
For information on changing the instrument
cluster settings, e.g. the language, see
(Y page 103). 92
Instrument clusterControls in detail
171_AKB; 3; 60, en-US
d2ureepe,
Version: 2.11.8.1 2009-05-11T16:00:23+02:00 - Seite 92
Page 100 of 312
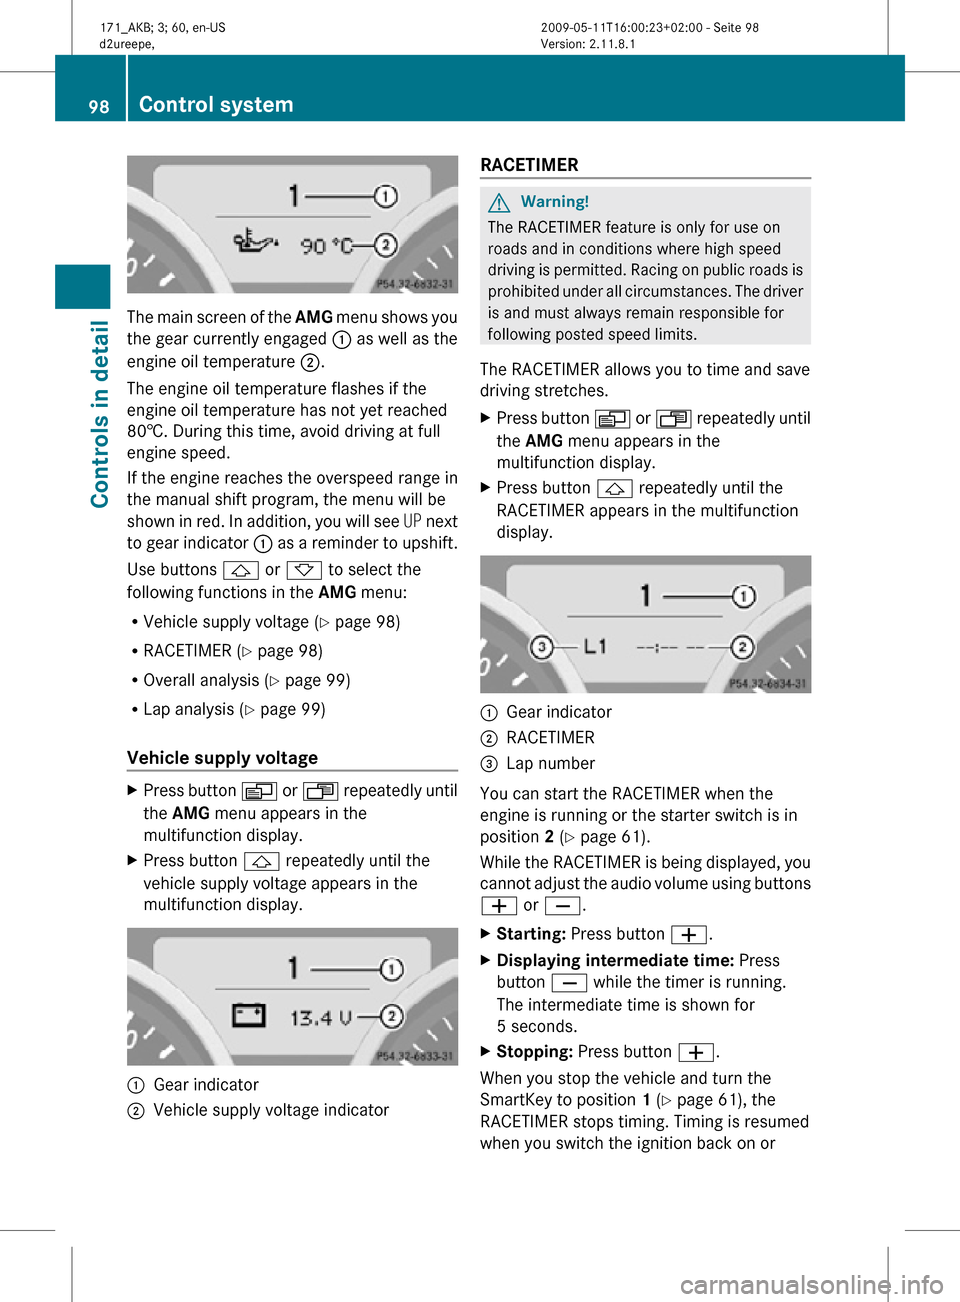
The main screen of the
AMG menu shows you
the gear currently engaged : as well as the
engine oil temperature ;.
The engine oil temperature flashes if the
engine oil temperature has not yet reached
80†. During this time, avoid driving at full
engine speed.
If the engine reaches the overspeed range in
the manual shift program, the menu will be
shown in red. In addition, you will see UP next
to gear indicator : as a reminder to upshift.
Use buttons & or * to select the
following functions in the AMG menu:
R Vehicle supply voltage ( Y page 98)
R RACETIMER (Y page 98)
R Overall analysis ( Y page 99)
R Lap analysis (Y page 99)
Vehicle supply voltage X
Press button V or U repeatedly until
the AMG menu appears in the
multifunction display.
X Press button & repeatedly until the
vehicle supply voltage appears in the
multifunction display. :
Gear indicator
; Vehicle supply voltage indicator RACETIMER G
Warning!
The RACETIMER feature is only for use on
roads and in conditions where high speed
driving is permitted. Racing on public roads is
prohibited under all circumstances. The driver
is and must always remain responsible for
following posted speed limits.
The RACETIMER allows you to time and save
driving stretches.
X Press button V or U repeatedly until
the AMG menu appears in the
multifunction display.
X Press button & repeatedly until the
RACETIMER appears in the multifunction
display. :
Gear indicator
; RACETIMER
= Lap number
You can start the RACETIMER when the
engine is running or the starter switch is in
position 2 (Y page 61).
While the RACETIMER is being displayed, you
cannot adjust the audio volume using buttons
W or X.
X Starting: Press button W.
X Displaying intermediate time: Press
button X while the timer is running.
The intermediate time is shown for
5 seconds.
X Stopping: Press button W.
When you stop the vehicle and turn the
SmartKey to position 1 (Y page 61), the
RACETIMER stops timing. Timing is resumed
when you switch the ignition back on or 98
Control systemControls in detail
171_AKB; 3; 60, en-US
d2ureepe,
Version: 2.11.8.1 2009-05-11T16:00:23+02:00 - Seite 98
Page 101 of 312
restart the engine and then press button
W.
Saving lap time and starting a new lap
You can save up to nine laps.
X
Press button X while the timer is
running.
The intermediate time will be shown for
5 seconds.
X Press button X within 5 seconds.
The intermediate time shown will be saved
as a lap time.
The RACETIMER begins timing the new lap.
The new lap begins to be timed as soon as
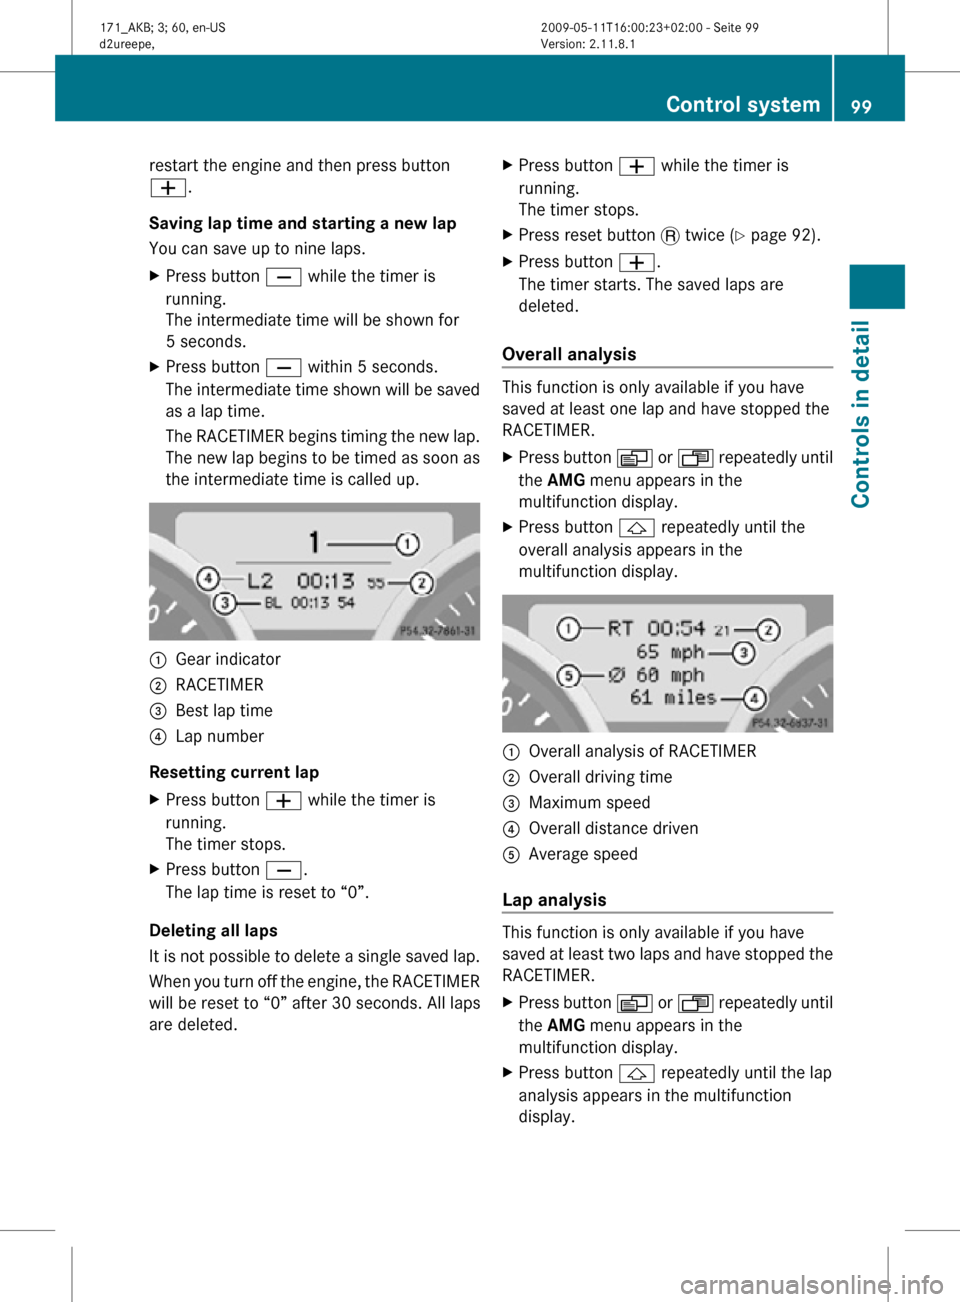
the intermediate time is called up. :
Gear indicator
; RACETIMER
= Best lap time
? Lap number
Resetting current lap
X Press button W while the timer is
running.
The timer stops.
X Press button X.
The lap time is reset to “0”.
Deleting all laps
It is not possible to delete a single saved lap.
When you turn off the engine, the RACETIMER
will be reset to “0” after 30 seconds. All laps
are deleted. X
Press button W while the timer is
running.
The timer stops.
X Press reset button . twice (Y page 92).
X Press button W.
The timer starts. The saved laps are
deleted.
Overall analysis This function is only available if you have
saved at least one lap and have stopped the
RACETIMER.
X
Press button V or U repeatedly until
the AMG menu appears in the
multifunction display.
X Press button & repeatedly until the
overall analysis appears in the
multifunction display. :
Overall analysis of RACETIMER
; Overall driving time
= Maximum speed
? Overall distance driven
A Average speed
Lap analysis This function is only available if you have
saved at least two laps and have stopped the
RACETIMER.
X
Press button V or U repeatedly until
the AMG menu appears in the
multifunction display.
X Press button & repeatedly until the lap
analysis appears in the multifunction
display. Control system
99Controls in detail
171_AKB; 3; 60, en-US
d2ureepe, Version: 2.11.8.1 2009-05-11T16:00:23+02:00 - Seite 99 Z
Page 112 of 312
Resetting fuel consumption statistics
X
Press button U or V repeatedly until
the message From Start appears in the
multifunction display.
X Press button & or * repeatedly until
the reading that you want to reset appears
in the multifunction display.
X Press and hold the reset button . in the
instrument cluster until the respective
values are reset to 0.
The fuel consumption statistics reset
automatically to 0 after 99 999 miles or
9 999 hours, whichever occurs first.
Distance to empty X
Press button U or V repeatedly until
the message From Start appears in the
multifunction display.
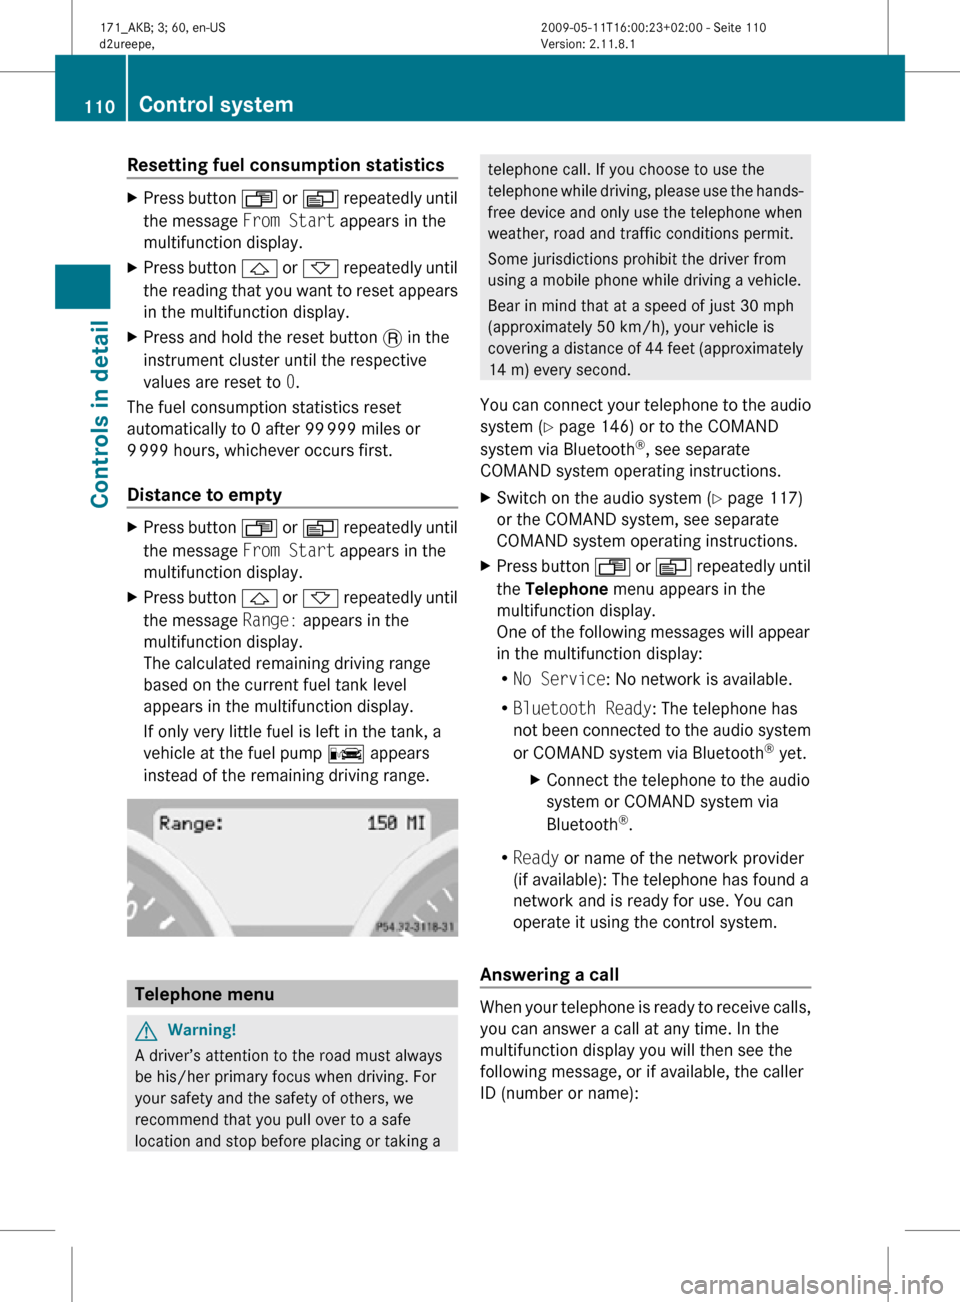
X Press button & or * repeatedly until
the message Range: appears in the
multifunction display.
The calculated remaining driving range
based on the current fuel tank level
appears in the multifunction display.
If only very little fuel is left in the tank, a
vehicle at the fuel pump C appears
instead of the remaining driving range. Telephone menu
G
Warning!
A driver’s attention to the road must always
be his/her primary focus when driving. For
your safety and the safety of others, we
recommend that you pull over to a safe
location and stop before placing or taking a telephone call. If you choose to use the
telephone while driving, please use the hands-
free device and only use the telephone when
weather, road and traffic conditions permit.
Some jurisdictions prohibit the driver from
using a mobile phone while driving a vehicle.
Bear in mind that at a speed of just 30 mph
(approximately 50 km/h), your vehicle is
covering a distance of 44 feet (approximately
14 m) every second.
You can connect your telephone to the audio
system (Y page 146) or to the COMAND
system via Bluetooth ®
, see separate
COMAND system operating instructions.
X Switch on the audio system ( Y page 117)
or the COMAND system, see separate
COMAND system operating instructions.
X Press button U or V repeatedly until
the Telephone menu appears in the
multifunction display.
One of the following messages will appear
in the multifunction display:
R No Service: No network is available.
R Bluetooth Ready: The telephone has
not been connected to the audio system
or COMAND system via Bluetooth ®
yet.
X Connect the telephone to the audio
system or COMAND system via
Bluetooth ®
.
R Ready or name of the network provider
(if available): The telephone has found a
network and is ready for use. You can
operate it using the control system.
Answering a call When your telephone is ready to receive calls,
you can answer a call at any time. In the
multifunction display you will then see the
following message, or if available, the caller
ID (number or name):110
Control systemControls in detail
171_AKB; 3; 60, en-US
d2ureepe,
Version: 2.11.8.1 2009-05-11T16:00:23+02:00 - Seite 110
Page 148 of 312
Calling up AUX mode
G
Warning!
Due to the different volumes of the external
audio sources, system messages of the
vehicle may be much louder. You may need to
disable these system messages or adjust the
volume of these messages manually.
X Selecting audio AUX mode:
Press button h repeatedly until the
main menu for AUX operation appears.
or
X In CD mode: Select CD/MP3 Q Aux.
The audio AUX menu appears. The medium in
the external audio source is heard, provided
it is connected and switched to playback.
i Please refer to the relevant operating
guide for operation of the external audio
source.
The following settings can be made in the
audio AUX mode:
R Volume ( Y page 117)
R Balance control ( Y page 118)
R Bass and treble control (Y page 118)
R Surround sound ( Y page 119)
i The volume of external audio sources is
extremely variable. It is possible that a
device connected as an external audio
source will sound quieter or louder in the
vehicle or that the usual maximum volume
cannot be achieved. On certain devices the
volume can be set separately. In this case,
start at a moderate volume and increase it
slowly. In this way, you can determine
whether the system is capable of playback
without distortion, even at high volume.
Volume adjustment for the audio device
You can increase the volume for the AUX
socket in case the internal volume of the
connected audio device is too low. Use the
setting Boost for such devices. You should set the system back to
Standard before connecting a different audio
device to the AUX socket.
X
Select Volume in AUX mode.
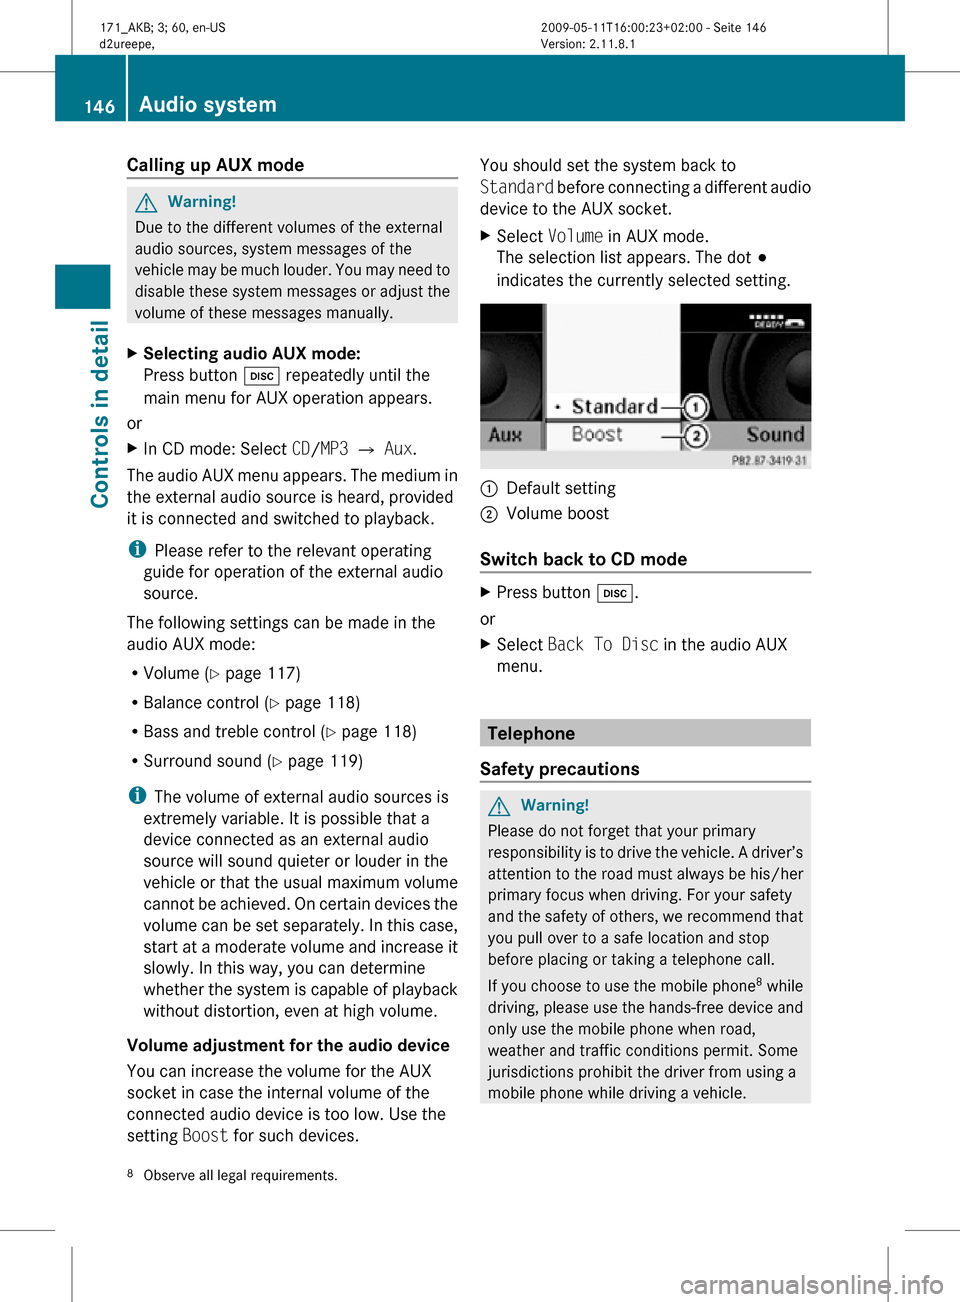
The selection list appears. The dot #
indicates the currently selected setting. :
Default setting
; Volume boost
Switch back to CD mode X
Press button h.
or
X Select Back To Disc in the audio AUX
menu. Telephone
Safety precautions G
Warning!
Please do not forget that your primary
responsibility is to drive the vehicle. A driver’s
attention to the road must always be his/her
primary focus when driving. For your safety
and the safety of others, we recommend that
you pull over to a safe location and stop
before placing or taking a telephone call.
If you choose to use the mobile phone 8
while
driving, please use the hands-free device and
only use the mobile phone when road,
weather and traffic conditions permit. Some
jurisdictions prohibit the driver from using a
mobile phone while driving a vehicle.
8 Observe all legal requirements. 146
Audio systemControls in detail
171_AKB; 3; 60, en-US
d2ureepe,
Version: 2.11.8.1 2009-05-11T16:00:23+02:00 - Seite 146
Page 204 of 312
G
Warning!
The TPMS does not indicate a warning for
wrongly selected inflation pressures. Always
adjust
tire inflation pressure according to the
Tire and Loading Information placard or the
supplemental tire inflation pressure
information on the inside of the fuel filler flap.
The TPMS is not able to issue a warning due
to a sudden dramatic loss of pressure (e.g. tire
blowout caused by a foreign object). In this
case bring the vehicle to a halt by carefully
applying the brakes and avoiding abrupt
steering maneuvers. G
Warning!
Each tire, including the spare (if provided),
should be checked at least once a month
when cold and inflated to the inflation
pressure recommended by the vehicle
manufacturer on the Tire and Loading
Information placard on the driver’s door B-
pillar
or the tire inflation pressure label on the
inside of the fuel filler flap. If your vehicle has
tires of a different size than the size indicated
on the Tire and Loading Information placard
or the tire inflation pressure label, you should
determine the proper tire inflation pressure
for those tires.
As an added safety feature, your vehicle has
been equipped with a tire pressure monitoring
system (TPMS) that illuminates a low tire
pressure telltale when one or more of your
tires are significantly underinflated.
Accordingly, when the low tire pressure
telltale illuminates, you should stop and check
your tires as soon as possible, and inflate
them to the proper pressure. Driving on a
significantly underinflated tire causes the tire
to overheat and can lead to tire failure.
Underinflation also reduces fuel efficiency
and tire tread life, and may affect the vehicle’s
handling and stopping ability. Please note that
the TPMS is not a substitute for proper tire
maintenance, and it is the driver’s
responsibility to maintain correct tire
pressure, even if underinflation has not reached the level to trigger illumination of the
TPMS low tire pressure telltale.
Your vehicle has also been equipped with a
TPMS malfunction indicator to indicate when
the system is not operating properly. The
TPMS
malfunction indicator is combined with
the low tire pressure telltale. When the
system detects a malfunction, the telltale will
flash for approximately 1 minute and then
remain continuously illuminated. This
sequence will continue upon subsequent
vehicle start-ups as long as the malfunction
exists. When the malfunction indicator is
illuminated, the system may not be able to
detect or signal low tire pressure as intended.
TPMS malfunctions may occur for a variety of
reasons, including the installation of
incompatible replacement or alternate tires
or wheels on the vehicle that prevent the
TPMS from functioning properly. Always
check the TPMS malfunction telltale after
replacing one or more tires or wheels on your
vehicle to ensure that the replacement or
alternate tires and wheels allow the TPMS to
continue to function properly.
i If a condition causing the TPMS to
malfunction develops, it may take up to
10 minutes for the system to signal a
malfunction using the TPMS telltale
flashing and illumination sequence.
The telltale extinguishes after a few
minutes driving if the malfunction has been
corrected.
Tire pressure inquiries are made using the
multifunction display. The current tire
inflation pressure for each tire appears in the
multifunction display after a few minutes of
driving.
i Possible differences between the
readings of a tire pressure gauge of an air
hose, e.g. gas station equipment, and the
vehicle’s control system can occur. The tire
pressure displayed by the control system
apply to sea level. In high-altitude
locations, the reading on a tire pressure 202
Tires and wheels
Operation
171_AKB; 3; 60, en-US
d2ureepe,
Version: 2.11.8.1 2009-05-11T16:00:23+02:00 - Seite 202
Page 206 of 312
Restart the TPMS after adjusting the tire
inflation pressure to the inflation pressure
recommended for the vehicle operating
condition. Tire inflation pressure should only
be adjusted on cold tires. Observe the
recommended tire inflation pressure on the
Tire and Loading Information placard on the
driver’s door B-pillar. Some vehicles may have
supplemental tire inflation pressure
information for driving at high speeds or for
vehicle loads less than the maximum loaded
vehicle condition. If such information is
provided, it can be found on the inside of the
fuel filler flap.
X
Using the Tire and Loading Information
placard on the driver’s door B-pillar
(Y page 205) or the supplemental tire
inflation pressure information on the inside
of the fuel filler flap, make sure the tire
inflation pressure of all four tires is correct.
X Switch on the ignition.
X Press button V or U on the
multifunction steering wheel repeatedly
until the standard display appears in the
multifunction display ( Y page 96).
X Press button & or * repeatedly until
you see the current inflation pressures for
each tire appear in the display or the
following message appears in the
multifunction display:
Tire pressure is
only displayed
after driving for
a few minutes.
X Press the reset button (Y page 92).
The following message will appear in the
multifunction display:
Restart tire
pressure monitor?
X If you wish to confirm: Press button
W.
The following message will appear in the
multifunction display:
Tire Pressure Monitor
Restarted After driving a few minutes the system
verifies that the current tire inflation
pressures are within the system’s specified
range. Afterwards the current tire inflation
pressures are accepted as reference values
and then monitored.
X If you wish to cancel: Press button X.
i When the wheel positions have been
changed, the inflation pressure of a tire
may be displayed for the wrong position
temporarily. After driving for a few minutes,
the inflation pressure will be shown for the
correct position. Maximum tire inflation pressure
G
Warning!
Never exceed the maximum tire inflation
pressure. Follow recommended tire inflation
pressures.
Do not underinflate tires. Underinflated tires
wear excessively and/or unevenly, adversely
affect handling and fuel economy, and are
more likely to fail from being overheated.
Do not overinflate tires. Overinflated tires can
adversely affect handling and ride comfort,
wear unevenly, increase stopping distance,
and result in sudden deflation (blowout)
because they are more likely to become
punctured or damaged by road debris,
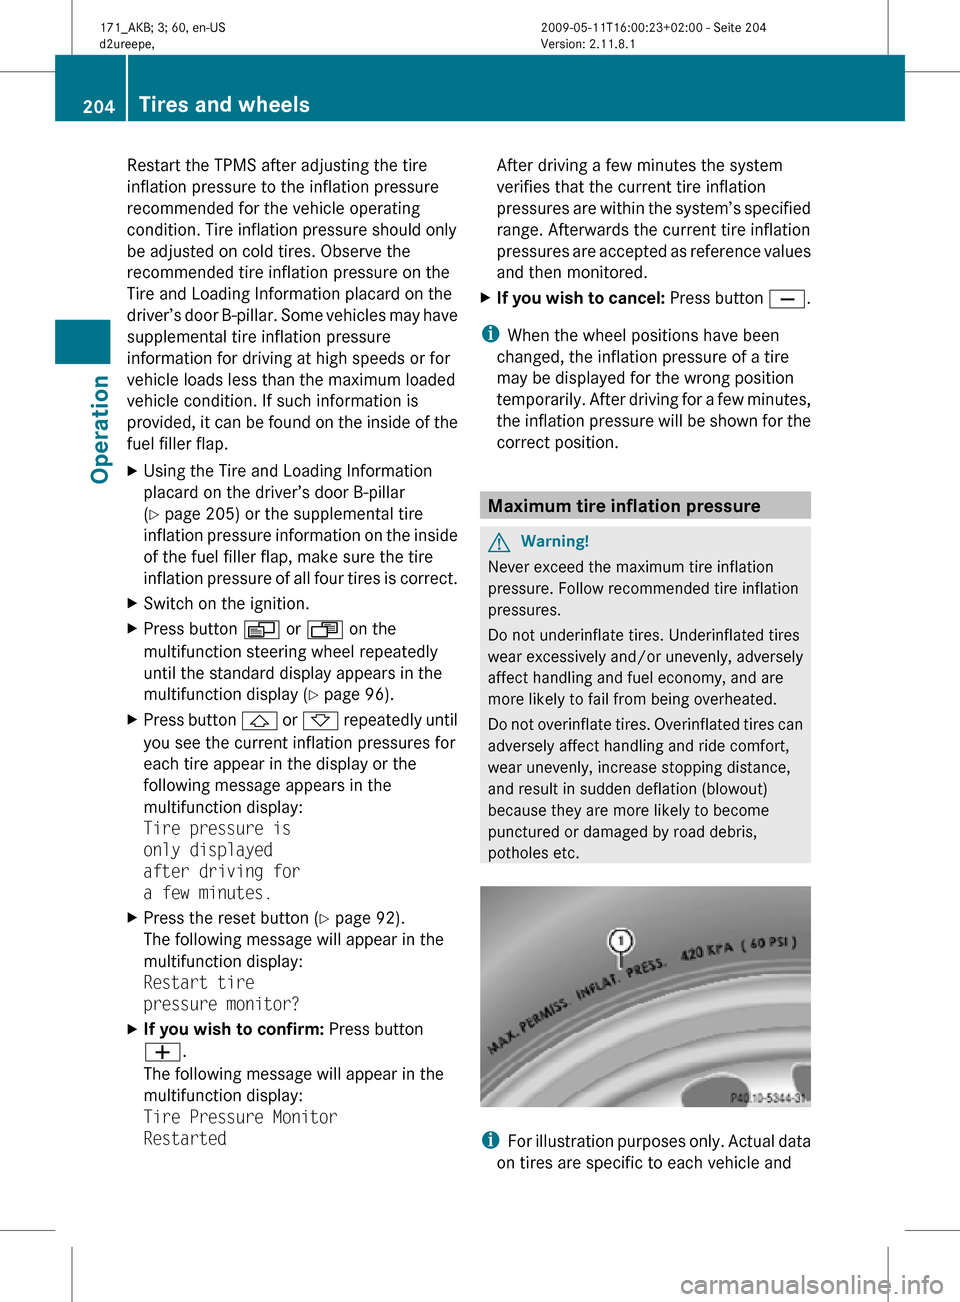
potholes etc. i
For illustration purposes only. Actual data
on tires are specific to each vehicle and 204
Tires and wheelsOperation
171_AKB; 3; 60, en-US
d2ureepe,
Version: 2.11.8.1 2009-05-11T16:00:23+02:00 - Seite 204