2011 MERCEDES-BENZ SLK300 oil
[x] Cancel search: oilPage 100 of 312
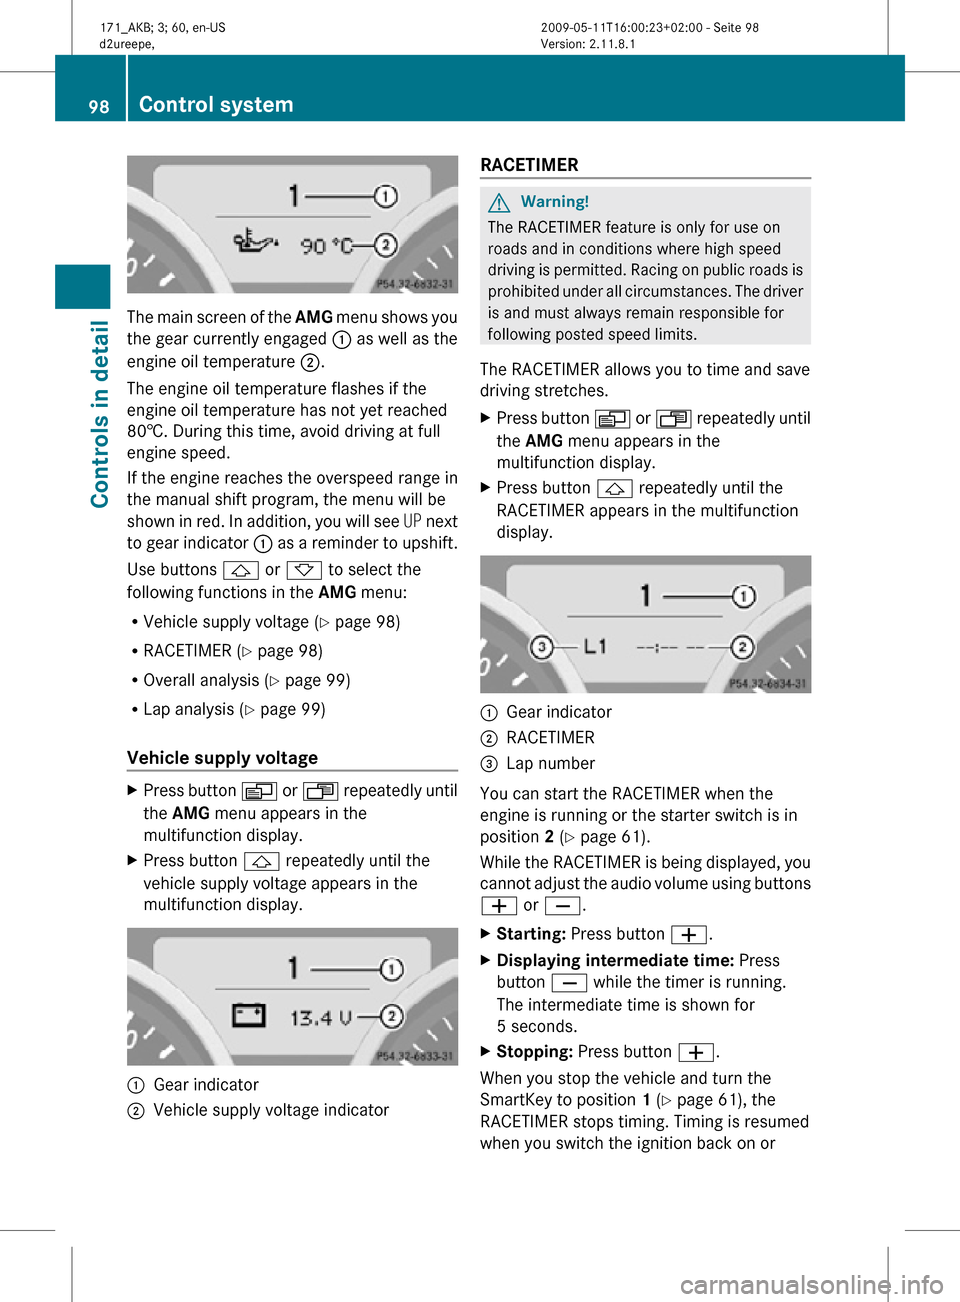
The main screen of the
AMG menu shows you
the gear currently engaged : as well as the
engine oil temperature ;.
The engine oil temperature flashes if the
engine oil temperature has not yet reached
80†. During this time, avoid driving at full
engine speed.
If the engine reaches the overspeed range in
the manual shift program, the menu will be
shown in red. In addition, you will see UP next
to gear indicator : as a reminder to upshift.
Use buttons & or * to select the
following functions in the AMG menu:
R Vehicle supply voltage ( Y page 98)
R RACETIMER (Y page 98)
R Overall analysis ( Y page 99)
R Lap analysis (Y page 99)
Vehicle supply voltage X
Press button V or U repeatedly until
the AMG menu appears in the
multifunction display.
X Press button & repeatedly until the
vehicle supply voltage appears in the
multifunction display. :
Gear indicator
; Vehicle supply voltage indicator RACETIMER G
Warning!
The RACETIMER feature is only for use on
roads and in conditions where high speed
driving is permitted. Racing on public roads is
prohibited under all circumstances. The driver
is and must always remain responsible for
following posted speed limits.
The RACETIMER allows you to time and save
driving stretches.
X Press button V or U repeatedly until
the AMG menu appears in the
multifunction display.
X Press button & repeatedly until the
RACETIMER appears in the multifunction
display. :
Gear indicator
; RACETIMER
= Lap number
You can start the RACETIMER when the
engine is running or the starter switch is in
position 2 (Y page 61).
While the RACETIMER is being displayed, you
cannot adjust the audio volume using buttons
W or X.
X Starting: Press button W.
X Displaying intermediate time: Press
button X while the timer is running.
The intermediate time is shown for
5 seconds.
X Stopping: Press button W.
When you stop the vehicle and turn the
SmartKey to position 1 (Y page 61), the
RACETIMER stops timing. Timing is resumed
when you switch the ignition back on or 98
Control systemControls in detail
171_AKB; 3; 60, en-US
d2ureepe,
Version: 2.11.8.1 2009-05-11T16:00:23+02:00 - Seite 98
Page 194 of 312

Check the following:
R
Engine oil level ( Y page 193)
R Tire inflation pressure ( Y page 201)
R Coolant level ( Y page 196)
R Vehicle lighting ( Y page 267)
R Washer system and headlamp cleaning
system (Y page 196)
R Brake fluid ( Y page 197) Engine compartment
Hood
G
Warning!
Do not pull the release lever while the vehicle
is in motion. Otherwise the hood could be
forced open by passing air flow.
This could cause the hood to come loose and
injure you and/or others.
Opening G
Warning!
Do not open the hood when the engine is
overheated. You could be seriously injured.
Observe the coolant temperature display to
determine whether the engine may be
overheated. If you see flames or smoke
coming from the engine compartment, move
away from the vehicle. Wait until the engine
has cooled. If necessary, call the fire
department. G
Warning!
You could be injured when the hood is open –
even when the engine is turned off.
Parts of the engine can become very hot. To
prevent burns, let the engine cool completely
before touching any components on the
vehicle. Comply with all relevant safety
precautions. G
Warning!
To help prevent personal injury, stay clear of
moving parts when the hood is open and the
engine is running.
The radiator fan may continue to run for
approximately 30 seconds or may even
restart after the engine has been turned off.
Stay clear of fan blades. G
Warning!
The engine is equipped with a transistorized
ignition system. Because of the high voltage
it is dangerous to touch any components
(ignition coils, spark plug sockets, diagnostic
socket) of the ignition system
R with the engine running
R while starting the engine
R when the ignition is switched on and the
engine is turned manually X
Pull hood lock release lever :.
The hood is unlocked.
! Never open the hood if the wiper arms are
folded forward away from the windshield.
Otherwise the windshield wipers or the
hood could be damaged. 192
Engine compartmentOperation
171_AKB; 3; 60, en-US
d2ureepe,
Version: 2.11.8.1 2009-05-11T16:00:23+02:00 - Seite 192
Page 195 of 312
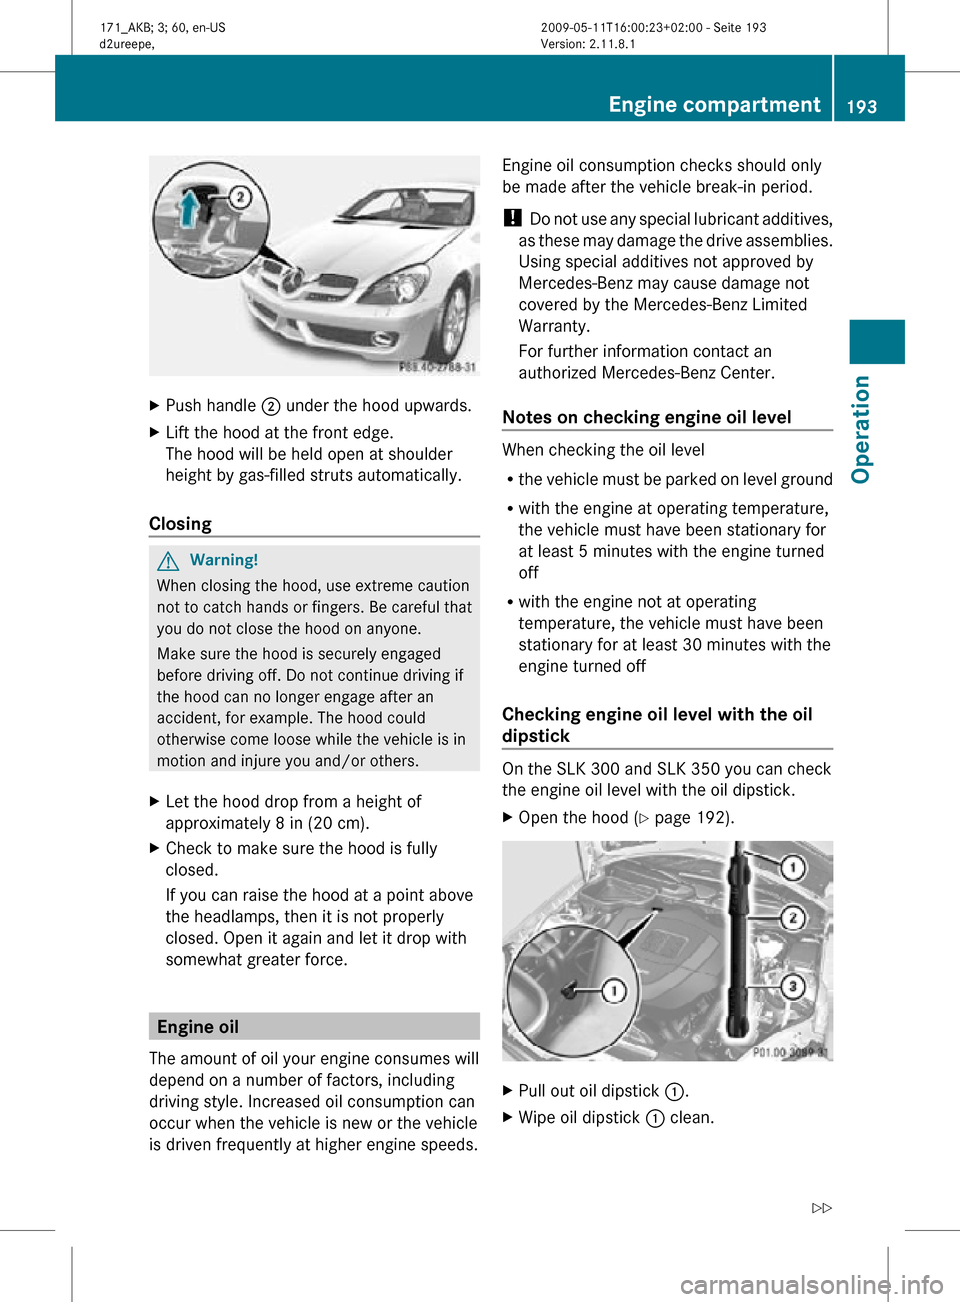
X
Push handle ; under the hood upwards.
X Lift the hood at the front edge.
The hood will be held open at shoulder
height by gas-filled struts automatically.
Closing G
Warning!
When closing the hood, use extreme caution
not to catch hands or fingers. Be careful that
you do not close the hood on anyone.
Make sure the hood is securely engaged
before driving off. Do not continue driving if
the hood can no longer engage after an
accident, for example. The hood could
otherwise come loose while the vehicle is in
motion and injure you and/or others.
X Let the hood drop from a height of
approximately 8 in (20 cm).
X Check to make sure the hood is fully
closed.
If you can raise the hood at a point above
the headlamps, then it is not properly
closed. Open it again and let it drop with
somewhat greater force. Engine oil
The amount of oil your engine consumes will
depend on a number of factors, including
driving style. Increased oil consumption can
occur when the vehicle is new or the vehicle
is driven frequently at higher engine speeds. Engine oil consumption checks should only
be made after the vehicle break-in period.
!
Do not use any special lubricant additives,
as these may damage the drive assemblies.
Using special additives not approved by
Mercedes-Benz may cause damage not
covered by the Mercedes-Benz Limited
Warranty.
For further information contact an
authorized Mercedes-Benz Center.
Notes on checking engine oil level When checking the oil level
R
the vehicle must be parked on level ground
R with the engine at operating temperature,
the vehicle must have been stationary for
at least 5 minutes with the engine turned
off
R with the engine not at operating
temperature, the vehicle must have been
stationary for at least 30 minutes with the
engine turned off
Checking engine oil level with the oil
dipstick On the SLK 300 and SLK 350 you can check
the engine oil level with the oil dipstick.
X
Open the hood (Y page 192). X
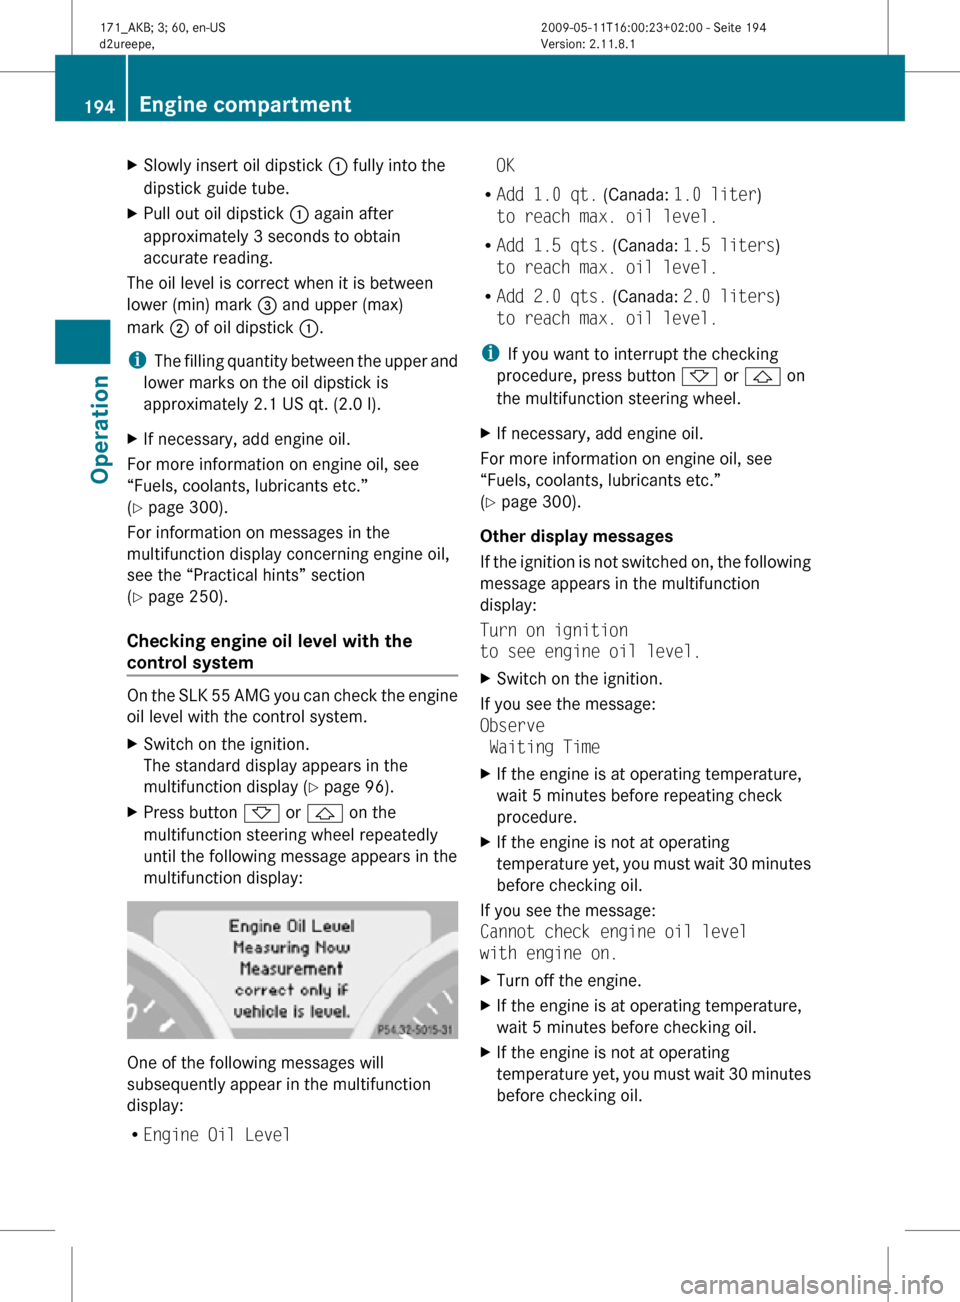
Pull out oil dipstick :.
X Wipe oil dipstick : clean. Engine compartment
193Operation
171_AKB; 3; 60, en-US
d2ureepe, Version: 2.11.8.1 2009-05-11T16:00:23+02:00 - Seite 193 Z
Page 196 of 312
X
Slowly insert oil dipstick : fully into the
dipstick guide tube.
X Pull out oil dipstick : again after
approximately 3 seconds to obtain
accurate reading.
The oil level is correct when it is between
lower (min) mark = and upper (max)
mark ; of oil dipstick :.
i The filling quantity between the upper and
lower marks on the oil dipstick is
approximately 2.1 US qt. (2.0 l).
X If necessary, add engine oil.
For more information on engine oil, see
“Fuels, coolants, lubricants etc.”
(Y page 300).
For information on messages in the
multifunction display concerning engine oil,
see the “Practical hints” section
(Y page 250).
Checking engine oil level with the
control system On the SLK 55 AMG you can check the engine
oil level with the control system.
X
Switch on the ignition.
The standard display appears in the
multifunction display ( Y page 96).
X Press button * or & on the
multifunction steering wheel repeatedly
until the following message appears in the
multifunction display: One of the following messages will
subsequently appear in the multifunction
display:
R
Engine Oil Level OK
R Add 1.0 qt. (Canada: 1.0 liter)
to reach max. oil level.
R Add 1.5 qts. (Canada: 1.5 liters)
to reach max. oil level.
R Add 2.0 qts. (Canada: 2.0 liters)
to reach max. oil level.
i If you want to interrupt the checking
procedure, press button * or & on
the multifunction steering wheel.
X If necessary, add engine oil.
For more information on engine oil, see
“Fuels, coolants, lubricants etc.”
(Y page 300).
Other display messages
If the ignition is not switched on, the following
message appears in the multifunction
display:
Turn on ignition
to see engine oil level.
X Switch on the ignition.
If you see the message:
Observe
Waiting Time
X If the engine is at operating temperature,
wait 5 minutes before repeating check
procedure.
X If the engine is not at operating
temperature yet, you must wait 30 minutes
before checking oil.
If you see the message:
Cannot check engine oil level
with engine on.
X Turn off the engine.
X If the engine is at operating temperature,
wait 5 minutes before checking oil.
X If the engine is not at operating
temperature yet, you must wait 30 minutes
before checking oil. 194
Engine compartmentOperation
171_AKB; 3; 60, en-US
d2ureepe,
Version: 2.11.8.1 2009-05-11T16:00:23+02:00 - Seite 194
Page 197 of 312

i
If you want to interrupt the checking
procedure, press button * or & on
the multifunction steering wheel.
If there is excess engine oil with the engine at
normal operating temperature, the following
message appears in the multifunction
display:
Engine Oil Level
Reduce Oil Level
X Have excess oil siphoned or drained off.
Contact an authorized Mercedes-Benz
Center.
! Excess oil must be siphoned or drained
off. It could cause damage to the engine
and emission control system not covered
by the Mercedes-Benz Limited Warranty.
For information on messages in the
multifunction display concerning engine oil,
see the “Practical hints” section
(Y page 251).
Adding engine oil !
Only use approved engine oils and oil
filters required for vehicles with
Maintenance System. For a listing of
approved engine oils and oil filters, contact
an authorized Mercedes-Benz Center or
visit www.mbusa.com (USA only).
The following will result in engine or
emission control system damage not
covered by the Mercedes-Benz Limited
Warranty:
R Using engine oils and oil filters of
specification other than those expressly
required for the Maintenance System.
R Changing of oil and oil filter at change
intervals longer than those called for by
the Maintenance System.
R Using any oil additives. Example illustration: SLK 350 (SLK 300 similar)
SLK 55 AMG
X
Unscrew filler cap : from filler neck.
X Add engine oil as required. Be careful not
to overfill with oil.
Be careful not to spill any oil when adding.
Avoid environmental damage caused by oil
entering the ground or water.
! Excess oil must be siphoned or drained
off. It could cause damage to the engine
and emission control system not covered
by the Mercedes-Benz Limited Warranty.
X Screw filler cap : back on filler neck.
For more information on engine oil, see the
“Technical data” section ( Y page 300) and
(Y page 302). Transmission fluid level
Vehicles with automatic transmission:
The transmission fluid level does not need to
be checked. If you notice transmission fluid
loss or gearshifting malfunctions, have an Engine compartment
195Operation
171_AKB; 3; 60, en-US
d2ureepe, Version: 2.11.8.1 2009-05-11T16:00:23+02:00 - Seite 195 Z
Page 212 of 312
Life of tire
G
Warning!
Tires and spare tire should be replaced after
6 years, regardless of the remaining tread.
The service life of a tire is dependent upon
varying factors including but not limited to:
R Driving style
R Tire inflation pressure
R Distance driven
Tread depth G
Warning!
Although the applicable federal motor vehicle
safety laws consider a tire to be worn when
the treadwear indicators (TWI) become visible
at approximately 1
/ 16 in (1.6 mm), we
recommend that you do not allow your tires
to wear down to that level. As tread depth
approaches 1
/ 8 in (3 mm), the adhesion
properties on a wet road are sharply reduced.
Depending upon the weather and/or road
surface (conditions), the tire traction varies
widely.
Do not allow your tires to wear down too far.
Adhesion properties on wet roads are sharply
reduced at tread depths of less than 1
/ 8 in
(3 mm).
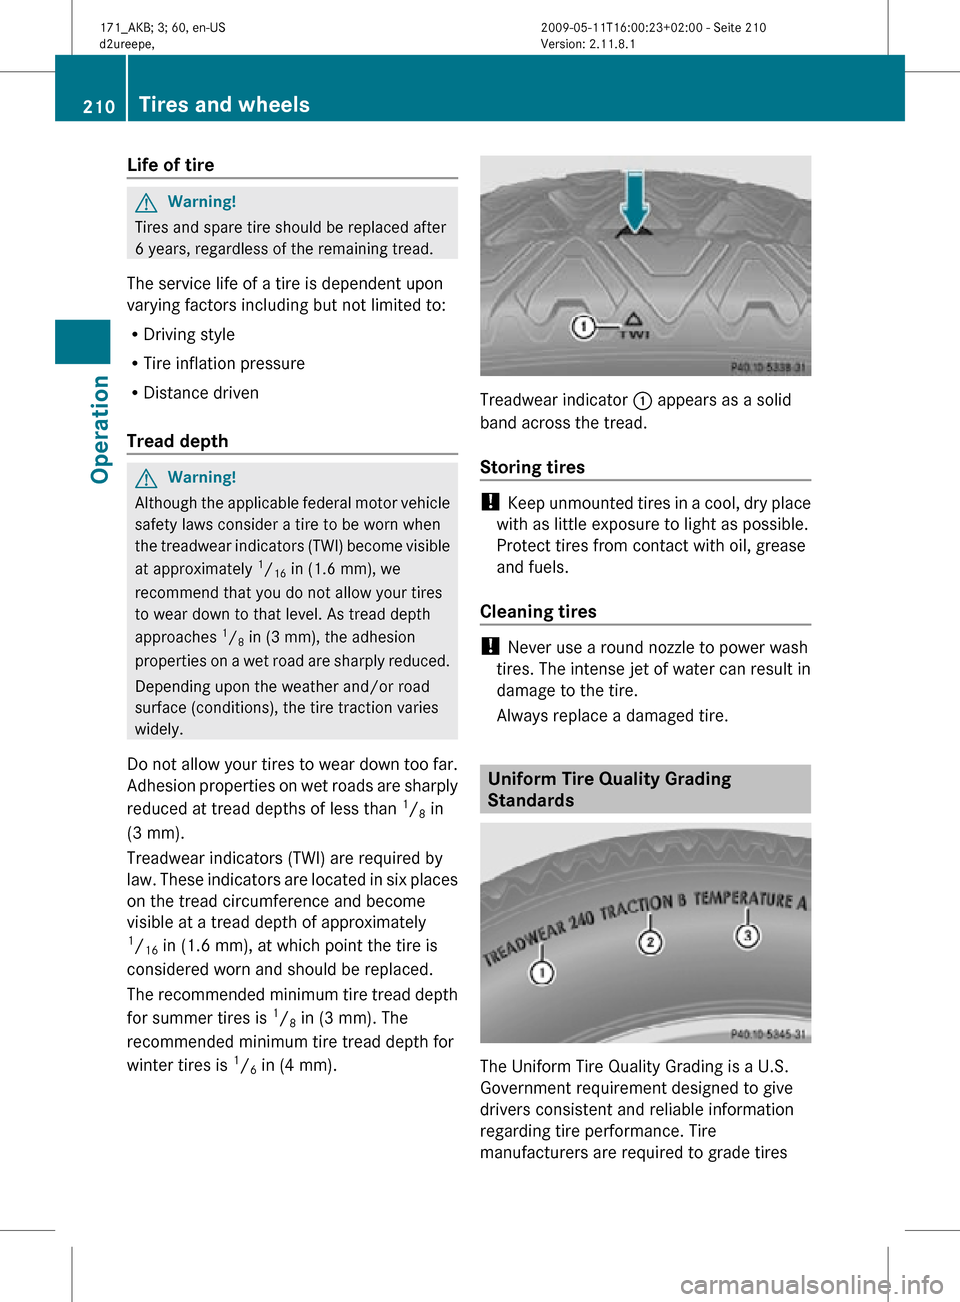
Treadwear indicators (TWI) are required by
law. These indicators are located in six places
on the tread circumference and become
visible at a tread depth of approximately
1 / 16 in (1.6 mm), at which point the tire is
considered worn and should be replaced.
The recommended minimum tire tread depth
for summer tires is 1
/ 8 in (3 mm). The
recommended minimum tire tread depth for
winter tires is 1
/ 6 in (4 mm). Treadwear indicator
: appears as a solid
band across the tread.
Storing tires !
Keep unmounted tires in a cool, dry place
with as little exposure to light as possible.
Protect tires from contact with oil, grease
and fuels.
Cleaning tires !
Never use a round nozzle to power wash
tires. The intense jet of water can result in
damage to the tire.
Always replace a damaged tire. Uniform Tire Quality Grading
Standards
The Uniform Tire Quality Grading is a U.S.
Government requirement designed to give
drivers consistent and reliable information
regarding tire performance. Tire
manufacturers are required to grade tires210
Tires and wheelsOperation
171_AKB; 3; 60, en-US
d2ureepe,
Version: 2.11.8.1 2009-05-11T16:00:23+02:00 - Seite 210
Page 219 of 312
Tire type code
Tire type code
? may, at the option of the
manufacturer, be used as a descriptive code
for identifying significant characteristics of
the tire.
Date of manufacture The date of manufacture
A identifies the
week and year of manufacture.
The first two figures identify the week,
starting with “01” to represent the first full
week of the calendar year. The second two
figures represent the year.
For example, “3208” represents the 32nd
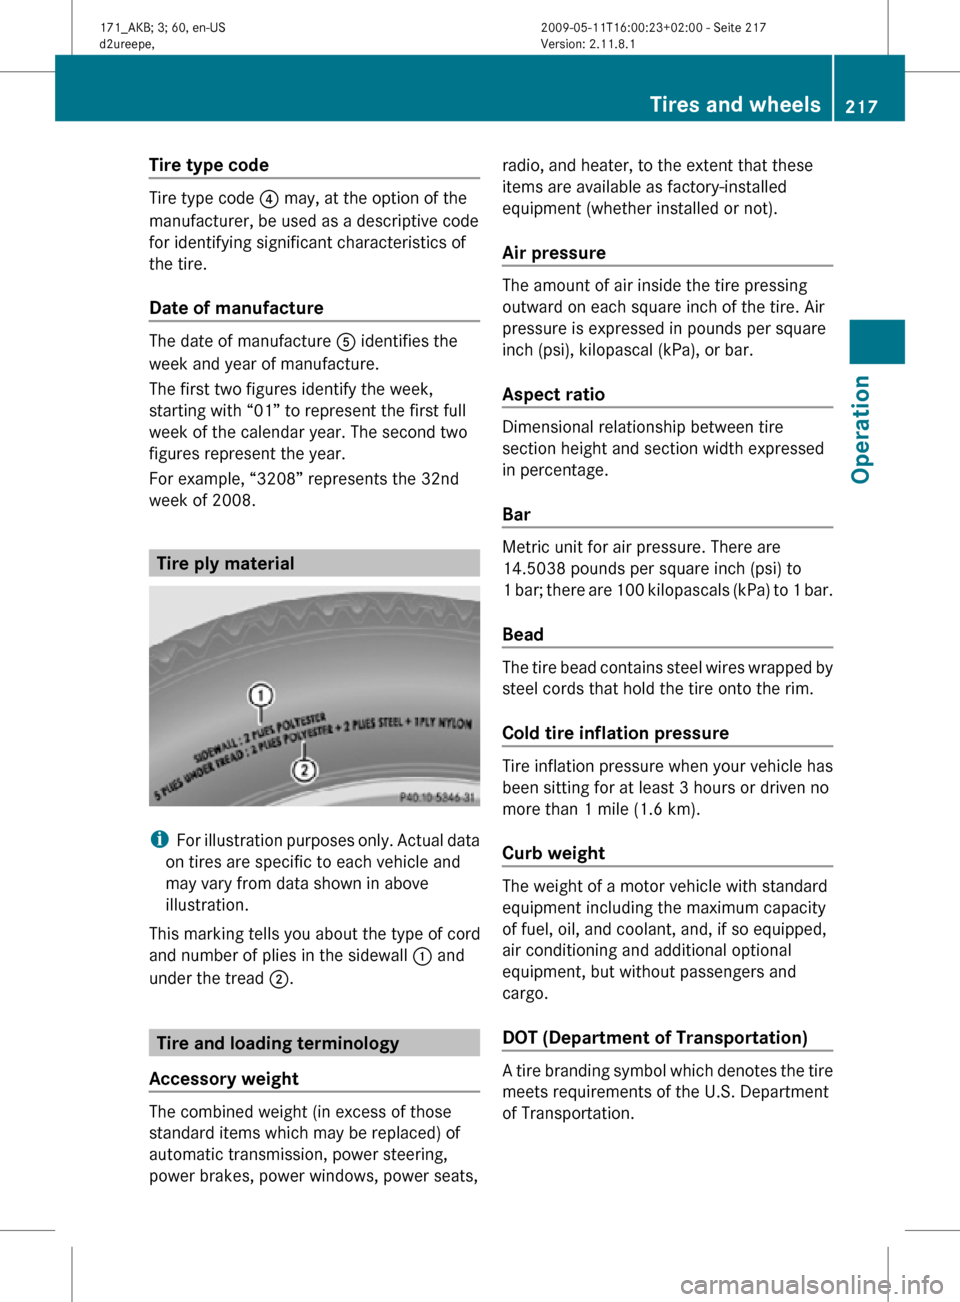
week of 2008. Tire ply material
i
For illustration purposes only. Actual data
on tires are specific to each vehicle and
may vary from data shown in above
illustration.
This marking tells you about the type of cord
and number of plies in the sidewall : and
under the tread ;. Tire and loading terminology
Accessory weight The combined weight (in excess of those
standard items which may be replaced) of
automatic transmission, power steering,
power brakes, power windows, power seats, radio, and heater, to the extent that these
items are available as factory-installed
equipment (whether installed or not).
Air pressure The amount of air inside the tire pressing
outward on each square inch of the tire. Air
pressure is expressed in pounds per square
inch (psi), kilopascal (kPa), or bar.
Aspect ratio
Dimensional relationship between tire
section height and section width expressed
in percentage.
Bar
Metric unit for air pressure. There are
14.5038 pounds per square inch (psi) to
1 bar; there are 100 kilopascals (kPa) to 1 bar.
Bead
The tire bead contains steel wires wrapped by
steel cords that hold the tire onto the rim.
Cold tire inflation pressure
Tire inflation pressure when your vehicle has
been sitting for at least 3 hours or driven no
more than 1 mile (1.6 km).
Curb weight
The weight of a motor vehicle with standard
equipment including the maximum capacity
of fuel, oil, and coolant, and, if so equipped,
air conditioning and additional optional
equipment, but without passengers and
cargo.
DOT (Department of Transportation)
A tire branding symbol which denotes the tire
meets requirements of the U.S. Department
of Transportation. Tires and wheels
217Operation
171_AKB; 3; 60, en-US
d2ureepe, Version: 2.11.8.1 2009-05-11T16:00:23+02:00 - Seite 217 Z
Page 228 of 312
Clearing the maintenance service
indicator message
The maintenance service indicator message
is cleared automatically
R
after approximately 10 seconds when you
switch on the ignition
R after approximately 10 seconds when
reaching
the service threshold while driving
R after approximately 30 seconds, once the
suggested maintenance service term has
passed
X Clearing the maintenance service
indicator
message manually: Press reset
button . on the instrument cluster.
The standard display appears in the
multifunction display.
Maintenance service term exceeded If you have exceeded the suggested
maintenance service term, you will see the
following message in the multifunction
display:
Service A Exceeded By XXXXX Miles
(Km)
Service A Exceeded By XXX Days
Service A Exceeded By X Day
In addition, a signal sounds when the
message appears.
Any authorized Mercedes-Benz Center will
reset the maintenance service indicator
following a completed maintenance service.
Calling up the maintenance service
indicator display
i The menu overview can be found on
(Y page 96).
You can call up the maintenance service
indicator display at any time to check when
the next maintenance service is required. X
Switch on the ignition.
X Press button V or U on the
multifunction steering wheel repeatedly
until the standard display
(Y page 96)
appears in the multifunction display.
X Press button * or & on the
multifunction steering wheel until the
maintenance
service indicator display with
the service symbol ¯ and the
maintenance service deadline appears in
the multifunction display.
i If
the battery was disconnected, the days
of disconnection will not be included in the
count shown by the maintenance service
indicator. To arrive at the true maintenance
service deadline, you will need to subtract
these days from the days shown in the
maintenance service indicator message or
maintenance service indicator display.
Do not confuse the maintenance service
indicator with the engine oil level indicator
4. Resetting the maintenance service
indicator
In
the event that the maintenance service on
your vehicle is not carried out at an authorized
Mercedes-Benz Center, you can have the
maintenance service indicator reset.
The automotive maintenance facility carrying
out the maintenance service will find the
information for resetting the maintenance
service indicator in the maintenance-relevant
literature for your vehicle.
Such literature is available at any authorized
Mercedes-Benz Center or directly from
Mercedes-Benz.
! If the maintenance service indicator was
reset inadvertently, have an authorized
Mercedes-Benz Center correct it.
Only reset the maintenance service
indicator if the proper maintenance service
has been performed. Not following the
proper maintenance service as described 226
Maintenance
Operation
171_AKB; 3; 60, en-US
d2ureepe,
Version: 2.11.8.1 2009-05-11T16:00:23+02:00 - Seite 226