2011 MERCEDES-BENZ S-Class Lights
[x] Cancel search: LightsPage 415 of 524

Warning and indicator lamps in the instrument cluster
Brakes
ProblemPossible causes/consequences and M SolutionsF (USA only)
! (Canada only)
The red indicator lamp
for the electric parking
brake flashes and/or
the yellow warning
lamp for the electric
parking brake lights up.The electric parking brake is temporarily malfunctioning or
defective.XObserve the additional display messages in the multifunction
display.$ (USA only)
J (Canada only)
The red brake system
warning lamp comes on
while the engine is
running. A warning tone
also sounds.GRisk of accident
There is insufficient brake fluid in the fluid reservoir.
XPull over and stop the vehicle safely as soon as possible, paying
attention to road and traffic conditions. Do not continue driving
under any circumstances.XEngage the parking brake.XConsult a qualified specialist workshop immediately.XObserve the additional display messages in the multifunction
display.
Do not add brake fluid. This will not rectify the problem.
GWarning
Driving with the brake warning lamp illuminated can result in an accident. Have your brake system
checked immediately if the brake warning lamp stays on. Do not add brake fluid before checking
the brake system.
Overfilling the brake fluid reservoir can result in spilling brake fluid on hot engine parts and the
brake fluid catching fire. You can be seriously burned.
Warning and indicator lamps in the instrument cluster413On-board computer and displaysZ
Page 416 of 524
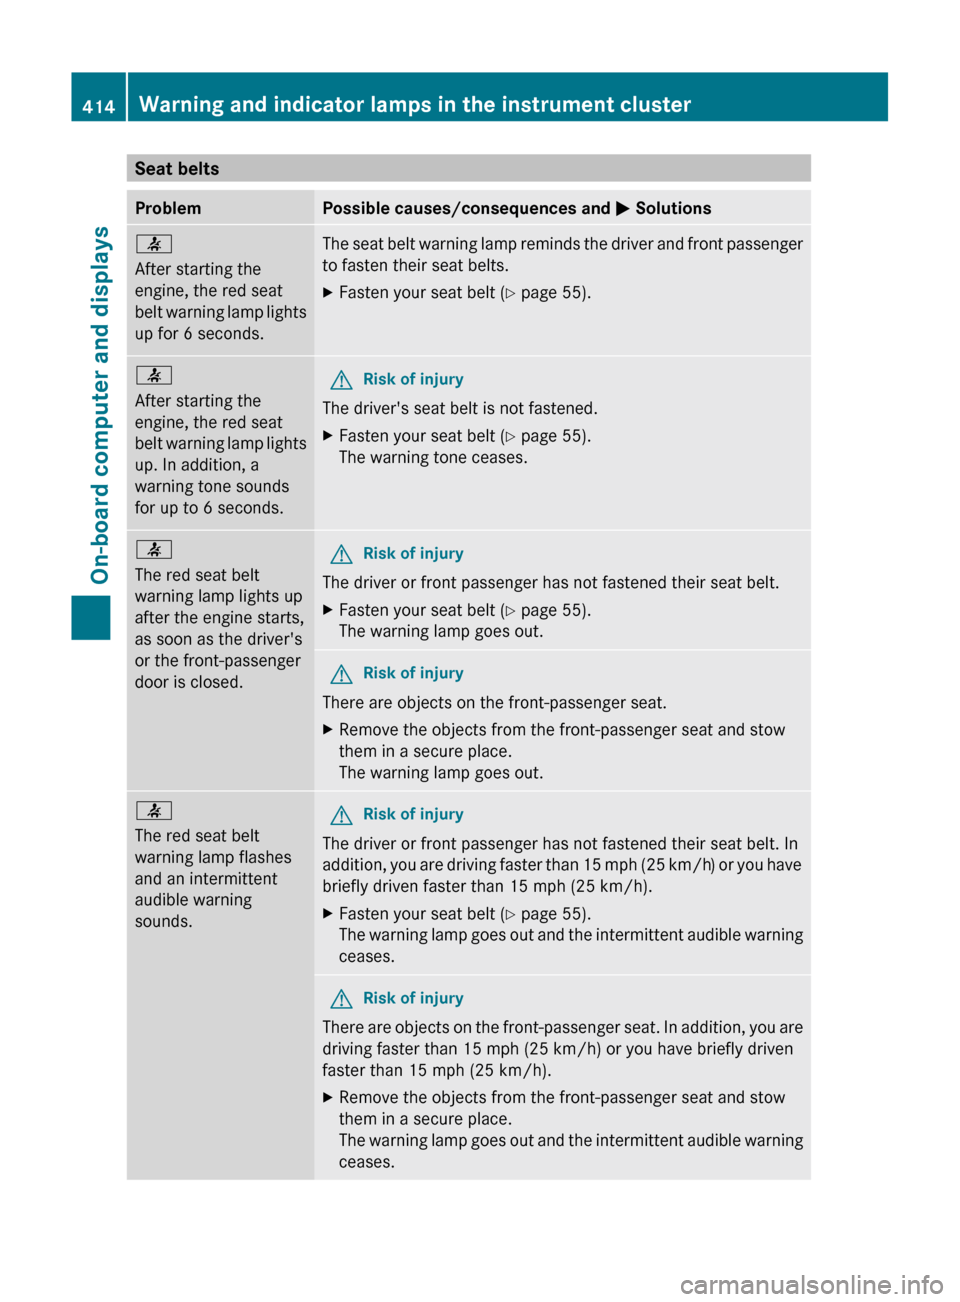
Seat beltsProblemPossible causes/consequences and M Solutions7
After starting the
engine, the red seat
belt warning lamp lights
up for 6 seconds.The seat belt warning lamp reminds the driver and front passenger
to fasten their seat belts.XFasten your seat belt ( Y page 55).7
After starting the
engine, the red seat
belt warning lamp lights
up. In addition, a
warning tone sounds
for up to 6 seconds.GRisk of injury
The driver's seat belt is not fastened.
XFasten your seat belt ( Y page 55).
The warning tone ceases.7
The red seat belt
warning lamp lights up
after the engine starts,
as soon as the driver's
or the front-passenger
door is closed.GRisk of injury
The driver or front passenger has not fastened their seat belt.
XFasten your seat belt ( Y page 55).
The warning lamp goes out.GRisk of injury
There are objects on the front-passenger seat.
XRemove the objects from the front-passenger seat and stow
them in a secure place.
The warning lamp goes out.7
The red seat belt
warning lamp flashes
and an intermittent
audible warning
sounds.GRisk of injury
The driver or front passenger has not fastened their seat belt. In
addition, you are driving faster than 15 mph (25 km/h) or you have
briefly driven faster than 15 mph (25 km/h).
XFasten your seat belt ( Y page 55).
The warning lamp goes out and the intermittent audible warning
ceases.GRisk of injury
There are objects on the front-passenger seat. In addition, you are
driving faster than 15 mph (25 km/h) or you have briefly driven
faster than 15 mph (25 km/h).
XRemove the objects from the front-passenger seat and stow
them in a secure place.
The warning lamp goes out and the intermittent audible warning
ceases.414Warning and indicator lamps in the instrument clusterOn-board computer and displays
Page 420 of 524
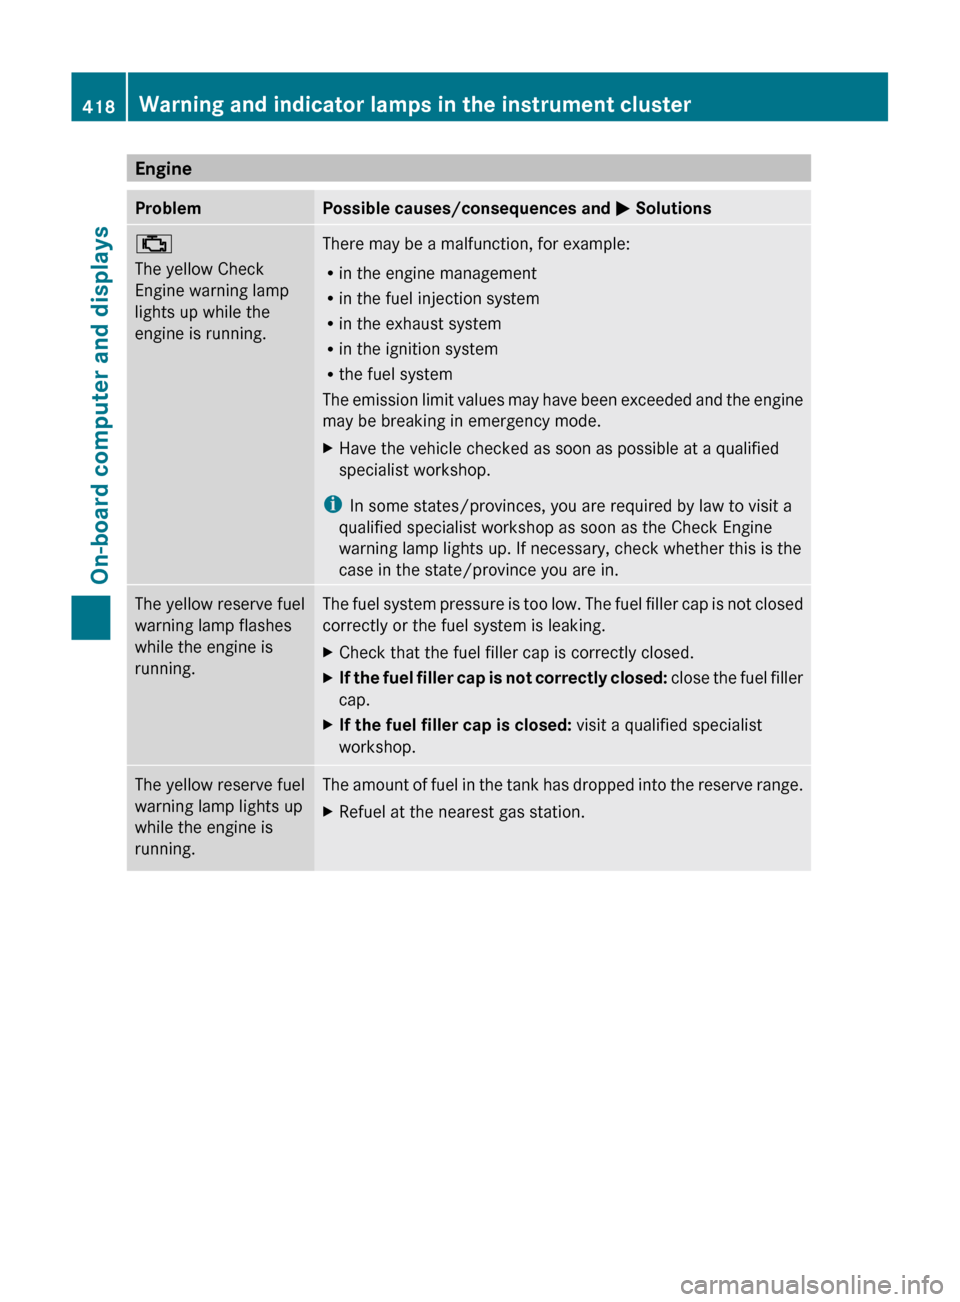
EngineProblemPossible causes/consequences and M Solutions;
The yellow Check
Engine warning lamp
lights up while the
engine is running.There may be a malfunction, for example:
R in the engine management
R in the fuel injection system
R in the exhaust system
R in the ignition system
R the fuel system
The emission limit values may have been exceeded and the engine
may be breaking in emergency mode.XHave the vehicle checked as soon as possible at a qualified
specialist workshop.
i In some states/provinces, you are required by law to visit a
qualified specialist workshop as soon as the Check Engine
warning lamp lights up. If necessary, check whether this is the
case in the state/province you are in.
The yellow reserve fuel
warning lamp flashes
while the engine is
running.The fuel system pressure is too low. The fuel filler cap is not closed
correctly or the fuel system is leaking.XCheck that the fuel filler cap is correctly closed.XIf the fuel filler cap is not correctly closed: close the fuel filler
cap.XIf the fuel filler cap is closed: visit a qualified specialist
workshop.The yellow reserve fuel
warning lamp lights up
while the engine is
running.The amount of fuel in the tank has dropped into the reserve range.XRefuel at the nearest gas station.418Warning and indicator lamps in the instrument clusterOn-board computer and displays
Page 421 of 524
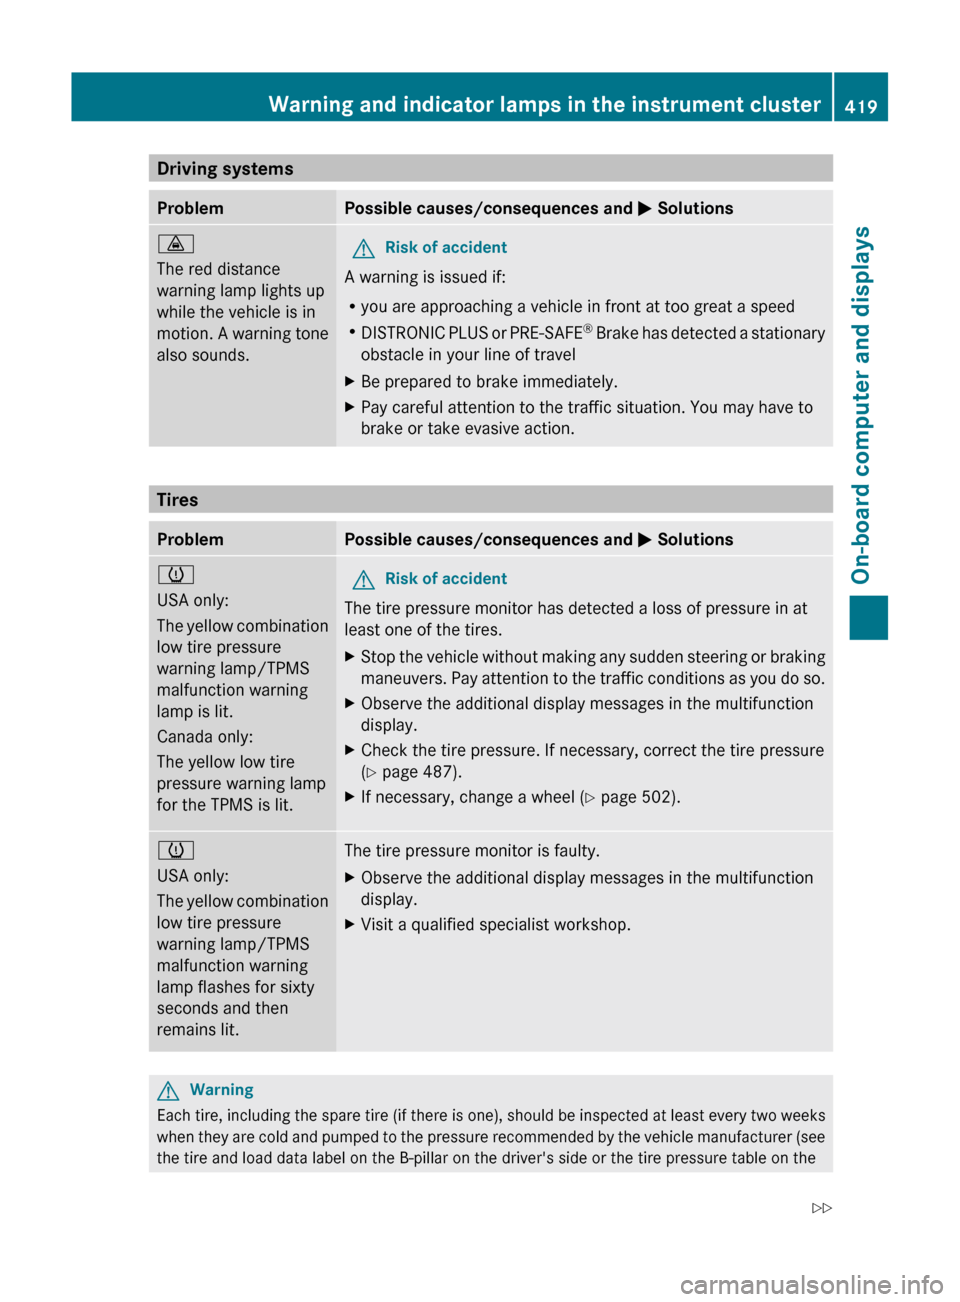
Driving systemsProblemPossible causes/consequences and M Solutions·
The red distance
warning lamp lights up
while the vehicle is in
motion. A warning tone
also sounds.GRisk of accident
A warning is issued if:
R you are approaching a vehicle in front at too great a speed
R DISTRONIC PLUS or PRE-SAFE ®
Brake has detected a stationary
obstacle in your line of travel
XBe prepared to brake immediately.XPay careful attention to the traffic situation. You may have to
brake or take evasive action.
Tires
ProblemPossible causes/consequences and M Solutionsh
USA only:
The yellow combination
low tire pressure
warning lamp/TPMS
malfunction warning
lamp is lit.
Canada only:
The yellow low tire
pressure warning lamp
for the TPMS is lit.GRisk of accident
The tire pressure monitor has detected a loss of pressure in at
least one of the tires.
XStop the vehicle without making any sudden steering or braking
maneuvers. Pay attention to the traffic conditions as you do so.XObserve the additional display messages in the multifunction
display.XCheck the tire pressure. If necessary, correct the tire pressure
( Y page 487).XIf necessary, change a wheel ( Y page 502).h
USA only:
The yellow combination
low tire pressure
warning lamp/TPMS
malfunction warning
lamp flashes for sixty
seconds and then
remains lit.The tire pressure monitor is faulty.XObserve the additional display messages in the multifunction
display.XVisit a qualified specialist workshop.GWarning
Each tire, including the spare tire (if there is one), should be inspected at least every two weeks
when they are cold and pumped to the pressure recommended by the vehicle manufacturer (see
the tire and load data label on the B-pillar on the driver's side or the tire pressure table on the
Warning and indicator lamps in the instrument cluster419On-board computer and displaysZ
Page 422 of 524

inside of the fuel filler flap of your vehicle, if there is one). If your vehicle has tires which are a
different size to those on the tire and load data label or those specified in the tire pressure table,
if there is one, you should determine the correct tire pressure for these tires.
As an added safety feature, your vehicle has been equipped with a tire pressure monitor (TPMS).
An indicator lamp lights up if one or more of your tires are significantly underinflated. Accordingly,
when the low tire pressure indicator lamp lights up, you should stop and check your tires as soon
as possible, and inflate them to the proper pressure. Driving on a significantly underinflated tire
causes the tire to overheat and can lead to tire failure.
An excessively low tire pressure also increases fuel consumption, reduces the service life of the
tires and may impair the driving and braking characteristics of the vehicle. Please note that the
TPMS is not a substitute for proper tire maintenance and it is the driver's responsibility to maintain
correct tire pressure, even if underinflation has not reached the level at which the low tire
pressure indicator lamp of the TPMS lights up.
USA only:
Your vehicle has also been equipped with a TPMS malfunction indicator to indicate when the
system is not operating properly. The TPMS malfunction indicator is combined with the low tire
pressure indicator lamp. When the system detects a malfunction, the indicator lamp will flash
for approximately one minute and then remain illuminated. This sequence will continue upon
subsequent vehicle start-ups as long as the malfunction exists. When the malfunction indicator
is lit, the system may not be able to detect or signal low tire pressure as intended.
TPMS malfunctions may occur for a variety of reasons, including the installation of incompatible
replacement or alternate tires or wheels on the vehicle that prevent the TPMS from functioning
properly. Always check the TPMS malfunction indicator after replacing one or more tires or wheels
on your vehicle to ensure that the replacement or alternate tires and wheels allow the TPMS to
continue to function properly.420Warning and indicator lamps in the instrument clusterOn-board computer and displays
Page 443 of 524
view mirror with the garage door system
receiver after programming.
You will find further information in the
garage door opening system's operating
instructions, e.g. the sections on
"Synchronizing the transmitter" or
"Registering a new transmitter". You can
also call the hotline mentioned above.
Notes on programming the remote
control
Canadian radio frequency laws require a
"break" (or interruption) of the transmission
signals a few seconds after broadcasting.
Therefore, these signals may not last long
enough for the integrated remote control to
recognize the signal during programming.
Comparable with Canadian law, some U.S.
garage door openers also have a built-in
"interruption".
If you live in Canada or have difficulties
programming the garage door opener
(regardless of where you live) when using the
programming steps (see above), proceed as
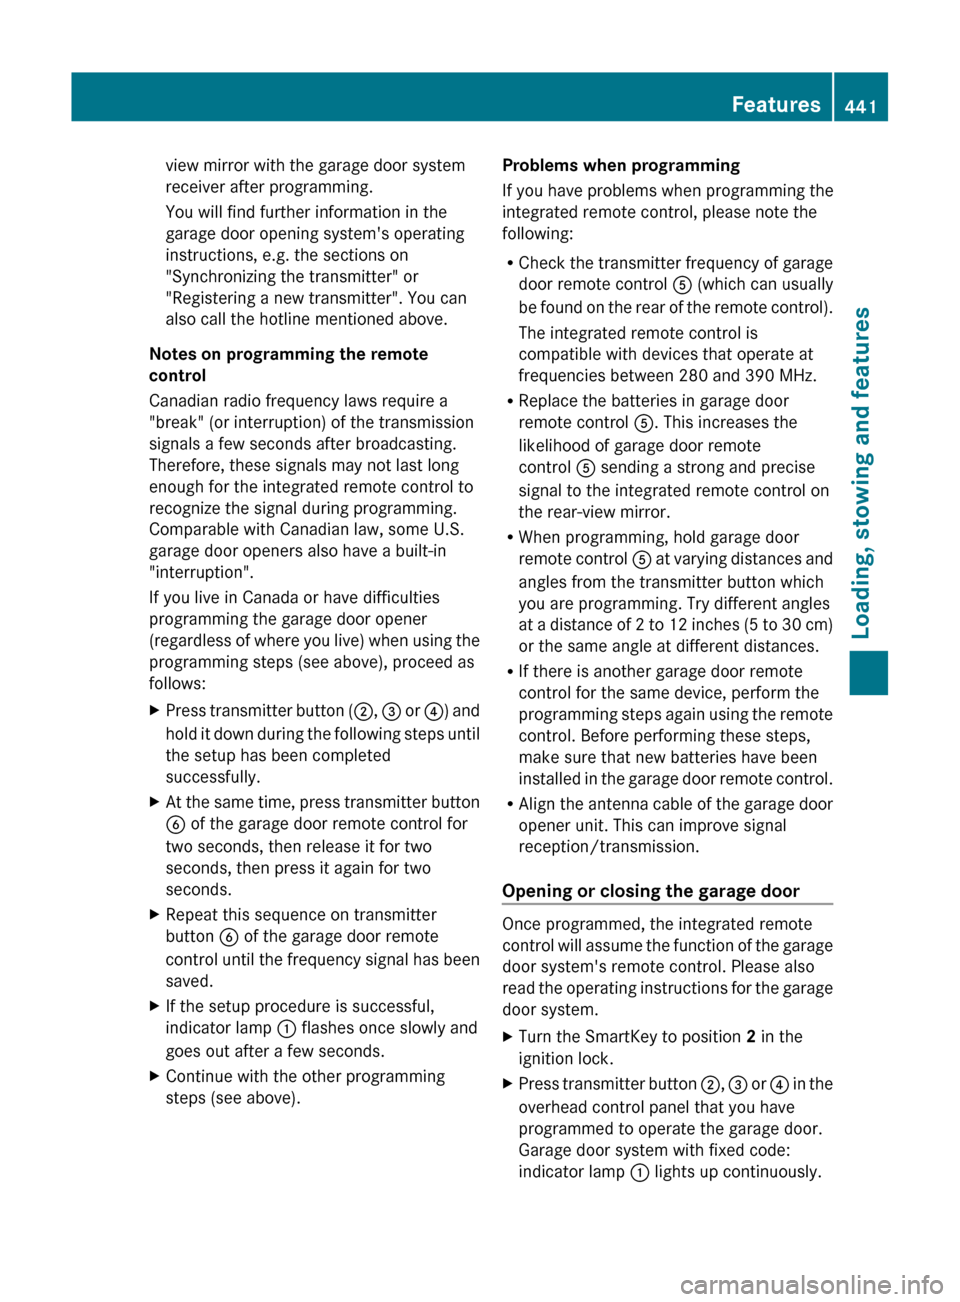
follows:XPress transmitter button ( ;, = or ?) and
hold it down during the following steps until
the setup has been completed
successfully.XAt the same time, press transmitter button
B of the garage door remote control for
two seconds, then release it for two
seconds, then press it again for two
seconds.XRepeat this sequence on transmitter
button B of the garage door remote
control until the frequency signal has been
saved.XIf the setup procedure is successful,
indicator lamp : flashes once slowly and
goes out after a few seconds.XContinue with the other programming
steps (see above).Problems when programming
If you have problems when programming the
integrated remote control, please note the
following:
R Check the transmitter frequency of garage
door remote control A (which can usually
be found on the rear of the remote control).
The integrated remote control is
compatible with devices that operate at
frequencies between 280 and 390 MHz.
R Replace the batteries in garage door
remote control A. This increases the
likelihood of garage door remote
control A sending a strong and precise
signal to the integrated remote control on
the rear-view mirror.
R When programming, hold garage door
remote control A at varying distances and
angles from the transmitter button which
you are programming. Try different angles
at a distance of 2 to 12 inches (5 to 30 cm)
or the same angle at different distances.
R If there is another garage door remote
control for the same device, perform the
programming steps again using the remote
control. Before performing these steps,
make sure that new batteries have been
installed in the garage door remote control.
R Align the antenna cable of the garage door
opener unit. This can improve signal
reception/transmission.
Opening or closing the garage door
Once programmed, the integrated remote
control will assume the function of the garage
door system's remote control. Please also
read the operating instructions for the garage
door system.
XTurn the SmartKey to position 2 in the
ignition lock.XPress transmitter button ;, = or ? in the
overhead control panel that you have
programmed to operate the garage door.
Garage door system with fixed code:
indicator lamp : lights up continuously.Features441Loading, stowing and featuresZ
Page 444 of 524

Garage door system with rolling code:
indicator lamp : flashes briefly and then
lights up for approximately two seconds.
This is repeated for up to 20 seconds.
iThe transmitter will transmit a signal for
as long as the transmitter button is being
pressed. The transmission will be halted
after a maximum of 20 seconds and
indicator lamp : will flash. Press the
transmitter button again, if necessary.
Clearing the remote control memory
XTurn the SmartKey to position 2 in the
ignition lock.
XPress and hold transmitter buttons ;
and ? for approximately 20 seconds until
indicator lamp : flashes rapidly.
The memory is cleared.
iYou should clear the remote control
memory before selling the vehicle.
Floormat on the driver's side
GWarning!
Whenever you are using a floormat, make sure
there is enough clearance and that the
floormat is securely fastened.
The floormat should always be securely
fastened using the fastening equipment.
Before driving off, check that the floormat is
securely in place and adjust it if necessary. A
loose floormat could slip and hinder proper
functioning of the pedals.
Do not place several floormats on top of each
other as this may impair pedal movement.
XSlide seat backwards.XTo install: place the floormat in position.XPress floormat eyelets : onto retainer
pins ;.
XTo remove: pull the floormats off
retainers ;.
XRemove the floormat.
Infrared reflective windshield
The infrared reflecting glass prevents the
vehicle interior from becoming too hot. It also
blocks radio waves up into the gigahertz
range.
Vehicles without Night View Assist Plus
:Areas permeable to radio waves (to the
left and right of the rain sensor cover)
;Rain sensor cover=Areas permeable to radio waves442FeaturesLoading, stowing and features
Page 456 of 524
movements. This can cause damage to the
vehicle.
After using an automatic car wash, wipe off
wax from the windshield and the wiper
blades. This will prevent smears and reduce
wiping noises caused by residue on the
windshield.
Washing by hand
Carefully remove all deposits of road salt as
soon as possible when driving in winter.
Also, clean the insides of the wheels when
washing the underbody of the vehicle.
XDo not use hot water and do not wash the
vehicle in direct sunlight.XUse a soft car sponge for cleaning.XUse a gentle cleaning agent, e.g. a
Mercedes-Benz approved car shampoo.XWash down the vehicle with a gentle water
jet.XDo not point the water jet directly at the air
inlets.XUse plenty of water and rinse the sponge
frequently.XRinse the vehicle with clean water and dry
it thoroughly with a chamois.XDo not allow the cleaning agent to dry on
the paintwork.
Power washers
GWarning
Do not use power washers with circular jet
nozzles (concentrated-power jets) to clean
your vehicle, especially for cleaning tires. You
could otherwise damage the tires and cause
an accident.
! Keep the distance between the vehicle
and the nozzle of the power washer at
11.8 in (30 cm). Information about the
correct distance is available from the
equipment manufacturer.
Move the power washer nozzle around
when cleaning your vehicle.
Do not aim directly at any of the following:
R tires
R door joint
R electrical components
R battery
R connectors
R lights
R seals
R trim elements
R ventilation slots
Damaged seals or electrical components
can lead to leaks or failures.
Cleaning the wheels
! Do not use acidic wheel cleaning products
to remove brake dust. This could damage
wheel bolts and brake components.
! Do not park the vehicle for an extended
period right after cleaning it, particularly
after having cleaned the wheels with wheel
cleaner. Wheel cleaners could cause
increased corrosion of the brake discs and
brake pads/linings. For this reason, you
should drive for a few minutes after
cleaning. Braking heats the brake discs and
brake pads, thus drying them. The vehicle
can then be parked up.
Cleaning the paintwork
Scratches, corrosive deposits, areas affected
by corrosion and damage caused by
inadequate care cannot always be completely
repaired. In such cases, visit a qualified
specialist workshop immediately, e.g. an
authorized Mercedes-Benz Center.
XRemove impurities immediately, where
possible, whilst avoiding rubbing too hard.XSoak insect remains with insect remover
and rinse off the treated areas afterwards.XSoak bird droppings with water and rinse
off the treated areas afterwards.XRemove coolant, brake fluid, tree resin,
oils, fuels and greases by rubbing gently454CareMaintenance and care