2011 MERCEDES-BENZ S-Class rear windows
[x] Cancel search: rear windowsPage 40 of 524

RearFunctionPage:v Adjusts the front-
passenger seat from the
rear
103
;r 45=
Memory function
111
=Adjusts the seat electrically102?Opens the door83Au Roller sunblind429By Operates the rear
roller sunblind of the
panorama roof with power
tilt/sliding panel from the
rear
96
FunctionPageCW Opens/closes the
side windows
89
t Opens/closes the
roller sunblinds in the rear
side windows
90
Dc Adjusts seat heating106s Adjusts seat
ventilation
107
38Door control panelAt a glance
Page 55 of 524

PRE-SAFE®
systemGWarning
The PRE-SAFE ®
system reduces the impact of
an accident on vehicle occupants, as long as
their seat belts have been fastened correctly.
Although your vehicle is equipped with a PRE-
SAFE ®
system, the possibility of injury in the
event of an accident cannot be ruled out. You
should therefore always drive carefully and
adapt your driving style to the prevailing road,
weather and traffic conditions.
PRE-SAFE ®
takes pre-emptive measures to
protect occupants in certain hazardous
situations.
PRE-SAFE ®
intervenes:
R in emergency braking situations, e.g. if BAS
is activated or, in vehicles with DISTRONIC
PLUS, where BAS PLUS intervenes
powerfully
R if, on vehicles with DISTRONIC PLUS, the
radar sensor system detects an imminent
danger of collision in certain situations
R in critical driving situations, e.g. when
physical limits are exceeded and the
vehicle understeers or oversteers severely
or when having to swerve to avoid an
obstacle at a speed
PRE-SAFE ®
takes the following measures
depending on the hazardous situation
detected:
R the front seat belts are pre-tensioned.
R the front-passenger seat or the electrically
adjustable outer rear seats are adjusted if
they are in unfavorable position.
R on vehicles with a multicontour seat or an
active multicontour seat: the air pressure
in the side bolsters on the seat cushion and
the side bolsters on the backrest is
increased.
R on vehicles with multicontour seats in the
rear: the air pressure in the backrest side
bolsters of the outer seats in the rear is
increased.
R if the vehicle skids, the sliding sunroof,
panorama sliding sunroof and the side
windows are closed so that only a small gap
remains.
If the sliding sunroof, panorama roof with
power tilt/sliding panel or a side window is
obstructed when closing, the closing
procedure is stopped. The obstructed sliding
sunroof, panorama roof with power tilt/
sliding panel or side window then opens again
slightly.
If the hazardous situation passes without
resulting in an accident, PRE-SAFE ®
slackens
the belt pretensioning. The air pressure in the
side bolsters on the multicontour seat/active
multicontour seat is reduced again. All
settings made by PRE-SAFE ®
can then be
reversed.
If the seat belts are not released:XMove the backrest back slightly, but only
when the vehicle is stationary.
The belt pretensioning is reduced and the
locking mechanism is released.GWarning
Make sure that nobody can become trapped
as you adjust the seat.
! Make sure that there are no objects in the
footwell or behind the seats when resetting
the seats. There is a risk that the seats
and/or the objects could be damaged.
More information about seat-belt
adjustment, a convenience function
integrated into PRE-SAFE ®
, can be found in
the "Seat-belt adjustment" section
( Y page 58).
NECK-PRO head restraints/NECK-
PRO luxury head restraints
NECK-PRO head restraints/NECK-PRO luxury
head restraints increase protection of the
driver’s and front-passenger’s head and neck.
Occupant safety53SafetyZ
Page 67 of 524

All of the above will lessen the
effectiveness of the child restraint and thus
increase the chance or severity of injury in
an accident.
Child-proof locks
Child-proof locks for the rear doors
GWarning
Observe "Important safety notes"
(Y page 60).
GWarning
Children could open a rear door from inside
the vehicle. This could result in serious
injuries or an accident. Therefore, when
children ride in the rear always secure the rear
doors with the child-proof locks.
You can secure each door individually with
the child-proof locks on the rear doors. A door
secured with a child-proof lock cannot be
opened from inside the vehicle. When the
vehicle is unlocked, the door can be opened
from the outside.
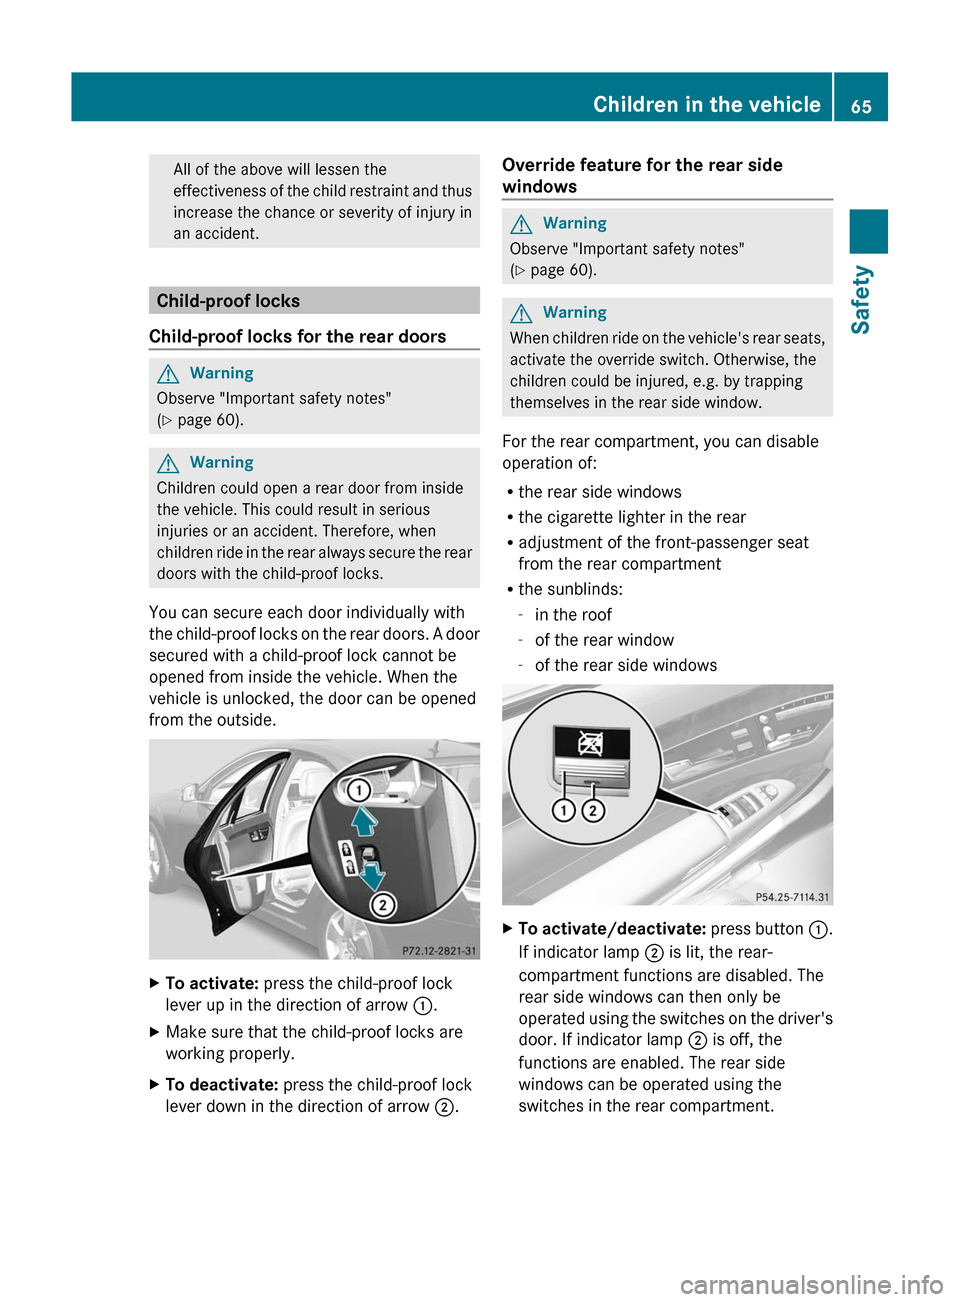
XTo activate: press the child-proof lock
lever up in the direction of arrow :.
XMake sure that the child-proof locks are
working properly.
XTo deactivate: press the child-proof lock
lever down in the direction of arrow ;.
Override feature for the rear side
windows
GWarning
Observe "Important safety notes"
(Y page 60).
GWarning
When children ride on the vehicle's rear seats,
activate the override switch. Otherwise, the
children could be injured, e.g. by trapping
themselves in the rear side window.
For the rear compartment, you can disable
operation of:
Rthe rear side windows
Rthe cigarette lighter in the rear
Radjustment of the front-passenger seat
from the rear compartment
Rthe sunblinds:
-in the roof
-of the rear window
-of the rear side windows
XTo activate/deactivate: press button :.
If indicator lamp ; is lit, the rear-
compartment functions are disabled. The
rear side windows can then only be
operated using the switches on the driver's
door. If indicator lamp ; is off, the
functions are enabled. The rear side
windows can be operated using the
switches in the rear compartment.
Children in the vehicle65SafetyZ
Page 92 of 524

Opening and closing the side
windows
:Front left;Front right=Rear right?Rear left
The switches for all side windows are located
on the driver's door. There is also a switch on
each door for the corresponding side window.
iIt is not possible to operate the door
windows from the rear compartment when
the override feature is activated for the
door windows.
XTurn the SmartKey to position 1 in the
ignition lock.
iThe switches on the driver's door take
precedence over the switches on the other
doors.
XTo open: press the corresponding switch.XTo close: pull the corresponding switch.
iIf you press the switch beyond the point
of resistance, an automatic opening/
closing process is started in the
corresponding direction. You can stop
automatic operation by pressing again.
iYou can continue to operate the side
windows after you switch off the engine.
This function remains active for five
minutes or until one of the front doors is
opened.
Sunblinds on the rear side windowsXTo close fully: pull the corresponding
switch when the side window is closed.
iThe roller sunblinds on the rear door
windows are always closed fully.
XTo open fully: press the corresponding
switch.
iYou can use the switches on the rear
doors to close the roller sunblind on the
rear door window on the opposite side of
the vehicle.
Convenience opening
You can ventilate the vehicle before you start
driving. To do this, you can use the SmartKey
to simultaneously:
Ropen the side windows
Ropen the roller sunblinds on the rear side
windows
Ropen the sliding sunroof or the panorama
roof with power tilt/sliding panel and the
roller sunblinds
Rswitch on the seat ventilation of the driver's
seat
iThe convenience opening feature can
only be operated using the SmartKey. The
SmartKey must be close to the driver's
door handle.
XPoint the tip of the SmartKey at the driver's
door handle.
XUnlock the vehicle by pressing the %
button.
XPress and hold the % button until the
side windows and the sliding sunroof or the
panorama roof with power tilt/sliding
panel are in the desired position.
If one of the sunblinds is closed, the sunblind
will open first.
iThe roller sunblinds of the panorama roof
with power tilt/sliding panel and the roller
sunblinds on the rear side windows are
opened at the same time.
90Side windowsOpening and closing
Page 93 of 524

XPress and hold the % button again until
the side windows and the sliding sunroof or
the panorama roof with power tilt/sliding
panel are in the desired position.
XTo interrupt the convenience opening:
release the % button.
Convenience closing
General information
When you lock the vehicle, you can
simultaneously:
Rclose the side windows
Rclose the sliding sunroof or the panorama
roof with power tilt/sliding panel
On vehicles with roller sunblinds, you can
then close the roller sunblinds.
iThe roller sunblinds of the panorama roof
with power tilt/sliding panel and the roller
sunblinds on the rear side windows are
closed at the same time.
GWarning
When closing the door windows and the
sliding sunroof or panorama roof with power
tilt/sliding panel, make sure that there is no
danger of anyone being harmed by the closing
procedure.
If potential danger exists, proceed as follows:
RRelease the & button to stop the closing
procedure. To open, press and hold the
% button. To continue the closing
procedure after making sure that there is
no danger of anyone being harmed by the
closing procedure, press and hold the
& button.
Vehicles with KEYLESS-GO:
RRelease the sensor surface on the outside
door handle to stop the closing procedure.
RImmediately pull on the same outside door
handle and hold firmly. The door windows
and the sliding sunroof or panorama roof
with power tilt/sliding panel will open for
as long as the door handle is held but the
door is not opened.
Using the SmartKey
iThe SmartKey must be close to the
driver's door handle.
XPoint the tip of the SmartKey at the driver's
door handle.
XLock the vehicle by pressing the &
button.
XPress and hold the & button until the
side windows and the sliding sunroof or the
panorama roof with power tilt/sliding
panel are fully closed.
XMake sure that all the side windows and the
sliding sunroof or panorama roof with
power tilt/sliding panel are closed.
XTo interrupt the convenience closing:
release the & button.
On vehicles with roller sunblinds:
XPress the & button again until the roller
sunblinds close.
XTo interrupt the roller sunblind closing
procedure: press the % button.
With KEYLESS-GO
The KEYLESS-GO key must be outside the
vehicle but must not be further than 3 ft (1 m)
from a door.
XClose all the doors.Side windows91Opening and closingZ
Page 109 of 524

iIf the battery voltage is too low, the seat
heating may switch off.
The system automatically switches down
from level 3 to level 2 after approximately
eight minutes.
The system automatically switches down
from level 2 to level 1 after approximately ten
minutes.
The system automatically switches off
approximately 20 minutes after it is set to
level 1.
XMake sure that the SmartKey is in position
2 in the ignition lock.
XTo switch on: press button : repeatedly
until the desired heating level is set.
XTo switch off: press button : repeatedly
until all the indicator lamps go out.
Problems with the seat heating
The seat heating has switched itself off
prematurely. The vehicle's electrical system
voltage is too low because too many electrical
consumers are switched on.
XSwitch off electrical consumers which you
do not need, such as the rear window
heating or interior lighting.
Switching the seat ventilation on/off
Switching on/off
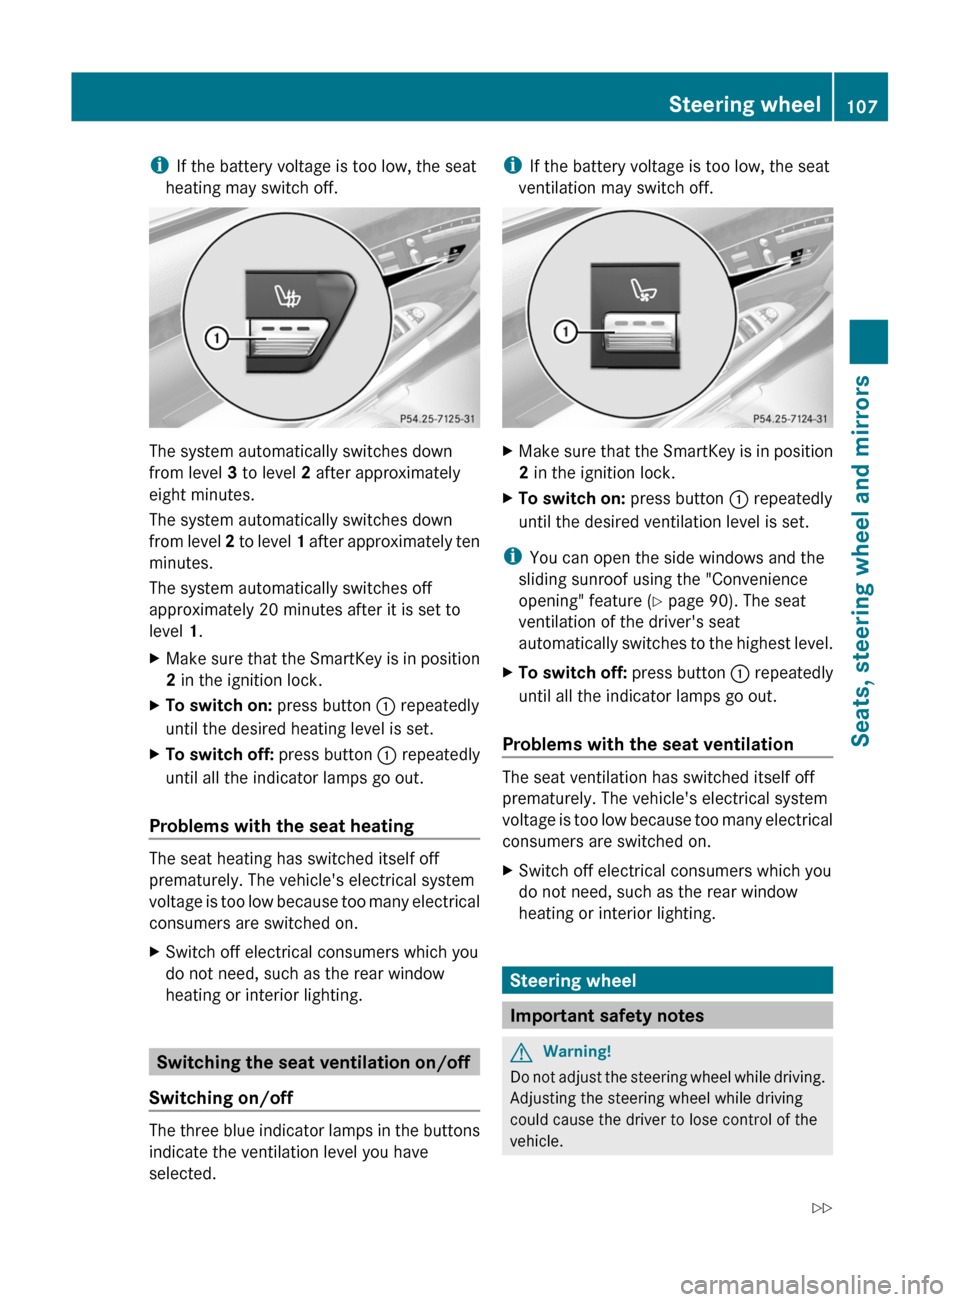
The three blue indicator lamps in the buttons
indicate the ventilation level you have
selected.
iIf the battery voltage is too low, the seat
ventilation may switch off.
XMake sure that the SmartKey is in position
2 in the ignition lock.
XTo switch on: press button : repeatedly
until the desired ventilation level is set.
iYou can open the side windows and the
sliding sunroof using the "Convenience
opening" feature (Y page 90). The seat
ventilation of the driver's seat
automatically switches to the highest level.
XTo switch off: press button : repeatedly
until all the indicator lamps go out.
Problems with the seat ventilation
The seat ventilation has switched itself off
prematurely. The vehicle's electrical system
voltage is too low because too many electrical
consumers are switched on.
XSwitch off electrical consumers which you
do not need, such as the rear window
heating or interior lighting.
Steering wheel
Important safety notes
GWarning!
Do not adjust the steering wheel while driving.
Adjusting the steering wheel while driving
could cause the driver to lose control of the
vehicle.
Steering wheel107Seats, steering wheel and mirrorsZ
Page 265 of 524

Setting the airflow
You can set the airflow separately for the
driver’s side and for the front-passenger side.
XSelect left airflow = or right airflow A by
turning cVd the COMAND controller and
press W to confirm.
XTo adjust the airflow: slide ZVÆ or turn
cVd the COMAND controller.
XTo confirm the selection: press W the
COMAND controller.
Climate control main menu
Using COMAND, you can set additional
functions that cannot be called up using the
control panel in the center console. Call up
these functions using the climate control
main menu.
XTo open the climate control main
menu: select the AC climate control
symbol in the air-conditioning function bar
by turning cVd the COMAND controller
and press W to confirm.
The climate control menu opens.
Climate control main menu
You can:
Rswitch cooling with dehumidification on/
off (Æ)
Rcontrol climate control centrally (Mono)
Radjust the Footwell temperature
Rset the Airflow for the air vents
Roperate the Rear air conditioning from the
front
Rset the Auxiliary heating,
departure time
Switching cooling with air
dehumidification on/off
Cooling is operational when the engine is
running and cools according to the selected
interior temperature for the vehicle. Cooling
also dehumidifies the air inside the vehicle
and, thereby, prevents the windows from
misting up.
GRisk of accident
If you switch off cooling with
dehumidification, the vehicle will not be
cooled and the air not dehumidified in warm
weather conditions. The windows can mist up
faster. This could result in your no longer
being able to observe the traffic conditions
properly and you may cause an accident.
iCondensation may collect on the
underside of the vehicle when the cooler is
operating.
XSelect the climate control main menu in the
air-conditioning function bar by turning
Vehicle263COMANDZ
Page 290 of 524

FunctioniNotes/tipsDSwitches the rear window
defroster on/offESets the airflow, rightFSets the temperature, rightSet the temperature to 72 ‡ (22 †).GSets climate control to
automatic, rightActivate climate control using the à rocker
switch. The indicator lamp in the à rocker switch
lights up.Rear control panelHSets the temperature, leftSet the temperature to 72 ‡ (22 †).ISets the air distribution, leftJSets the airflowKOFF Deactivates the rear-
compartment climate control
AUTO Sets the rear-
compartment climate control
to automatic
MAN Sets the rear-
compartment climate control
to manualLSets the air distribution, rightMSets the temperature, rightSet the temperature to 72 ‡ (22 †).Operating the climate control
systems
Switching climate control on/off
Important information
GWarning!
When the climate control system is
deactivated, the outside air supply and
circulation are also deactivated. Only choose
this setting for a short time. Otherwise the
windows could fog up, impairing visibility and
endangering you and others.
i Activate climate control primarily using
the à rocker switch ( Y page 289).
Activating/deactivating the front
climate control using the front control
panelXTurn the key to position 2 in the ignition
lock.XTo switch on: press the ^ rocker
switch up or down.
The indicator lamp in the rocker switch
goes out. The previously selected settings
come into effect again.XTo switch off: press the ^ rocker
switch up or down.
The indicator lamp in the rocker switch
lights up.288Operating the climate control systemsClimate control