2011 MERCEDES-BENZ M-CLASS SUV seats
[x] Cancel search: seatsPage 101 of 389

Problems wit
hthe seat ventilation Th
es eat ven tilation has switched off prema-
turely or cannot be switched on. The vehicle's
electrical system voltage is too low because
too many electrical consumer sare switched
on.
X Switch off electrica lconsumers which you
do not need, such as the rea rwindow heat-
ing or interior lighting. Steering wheel
Important safet
ynotes G
WARNING
The electrically adjustable steering wheel can
still be adjusted when there is no key in the
ignition lock. Therefore, do not leave children
unsupervised in the vehicle, as they could
become trapped if the steering wheel is adjus-
ted. G
WARNING
Only adjust the steering wheel when the vehi-
cle is stationar yand do not pull away until the
steering wheel adjustment mechanis mis
locked in position. You might otherwise drive
without the steering wheel adjustment mech-
anism being locked in position. As aresult,
you could be distracted from road and traffic
condition sbyanunintentional movement of
the steering wheel and thereby cause an acci-
dent.
However, the steerability of the vehicl eisnot
affected. Adjusting th
esteerin gwheel man-
ually :
Release lever
; To adjus tthe steering wheel height
= To adjust the steering wheel position
(fore-and-af tadjustment)
X Push release lever :down completely.
The steerin gcolum nisu nlocked.
X Adjus tthe steering wheel to the desired
position.
X Push release lever :up completely.
The steering column is locked.
X Chec kifthe steering column is locked.
When doing so, tr ytopush the steering
wheel up or down or try to move it in the
fore-and-aft direction. Adjusting the steering wheel electri-
cally
:
To adjust the steering wheel height
; To adjust the steering wheel position
(fore-and-aft adjustment) 98
Steering wheelSeats, steerin
gwhee land mirrors
Page 102 of 389

i
Related topics:
R EASY-ENTRY/EXI Tfeature
(Y page 99)
R Storing setting s(Ypage 103) Steering whee
lheating
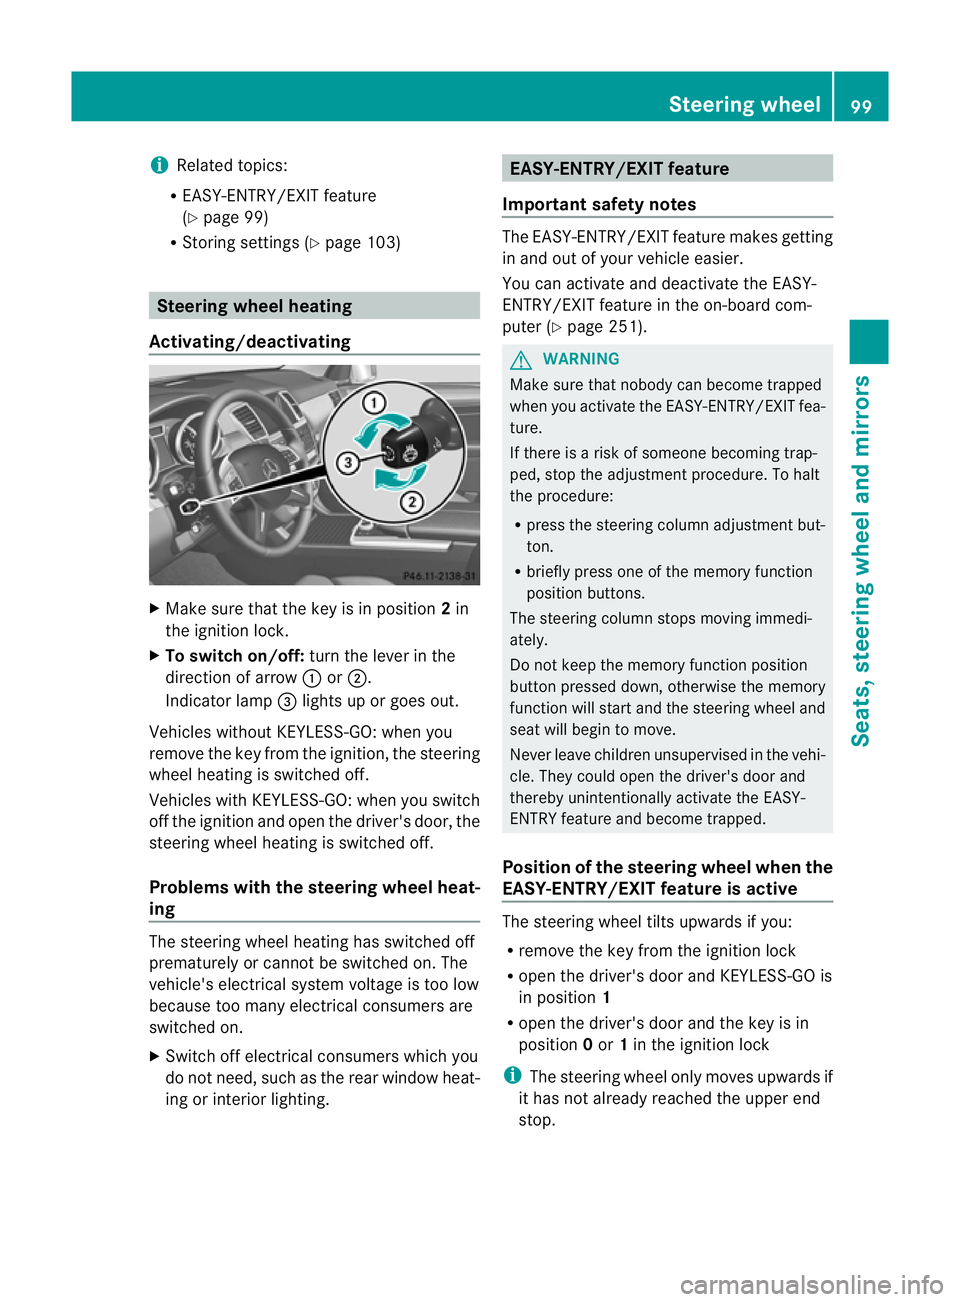
Activating/deactivating X
Mak esuret hat the key is in position 2in
th ei gnition lock.
X To switch on/off: turnthe lever in the
direction of arrow :or;.
Indicato rlamp =lights up or goes out.
Vehicles without KEYLESS-GO: when you
remove the key from the ignition ,the steering
wheel heating is switched off.
Vehicles with KEYL ESS-GO:when you switch
off the ignition and open the driver's door, the
steering wheel heating is switched off.
Problems wit hthe steering whee lheat-
ing The steering wheel heating has switched off
prematurely or cannot be switched on. The
vehicle's electrical system voltage is too low
because too many electrical consumer sare
switche don.
X Switch off electrical consumers which you
do not need ,such as the rear window heat-
ing or interior lighting. EASY-ENTRY/EXIT featu
re
Important safety notes The EASY-ENTRY/EXI
Tfeatur emakes getting
in and out of your vehicle easier.
You can activate and deactivate the EASY-
ENTRY/EXIT feature in the on-board com-
puter (Y page 251). G
WARNING
Make sure that nobody can become trapped
when you activate the EASY-ENTRY/EXI Tfea-
ture.
If there is arisk of someone becoming trap-
ped, stop the adjustment procedure. To halt
the procedure:
R press the steering column adjustment but-
ton.
R briefly press one of the memor yfunction
position buttons.
The steering column stops moving immedi-
ately.
Do not keep the memory function position
button presse ddown, otherwise the memory
function will star tand the steering wheel and
sea twill begin to move.
Never leave children unsupervised in the vehi-
cle. They could open the driver's door and
thereby unintentionally activate the EASY-
ENTRY featur eand become trapped.
Positio nofthe steering whee lwhen the
EAS Y-ENTRY/EXIT featur eisactive The steerin
gwheel tilt supwards if you:
R remove the key from the ignition lock
R open the driver' sdoor and KEYLESS -GOis
in position 1
R open the driver's door and the key is in
position 0or 1in the ignition lock
i The steerin gwheel only moves upwards if
it has not already reached the upper end
stop. Steering wheel
99Seats,steering wheeland mirror s Z
Page 103 of 389

Position of th
esteerin gwheel for driv-
ing Th
es teering whee lismoved to the previously
set position if:
R the driver's door is closed.
R you inser tthe key int othe ignition lock.
or
R you press the Star t/Stop butto nonce on
vehicles with KEYLESS-GO.
If you clos ethe driver's door with the key
inserted int othe ignition lock ,the steering
wheel is automatically moved to the previ-
ously set position.
The last position of the steering wheel is
stored when you switc hoff th eignition or
when you stor ethe setti ngwith the memory
function (Y page 103).
Crash-responsive EASY-EXIT fea tureIf th
ecrash-resp onsive EASY-EXIT feature is
trig gere dinana ccident,the steeri ngcolu mn
will mov eupwards when the driv er'sdoor is
opened. This occurs irrespective of the posi-
tion of the key in the ignition lock .This makes
it easier to exit the vehicle and rescue the
occupants.
The crash-responsive EASY-EXIT featur eis
only operational if the EASY-EXIT/ENTRY fea-
tur eisa ctivate dinthe on-boar dcomputer. Mirrors
Rear-view mirror
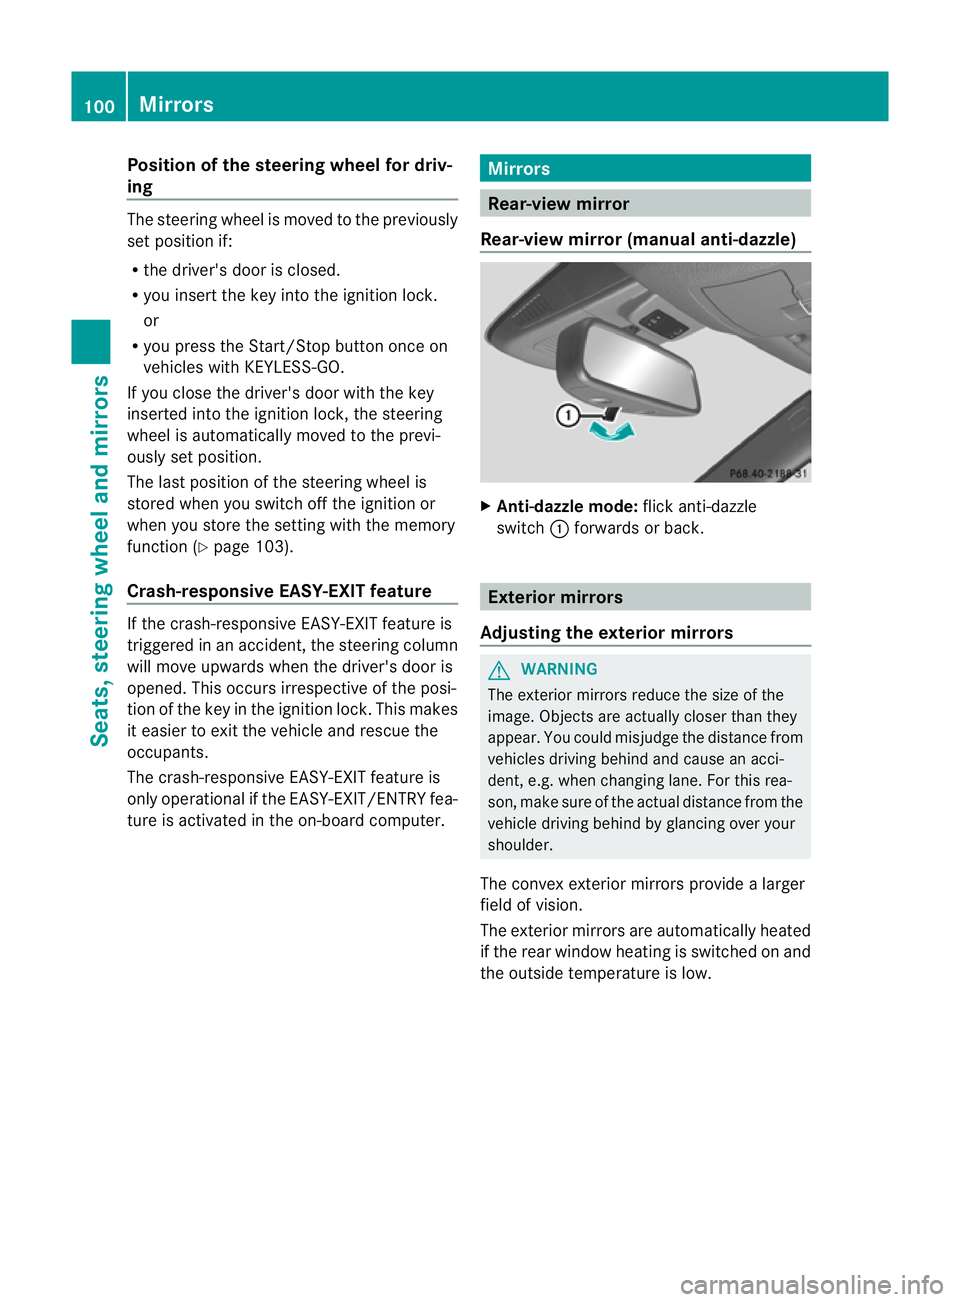
Rear-view mirror (manua lanti- daz zle) X
Anti-dazzle mode: flick anti-dazzle
switch :forward sorback. Exterior mirrors
Adjusting the exterior mirrors G
WARNING
The exterior mirrors reduce the size of the
image. Objects are actually closer than they
appear. You could misjudge the distance from
vehicles driving behind and cause an acci-
dent, e.g. when changing lane. For this rea-
son, make sure of the actual distance from the
vehicle driving behind by glancing over your
shoulder.
The convex exterior mirrors provide alarger
field of vision.
The exterior mirrors are automatically heated
if the rear window heating is switched on and
the outside temperature is low. 100
MirrorsSeats
,steering wheel and mirrors
Page 104 of 389

X
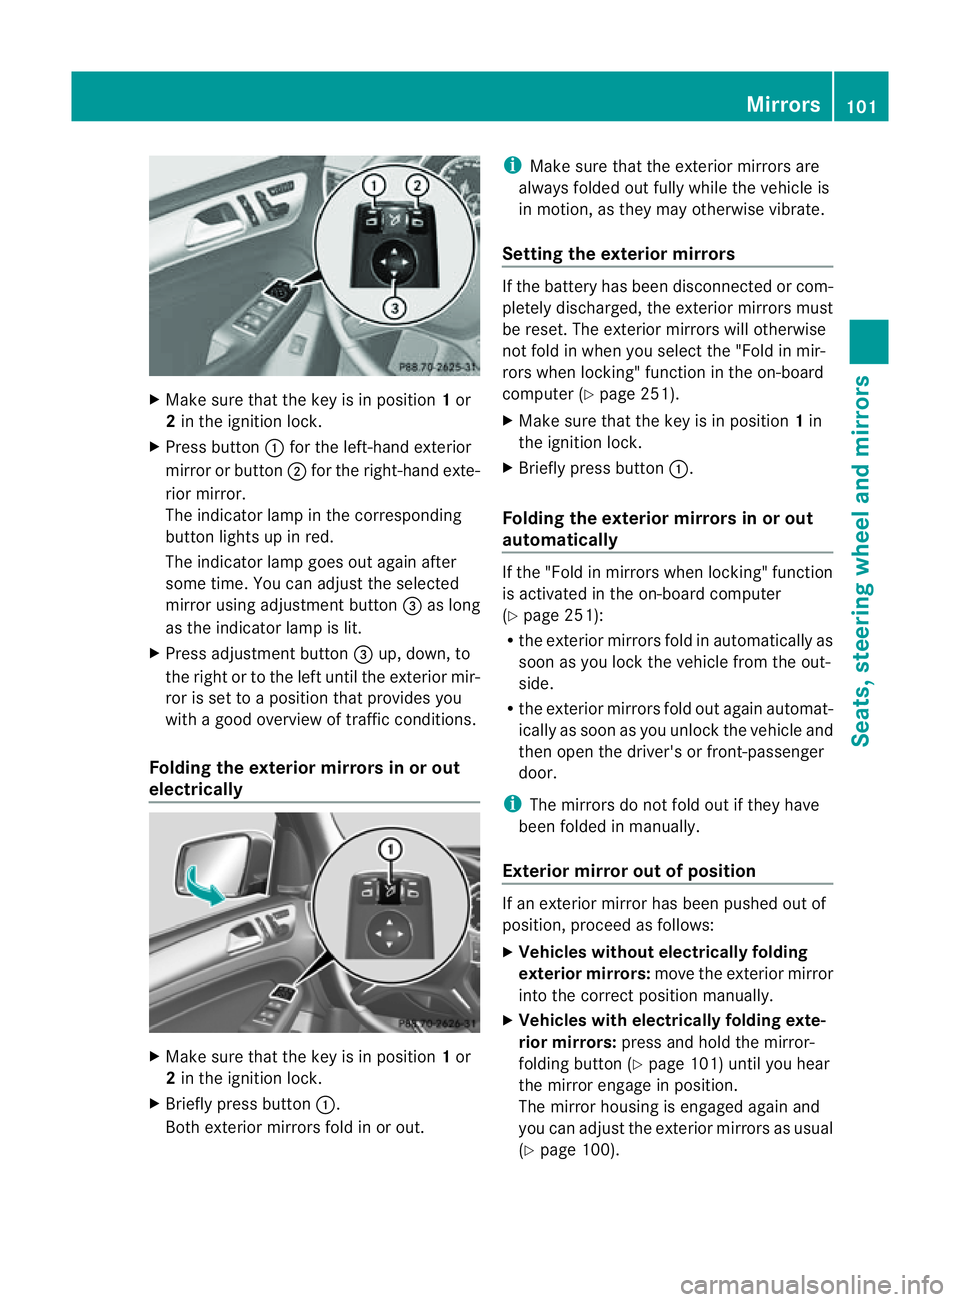
Make sur ethat the key is in position 1or
2 in the ignition lock.
X Press button :for the left-hand exterior
mirror or button ;for the right-hand exte-
rior mirror.
The indicator lam pint he corresponding
button lights up in red.
The indicator lam pgoes out again after
some time. You can adjust the selected
mirror using adjustment button =as long
as the indicator lam pislit.
X Press adjustment button =up, down, to
the right or to the left until the exterior mir-
ror is set to aposition that provides you
with agood overview of traffic conditions.
Folding th eexterior mir rors in or out
electrically X
Make sure that the key is in position 1or
2 in the ignitio nlock.
X Briefl ypres sbutton :.
Both exterior mirrors fold in or out. i
Make sure that the exterior mirrors are
always folded out fully while the vehicle is
in motion, as they may otherwis evibrate.
Setting the exterior mirrors If the battery has been disconnected or com-
pletely discharged, the exterior mirrors must
be reset. The exterior mirrors will otherwise
not fold in when you select the "Fold in mir-
rors when locking" func tion in the on-board
computer (Y page 251).
X Make sure that the key is in position 1in
the ignition lock.
X Briefl ypres sbutton :.
Folding the exterior mirrors in or out
automatically If the "Fold in mirrors when locking" function
is activated in the on-board computer
(Y page 251):
R the exterior mirrors fold in automatically as
soo nasyou lock the vehicle from the out-
side.
R the exterior mirror sfold out again automat-
ically as soon as you unloc kthe vehicle and
then open the driver's or front-passenger
door.
i The mirrors do not fol dout if they have
been folded in manually.
Exterior mirror out of position If an exterior mirror has been pushed out of
position, proceed as follows:
X Vehicles without electrically folding
exterior mirrors: move the exterior mirror
into the correct position manually.
X Vehicles with electrically folding exte-
rior mirrors: press and hold the mirror-
folding button (Y page 101)until you hear
the mirror engage in position.
The mirror housing is engaged agai nand
you can adjus tthe exterior mirrors as usual
(Y page 100). Mir
rors
101Seats ,steeri ngwheel and mirrors Z
Page 105 of 389

Automati
canti-dazzle mirrors G
WA
RNING
If inciden tlight fro mheadlamps is prevented
from striking the sensor in the rear-view mir-
ror ,for instance, by luggage piled too high in
the vehicle, the mirror's automatic anti-dazzle
fun ction will not operate.
Incident light could then blind you. This may
distrac tyou from the traffic condition sand,
as aresult, you may cause an accident.
The rear-view mirror and the exterior mirror
on the driver' sside automatically go into anti-
dazzle mode if the ignition is switched on and
inciden tlight from headlamps strikes the sen-
sor in the rear-view mirror.
The mirror sdonot go int oanti-dazzle mode if
reverse gea risengaged or if the interior light-
ing is switched on. Parking position for the exterior mir-
ror on the front-passenge rside
Setting and storing the parking position You can position the front-passenger side
exterior mirror in such away that you can see
the rear wheel on that side as soon as you
engage revers egear. You can stor ethis posi-
tion. X
Make sur ethat the vehicle is stationary and
that the key is in position 2in the ignition
lock.
X Engage revers egear.
The exterior mirror on the front-passenger
side moves to the preset parkin gposition.
X Use adjustment button =to adjust the
exterior mirror to aposition that allows you
to see the rea rwheel and the kerb.
The parkin gposition is stored.
i If you shift the transmission to anot her
po sition ,the exterior mirror on the front-
passenger side retur nsto the driving posi-
tion.
i You can also store the parking position
using memory button M?.
X Make sure that the key is in position
2in the ignitio nlock.
X With the exterior mirror on the front-
passenger side activa ted, use adjust-
ment button =to adjust the exterior
mirror to aposition which allows you
to see the rea rwheel and the kerb.
X Press memory button M? and one of
the arrow sonadjustment button =
within three seconds.
The parkin gposition is stored if the
exterior mirror does not move.
If the mirror moves out of position ,repeat
the steps.
Calling up astore dparkin gposition set-
ting X
Turn the key to position 2in the ignition
lock.
X Adjus tthe exterior mirror on the front-
passenger side with the correspondin gbut-
ton (Y page 100).
X Engage reverse gear.
The exterior mirror on the front-passenger
side moves to the stored parking position. 102
MirrorsSeats, steerin
gwhee land mirrors
Page 106 of 389

The exterior mirror on the front-passenger
side moves back to its original position:
R
as soon as you exceed aspeed of
15 km/h
R about ten seconds after you have disen-
gaged reverse gear
R if you press button :for the exterior mir-
ror on the driver' sside Memory function
Storing settings
With the memor yfunction, you can store up
to three different settings, e.g. for three dif-
ferent people.
The following settings are stored as asingle
memor ypreset:
R positio nofthe seat, backrest and head
rest raint
R driver's side: steerin gwheel position
R driver's side: position of the exterior mir-
ror sont he driver's and front-passenger
sides G
WARNING
The memory func tion can still be used when
the key has been removed. For this reason,
children should never be left unsupervised in
the vehicle. They coul dotherwis ebecome
trapped when adjusting the seat or the steer-
ing wheel. G
WARNING
Only use the memory function on the driver's
side when the vehicle is stationary .Other-
wise ,you coul dbedistracted from the traf fic
conditions by the steering wheel and seat
moving of their own accord ,and as aresult
cause an accident. X
Adjust the seat (Y page 94).
X On the driver' sside, adjust the steering
wheel (Y page 98) and the exterior mirrors
(Y page 100).
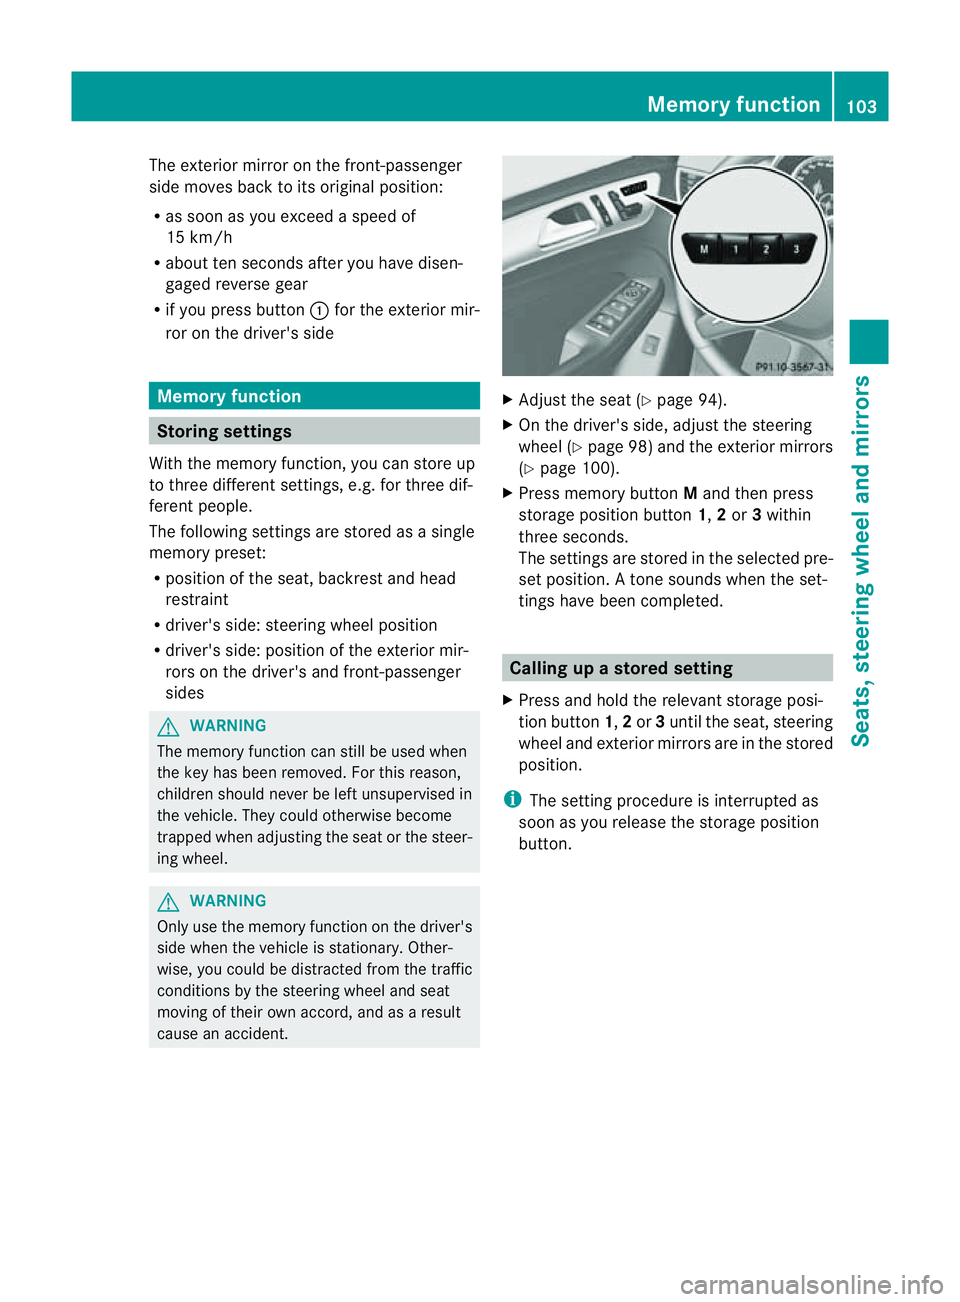
X Press memor ybutton Mand then press
storage position button 1,2or 3within
three seconds.
The settings are stored in the selected pre-
set position. Atone sounds when the set-
tings have been completed. Calling up
astore dsetting
X Pres sand hol dthe rele vant storage posi-
tion button 1,2or 3until the seat ,steering
wheel and exterio rmirror sare in th estored
position.
i The settin gprocedure is interrup tedas
soon as you release the storage position
but ton. Memory function
103Seats,steering wheeland mirrors Z
Page 111 of 389

it, the previous rear foglam
psettings are
restored.
Adjusting th eheadlam prang e(halog en
headlamps) Th
eh eadlamp range control allow syou to
adjust the con eoflight from the headlamps
to sui tthe vehicle load. Headlam
prange control
g Driver' sseat and front-passenger seat
occupied
1 Driver's seat, front-passenger seat and
rear seats occupied
2 Driver's seat, front-passenger seat and
rear seats occupied and maximu mper-
missible rear axle load utilised when the
vehicle is laden
3 Driver's seat occupied and maximu mper-
missible rear axle load utilised when the
vehicle is laden
X Start the engine.
X Turn headlamp range control to the posi-
tion which corresponds to the load in your
vehicle.
Headla mpcleaning system The headlamps are cleaned automatically if
the "Wipe with washer fluid" fun
ction is oper-
ated ten times while the lights are on and the
engin eisrunning (Y page 116). When you
switc hoff th eignition, the automa tich ead-
lam pcleaning system is reset and counting is
resumed from 0. Combination switch
Tu rn signals :
Main-beam headlamps
; Turnsignal, right
= Headlamp flasher
? Turn signal, left
X To indicate briefly: press the combination
switch briefly to the pressure point in the
direction of arrow ;or?.
The corresponding turn signal flashes three
times.
X To indicate: press the combination switch
beyond the pressure point in the direction
of arrow ;or?.
Main-beam headlamps X
To switch on the main-bea mhead-
lamps: turn the key in the ignition lock to
position 2or start the engine.
X Turn the light switch to LorÃ.
X Press the combination switch beyond the
pressure point in the direction of
arrow :.
In the Ãposition, the main-beam head-
lamps are only switched on when it is dark
and the engine is running. 108
Exterio
rlightingLights and windscreen wipers
Page 128 of 389

more quickly
.This ma yprevent you from
observing th etraffic conditions, thereby caus-
ing an accident.
Condensation may dri pfrom th eunders ideof
the vehicl ewhen cooling mode is active .This
is norma land not asign that there is amal-
function.
i The cooling with air dehumidification
function uses refrigerant R134a. This cool-
ant does not contain chlorofluorocarbons,
and therefore does not damage the ozone
layer.
Switching on/off X
To activate: press the¿/Á button.
The indicator lamp in the ¿/Ábut-
ton lights up.
X To deactivate: press the¿/Á but-
ton.
The indicator lamp in the ¿/Ábut-
ton goes out. The cooling with air dehumid-
ification function has adelayed switch-off
feature.
Problems with the cooling with air
dehumidification function When you press the
¿/Ábutton ,the
indicator lam pint he button fla shes three
times or remains off .You can no longer switch
on the cooling with air dehumidification func-
tion.
X Consult aqualified specialist worksho p.Setting climat
econt rol to automatic
mode
In automatic mode, the set temperature is
maintained automatically at aconstant leve l.
The system automatically regulates the tem-
peratur eofthe dispensed air ,the airflow and
the air distribution.
Automatic mode will achi eveo ptimal opera-
tion if cooling with air dehumidification is also activated
.Ifdesired, coolin gwith air dehu-
midification can be deactiva ted.
In the rear compartment ,you can also switch
climate control for the rea rseats to automatic
mode using the Ãbutton.
X Turn the key to position 2in the ignition
lock.
X Set the desired temperature.
X To activate: press theÃbutton.
The indicator lam pintheà button lights
up. Automati cair distribution and airflow
are activated.
i THERMOTRONIC automatic climate con-
trol: when automatic mode is activated, you
can select aclimate mode setting
(Y page 125).
X To switch off: press the_button.
or
X Press the IorK button.
The indicator lamp in the Ãbutton goes
out. Setting the climat
emode
This function is only available with the
THERMOTRONIC automatic climat econtrol.
The climate control settings ar eespecially
effectiv eathigh temperatures.
You can select the following climat econtrol
settings in automatic mode:
FOCU Shigh airflow that is set slightly
cooler
MEDIU Mmedium airflow, standard setting
DI FFUS Elow airflow that is set slightly
warmer and with alower rate of
airflow
X Tur nthe key to position 2in the ignition
lock.
X Press the Ãbutton.
X Press the ñbutton repeatedly until the
desired climate mode appears in the dis-
play. Operating th
eclimat econtrol system
125Climate control Z