2011 MERCEDES-BENZ GL350 BlueTEC ECU
[x] Cancel search: ECUPage 234 of 376

Display messagesPossible causes/consequences and M SolutionsFront Passenger
Airbag Enabled
See Operator's
ManualThe front-passenger air bag is enabled during the journey,
although:
R there is a child, a small adult or an object weighing less than the
system's weight threshold is on the front-passenger seat.
R the front-passenger seat is unoccupied
The system may detect the additional weight of objects on the
seat or forces acting on the seat.XPull over and stop the vehicle safely as soon as possible, paying
attention to road and traffic conditions.XEngage the parking brake.XSwitch off the ignition.XOpen the front-passenger door.XRemove the child and the child restraint system from the front-
passenger seat.XIf necessary, secure the child in a child restraint system on a
suitable rear seat.XMake sure that no forces are acting on the seat, such as:
R trapped books, bags, etc. lying on, behind or beside the seat
R head restraints pressing against the headliner
The system may otherwise detect these forces and interpret the
seat occupant's weight as greater than it actually is.XMake sure that the seat is unoccupied and has no objects placed
on it, close the front-passenger door, and switch on the ignition.
Observe the 42 indicator lamps (Y page 42) and the
multifunction display and check the following:
Seat unoccupied and ignition switched on:
R the 42 indicator lamp must light up and remain lit.
When the indicator lamp is on, OCS ( Y page 42) has disabled
the front-passenger air bag.
R the display messages Front Passenger Airbag Enabled
See Operator's Manual or Front Passenger Airbag
Disabled See Operator's Manual must not appear in the
multifunction display. Wait for a period of at least 60 seconds
until the necessary system checks have been completed and to
make sure that the display messages do not appear in the
multifunction display.
If these conditions are met, the front-passenger seat can be
occupied again. Whether the 42 indicator lamp
remains lit or goes out depends on how OCS classifies the
occupant.
If the conditions are not met, the system is not operating correctly.
232Display messagesOn-board computer and displays
BA 164.8 USA, CA Edition B 2011; 1; 2, en-USd2sboikeVersion: 3.0.3.52010-04-21T15:08:44+02:00 - Seite 232
Page 257 of 376
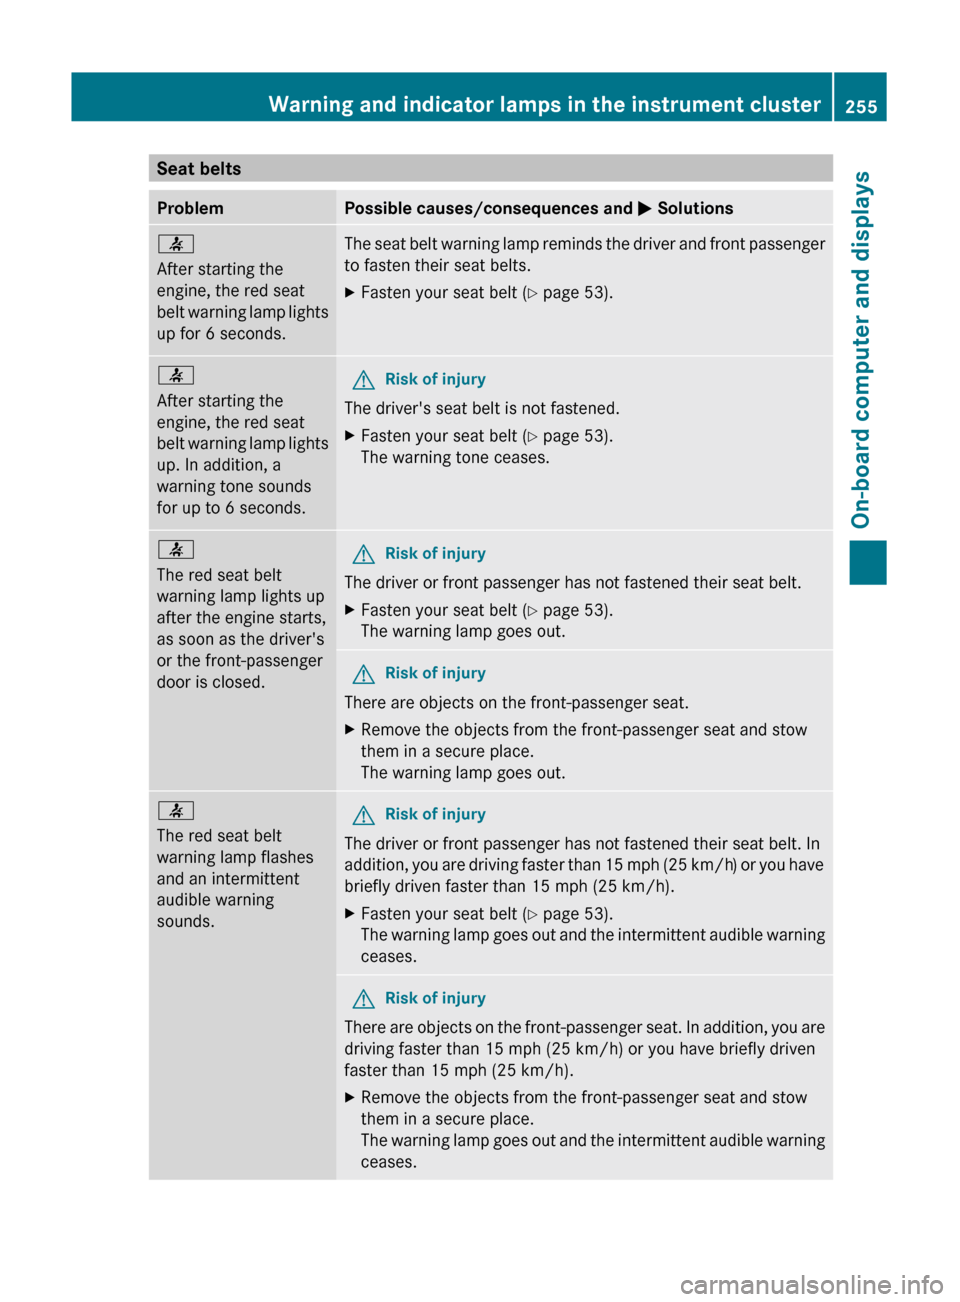
Seat beltsProblemPossible causes/consequences and M Solutions7
After starting the
engine, the red seat
belt warning lamp lights
up for 6 seconds.The seat belt warning lamp reminds the driver and front passenger
to fasten their seat belts.XFasten your seat belt ( Y page 53).7
After starting the
engine, the red seat
belt warning lamp lights
up. In addition, a
warning tone sounds
for up to 6 seconds.GRisk of injury
The driver's seat belt is not fastened.
XFasten your seat belt ( Y page 53).
The warning tone ceases.7
The red seat belt
warning lamp lights up
after the engine starts,
as soon as the driver's
or the front-passenger
door is closed.GRisk of injury
The driver or front passenger has not fastened their seat belt.
XFasten your seat belt ( Y page 53).
The warning lamp goes out.GRisk of injury
There are objects on the front-passenger seat.
XRemove the objects from the front-passenger seat and stow
them in a secure place.
The warning lamp goes out.7
The red seat belt
warning lamp flashes
and an intermittent
audible warning
sounds.GRisk of injury
The driver or front passenger has not fastened their seat belt. In
addition, you are driving faster than 15 mph (25 km/h) or you have
briefly driven faster than 15 mph (25 km/h).
XFasten your seat belt ( Y page 53).
The warning lamp goes out and the intermittent audible warning
ceases.GRisk of injury
There are objects on the front-passenger seat. In addition, you are
driving faster than 15 mph (25 km/h) or you have briefly driven
faster than 15 mph (25 km/h).
XRemove the objects from the front-passenger seat and stow
them in a secure place.
The warning lamp goes out and the intermittent audible warning
ceases.Warning and indicator lamps in the instrument cluster255On-board computer and displaysBA 164.8 USA, CA Edition B 2011; 1; 2, en-USd2sboikeVersion: 3.0.3.52010-04-21T15:08:44+02:00 - Seite 255Z
Page 266 of 376

Vehicle equipment
i This manual describes all the standard
and optional equipment of your vehicle
which was available at the time of
purchase. Country-specific differences are
possible. Bear in mind that your vehicle
may not feature all functions described
here. This also refers to safety-related
systems and functions.
Loading guidelines
GWarning!
Always fasten items being carried as securely
as possible. Use cargo tie-down rings and
fastening materials appropriate for the weight
and size of the load.
In an accident, during hard braking or sudden
maneuvers, loose items will be thrown around
inside the vehicle. This can cause injury to
vehicle occupants unless the items are
securely fastened in the vehicle.
To help avoid personal injury during a collision
or sudden maneuver, exercise care when
transporting cargo. Do not pile luggage or
cargo higher than the seat backrests.
The cargo compartment is the preferred place
to carry objects. Always use cargo tie-down
rings, and if so equipped, always use the cargo
net when transporting cargo.
Never drive a vehicle with the tailgate open.
Deadly carbon monoxide (CO) gases may
enter vehicle interior resulting in
unconsciousness and death.
The gross vehicle weight (GVW) is the weight
of the vehicle including fuel, the vehicle tool
kit, spare tire, any installed accessories,
vehicle occupants and luggage/cargo.
The load limit and the gross vehicle weight
rating (GVWR) of your vehicle must never be
exceeded. The load limit and the GVWR are
stated on the vehicle identification plate on
the B-pillar on the driver's side
( Y page 344).
Additionally, the cargo must be distributed so
that the weight on each axle never exceeds
the maximum gross axle weight rating
(GAWR) for the front and rear axles. The data
on GVWR and GAWR is stated on the vehicle
identification plate on the B-pillar on the
driver's side ( Y page 344).
Further information can be found in the
"Loading the vehicle" section ( Y page 344).
The handling characteristics of a laden
vehicle are dependent on the distribution of
the load within the vehicle. For this reason,
you should observe the following notes when
transporting a load:
R Position heavy loads as far forwards as
possible and as low down in the cargo
compartment as possible.
R The load must not protrude above the
upper edge of the seat backrests.
R always place the load against the rear or
front seat backrests. Make sure that the
seat backrests are securely locked into
place.
R Hook in the cargo net when loading.
R Always place the load behind unoccupied
seats if possible.
R Secure the load with sufficiently strong and
wear-resistant tie down. Pad sharp edges
for protection.
Stowage compartments
Important safety notes
GWarning!
To help avoid personal injury during a collision
or sudden maneuver, exercise care when
storing objects in the vehicle. Put luggage or
cargo in the cargo compartment if possible.
Do not pile luggage or cargo higher than the
seat backrests.
264Stowage compartmentsLoading, stowing and features
BA 164.8 USA, CA Edition B 2011; 1; 2, en-USd2sboikeVersion: 3.0.3.52010-04-21T15:08:44+02:00 - Seite 264
Page 267 of 376
If so equipped, always use the cargo net when
transporting cargo. The cargo net cannot
secure hard or heavy objects.
Parcel nets cannot secure hard or heavy
objects.
Keep compartment lids closed. This will help
to prevent stored objects from being thrown
about and injuring vehicle occupants during
R braking
R vehicle maneuvers
R an accident
Stowage compartments in the front
Glove box
i Depending on the vehicle equipment,
there is an AUX-IN connection or a Media
Interface installed in the glove box. Media
Interface is a universal interface for mobile
audio equipment, e.g. for an iPod ®
or USB
devices; see separate COMAND APS
operating instructions.
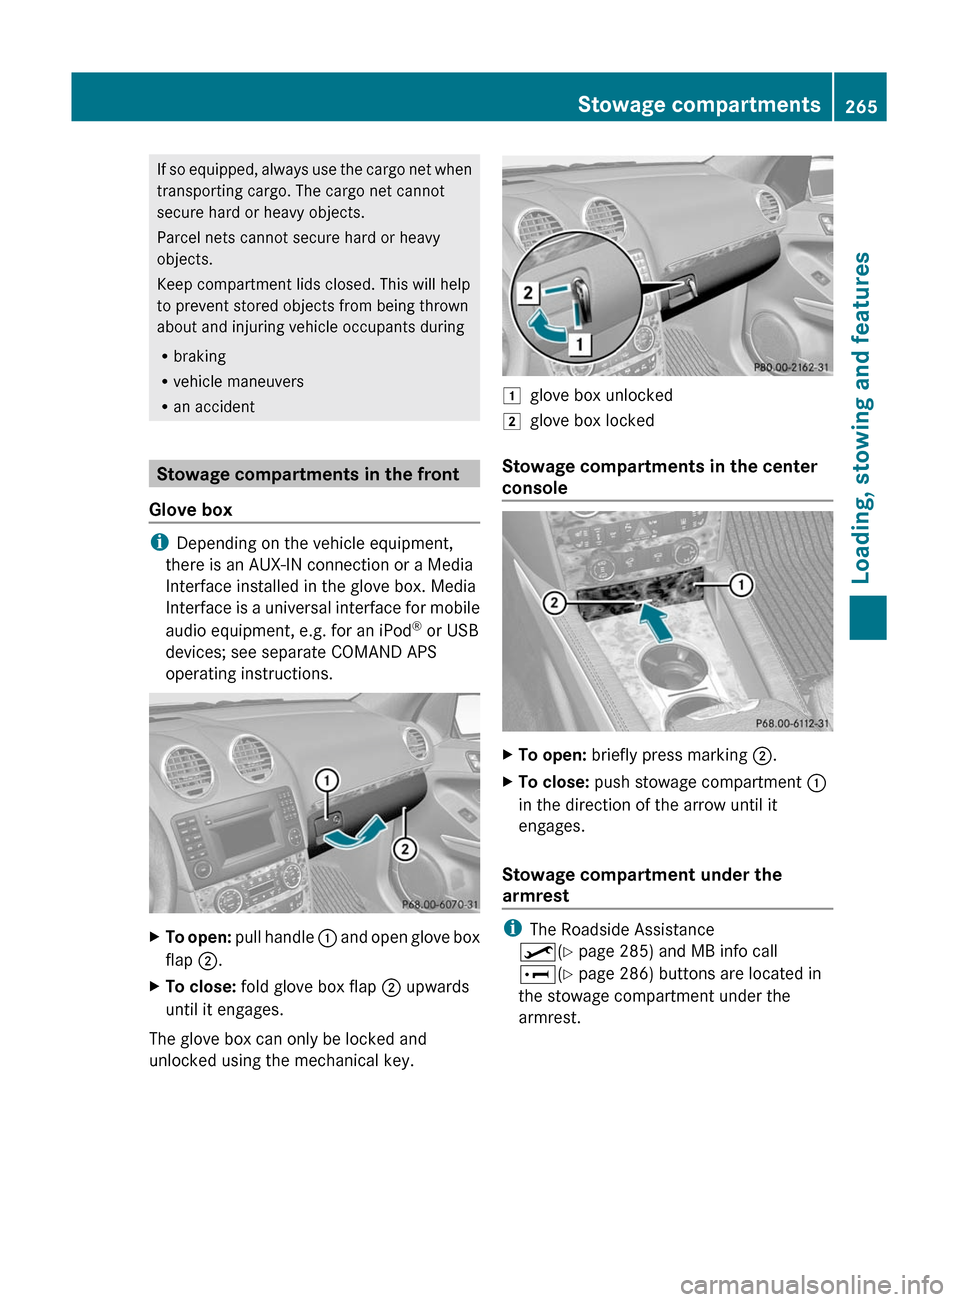
XTo open: pull handle : and open glove box
flap ;.XTo close: fold glove box flap ; upwards
until it engages.
The glove box can only be locked and
unlocked using the mechanical key.
1glove box unlocked2glove box locked
Stowage compartments in the center
console
XTo open: briefly press marking ;.XTo close: push stowage compartment :
in the direction of the arrow until it
engages.
Stowage compartment under the
armrest
i The Roadside Assistance
º (Y page 285) and MB info call
E (Y page 286) buttons are located in
the stowage compartment under the
armrest.
Stowage compartments265Loading, stowing and featuresBA 164.8 USA, CA Edition B 2011; 1; 2, en-USd2sboikeVersion: 3.0.3.52010-04-21T15:08:44+02:00 - Seite 265Z
Page 269 of 376
vehicle occupants unless the items are
securely fastened in the vehicle.
Always use the cargo tie-down rings.GWarning!
Never drive a vehicle with the tailgate open.
Deadly carbon monoxide (CO) gases may
enter vehicle interior resulting in
unconsciousness and death.
! Release and fold the seat cushion
upwards before folding the rear bench seat
forward. Otherwise, the backrests may be
damaged.
When the backrest is folded forwards, the
front seats cannot be moved to their
rearmost position. Otherwise, the front
seats and the rear bench seat could be
damaged.
The left-hand and right-hand backrests in the
2nd row of seats can be folded forwards
separately to increase the cargo
compartment capacity. On vehicles with a 3rd
row of seats, you must fold down the 3rd row
of seats beforehand ( Y page 100) to obtain
maximum cargo compartment enlargement.
Folding the rear bench seat forward
i If the driver's or front-passenger seat is
set for a larger person, it may not be
possible to fold the rear bench seat
forwards. In this case, move the front seats
as far forward as possible.
XMove the head restraints to the lowest
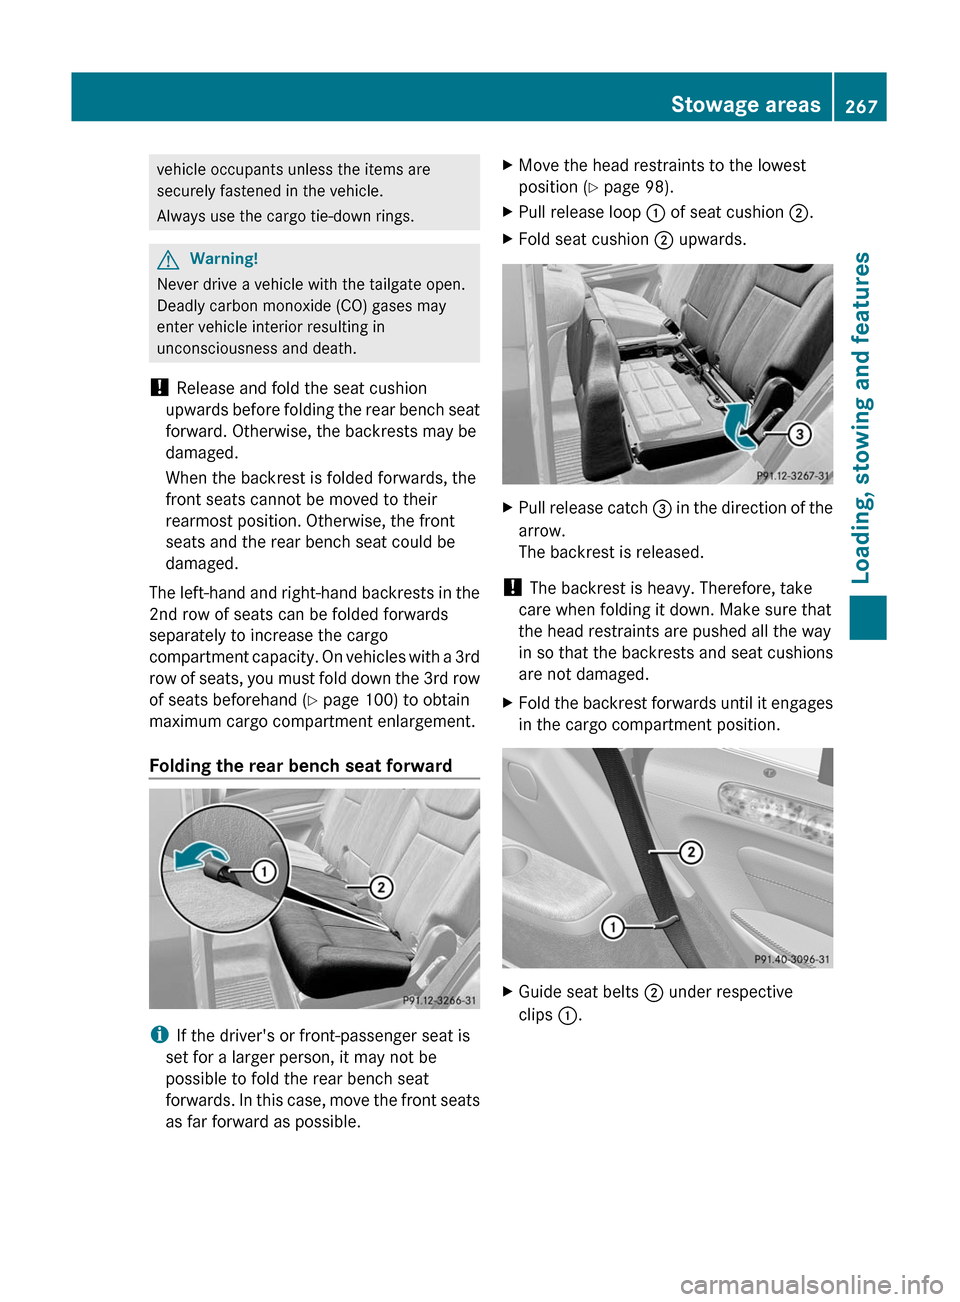
position ( Y page 98).XPull release loop : of seat cushion ;.XFold seat cushion ; upwards.XPull release catch = in the direction of the
arrow.
The backrest is released.
! The backrest is heavy. Therefore, take
care when folding it down. Make sure that
the head restraints are pushed all the way
in so that the backrests and seat cushions
are not damaged.
XFold the backrest forwards until it engages
in the cargo compartment position.XGuide seat belts ; under respective
clips :.Stowage areas267Loading, stowing and featuresBA 164.8 USA, CA Edition B 2011; 1; 2, en-USd2sboikeVersion: 3.0.3.52010-04-21T15:08:44+02:00 - Seite 267Z
Page 270 of 376
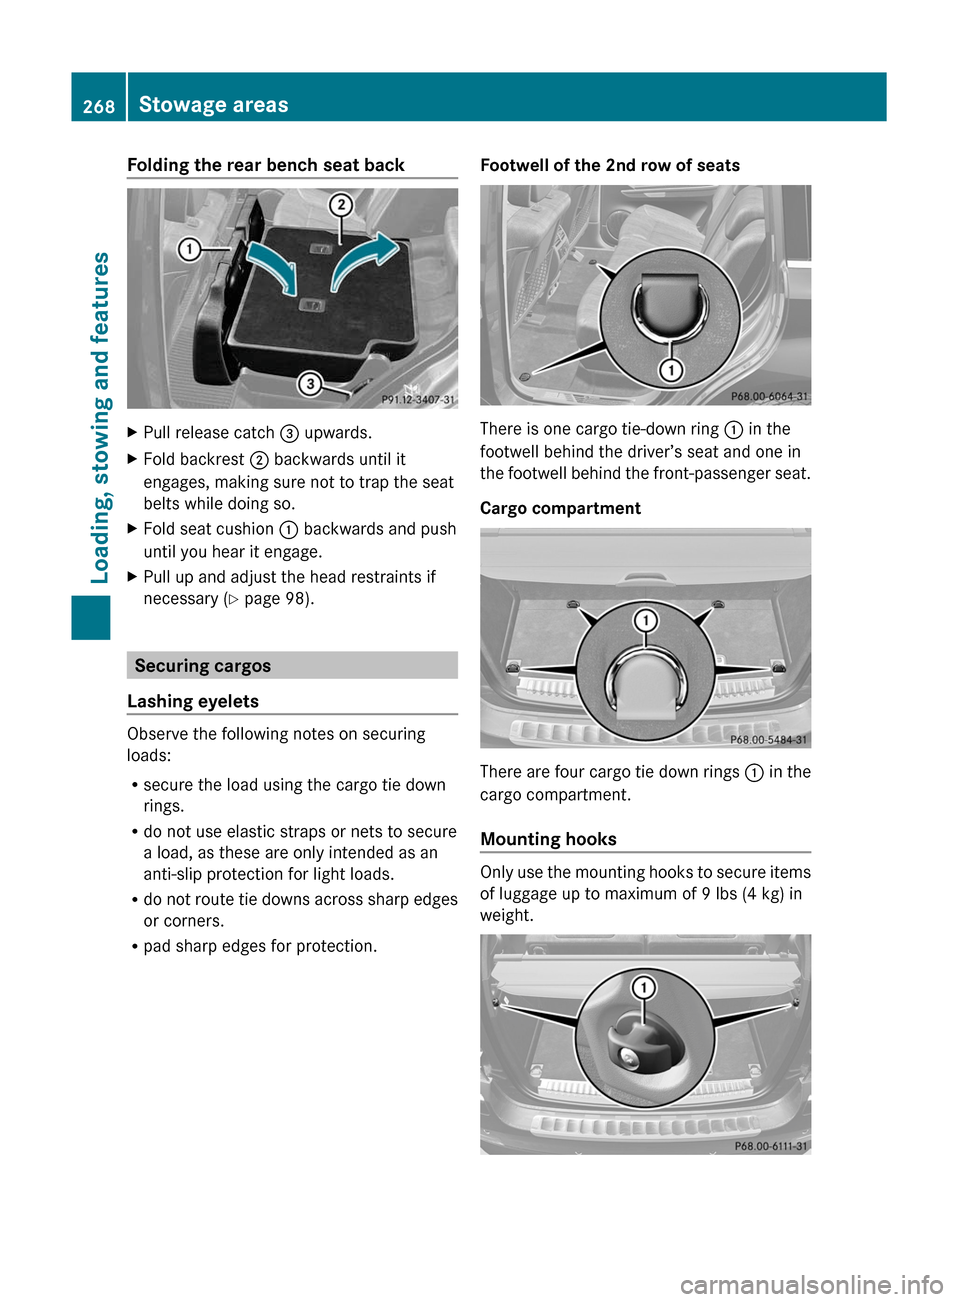
Folding the rear bench seat backXPull release catch = upwards.XFold backrest ; backwards until it
engages, making sure not to trap the seat
belts while doing so.XFold seat cushion : backwards and push
until you hear it engage.XPull up and adjust the head restraints if
necessary ( Y page 98).
Securing cargos
Lashing eyelets
Observe the following notes on securing
loads:
R secure the load using the cargo tie down
rings.
R do not use elastic straps or nets to secure
a load, as these are only intended as an
anti-slip protection for light loads.
R do not route tie downs across sharp edges
or corners.
R pad sharp edges for protection.
Footwell of the 2nd row of seats
There is one cargo tie-down ring : in the
footwell behind the driver’s seat and one in
the footwell behind the front-passenger seat.
Cargo compartment
There are four cargo tie down rings : in the
cargo compartment.
Mounting hooks
Only use the mounting hooks to secure items
of luggage up to maximum of 9 lbs (4 kg) in
weight.
268Stowage areasLoading, stowing and features
BA 164.8 USA, CA Edition B 2011; 1; 2, en-USd2sboikeVersion: 3.0.3.52010-04-21T15:08:44+02:00 - Seite 268
Page 271 of 376
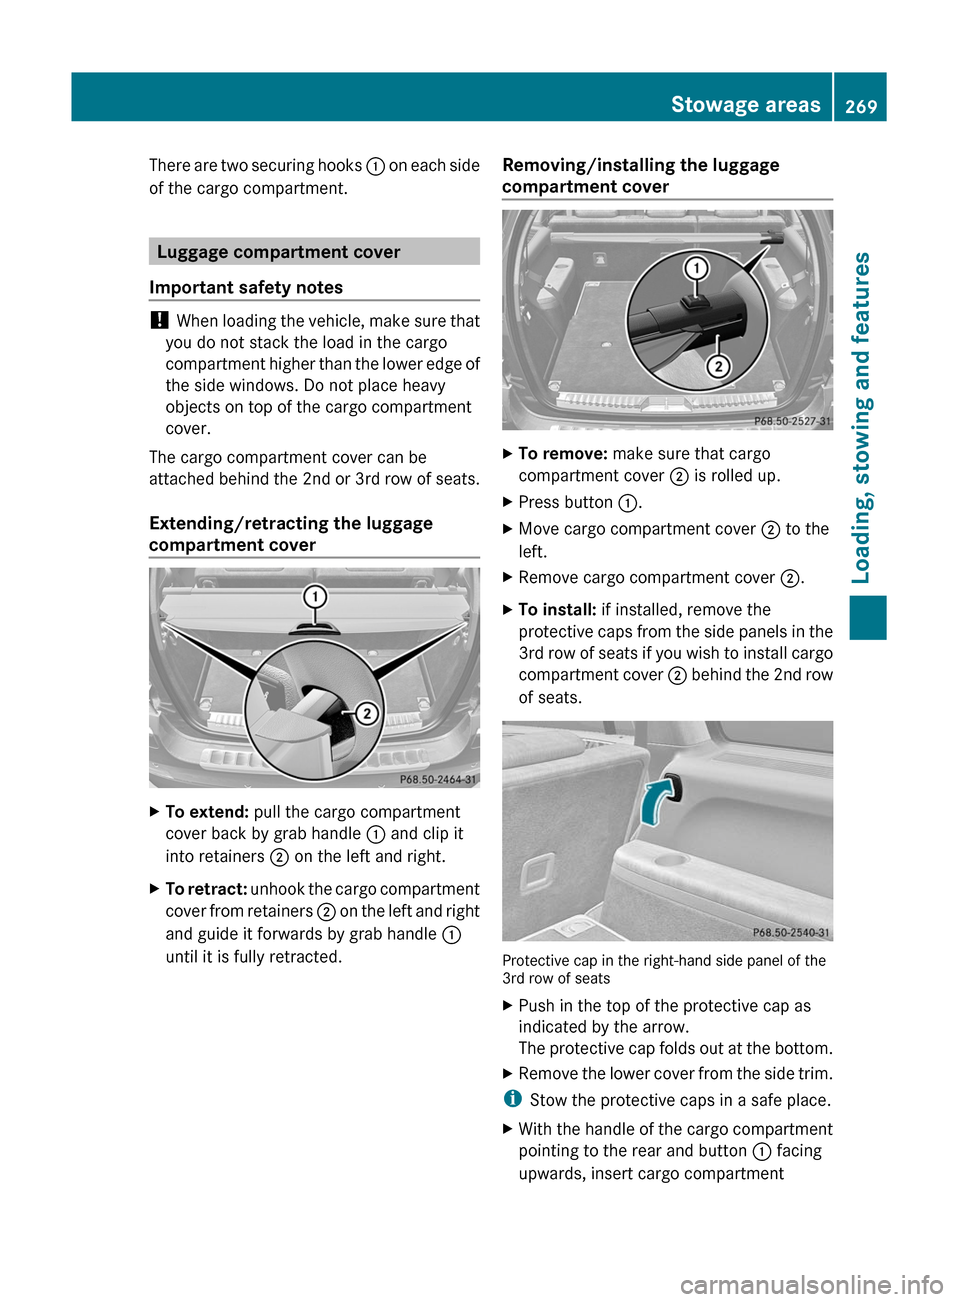
There are two securing hooks : on each side
of the cargo compartment.
Luggage compartment cover
Important safety notes
! When loading the vehicle, make sure that
you do not stack the load in the cargo
compartment higher than the lower edge of
the side windows. Do not place heavy
objects on top of the cargo compartment
cover.
The cargo compartment cover can be
attached behind the 2nd or 3rd row of seats.
Extending/retracting the luggage
compartment cover
XTo extend: pull the cargo compartment
cover back by grab handle : and clip it
into retainers ; on the left and right.XTo retract: unhook the cargo compartment
cover from retainers ; on the left and right
and guide it forwards by grab handle :
until it is fully retracted.Removing/installing the luggage
compartment coverXTo remove: make sure that cargo
compartment cover ; is rolled up.XPress button :.XMove cargo compartment cover ; to the
left.XRemove cargo compartment cover ;.XTo install: if installed, remove the
protective caps from the side panels in the
3rd row of seats if you wish to install cargo
compartment cover ; behind the 2nd row
of seats.
Protective cap in the right-hand side panel of the
3rd row of seats
XPush in the top of the protective cap as
indicated by the arrow.
The protective cap folds out at the bottom.XRemove the lower cover from the side trim.
i Stow the protective caps in a safe place.
XWith the handle of the cargo compartment
pointing to the rear and button : facing
upwards, insert cargo compartmentStowage areas269Loading, stowing and featuresBA 164.8 USA, CA Edition B 2011; 1; 2, en-USd2sboikeVersion: 3.0.3.52010-04-21T15:08:44+02:00 - Seite 269Z
Page 272 of 376
cover ; into the recess of the side trim on
the left-hand side.XGuide cargo compartment cover ; in front
of the recess on the right.XPress button : and insert the right-hand
side section into the recess of the side trim.
Cargo net
Important safety notes
GWarning!
Make sure the cargo net is properly engaged
at top and bottom position and the tightening
belts are securely fastened.
Never use a damaged cargo net.
Always use cargo net when transporting
cargo. This helps to avoid personal injury from
smaller objects being thrown around in the
occupant compartment during a collision or
sudden maneuver.
The cargo net cannot prevent the movement
of large, heavier objects into the passenger
compartment in an accident. Such items must
be properly secured using the cargo tie-down
rings in the cargo compartment floor.
Passenger use of seats behind installed cargo
net is restricted because of the footwell being
taken up by the net.
When the vehicle is loaded with objects that
extend beyond the seat backrests, using a
cargo net is particularly important. For
reasons of safety, a cargo net should always
be used when transporting cargo.
Preparing the cargo net
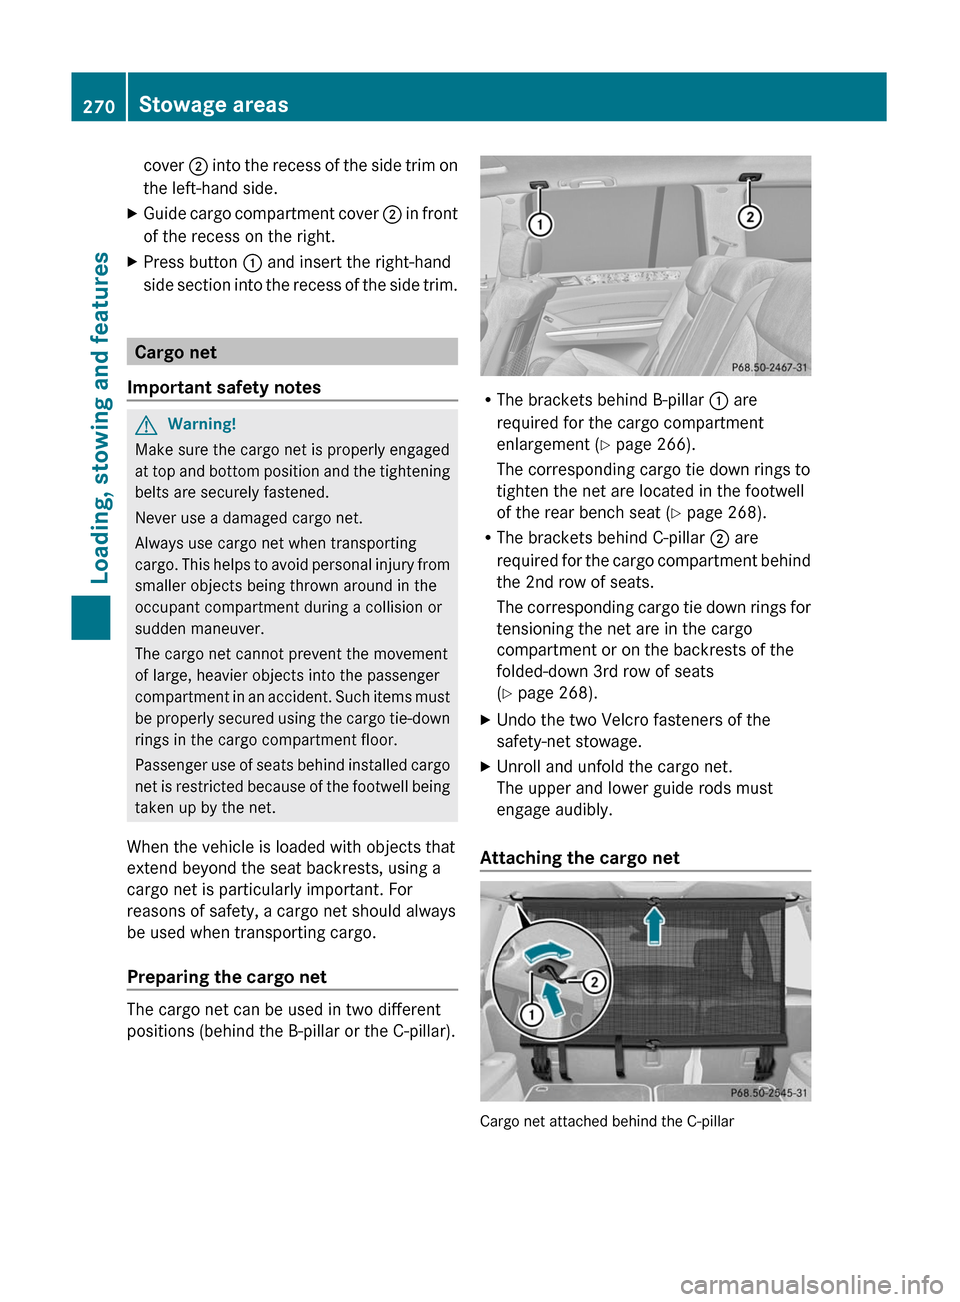
The cargo net can be used in two different
positions (behind the B-pillar or the C-pillar).
R The brackets behind B-pillar : are
required for the cargo compartment
enlargement ( Y page 266).
The corresponding cargo tie down rings to
tighten the net are located in the footwell
of the rear bench seat ( Y page 268).
R The brackets behind C-pillar ; are
required for the cargo compartment behind
the 2nd row of seats.
The corresponding cargo tie down rings for
tensioning the net are in the cargo
compartment or on the backrests of the
folded-down 3rd row of seats
( Y page 268).
XUndo the two Velcro fasteners of the
safety-net stowage.XUnroll and unfold the cargo net.
The upper and lower guide rods must
engage audibly.
Attaching the cargo net
Cargo net attached behind the C-pillar
270Stowage areasLoading, stowing and features
BA 164.8 USA, CA Edition B 2011; 1; 2, en-USd2sboikeVersion: 3.0.3.52010-04-21T15:08:44+02:00 - Seite 270