2011 MERCEDES-BENZ GL350 BlueTEC air condition
[x] Cancel search: air conditionPage 249 of 376
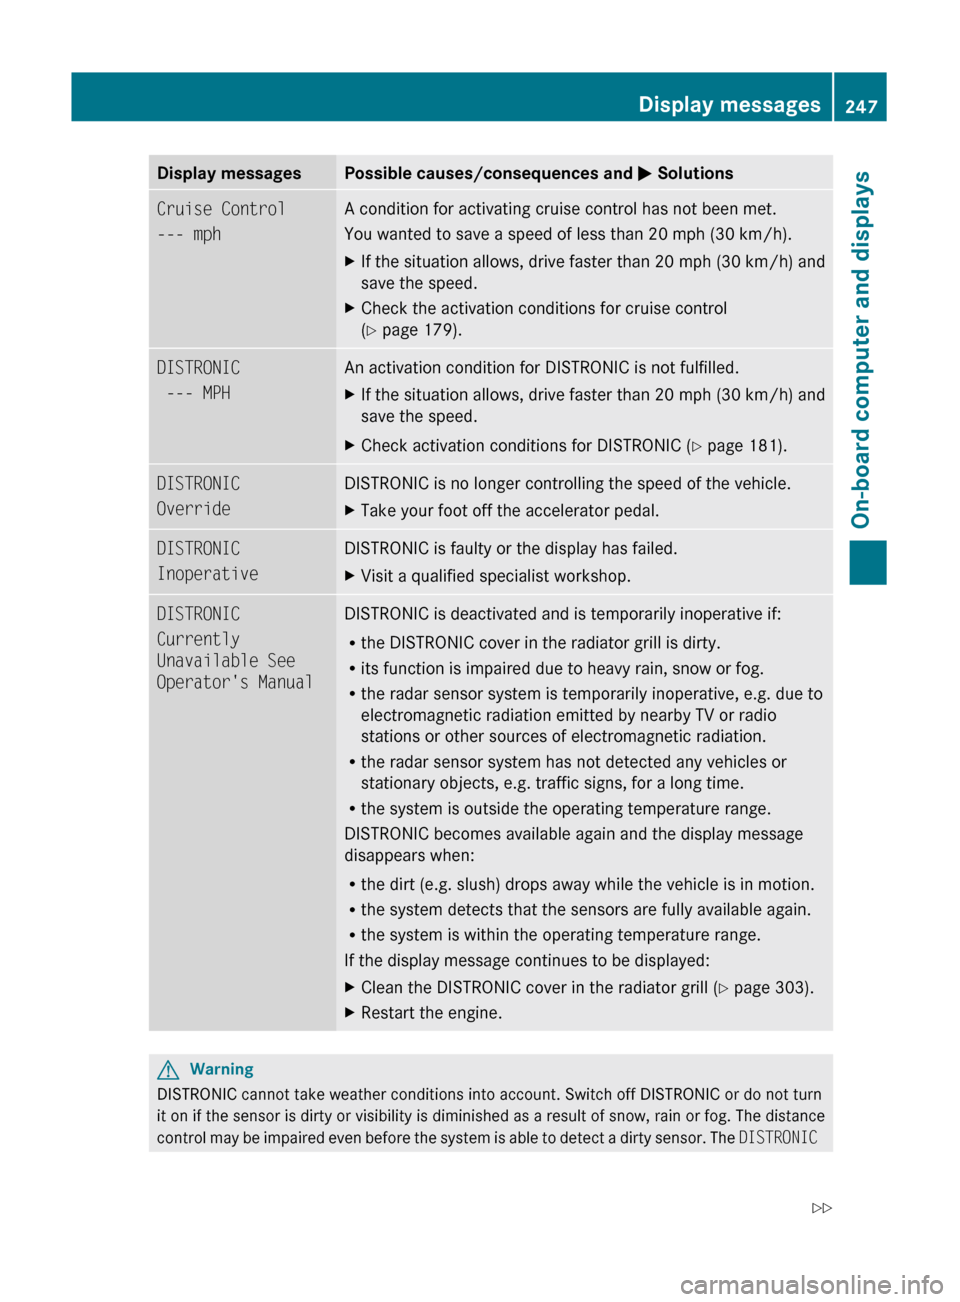
Display messagesPossible causes/consequences and M SolutionsCruise Control
--- mph A condition for activating cruise control has not been met.
You wanted to save a speed of less than 20 mph (30 km/h).XIf the situation allows, drive faster than 20 mph (30 km/h) and
save the speed.XCheck the activation conditions for cruise control
( Y page 179).DISTRONIC
--- MPH An activation condition for DISTRONIC is not fulfilled.XIf the situation allows, drive faster than 20 mph (30 km/h) and
save the speed.XCheck activation conditions for DISTRONIC ( Y page 181).DISTRONIC
OverrideDISTRONIC is no longer controlling the speed of the vehicle.XTake your foot off the accelerator pedal.DISTRONIC
InoperativeDISTRONIC is faulty or the display has failed.XVisit a qualified specialist workshop.DISTRONIC
Currently
Unavailable See
Operator's ManualDISTRONIC is deactivated and is temporarily inoperative if:
R the DISTRONIC cover in the radiator grill is dirty.
R its function is impaired due to heavy rain, snow or fog.
R the radar sensor system is temporarily inoperative, e.g. due to
electromagnetic radiation emitted by nearby TV or radio
stations or other sources of electromagnetic radiation.
R the radar sensor system has not detected any vehicles or
stationary objects, e.g. traffic signs, for a long time.
R the system is outside the operating temperature range.
DISTRONIC becomes available again and the display message
disappears when:
R the dirt (e.g. slush) drops away while the vehicle is in motion.
R the system detects that the sensors are fully available again.
R the system is within the operating temperature range.
If the display message continues to be displayed:XClean the DISTRONIC cover in the radiator grill ( Y page 303).XRestart the engine.GWarning
DISTRONIC cannot take weather conditions into account. Switch off DISTRONIC or do not turn
it on if the sensor is dirty or visibility is diminished as a result of snow, rain or fog. The distance
control may be impaired even before the system is able to detect a dirty sensor. The DISTRONIC
Display messages247On-board computer and displaysBA 164.8 USA, CA Edition B 2011; 1; 2, en-USd2sboikeVersion: 3.0.3.52010-04-21T15:08:44+02:00 - Seite 247Z
Page 260 of 376
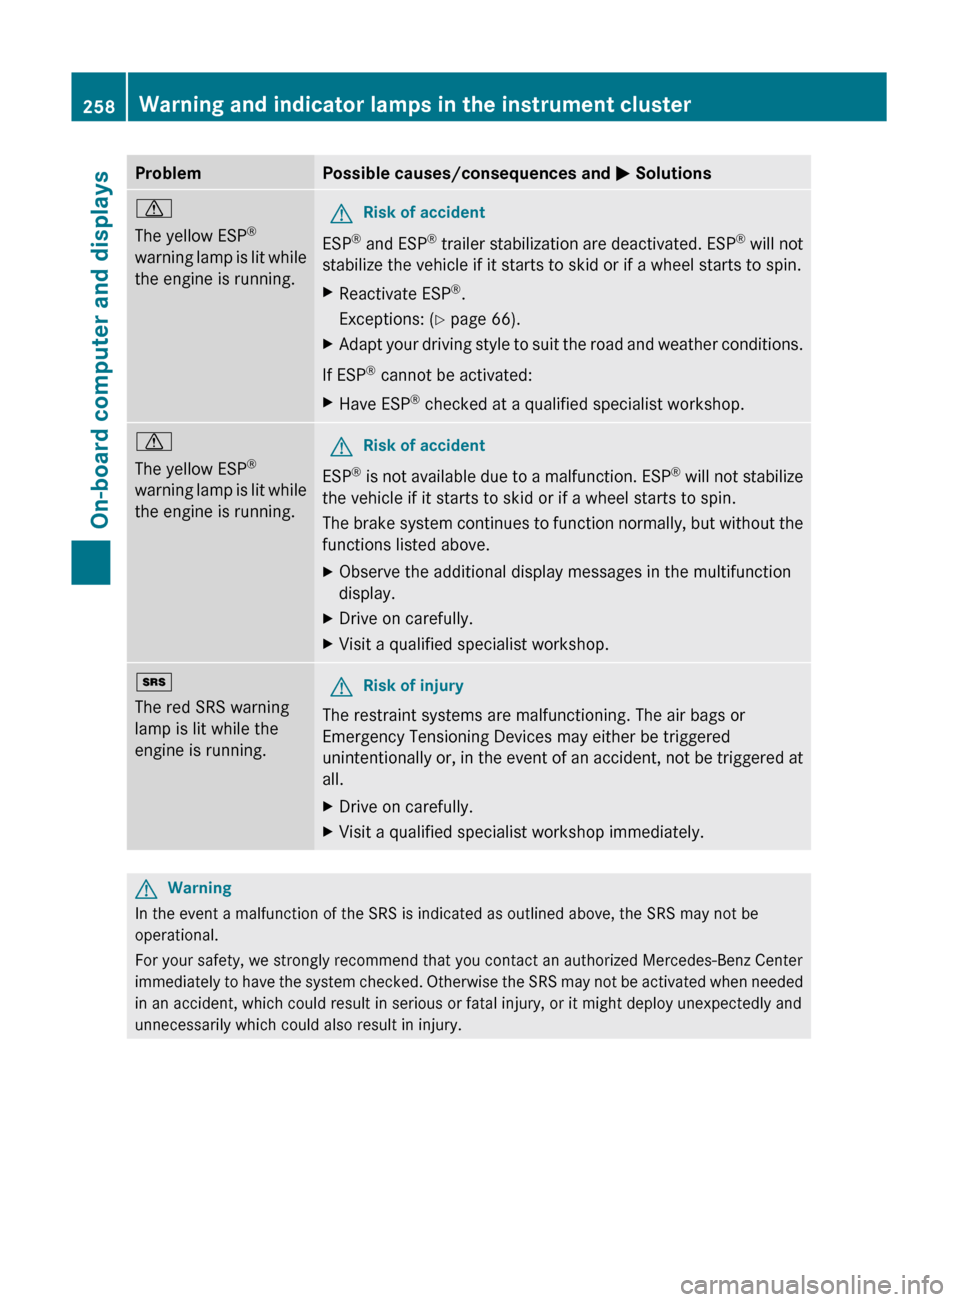
ProblemPossible causes/consequences and M Solutionsd
The yellow ESP ®
warning lamp is lit while
the engine is running.GRisk of accident
ESP ®
and ESP ®
trailer stabilization are deactivated. ESP ®
will not
stabilize the vehicle if it starts to skid or if a wheel starts to spin.
XReactivate ESP ®
.
Exceptions: ( Y page 66).XAdapt your driving style to suit the road and weather conditions.
If ESP ®
cannot be activated:
XHave ESP ®
checked at a qualified specialist workshop.d
The yellow ESP ®
warning lamp is lit while
the engine is running.GRisk of accident
ESP ®
is not available due to a malfunction. ESP ®
will not stabilize
the vehicle if it starts to skid or if a wheel starts to spin.
The brake system continues to function normally, but without the
functions listed above.
XObserve the additional display messages in the multifunction
display.XDrive on carefully.XVisit a qualified specialist workshop.+
The red SRS warning
lamp is lit while the
engine is running. GRisk of injury
The restraint systems are malfunctioning. The air bags or
Emergency Tensioning Devices may either be triggered
unintentionally or, in the event of an accident, not be triggered at
all.
XDrive on carefully.XVisit a qualified specialist workshop immediately.GWarning
In the event a malfunction of the SRS is indicated as outlined above, the SRS may not be
operational.
For your safety, we strongly recommend that you contact an authorized Mercedes-Benz Center
immediately to have the system checked. Otherwise the SRS may not be activated when needed
in an accident, which could result in serious or fatal injury, or it might deploy unexpectedly and
unnecessarily which could also result in injury.
258Warning and indicator lamps in the instrument clusterOn-board computer and displays
BA 164.8 USA, CA Edition B 2011; 1; 2, en-USd2sboikeVersion: 3.0.3.52010-04-21T15:08:44+02:00 - Seite 258
Page 286 of 376
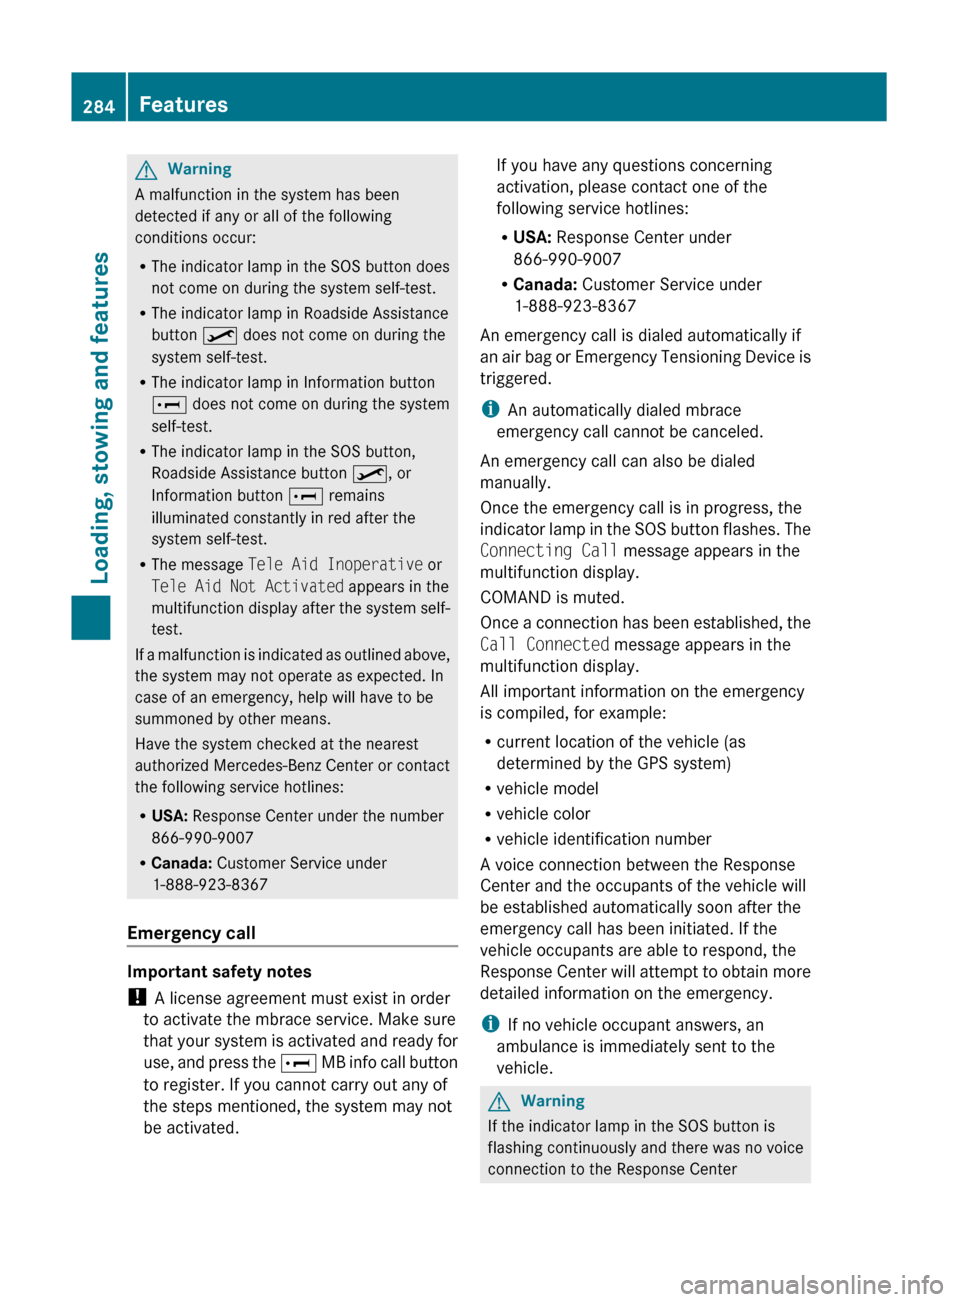
GWarning
A malfunction in the system has been
detected if any or all of the following
conditions occur:
R The indicator lamp in the SOS button does
not come on during the system self-test.
R The indicator lamp in Roadside Assistance
button º does not come on during the
system self-test.
R The indicator lamp in Information button
E does not come on during the system
self-test.
R The indicator lamp in the SOS button,
Roadside Assistance button º, or
Information button E remains
illuminated constantly in red after the
system self-test.
R The message Tele Aid Inoperative or
Tele Aid Not Activated appears in the
multifunction display after the system self-
test.
If a malfunction is indicated as outlined above,
the system may not operate as expected. In
case of an emergency, help will have to be
summoned by other means.
Have the system checked at the nearest
authorized Mercedes-Benz Center or contact
the following service hotlines:
R USA: Response Center under the number
866-990-9007
R Canada: Customer Service under
1-888-923-8367
Emergency call
Important safety notes
! A license agreement must exist in order
to activate the mbrace service. Make sure
that your system is activated and ready for
use, and press the E MB info call button
to register. If you cannot carry out any of
the steps mentioned, the system may not
be activated.
If you have any questions concerning
activation, please contact one of the
following service hotlines:
R USA: Response Center under
866-990-9007
R Canada: Customer Service under
1-888-923-8367
An emergency call is dialed automatically if
an air bag or Emergency Tensioning Device is
triggered.
i An automatically dialed mbrace
emergency call cannot be canceled.
An emergency call can also be dialed
manually.
Once the emergency call is in progress, the
indicator lamp in the SOS button flashes. The
Connecting Call message appears in the
multifunction display.
COMAND is muted.
Once a connection has been established, the
Call Connected message appears in the
multifunction display.
All important information on the emergency
is compiled, for example:
R current location of the vehicle (as
determined by the GPS system)
R vehicle model
R vehicle color
R vehicle identification number
A voice connection between the Response
Center and the occupants of the vehicle will
be established automatically soon after the
emergency call has been initiated. If the
vehicle occupants are able to respond, the
Response Center will attempt to obtain more
detailed information on the emergency.
i If no vehicle occupant answers, an
ambulance is immediately sent to the
vehicle.GWarning
If the indicator lamp in the SOS button is
flashing continuously and there was no voice
connection to the Response Center
284FeaturesLoading, stowing and features
BA 164.8 USA, CA Edition B 2011; 1; 2, en-USd2sboikeVersion: 3.0.3.52010-04-21T15:08:44+02:00 - Seite 284
Page 304 of 376
to painted surfaces. You could otherwise
damage the paintwork.
If water no longer forms "beads" on the
painted surface, paint care products should
be used that have been approved and
recommended by Mercedes-Benz. This is the
case approximately every three to five
months, depending on climatic conditions
and the care product used.
If dirt has entered the paint surface or the
paintwork has become dull, a paint cleaner
should be used that has been approved and
recommended by Mercedes-Benz.
Never use such care products in direct
sunlight or on a hot hood.XUse a suitable touch-up stick, e.g. MB
Touch Up stick, for quick, temporary repair
of damaged paintwork.
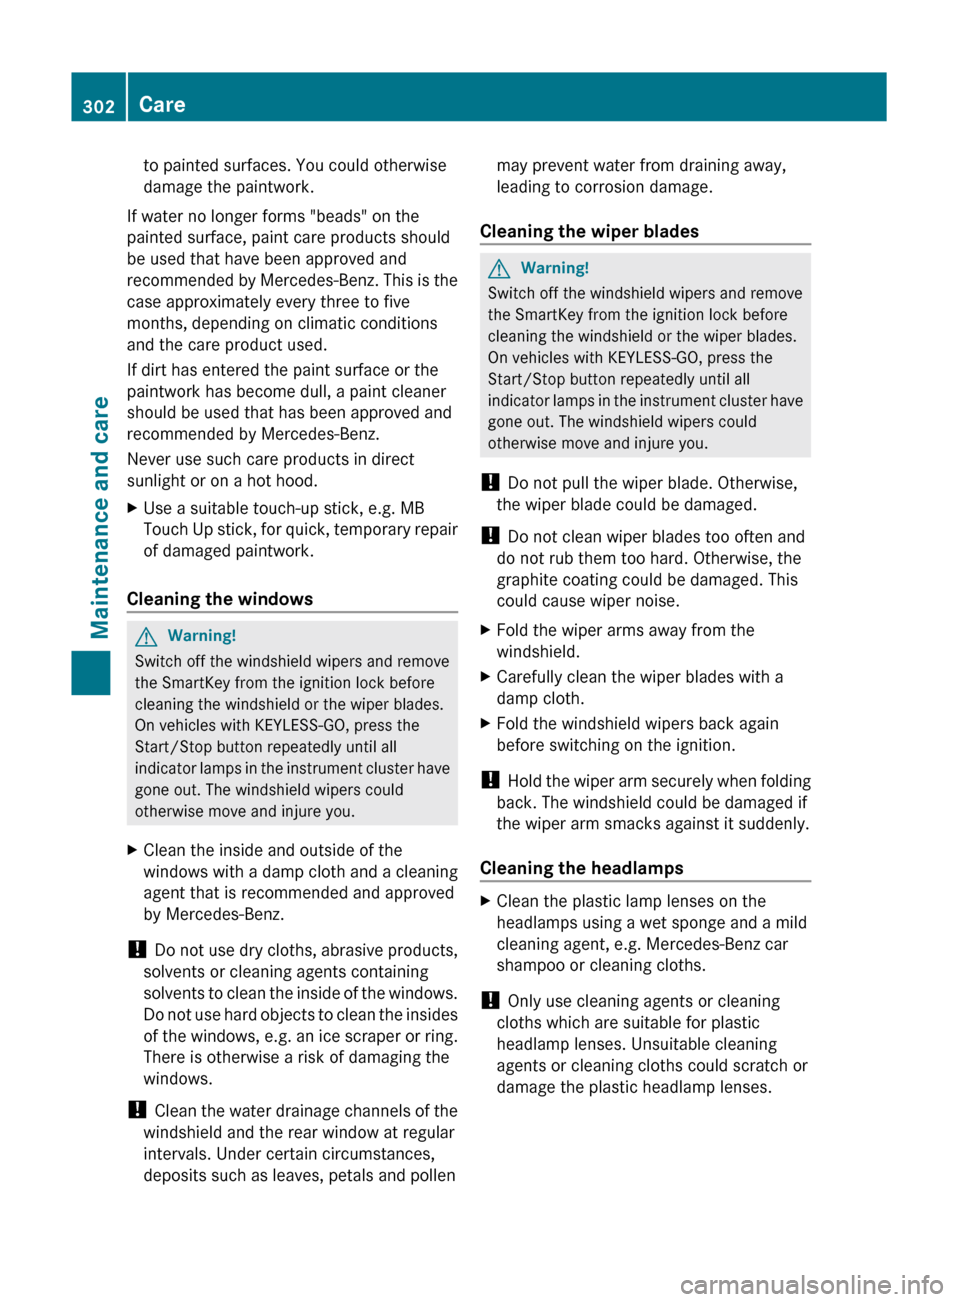
Cleaning the windows
GWarning!
Switch off the windshield wipers and remove
the SmartKey from the ignition lock before
cleaning the windshield or the wiper blades.
On vehicles with KEYLESS-GO, press the
Start/Stop button repeatedly until all
indicator lamps in the instrument cluster have
gone out. The windshield wipers could
otherwise move and injure you.
XClean the inside and outside of the
windows with a damp cloth and a cleaning
agent that is recommended and approved
by Mercedes-Benz.
! Do not use dry cloths, abrasive products,
solvents or cleaning agents containing
solvents to clean the inside of the windows.
Do not use hard objects to clean the insides
of the windows, e.g. an ice scraper or ring.
There is otherwise a risk of damaging the
windows.
! Clean the water drainage channels of the
windshield and the rear window at regular
intervals. Under certain circumstances,
deposits such as leaves, petals and pollen
may prevent water from draining away,
leading to corrosion damage.
Cleaning the wiper bladesGWarning!
Switch off the windshield wipers and remove
the SmartKey from the ignition lock before
cleaning the windshield or the wiper blades.
On vehicles with KEYLESS-GO, press the
Start/Stop button repeatedly until all
indicator lamps in the instrument cluster have
gone out. The windshield wipers could
otherwise move and injure you.
! Do not pull the wiper blade. Otherwise,
the wiper blade could be damaged.
! Do not clean wiper blades too often and
do not rub them too hard. Otherwise, the
graphite coating could be damaged. This
could cause wiper noise.
XFold the wiper arms away from the
windshield.XCarefully clean the wiper blades with a
damp cloth.XFold the windshield wipers back again
before switching on the ignition.
! Hold the wiper arm securely when folding
back. The windshield could be damaged if
the wiper arm smacks against it suddenly.
Cleaning the headlamps
XClean the plastic lamp lenses on the
headlamps using a wet sponge and a mild
cleaning agent, e.g. Mercedes-Benz car
shampoo or cleaning cloths.
! Only use cleaning agents or cleaning
cloths which are suitable for plastic
headlamp lenses. Unsuitable cleaning
agents or cleaning cloths could scratch or
damage the plastic headlamp lenses.
302CareMaintenance and care
BA 164.8 USA, CA Edition B 2011; 1; 2, en-USd2sboikeVersion: 3.0.3.52010-04-21T15:08:44+02:00 - Seite 302
Page 314 of 376
XVehicles without KEYLESS-GO: remove
the key from the ignition lock.
XVehicles with KEYLESS-GO: open the
driver's door.
The on-board electronics have status 0,
which is the same as the key having been
removed.
XVehicles with KEYLESS-GO: remove the
Start/Stop button from the ignition lock
(Y page 147).
XAll occupants must get out of the vehicle.
Make sure that they are not endangered as
they get out of the vehicle.
XMake sure that no one is near the danger
area whilst a wheel is being changed.
Anyone who is not directly assisting in the
wheel change should, for example, stand
behind the barrier.
XGet out of the vehicle. Pay attention to
traffic conditions when doing so.
XClose the driver's door.
iOnly operate the electric air pump using
the socket in the footwell of the 2nd row of
seats (Y page 281), even if the ignition is
turned off.
An emergency cut-off ensures that the on-
board voltage does not drop too low. If the
on-board voltage is too low, power to the
sockets is automatically cut-off. This
ensures that there is sufficient power to
start the engine.
TIREFIT kit
Using the TIREFIT kit
You can use the TIREFIT kit to seal small
punctures, particularly those in the tire tread.
You can use TIREFIT at outside temperatures
down to -4 ‡ (-20 †).
GWarning
TIREFIT is a limited repair device. TIREFIT
cannot be used for cuts or punctures larger
than approximately 0.16 in (4 mm) and tire
damage caused by driving with extremely low
tire inflation pressure, or on a flat tire, or a
damaged wheel.
Do not drive the vehicle under such
circumstances.
Contact the nearest authorized Mercedes-
Benz Center for assistance or call roadside
assistance.
XDo not remove any foreign objects which
have penetrated the tire, e.g. screws or
nails.
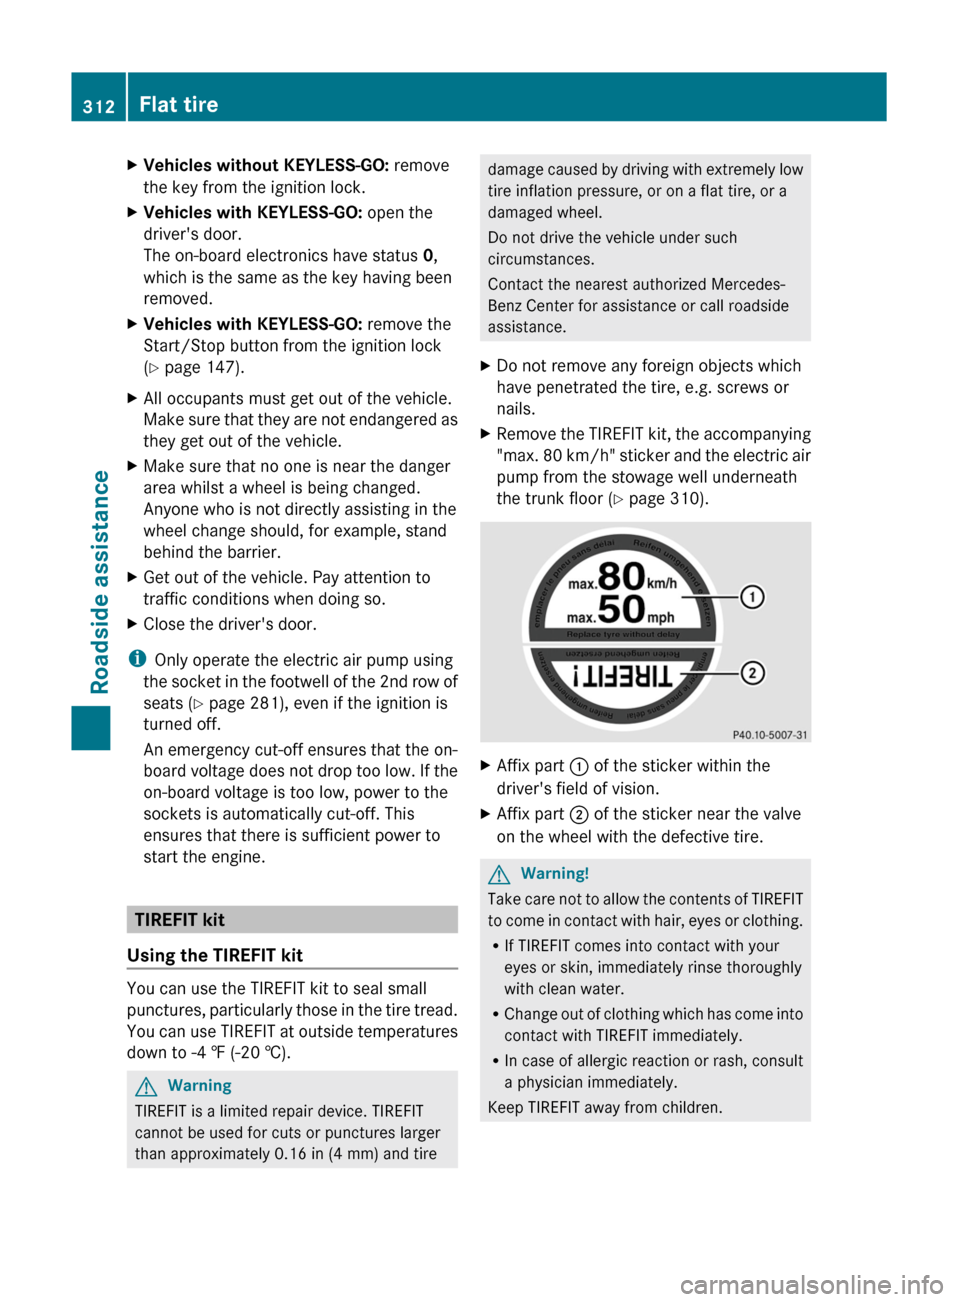
XRemove the TIREFIT kit, the accompanying
"max. 80 km/h" sticker and the electric air
pump from the stowage well underneath
the trunk floor (Y page 310).
XAffix part : of the sticker within the
driver's field of vision.
XAffix part ; of the sticker near the valve
on the wheel with the defective tire.
GWarning!
Take care not to allow the contents of TIREFIT
to come in contact with hair, eyes or clothing.
RIf TIREFIT comes into contact with your
eyes or skin, immediately rinse thoroughly
with clean water.
RChange out of clothing which has come into
contact with TIREFIT immediately.
RIn case of allergic reaction or rash, consult
a physician immediately.
Keep TIREFIT away from children.
312Flat tireRoadside assistance
BA 164.8 USA, CA Edition B 2011; 1; 2, en-USd2sboikeVersion: 3.0.3.52010-04-21T15:08:44+02:00 - Seite 312
Page 339 of 376
Rcheck the tire for foreign bodies.
R check whether the wheel is losing air or the
valve is leaking.
R make sure that only a valve cap approved
by Mercedes-Benz is installed on the tire
valve.
tire pressure that is too low have a negative
effect on vehicle safety, which could lead you
to cause an accident.
Only correct tire pressures when the tires are
cold. The tires are cold when the vehicle has
been parked for at least three hours or driven
for less than 1 mile (1.6 km). The tire
temperature changes depending on the
outside temperature, the vehicle speed and
the tire load. If the tire temperature changes
by 18 ‡ (10 †), the tire pressure changes by
approximately 10 kPa (0.1 bar/1.5 psi). Take
this into account when checking the pressure
of warm tires and only correct the tire
pressure if it is too low for the current
operating conditions. If you check the tire
pressure when the tires are warm, the
resulting value will be higher than if the tires
were cold. This is normal. Do not reduce the
tire pressure to the value specified for cold
tires. The tire pressure would otherwise be
too low.
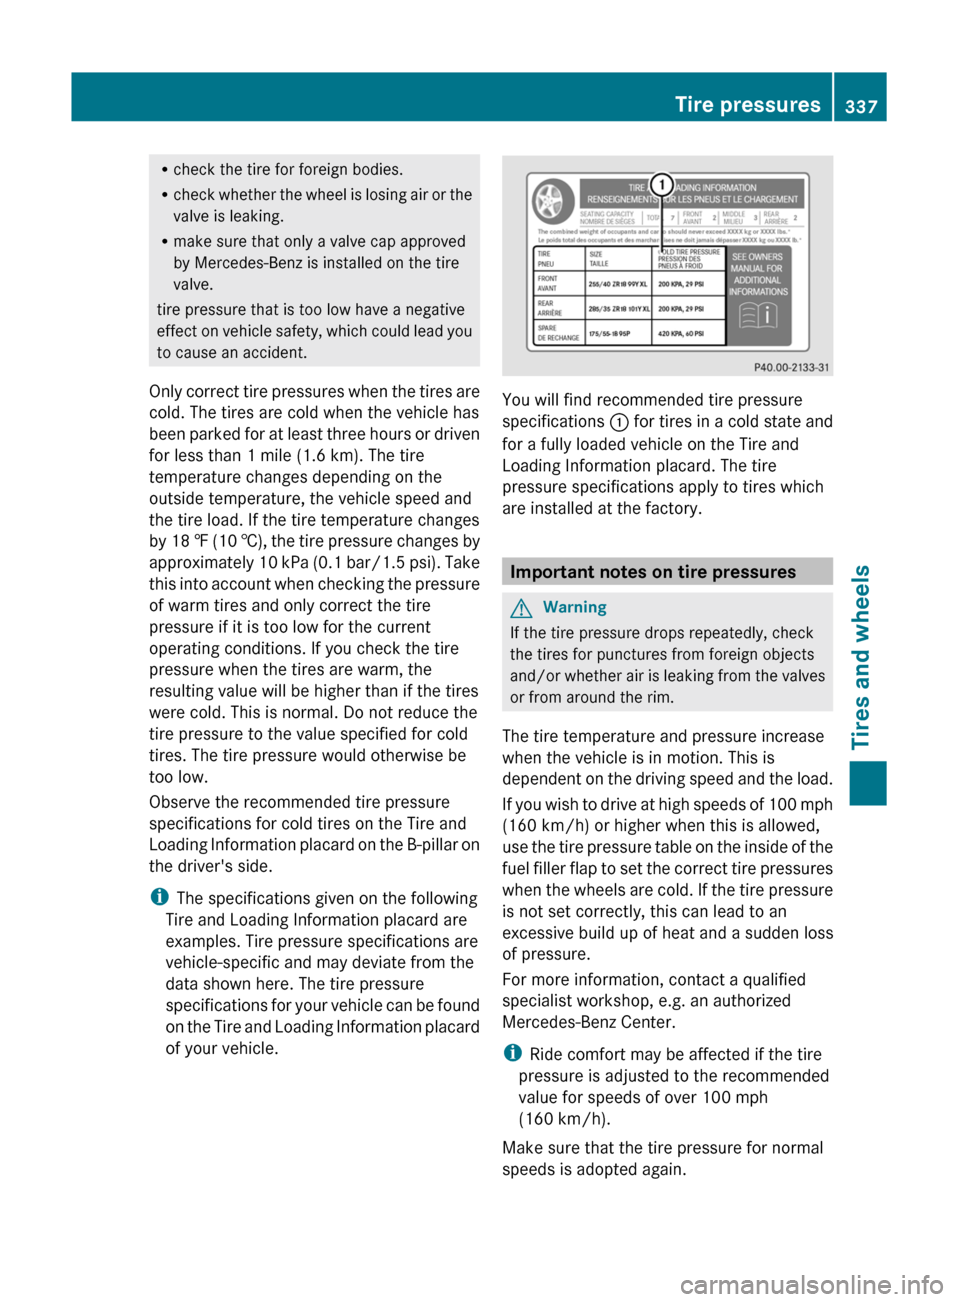
Observe the recommended tire pressure
specifications for cold tires on the Tire and
Loading Information placard on the B-pillar on
the driver's side.
i The specifications given on the following
Tire and Loading Information placard are
examples. Tire pressure specifications are
vehicle-specific and may deviate from the
data shown here. The tire pressure
specifications for your vehicle can be found
on the Tire and Loading Information placard
of your vehicle.
You will find recommended tire pressure
specifications : for tires in a cold state and
for a fully loaded vehicle on the Tire and
Loading Information placard. The tire
pressure specifications apply to tires which
are installed at the factory.
Important notes on tire pressures
GWarning
If the tire pressure drops repeatedly, check
the tires for punctures from foreign objects
and/or whether air is leaking from the valves
or from around the rim.
The tire temperature and pressure increase
when the vehicle is in motion. This is
dependent on the driving speed and the load.
If you wish to drive at high speeds of 100 mph
(160 km/h) or higher when this is allowed,
use the tire pressure table on the inside of the
fuel filler flap to set the correct tire pressures
when the wheels are cold. If the tire pressure
is not set correctly, this can lead to an
excessive build up of heat and a sudden loss
of pressure.
For more information, contact a qualified
specialist workshop, e.g. an authorized
Mercedes-Benz Center.
i Ride comfort may be affected if the tire
pressure is adjusted to the recommended
value for speeds of over 100 mph
(160 km/h).
Make sure that the tire pressure for normal
speeds is adopted again.
Tire pressures337Tires and wheelsBA 164.8 USA, CA Edition B 2011; 1; 2, en-USd2sboikeVersion: 3.0.3.52010-04-21T15:08:44+02:00 - Seite 337Z
Page 344 of 376
responsibility to maintain correct tire
pressure, even if underinflation has not
reached the level at which the low tire
pressure indicator lamp of the TPMS lights up.
Your vehicle has also been equipped with a
TPMS malfunction indicator to indicate when
the system is not operating properly. The
TPMS malfunction indicator is combined with
the low tire pressure indicator lamp. When the
system detects a malfunction, the indicator
lamp will flash for approximately 1 minute and
then remain illuminated. This sequence will
continue upon subsequent vehicle start-ups
as long as the malfunction exists. When the
malfunction indicator is lit, the system may
not be able to detect or signal low tire
pressure as intended.
TPMS malfunctions may occur for a variety of
reasons, including the installation of
incompatible replacement or alternate tires
or wheels on the vehicle that prevent the
TPMS from functioning properly. Always
check the TPMS malfunction indicator after
replacing one or more tires or wheels on your
vehicle to ensure that the replacement or
alternate tires and wheels allow the TPMS to
continue to function properly.
i If the tire pressure monitoring system
malfunctions, it may take up to 10 minutes
before the malfunction is displayed to you
by the tire pressure warning lamp flashing
for 60 seconds and then remaining lit.
When the error has been rectified, the tire
pressure warning lamp goes out after a few
minutes of driving.
Information on tire pressures is displayed in
the multifunction display. After a few minutes
of driving, the current tire pressure of each
tire is shown in the multifunction display.
i The tire pressure values in the on-board
computer may deviate from the inflation
pressure as measured using a tire pressure
checker at the filling station. The tire
pressures shown in the on-board computer
refer to pressures at sea level. At highaltitudes, a tire pressure checker will
display a higher tire pressure than the on-
board computer. In this case do not reduce
the tire pressure.
i If radio transmitting equipment (e.g. radio
headphones, a two-way radio) is operated
in or near the vehicle, this can lead to the
function of the tire pressure monitor being
impaired.
i This device complies with Part 15 of the
FCC Rules. Operation is subject to the
following two conditions:
1. This device may not cause harmful
interference, and
2. This device must withstand any
interference received, including
interference that may cause undesired
operation.
Any unauthorized modification to this
device could void the user's authority to
operate the equipment.
Checking the tire pressure
electronicallyXMake sure that the key is in position
2 (Y page 147) in the ignition lock.XPress and hold the V or U button on
the multifunction steering wheel until the
standard display appears in the
multifunction display ( Y page 218).XPress and hold the & or * button
until the current tire pressure of each tire
is shown in the multifunction display.
If the vehicle has been parked for longer than
20 minutes and subsequently you have not
driven faster than 15 mph (25 km/h), the
Tire pressure displayed after
driving for a few minutes message is
shown.
After a teach-in process, the tire pressure
monitor automatically detects new wheels or
new sensors. As long as it is not possible to
allocate tire pressure values to individual
wheel positions, the Tire Pressure
342Tire pressuresTires and wheels
BA 164.8 USA, CA Edition B 2011; 1; 2, en-USd2sboikeVersion: 3.0.3.52010-04-21T15:08:44+02:00 - Seite 342
Page 357 of 376

Wheel rim
The part of the wheel on which the tire is
mounted.
GAWR (Gross Axle Weight Rating)
The GAWR is the maximum gross axle weight
rating. The actual load on an axle must never
exceed the gross axle weight rating. The
gross axle weight rating can be found on the
vehicle identification plate on the B-pillar on
the driver's side.
Speed index
The speed index is part of the tire
identification. Specifies the speed range for
which the tire is approved.
GTW (Gross Trailer Weight)
The GTW is the weight of a trailer including
the weight of the load, luggage, accessories
etc. on the trailer.
GVW (Gross Vehicle Weight)
The gross vehicle weight includes the weight
of the vehicle including fuel, tools, the spare
wheel, accessories installed, occupants,
luggage and the drawbar noseweight if
applicable. The gross vehicle weight must not
exceed the gross vehicle weight rating GVWR
as specified on the vehicle identification plate
on the B-pillar on the driver's side.
GVWR (Gross Vehicle Weight Rating)
The GVWR is the maximum permissible gross
weight of a fully loaded vehicle (the weight of
the vehicle including all accessories,
occupants, fuel, luggage and the drawbar
noseweight if applicable). The gross vehicle
weight rating is specified on the vehicle
identification plate on the B-pillar on the
driver's side.
Maximum weight of the laden vehicle
The maximum weight is the sum of the
unladen weight of the vehicle, the weight of
the accessories, the maximum load and the
weight of the optional equipment installed at
the factory.
Kilopascal (kPa)
Metric unit for tire pressure. 6.9 kPa is the
equivalent of 1 psi. Another unit for tire
pressure is bar. 100 kilopascal (kPa) is the
equivalent of 1 bar.
Load index
In addition to the load bearing index, the load
index may also be imprinted on the sidewall
of the tire. This specifies the load bearing
capacity more precisely.
Unladen weight
The weight of a vehicle with standard
equipment including the maximum capacity
of fuel, oil and coolant. It also includes the air-
conditioning system and optional equipment
if these are installed on the vehicle, but does
not include passengers or luggage.
Maximum tire load
The maximum tire load in kilograms or
pounds is the maximum weight for which a
tire is approved.
Maximum permissible tire pressure
Maximum permissible tire pressure for one
tire.
Definitions for tires and loading355Tires and wheelsBA 164.8 USA, CA Edition B 2011; 1; 2, en-USd2sboikeVersion: 3.0.3.52010-04-21T15:08:44+02:00 - Seite 355Z