2011 MERCEDES-BENZ GL350 BlueTEC flat tire
[x] Cancel search: flat tirePage 250 of 376
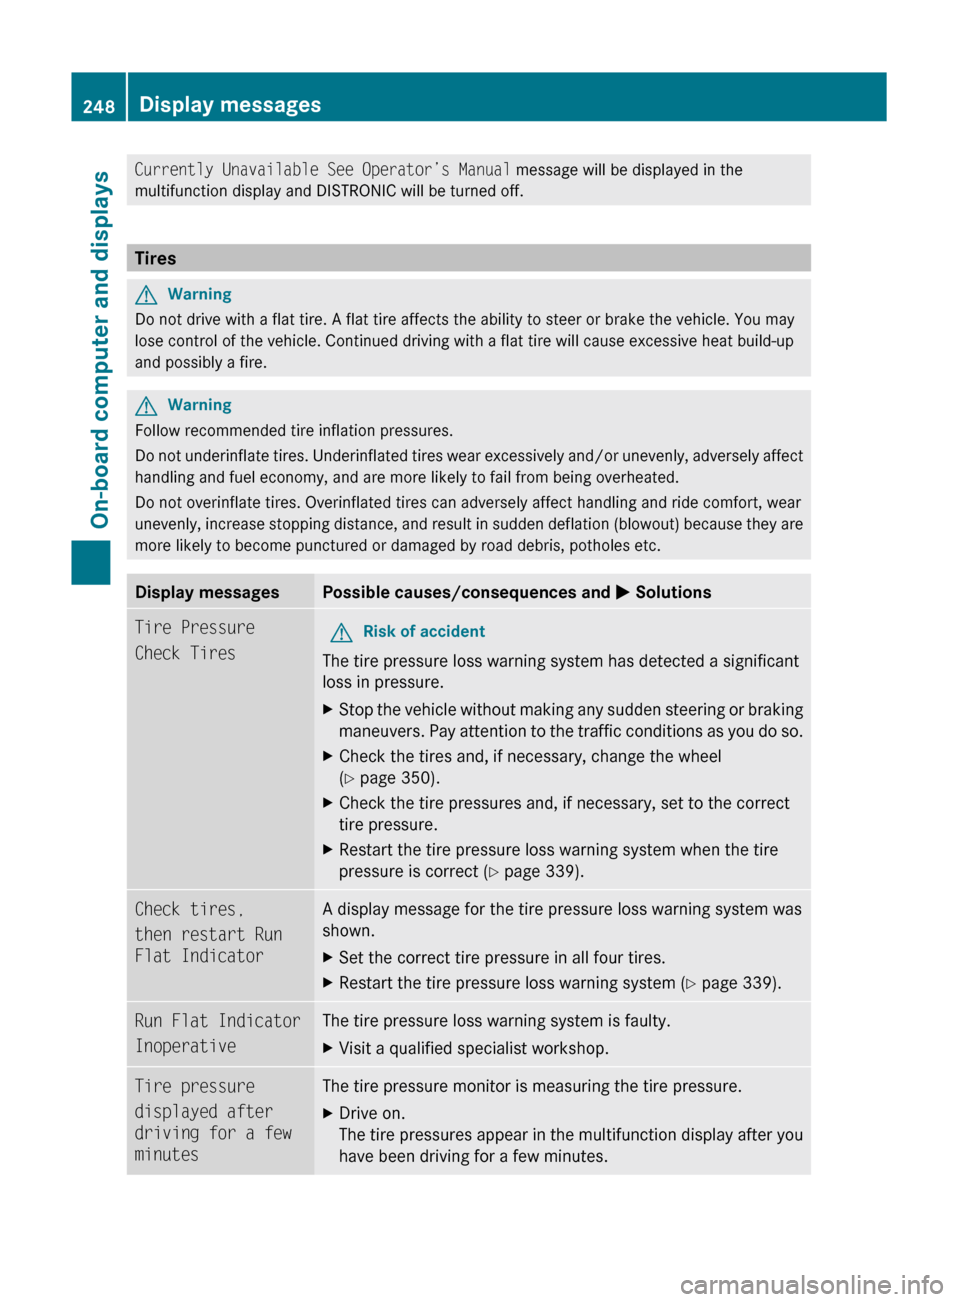
Currently Unavailable See Operator’s Manual message will be displayed in the
multifunction display and DISTRONIC will be turned off.
Tires
GWarning
Do not drive with a flat tire. A flat tire affects the ability to steer or brake the vehicle. You may
lose control of the vehicle. Continued driving with a flat tire will cause excessive heat build-up
and possibly a fire.
GWarning
Follow recommended tire inflation pressures.
Do not underinflate tires. Underinflated tires wear excessively and/or unevenly, adversely affect
handling and fuel economy, and are more likely to fail from being overheated.
Do not overinflate tires. Overinflated tires can adversely affect handling and ride comfort, wear
unevenly, increase stopping distance, and result in sudden deflation (blowout) because they are
more likely to become punctured or damaged by road debris, potholes etc.
Display messagesPossible causes/consequences and M SolutionsTire Pressure
Check TiresGRisk of accident
The tire pressure loss warning system has detected a significant
loss in pressure.
XStop the vehicle without making any sudden steering or braking
maneuvers. Pay attention to the traffic conditions as you do so.XCheck the tires and, if necessary, change the wheel
( Y page 350).XCheck the tire pressures and, if necessary, set to the correct
tire pressure.XRestart the tire pressure loss warning system when the tire
pressure is correct ( Y page 339).Check tires,
then restart Run
Flat IndicatorA display message for the tire pressure loss warning system was
shown.XSet the correct tire pressure in all four tires.XRestart the tire pressure loss warning system ( Y page 339).Run Flat Indicator
InoperativeThe tire pressure loss warning system is faulty.XVisit a qualified specialist workshop.Tire pressure
displayed after
driving for a few
minutesThe tire pressure monitor is measuring the tire pressure.XDrive on.
The tire pressures appear in the multifunction display after you
have been driving for a few minutes.248Display messagesOn-board computer and displays
BA 164.8 USA, CA Edition B 2011; 1; 2, en-USd2sboikeVersion: 3.0.3.52010-04-21T15:08:44+02:00 - Seite 248
Page 262 of 376

Driving systemsProblemPossible causes/consequences and M Solutions·
The red DTR distance
warning lamp lights up
while the vehicle is in
motion. A warning tone
also sounds.GRisk of accident
A warning is issued if:
R you are approaching a vehicle in front at too great a speed
R DISTRONIC has detected a stationary obstacle in your line of
travel
XBe prepared to brake immediately.XPay careful attention to the traffic situation. You may have to
brake or take evasive action.
Tires
ProblemPossible causes/consequences and M Solutionsh
USA only:
The yellow combination
low tire pressure
telltale/TPMS
malfunction telltale for
the TPMS is on.GRisk of accident
The TPMS has detected a loss of pressure in at least one of the
tires.
XStop the vehicle without making any sudden steering or braking
maneuvers. Pay attention to the traffic conditions as you do so.XObserve the additional display messages in the multifunction
display.XCheck the tire pressure. If necessary, correct the tire pressure
( Y page 341).XIf necessary, change a wheel ( Y page 350).h
USA only:
The yellow combination
low tire pressure
telltale/TPMS
malfunction telltale for
the TPMS flashes for 60
seconds and then
remains illuminated.The TPMS is faulty.XObserve the additional display messages in the multifunction
display.XVisit a qualified specialist workshop.GWarning
Each tire, including the spare (if provided), should be checked every other week when cold and
inflated to the inflation pressure recommended by the vehicle manufacturer on the Tire and
Loading Information placard on the driver's door B-pillar or, if available, the tire inflation pressure
label on the inside of the fuel filler flap. If your vehicle has tires of a different size than the size
260Warning and indicator lamps in the instrument clusterOn-board computer and displays
BA 164.8 USA, CA Edition B 2011; 1; 2, en-USd2sboikeVersion: 3.0.3.52010-04-21T15:08:44+02:00 - Seite 260
Page 263 of 376
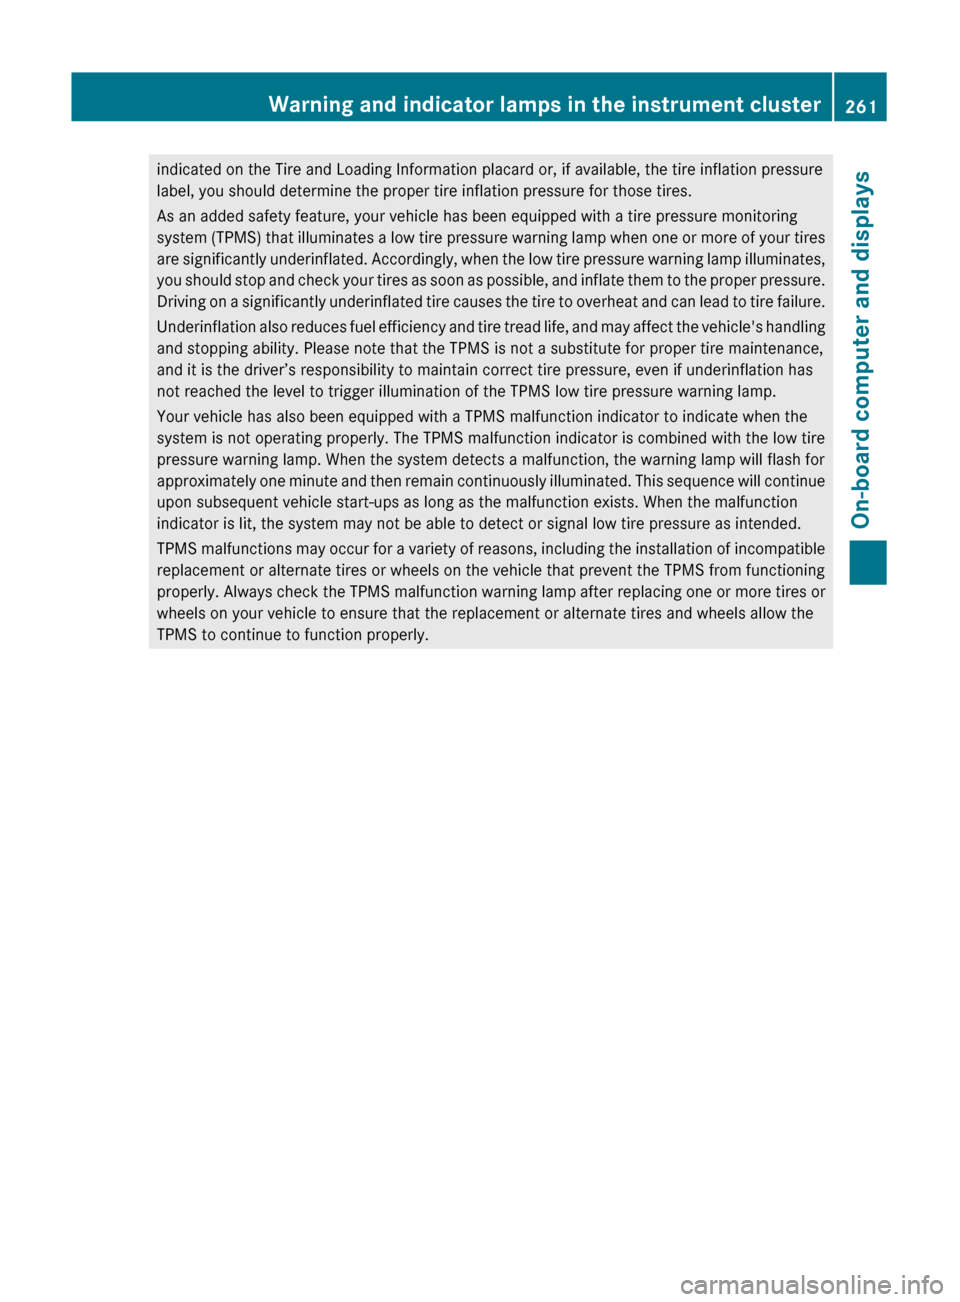
indicated on the Tire and Loading Information placard or, if available, the tire inflation pressure
label, you should determine the proper tire inflation pressure for those tires.
As an added safety feature, your vehicle has been equipped with a tire pressure monitoring
system (TPMS) that illuminates a low tire pressure warning lamp when one or more of your tires
are significantly underinflated. Accordingly, when the low tire pressure warning lamp illuminates,
you should stop and check your tires as soon as possible, and inflate them to the proper pressure.
Driving on a significantly underinflated tire causes the tire to overheat and can lead to tire failure.
Underinflation also reduces fuel efficiency and tire tread life, and may affect the vehicle's handling
and stopping ability. Please note that the TPMS is not a substitute for proper tire maintenance,
and it is the driver’s responsibility to maintain correct tire pressure, even if underinflation has
not reached the level to trigger illumination of the TPMS low tire pressure warning lamp.
Your vehicle has also been equipped with a TPMS malfunction indicator to indicate when the
system is not operating properly. The TPMS malfunction indicator is combined with the low tire
pressure warning lamp. When the system detects a malfunction, the warning lamp will flash for
approximately one minute and then remain continuously illuminated. This sequence will continue
upon subsequent vehicle start-ups as long as the malfunction exists. When the malfunction
indicator is lit, the system may not be able to detect or signal low tire pressure as intended.
TPMS malfunctions may occur for a variety of reasons, including the installation of incompatible
replacement or alternate tires or wheels on the vehicle that prevent the TPMS from functioning
properly. Always check the TPMS malfunction warning lamp after replacing one or more tires or
wheels on your vehicle to ensure that the replacement or alternate tires and wheels allow the
TPMS to continue to function properly.Warning and indicator lamps in the instrument cluster261On-board computer and displaysBA 164.8 USA, CA Edition B 2011; 1; 2, en-USd2sboikeVersion: 3.0.3.52010-04-21T15:08:44+02:00 - Seite 261Z
Page 288 of 376
The Mercedes-Benz Roadside Assistance
Representative either sends a qualified
Mercedes-Benz technician or organizes for
your vehicle to be transported to the nearest
authorized Mercedes-Benz Center. You may
be charged for services such as repair work
and/or towing. Further details are available
in your mbrace manual.
i If the indicator lamp in MB info call
button : flashes continuously and it was
not possible to establish a voice
connection to the Response Center, then
the mbrace system has failed to initiate a
Roadside Assistance call (e.g. the
corresponding cellular phone network is
not available). The Call Failed message
appears in the multifunction display.XTo end a call: press the ~ button on the
multifunction steering wheel.
or
XPress the corresponding button for ending
a phone call on COMAND.
i Sign and Drive services 38
: you are not
charged for services such as jump-starting,
providing a few gallons of fuel for a fuel tank
that has been run dry or changing a flat tire
with the vehicle's own spare tire.
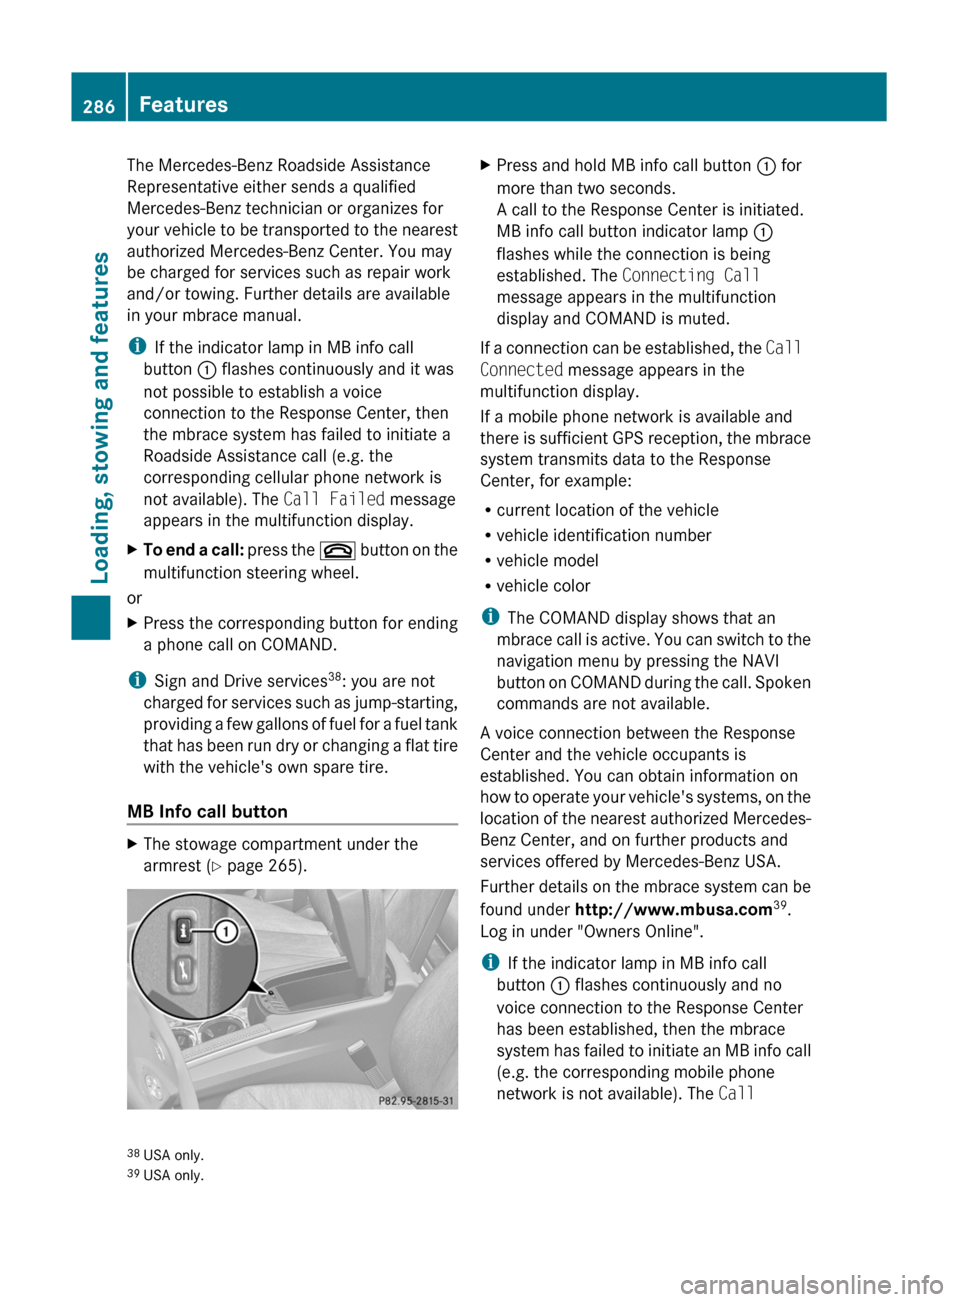
MB Info call button
XThe stowage compartment under the
armrest ( Y page 265).XPress and hold MB info call button : for
more than two seconds.
A call to the Response Center is initiated.
MB info call button indicator lamp :
flashes while the connection is being
established. The Connecting Call
message appears in the multifunction
display and COMAND is muted.
If a connection can be established, the Call
Connected message appears in the
multifunction display.
If a mobile phone network is available and
there is sufficient GPS reception, the mbrace
system transmits data to the Response
Center, for example:
R current location of the vehicle
R vehicle identification number
R vehicle model
R vehicle color
i The COMAND display shows that an
mbrace call is active. You can switch to the
navigation menu by pressing the NAVI
button on COMAND during the call. Spoken
commands are not available.
A voice connection between the Response
Center and the vehicle occupants is
established. You can obtain information on
how to operate your vehicle's systems, on the
location of the nearest authorized Mercedes-
Benz Center, and on further products and
services offered by Mercedes-Benz USA.
Further details on the mbrace system can be
found under http://www.mbusa.com 39
.
Log in under "Owners Online".
i If the indicator lamp in MB info call
button : flashes continuously and no
voice connection to the Response Center
has been established, then the mbrace
system has failed to initiate an MB info call
(e.g. the corresponding mobile phone
network is not available). The Call
38
USA only.
39 USA only.286FeaturesLoading, stowing and features
BA 164.8 USA, CA Edition B 2011; 1; 2, en-USd2sboikeVersion: 3.0.3.52010-04-21T15:08:44+02:00 - Seite 286
Page 309 of 376
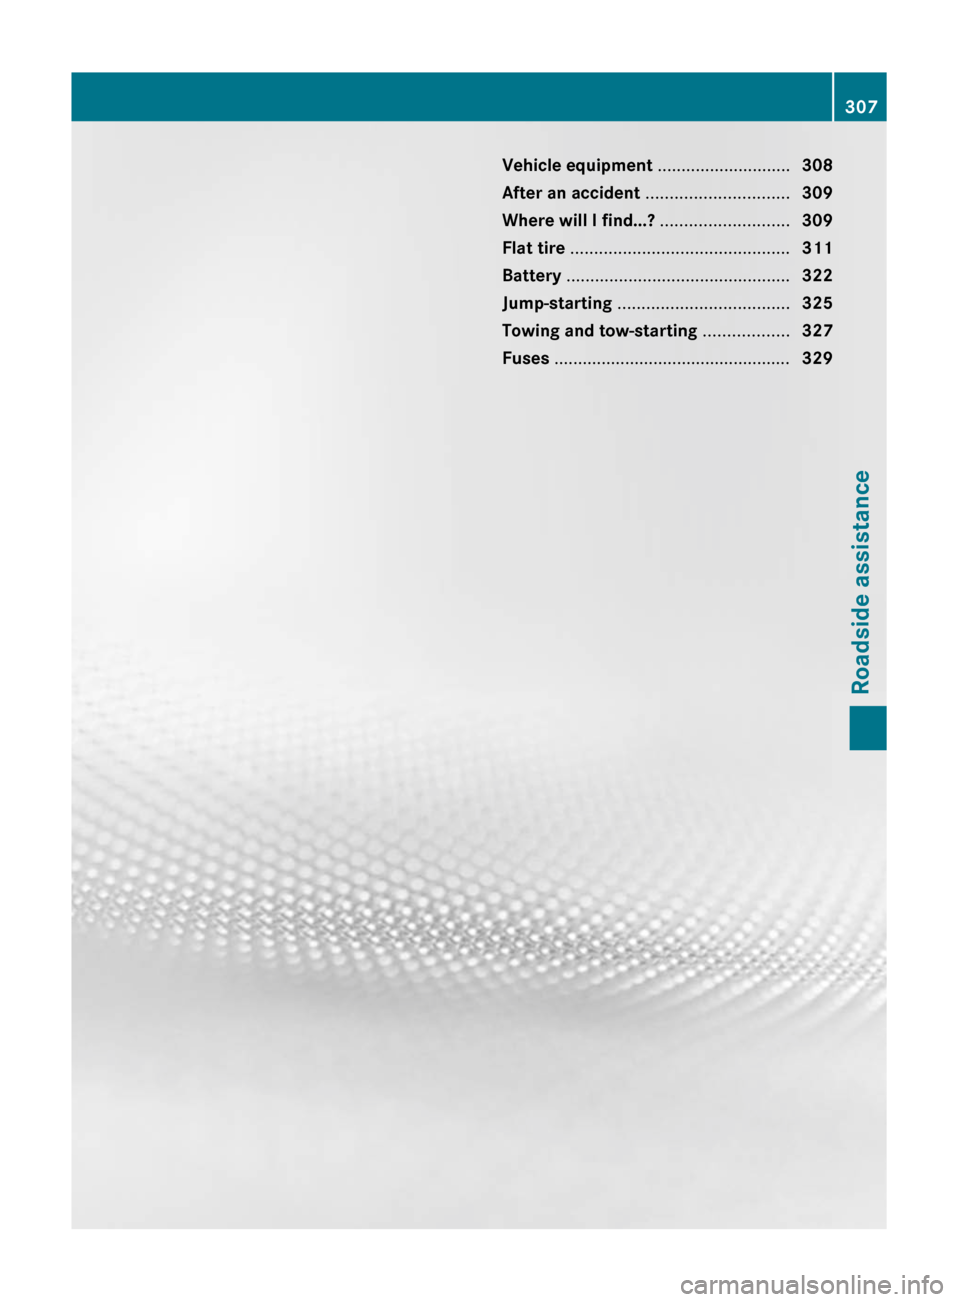
Vehicle equipment ............................308
After an accident .............................. 309
Where will I find...? ...........................309
Flat tire .............................................. 311
Battery ............................................... 322
Jump-starting .................................... 325
Towing and tow-starting ..................327
Fuses .................................................. 329307Roadside assistanceBA 164.8 USA, CA Edition B 2011; 1; 2, en-USd2sboikeVersion: 3.0.3.52010-04-21T15:08:44+02:00 - Seite 307
Page 313 of 376

:Alignment bolt;Towing eye=Lug wrench?Ratchet ring spannerAVelcro fastenerBJackCWheel boltsDFolding wheel chockEFuse allocation chartFStowage well
"Minispare" emergency spare wheel
The "Minispare" emergency spare wheel can
be found in the stowage well under the cargo
compartment floor.
XLift the trunk floor up ( Y page 310).XTake out the jack.XTurn emergency spare wheel retainer :
counter-clockwise and remove it.XRemove insert =.XRemove "Minispare" emergency spare
wheel ;.
For further information on changing a wheel
and mounting the spare wheel, see
( Y page 316).
Flat tire
Preparing the vehicle
Your vehicle could be equipped with a
"Minispare" emergency spare wheel or the
MOExtended run-flat system( Y page 321).
i Vehicle preparation is not necessary on
vehicles with the MOExtended run-flat
system.
i Vehicles featuring the MOExtended run-
flat system are not equipped with the
TIREFIT kit at the factory. It is therefore
recommended that you additionally equip
your vehicle with the TIREFIT kit if you
mount tires that do not feature run-flat
properties, e.g. winter tires. You can obtain
a TIREFIT kit from an authorized Mercedes-
Benz Center, for example.
XMake sure that highway level is
selected 41
(Y page 189).XStop the vehicle as far away as possible
from traffic on solid, non-slippery and level
ground.XSwitch on the hazard warning lamps.XFirmly depress the parking brake.XBring the front wheels into the straight-
ahead position.XMove the DIRECT SELECT lever to P.XSwitch off the engine.41
Vehicles with air suspension.Flat tire311Roadside assistanceBA 164.8 USA, CA Edition B 2011; 1; 2, en-USd2sboikeVersion: 3.0.3.52010-04-21T15:08:44+02:00 - Seite 311Z
Page 314 of 376
XVehicles without KEYLESS-GO: remove
the key from the ignition lock.
XVehicles with KEYLESS-GO: open the
driver's door.
The on-board electronics have status 0,
which is the same as the key having been
removed.
XVehicles with KEYLESS-GO: remove the
Start/Stop button from the ignition lock
(Y page 147).
XAll occupants must get out of the vehicle.
Make sure that they are not endangered as
they get out of the vehicle.
XMake sure that no one is near the danger
area whilst a wheel is being changed.
Anyone who is not directly assisting in the
wheel change should, for example, stand
behind the barrier.
XGet out of the vehicle. Pay attention to
traffic conditions when doing so.
XClose the driver's door.
iOnly operate the electric air pump using
the socket in the footwell of the 2nd row of
seats (Y page 281), even if the ignition is
turned off.
An emergency cut-off ensures that the on-
board voltage does not drop too low. If the
on-board voltage is too low, power to the
sockets is automatically cut-off. This
ensures that there is sufficient power to
start the engine.
TIREFIT kit
Using the TIREFIT kit
You can use the TIREFIT kit to seal small
punctures, particularly those in the tire tread.
You can use TIREFIT at outside temperatures
down to -4 ‡ (-20 †).
GWarning
TIREFIT is a limited repair device. TIREFIT
cannot be used for cuts or punctures larger
than approximately 0.16 in (4 mm) and tire
damage caused by driving with extremely low
tire inflation pressure, or on a flat tire, or a
damaged wheel.
Do not drive the vehicle under such
circumstances.
Contact the nearest authorized Mercedes-
Benz Center for assistance or call roadside
assistance.
XDo not remove any foreign objects which
have penetrated the tire, e.g. screws or
nails.
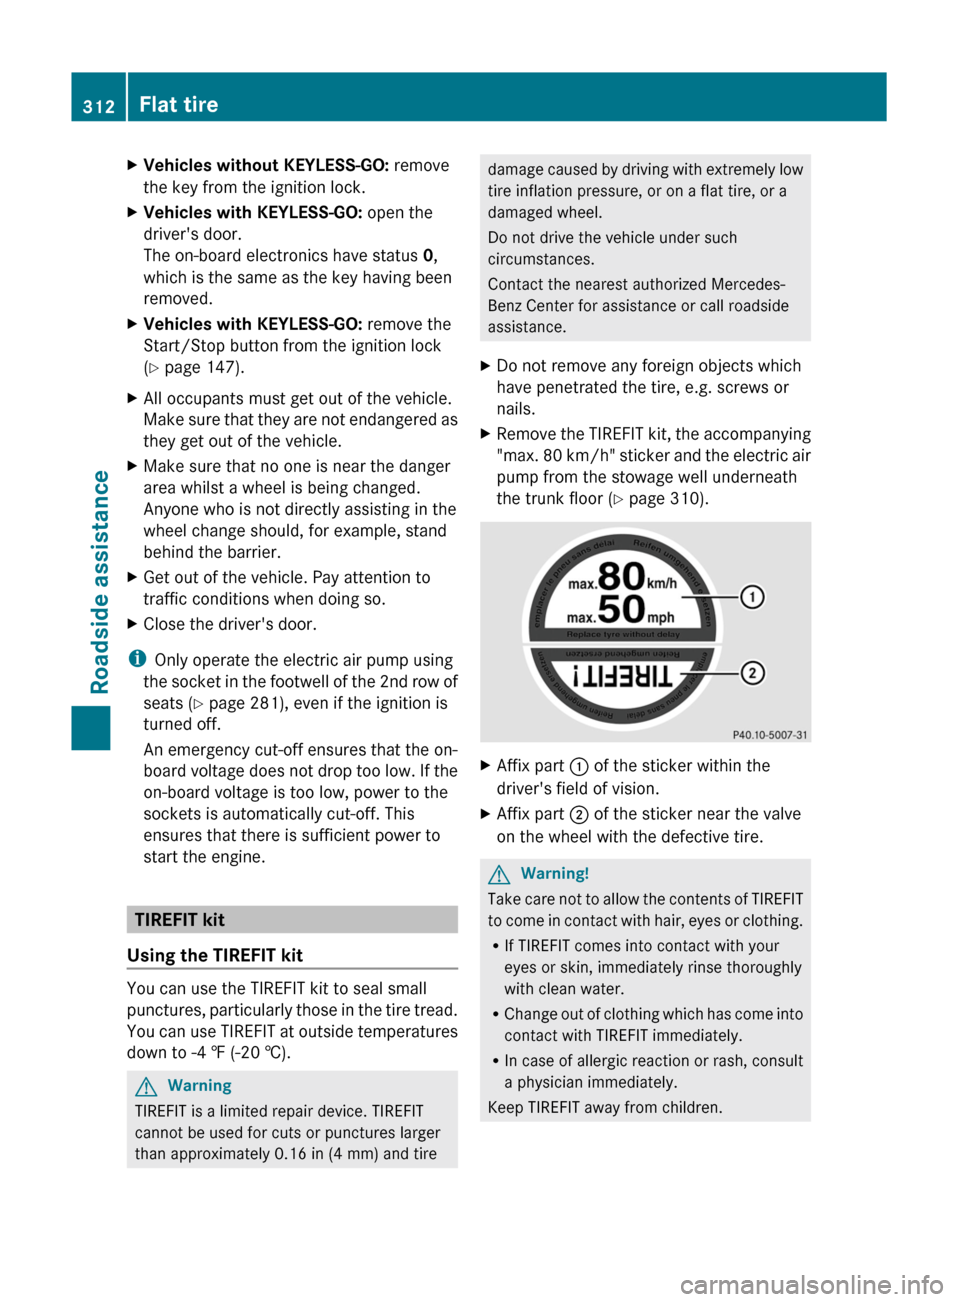
XRemove the TIREFIT kit, the accompanying
"max. 80 km/h" sticker and the electric air
pump from the stowage well underneath
the trunk floor (Y page 310).
XAffix part : of the sticker within the
driver's field of vision.
XAffix part ; of the sticker near the valve
on the wheel with the defective tire.
GWarning!
Take care not to allow the contents of TIREFIT
to come in contact with hair, eyes or clothing.
RIf TIREFIT comes into contact with your
eyes or skin, immediately rinse thoroughly
with clean water.
RChange out of clothing which has come into
contact with TIREFIT immediately.
RIn case of allergic reaction or rash, consult
a physician immediately.
Keep TIREFIT away from children.
312Flat tireRoadside assistance
BA 164.8 USA, CA Edition B 2011; 1; 2, en-USd2sboikeVersion: 3.0.3.52010-04-21T15:08:44+02:00 - Seite 312
Page 315 of 376
RIf TIREFIT is swallowed, immediately rinse
your mouth out thoroughly with water and
drink plenty of water.
RDo not induce vomiting. Consult a doctor
immediately.
RDo not inhale TIREFIT fumes.
iIf TIREFIT leaks out, allow it to dry. It can
then be removed like a layer of film.
If you get TIREFIT on your clothing, have it
cleaned as soon as possible with
perchloroethylene.
GWarning!
Comply with the manufacturer's safety
instructions on the sticker on the electric air
pump.
Your vehicle is provided with one of two
different electric air pumps:
RVersion 1: the hose with the pressure
gauge and the cable are behind a flap.
RVersion 2: the pressure gauge is in the
electric air pump.
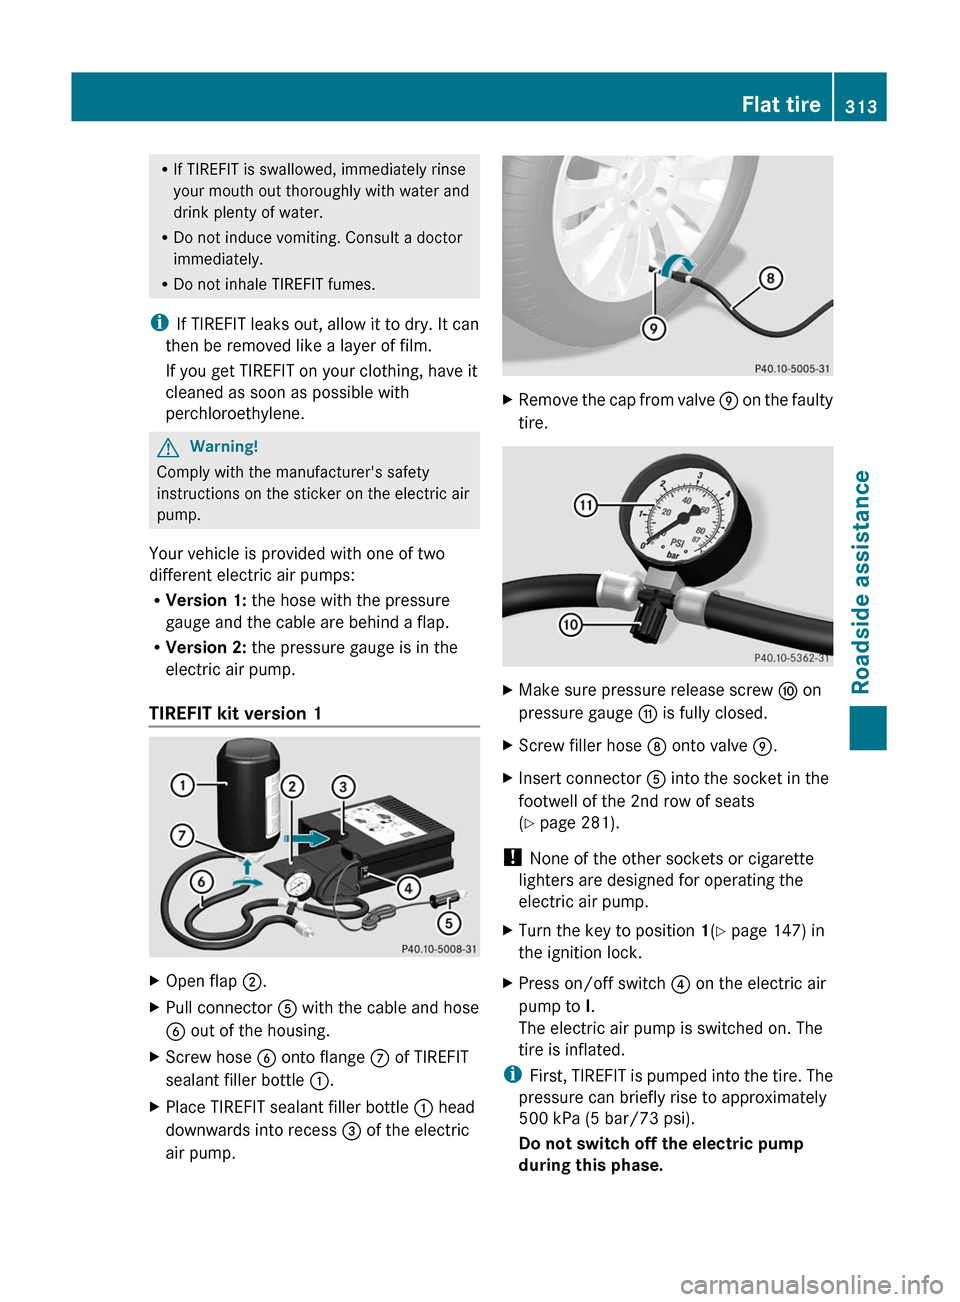
TIREFIT kit version 1
XOpen flap ;.XPull connector A with the cable and hose
B out of the housing.
XScrew hose B onto flange C of TIREFIT
sealant filler bottle :.
XPlace TIREFIT sealant filler bottle : head
downwards into recess = of the electric
air pump.
XRemove the cap from valve E on the faulty
tire.
XMake sure pressure release screw F on
pressure gauge G is fully closed.
XScrew filler hose D onto valve E.XInsert connector A into the socket in the
footwell of the 2nd row of seats
(Y page 281).
! None of the other sockets or cigarette
lighters are designed for operating the
electric air pump.
XTurn the key to position 1(Y page 147) in
the ignition lock.
XPress on/off switch ? on the electric air
pump to I.
The electric air pump is switched on. The
tire is inflated.
iFirst, TIREFIT is pumped into the tire. The
pressure can briefly rise to approximately
500 kPa (5 bar/73 psi).
Do not switch off the electric pump
during this phase.
Flat tire313Roadside assistanceBA 164.8 USA, CA Edition B 2011; 1; 2, en-USd2sboikeVersion: 3.0.3.52010-04-21T15:08:44+02:00 - Seite 313Z