2011 MERCEDES-BENZ GL engine
[x] Cancel search: enginePage 213 of 376
ROn long and steep gradients that are
difficult to drive down in shift range 1,
switch to the off-road drive program or
engage the LOW GEAR off-road gear.
R When driving downhill, shift to a lower gear
to utilize the engine's braking effect.
Avoid continuous brake application as this
may overheat the vehicle brakes and, if
installed, the trailer brakes.
R If the coolant temperature increases
dramatically while the air-conditioning
system is switched on, switch off the air-
conditioning system.
Coolant heat can additionally be dissipated
by opening the windows and by setting the
blower fan and the interior temperature to
maximum.
R When overtaking, pay particular attention
to the extended length of your vehicle/
trailer combination.
Due to the length of your vehicle/trailer
combination, you will have to travel an
additional distance beyond the vehicle you
are overtaking before returning to the
previous lane.
Decoupling a trailer
GWarning!
While you are coupling or decoupling a trailer,
make sure nobody locks or unlocks the
vehicle and/or opens or closes doors or the
tailgate.
The vehicle’s level could change and you
could endanger yourself and/or others as a
result.
Make sure that you do not operate the ADS
button or the vehicle level control system
when coupling/decoupling the trailer.
XMake sure that the automatic transmission
is set to position P.XApply the vehicle's parking brake.XStart the engine.XClose all doors and the tailgate.XApply the trailer's parking brake.GWarning!
As soon as you disconnect the electrical
connection between the trailer and the
vehicle, the vehicle will lower. To help avoid
personal injury, make sure no one is near the
wheel housing or underneath the vehicle
before the electrical connection is
disconnected.
When you decouple the trailer, the vehicle is
temporarily raised because the springs are
relieved of load. Be especially careful during
this process, as you could otherwise injure
yourself and/or others. Make sure that any
persons remaining in the vehicle do not press
the switches for vehicle level control or the
ADS.
XDetach the trailer cable and decouple the
trailer.XDetach the trailer cable and decouple the
trailer.XSwitch off the engine.
Permissible trailer load and drawbar
noseweight
Weight specifications
The Gross Trailer Weight (GTW) is the
combined weight of the trailer together with
the cargo and equipment loaded on the
trailer. Permissible gross weight: 7500 lb
(3402 kg).
The permissible Trailer drawbar Weight
Rating (TWR) is the maximum weight
permitted on the trailer drawbar: 600 lb
(272 kg) limit for Mercedes-Benz-approved
trailer couplings.
Loading a trailer
R When loading a trailer, please note that
neither the permissible gross trailer weight
nor the permissible Gross Vehicle Weight
Towing a trailer211Driving and parkingBA 164.8 USA, CA Edition B 2011; 1; 2, en-USd2sboikeVersion: 3.0.3.52010-04-21T15:08:44+02:00 - Seite 211Z
Page 216 of 376

Vehicle equipment
i This manual describes all the standard
and optional equipment of your vehicle
which was available at the time of
purchase. Country-specific differences are
possible. Bear in mind that your vehicle
may not feature all functions described
here. This also refers to safety-related
systems and functions.
Important safety notes
You will find an illustration of the instrument
cluster in the "At a glance" section
( Y page 28).
GWarning
A driver's attention to the road and traffic
conditions must always be his/her primary
focus when driving.
For your safety and the safety of others,
selecting features through the multifunction
steering wheel should only be done by the
driver when traffic and road conditions permit
it to be done safely.
Bear in mind that at a speed of just 30 mph
(approximately 50 km/h ), your vehicle is
covering a distance of 44 feet (approximately
14 m) every second.
GWarning!
No messages will be displayed if either the
instrument cluster or the multifunction
display is inoperative.
As a result, you will not be able to see
information about your driving conditions,
such as
R speed
R outside temperature
R warning/indicator lamps
R malfunction/warning messages
R failure of any systems
Driving characteristics may be impaired.
If you must continue to drive, do so with added
caution. Contact an authorized Mercedes-
Benz Center as soon as possible.GWarning
Malfunction and warning messages are only
indicated for certain systems and are
intentionally not very detailed. The
malfunction and warning messages are
simply a reminder with respect to the
operation of certain systems. They do not
replace the owner's and/or driver's
responsibility to maintain the vehicle's
operating safety. Have all required
maintenance and safety checks performed on
the vehicle. Bring the vehicle to an authorized
Mercedes-Benz Center to address the
malfunction and warning messages.
Displays and operation
Tachometer
The red band in the tachometer indicates the
engine's overrevving range.
! Do not drive in the overrevving range, as
this could damage the engine.
The fuel supply is interrupted to protect the
engine when the red band is reached.
Outside temperature display
The outside temperature display is in the
multifunction display.
GWarning!
The outside temperature indicator is not
designed to serve as an ice-warning device
and is therefore unsuitable for that purpose.
Indicated temperatures just above the
freezing point do not guarantee that the road
surface is free of ice. The road may still be icy,
especially in wooded areas or on bridges.
Changes in the outside temperature are
displayed after a short delay.
214Displays and operationOn-board computer and displays
BA 164.8 USA, CA Edition B 2011; 1; 2, en-USd2sboikeVersion: 3.0.3.52010-04-21T15:08:44+02:00 - Seite 214
Page 220 of 376
FunctionETrip computer menu (Y page 227)FTelephone menu (Y page 227)Standard display menu
Standard displayXPress V or U on the steering wheel
to select the standard display.
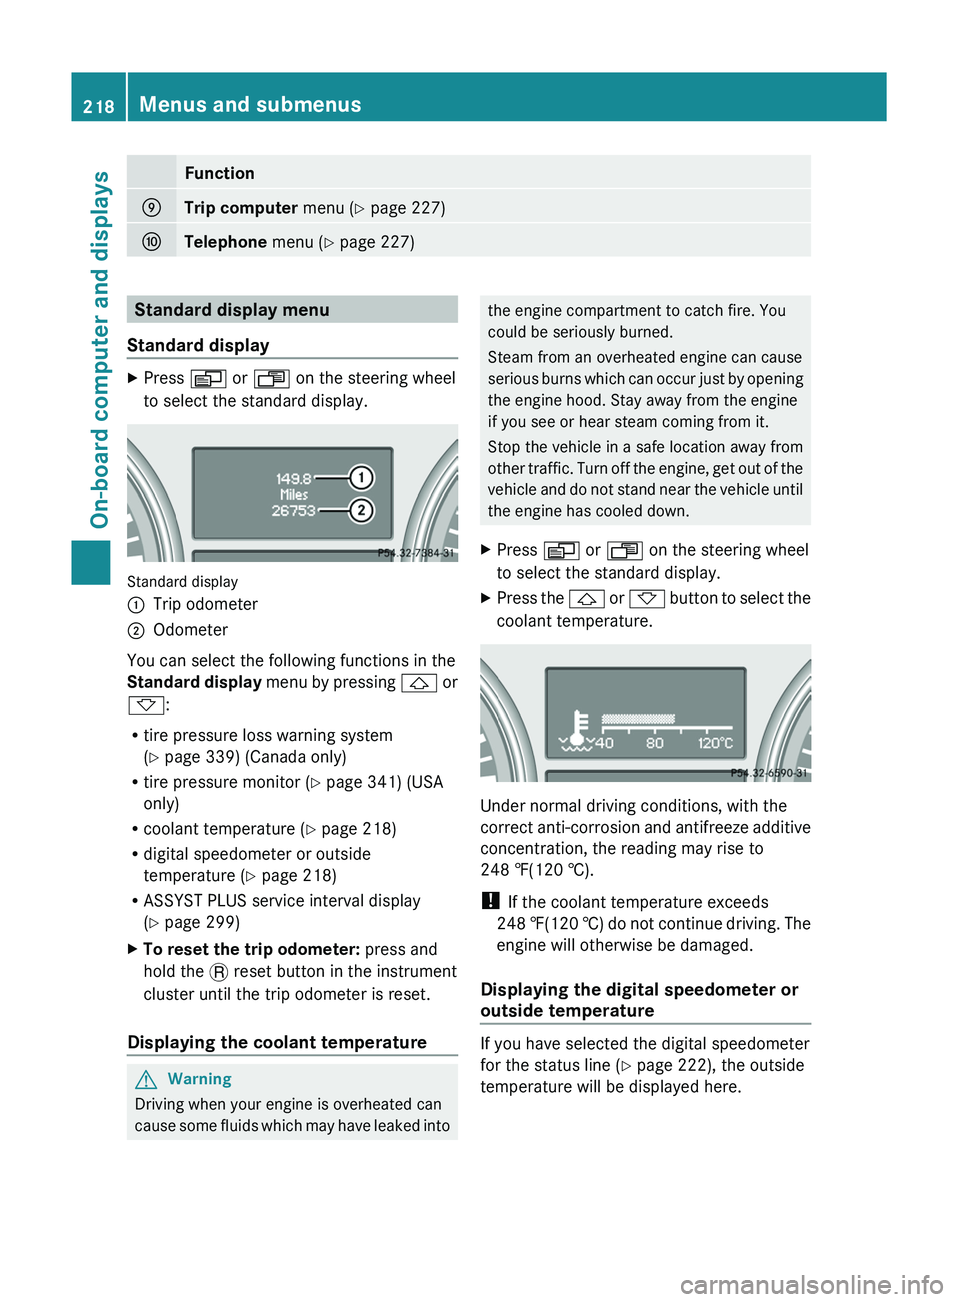
Standard display
:Trip odometer;Odometer
You can select the following functions in the
Standard display menu by pressing & or
* :
R tire pressure loss warning system
( Y page 339) (Canada only)
R tire pressure monitor ( Y page 341) (USA
only)
R coolant temperature ( Y page 218)
R digital speedometer or outside
temperature ( Y page 218)
R ASSYST PLUS service interval display
( Y page 299)
XTo reset the trip odometer: press and
hold the . reset button in the instrument
cluster until the trip odometer is reset.
Displaying the coolant temperature
GWarning
Driving when your engine is overheated can
cause some fluids which may have leaked into
the engine compartment to catch fire. You
could be seriously burned.
Steam from an overheated engine can cause
serious burns which can occur just by opening
the engine hood. Stay away from the engine
if you see or hear steam coming from it.
Stop the vehicle in a safe location away from
other traffic. Turn off the engine, get out of the
vehicle and do not stand near the vehicle until
the engine has cooled down.XPress V or U on the steering wheel
to select the standard display.XPress the & or * button to select the
coolant temperature.
Under normal driving conditions, with the
correct anti-corrosion and antifreeze additive
concentration, the reading may rise to
248 ‡(120 †).
! If the coolant temperature exceeds
248 ‡(120 †) do not continue driving. The
engine will otherwise be damaged.
Displaying the digital speedometer or
outside temperature
If you have selected the digital speedometer
for the status line ( Y page 222), the outside
temperature will be displayed here.
218Menus and submenusOn-board computer and displays
BA 164.8 USA, CA Edition B 2011; 1; 2, en-USd2sboikeVersion: 3.0.3.52010-04-21T15:08:44+02:00 - Seite 218
Page 223 of 376
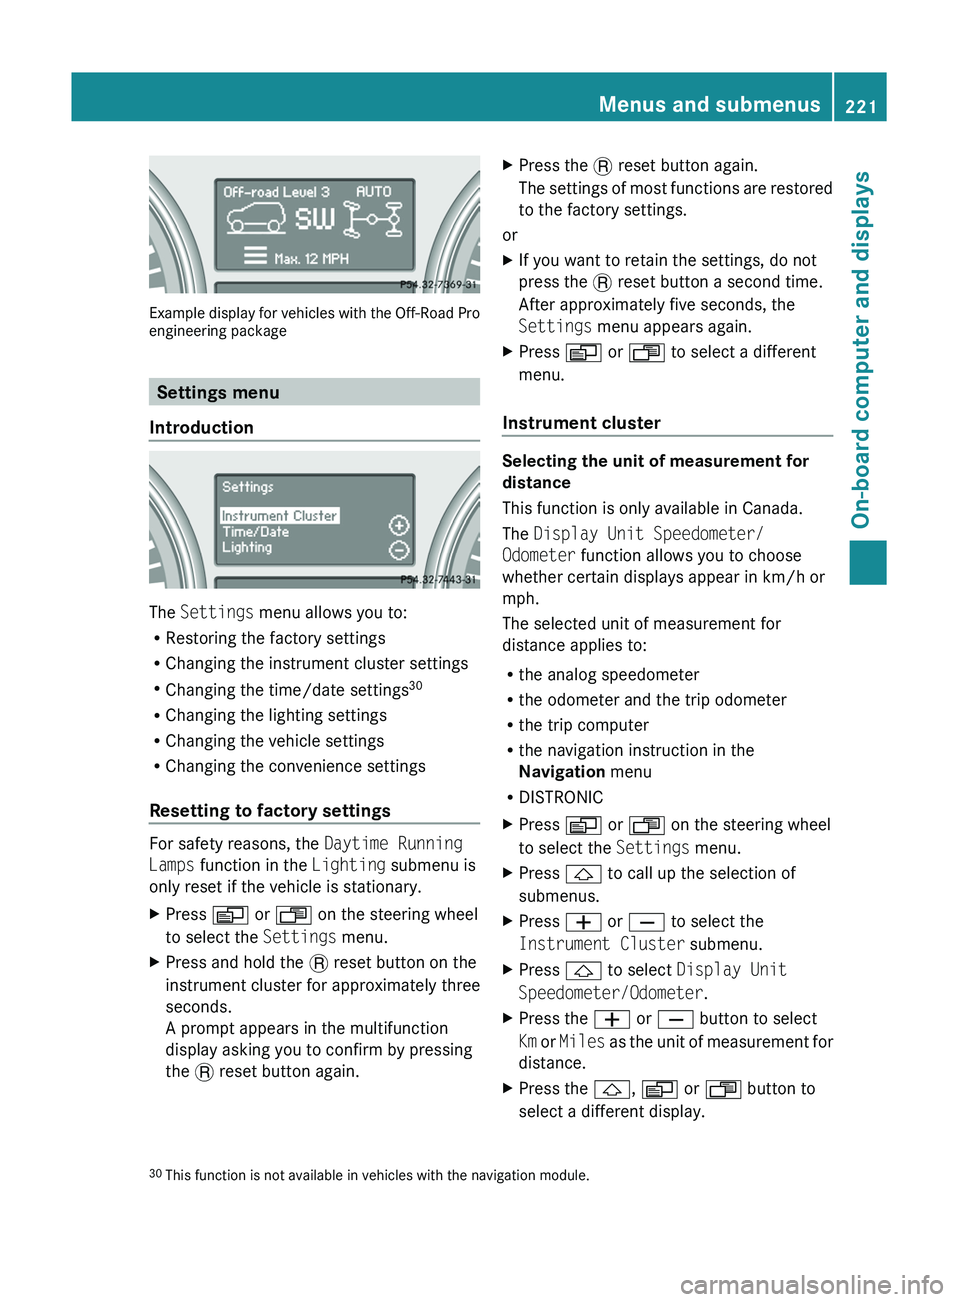
Example display for vehicles with the Off-Road Pro
engineering package
Settings menu
Introduction
The Settings menu allows you to:
R Restoring the factory settings
R Changing the instrument cluster settings
R Changing the time/date settings 30
R Changing the lighting settings
R Changing the vehicle settings
R Changing the convenience settings
Resetting to factory settings
For safety reasons, the Daytime Running
Lamps function in the Lighting submenu is
only reset if the vehicle is stationary.
XPress V or U on the steering wheel
to select the Settings menu.XPress and hold the . reset button on the
instrument cluster for approximately three
seconds.
A prompt appears in the multifunction
display asking you to confirm by pressing
the . reset button again.XPress the . reset button again.
The settings of most functions are restored
to the factory settings.
or
XIf you want to retain the settings, do not
press the . reset button a second time.
After approximately five seconds, the
Settings menu appears again.XPress V or U to select a different
menu.
Instrument cluster
Selecting the unit of measurement for
distance
This function is only available in Canada.
The Display Unit Speedometer/
Odometer function allows you to choose
whether certain displays appear in km/h or
mph.
The selected unit of measurement for
distance applies to:
R the analog speedometer
R the odometer and the trip odometer
R the trip computer
R the navigation instruction in the
Navigation menu
R DISTRONIC
XPress V or U on the steering wheel
to select the Settings menu.XPress & to call up the selection of
submenus.XPress W or X to select the
Instrument Cluster submenu.XPress & to select Display Unit
Speedometer/Odometer .XPress the W or X button to select
Km or Miles as the unit of measurement for
distance.XPress the &, V or U button to
select a different display.30 This function is not available in vehicles with the navigation module.Menus and submenus221On-board computer and displaysBA 164.8 USA, CA Edition B 2011; 1; 2, en-USd2sboikeVersion: 3.0.3.52010-04-21T15:08:44+02:00 - Seite 221Z
Page 225 of 376
lamps are switched on automatically when
the engine is running.
In the dark, the following also light up:
R the low-beam headlamps
R the parking lamps
R the tail lamps
R the license plate lamp
R the side marker lampsXPress V or U on the steering wheel
to select the Settings menu.XPress & to call up the selection of
submenus.XPress the W or X button to select the
Lighting submenu.XPress & to select Daytime Running
Lamps .XPress W or X to set daytime running
lamps to On or Off .XPress the &, V or U button to
select a different display.
Switching the surround lighting on/off
If you activate the surround lighting function
and the light switch is set to Ã, the
following will light up if it is dark and you
unlock the vehicle using the SmartKey:
R the parking lamps
R the license plate lamp
R the tail lamps
R the fog lamps 31
R the low-beam headlamps 32
R the side marker lamps
The surround lighting switches off
automatically after 40 seconds or when the
driver's door is opened.
XPress V or U on the steering wheel
to select the Settings menu.XPress & to call up the selection of
submenus.XPress the W or X button to select the
Lighting submenu.XPress & to select Surround Lighting
Function .XPress the W or X button to activate
or deactivate the Surround Lighting
function.XWhen leaving the vehicle, turn the light
switch to position Ã.
The surround lighting is activated.XPress the &, V or U button to
select a different display.
Setting the ambient lighting
XPress V or U on the steering wheel
to select the Settings menu.XPress & to call up the selection of
submenus.XPress the W or X button to select the
Lighting submenu.XPress the & button to select Ambient
Light .XPress W or X to adjust the
brightness to any level from Level 0 (off)
to Level 5 (bright).XPress the &, V or U button to
select a different display.
Activating/deactivating the exterior
lighting delayed switch-off
When you activate the Headlamp Delayed
Shut-off function and the light switch is set
to à , the exterior lighting remains on for
another 15 seconds after closing the doors
when it is dark.
If the engine is switched off and then none of
the doors are opened, or if an open door is
not closed, the exterior lighting goes out after
60 seconds.
If you have activated the delayed switch-off
function, the light switch is set to à and
31
Only for vehicles with front fog lamps.
32 Only for vehicles without front fog lamps.Menus and submenus223On-board computer and displaysBA 164.8 USA, CA Edition B 2011; 1; 2, en-USd2sboikeVersion: 3.0.3.52010-04-21T15:08:44+02:00 - Seite 223Z
Page 226 of 376
you switch off the engine, the following
remain lit:
R the parking lamps
R the license plate lamp
R the tail lamps
R the fog lamps 33
R the low-beam headlamps 34
R the side marker lampsXPress V or U on the steering wheel
to select the Settings menu.XPress & to call up the selection of
submenus.XPress the W or X button to select the
Lighting submenu.XPress the & button to select Headlamp
Delayed Shut-off .XPress the W or X button to activate
or deactivate the Headlamp Delayed
Shut-off function.XBefore switching off the engine, turn the
light switch to position Ã.
The exterior lighting delayed shut-off is
activated.XPress the &, V or U button to
select a different display.
To deactivate the delayed shut-off
temporarily:
XBefore leaving the vehicle, turn the
SmartKey to position 0 in the ignition lock.XTurn the SmartKey to position 2 in the
ignition lock and back to position 0.
The delayed shut-off is deactivated.
The delayed shut-off is reactivated the next
time you start the engine.
Activating/deactivating the interior
lighting delayed switch-off
When you activate the Interior Lighting
Delayed Shut-off function and remove the
SmartKey from the ignition lock, the interior
lighting remains on for 10 seconds.
XPress V or U on the steering wheel
to select the Settings menu.XPress & to call up the selection of
submenus.XPress the W or X button to select the
Lighting submenu.XPress the & button to select Interior
Lighting Delayed Shut-off .XPress the W or X button to activate
or deactivate the Interior Lighting
Delayed Shut-off function.XPress the &, V or U button to
select a different display.
Vehicle
Activating/deactivating the automatic
locking feature
When you activate the Automatic Door
Locking function, your vehicle will be
centrally locked above a speed of
approximately 9 mph (15 km/h).
i Further information on the automatic
locking feature ( Y page 79).
XPress V or U on the steering wheel
to select the Settings menu.XPress & to call up the selection of
submenus.XPress the W or X button to select the
Vehicle submenu.XPress & to select Automatic Door
Locking .XPress W or X to switch Automatic
Door Locking on or off.XPress the &, V or U button to
select a different display.
Activating/deactivating the radar sensor
system
If the radar sensor system is switched off,
Blind Spot Assist (Y page 200) is deactivated.
33
Only for vehicles with front fog lamps.
34 Only for vehicles without front fog lamps.224Menus and submenusOn-board computer and displays
BA 164.8 USA, CA Edition B 2011; 1; 2, en-USd2sboikeVersion: 3.0.3.52010-04-21T15:08:44+02:00 - Seite 224
Page 238 of 376

Display messagesPossible causes/consequences and M Solutions$
(USA only)
J
(Canada only)
EBV, ABS, ESP
Inoperative See
Operator's ManualGRisk of accident
EBD (Electronic Brake-force Distribution), ABS (Anti-lock Brake
System), ESP ®
(Electronic Stability Program) and therefore also
PRE-SAFE ®
are not available due to a malfunction. BAS (Brake
Assist) is also deactivated.
The brake system continues to function normally, but without the
functions listed above. The wheels could therefore lock if you
brake hard, for example.
XDrive on carefully.XVisit a qualified specialist workshop immediately.#
Brake WearThe brake pads/linings have reached their wear limit.XVisit a qualified specialist workshop.$
(USA only)
!
(Canada only)
Release Parking
BrakeYou are driving with the parking brake engaged. A warning tone
also sounds.XRelease the parking brake.$
(USA only)
J
(Canada only)
Check Brake Fluid
LevelGRisk of accident
There is insufficient brake fluid in the brake fluid reservoir. In
addition, the red warning lamp $(USA only) or J (Canada
only) in the instrument cluster lights up and a warning tone sounds.
XPull over and stop the vehicle safely as soon as possible, paying
attention to road and traffic conditions. Do not continue driving
under any circumstances.XEngage the parking brake.XConsult a qualified specialist workshop.XDo not add brake fluid. This will not rectify the malfunction.GWarning
Driving with the message Check Brake Fluid Level displayed can result in an accident. Have
your brake system checked immediately.
Do not add brake fluid before checking the brake system. Overfilling the brake fluid reservoir can
result in spilling brake fluid on hot engine parts and the brake fluid catching fire. You can be
seriously burned.
236Display messagesOn-board computer and displays
BA 164.8 USA, CA Edition B 2011; 1; 2, en-USd2sboikeVersion: 3.0.3.52010-04-21T15:08:44+02:00 - Seite 236
Page 242 of 376

Display messagesPossible causes/consequences and M Solutionsb
Daytime Running
Light Left
or
Daytime Running
Light RightThe left or right-hand daytime running light is defective.XCheck whether you are permitted to change the bulb yourself
( Y page 120).
or
XVisit a qualified specialist workshop.b
Active Headlamps
InoperativeThe active light function is faulty.XVisit a qualified specialist workshop.b
AUTO Light
InoperativeThe light sensor is faulty. The low-beam headlamps are switched
on.XUSA only: switch off daytime driving lights in the on-board
computer ( Y page 222).XSwitch the lights on and off using the light switch.XVisit a qualified specialist workshop.b
Switch Off LightsThe lights are still switched on when you leave the vehicle. A
warning tone also sounds.XTurn the light switch to $ or c .
or
XIf the rear fog lamp is switched on: press the light switch in to
the stop.
Engine
Display messagesPossible causes/consequences and M Solutions+
Top Up Coolant See
Operator's ManualThe coolant level is too low.XAdd coolant, observing the warning notes before doing so
( Y page 297).XIf coolant needs adding more often than usual, have the engine
coolant system checked at a qualified specialist workshop.GWarning
Do not spill antifreeze on hot engine parts. Antifreeze contains ethylene glycol which may burn
if it comes into contact with hot engine parts. You could be seriously burned.
! The coolant level is too low. Avoid making long journeys with too little coolant in the cooling
system. The engine will otherwise be damaged.
240Display messagesOn-board computer and displays
BA 164.8 USA, CA Edition B 2011; 1; 2, en-USd2sboikeVersion: 3.0.3.52010-04-21T15:08:44+02:00 - Seite 240