2011 MERCEDES-BENZ G55AMG ignition
[x] Cancel search: ignitionPage 203 of 288
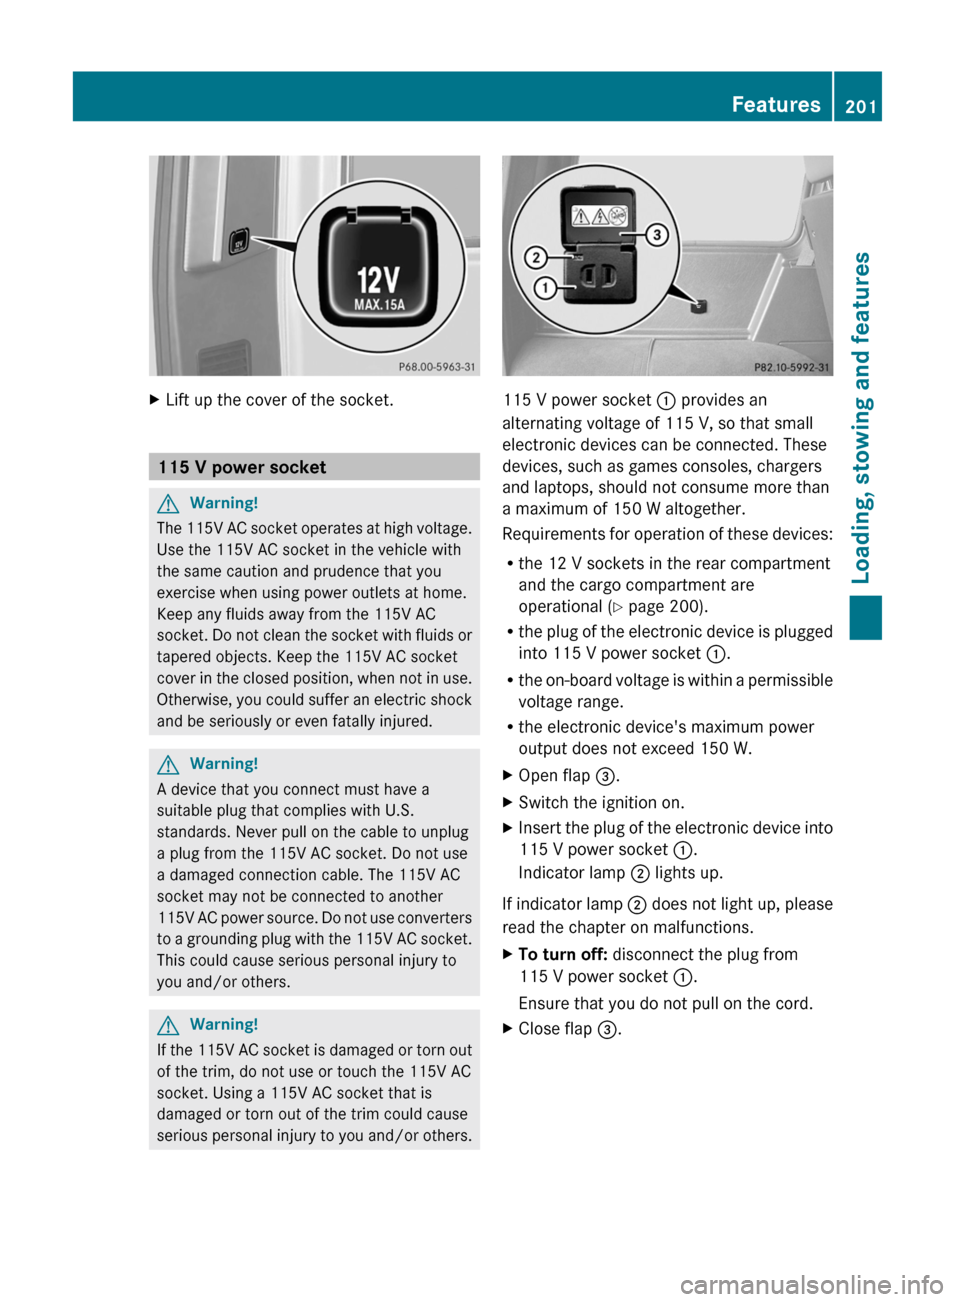
XLift up the cover of the socket.
115 V power socket
GWarning!
The 115V AC socket operates at high voltage.
Use the 115V AC socket in the vehicle with
the same caution and prudence that you
exercise when using power outlets at home.
Keep any fluids away from the 115V AC
socket. Do not clean the socket with fluids or
tapered objects. Keep the 115V AC socket
cover in the closed position, when not in use.
Otherwise, you could suffer an electric shock
and be seriously or even fatally injured.
GWarning!
A device that you connect must have a
suitable plug that complies with U.S.
standards. Never pull on the cable to unplug
a plug from the 115V AC socket. Do not use
a damaged connection cable. The 115V AC
socket may not be connected to another
115V AC power source. Do not use converters
to a grounding plug with the 115V AC socket.
This could cause serious personal injury to
you and/or others.
GWarning!
If the 115V AC socket is damaged or torn out
of the trim, do not use or touch the 115V AC
socket. Using a 115V AC socket that is
damaged or torn out of the trim could cause
serious personal injury to you and/or others.
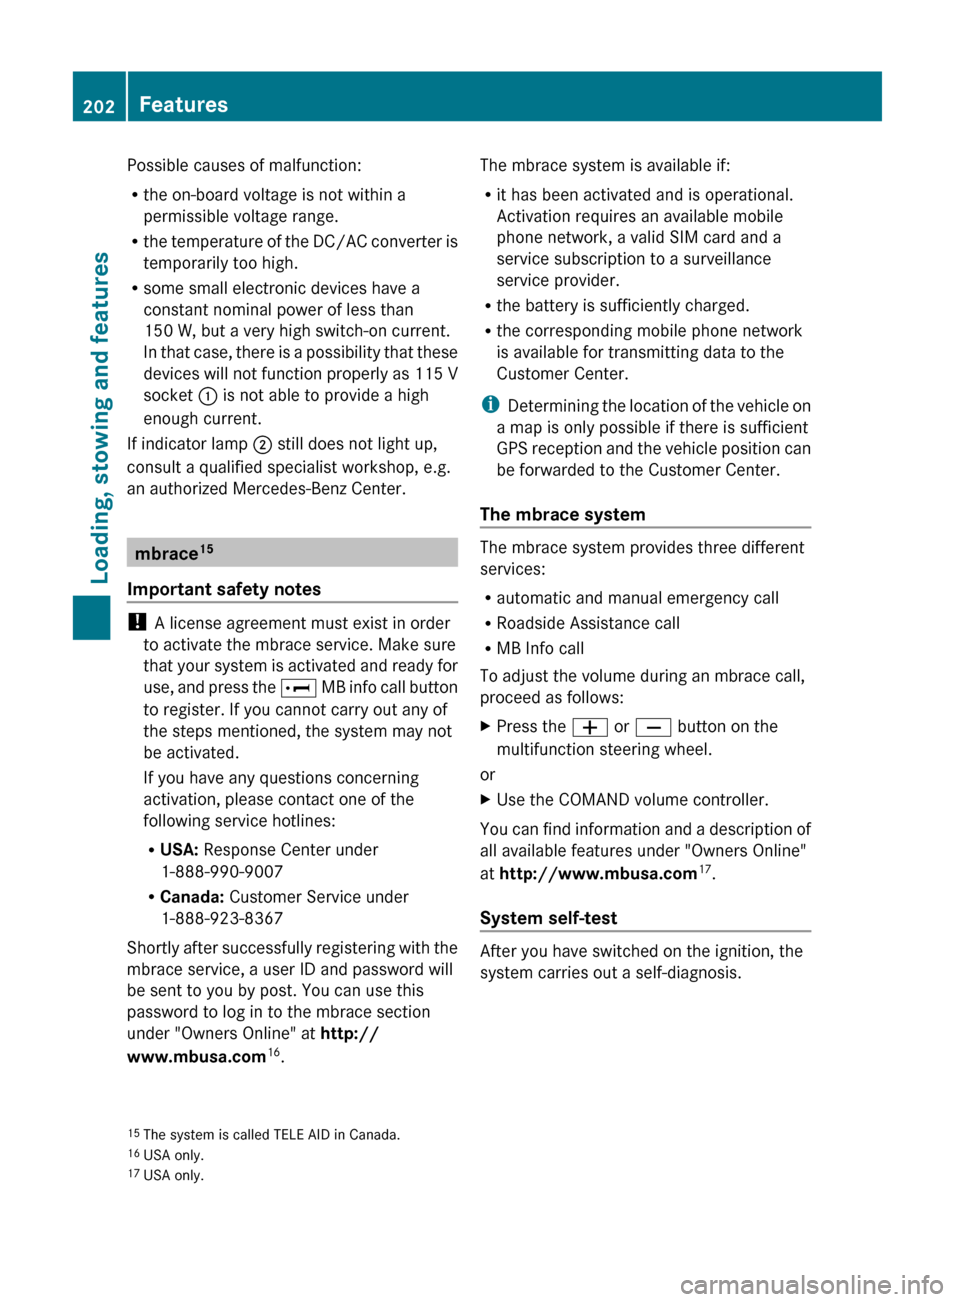
115 V power socket : provides an
alternating voltage of 115 V, so that small
electronic devices can be connected. These
devices, such as games consoles, chargers
and laptops, should not consume more than
a maximum of 150 W altogether.
Requirements for operation of these devices:
R the 12 V sockets in the rear compartment
and the cargo compartment are
operational ( Y page 200).
R the plug of the electronic device is plugged
into 115 V power socket :.
R the on-board voltage is within a permissible
voltage range.
R the electronic device's maximum power
output does not exceed 150 W.
XOpen flap =.XSwitch the ignition on.XInsert the plug of the electronic device into
115 V power socket :.
Indicator lamp ; lights up.
If indicator lamp ; does not light up, please
read the chapter on malfunctions.
XTo turn off: disconnect the plug from
115 V power socket :.
Ensure that you do not pull on the cord.XClose flap =.Features201Loading, stowing and featuresZ
Page 204 of 288
Possible causes of malfunction:
R the on-board voltage is not within a
permissible voltage range.
R the temperature of the DC/AC converter is
temporarily too high.
R some small electronic devices have a
constant nominal power of less than
150 W, but a very high switch-on current.
In that case, there is a possibility that these
devices will not function properly as 115 V
socket : is not able to provide a high
enough current.
If indicator lamp ; still does not light up,
consult a qualified specialist workshop, e.g.
an authorized Mercedes-Benz Center.
mbrace 15
Important safety notes
! A license agreement must exist in order
to activate the mbrace service. Make sure
that your system is activated and ready for
use, and press the E MB info call button
to register. If you cannot carry out any of
the steps mentioned, the system may not
be activated.
If you have any questions concerning
activation, please contact one of the
following service hotlines:
R USA: Response Center under
1-888-990-9007
R Canada: Customer Service under
1-888-923-8367
Shortly after successfully registering with the
mbrace service, a user ID and password will
be sent to you by post. You can use this
password to log in to the mbrace section
under "Owners Online" at http://
www.mbusa.com 16
.
The mbrace system is available if:
R it has been activated and is operational.
Activation requires an available mobile
phone network, a valid SIM card and a
service subscription to a surveillance
service provider.
R the battery is sufficiently charged.
R the corresponding mobile phone network
is available for transmitting data to the
Customer Center.
i Determining the location of the vehicle on
a map is only possible if there is sufficient
GPS reception and the vehicle position can
be forwarded to the Customer Center.
The mbrace system
The mbrace system provides three different
services:
R automatic and manual emergency call
R Roadside Assistance call
R MB Info call
To adjust the volume during an mbrace call,
proceed as follows:
XPress the W or X button on the
multifunction steering wheel.
or
XUse the COMAND volume controller.
You can find information and a description of
all available features under "Owners Online"
at http://www.mbusa.com 17
.
System self-test
After you have switched on the ignition, the
system carries out a self-diagnosis.
15 The system is called TELE AID in Canada.
16 USA only.
17 USA only.202FeaturesLoading, stowing and features
Page 211 of 288
Programming the remote control
Programming
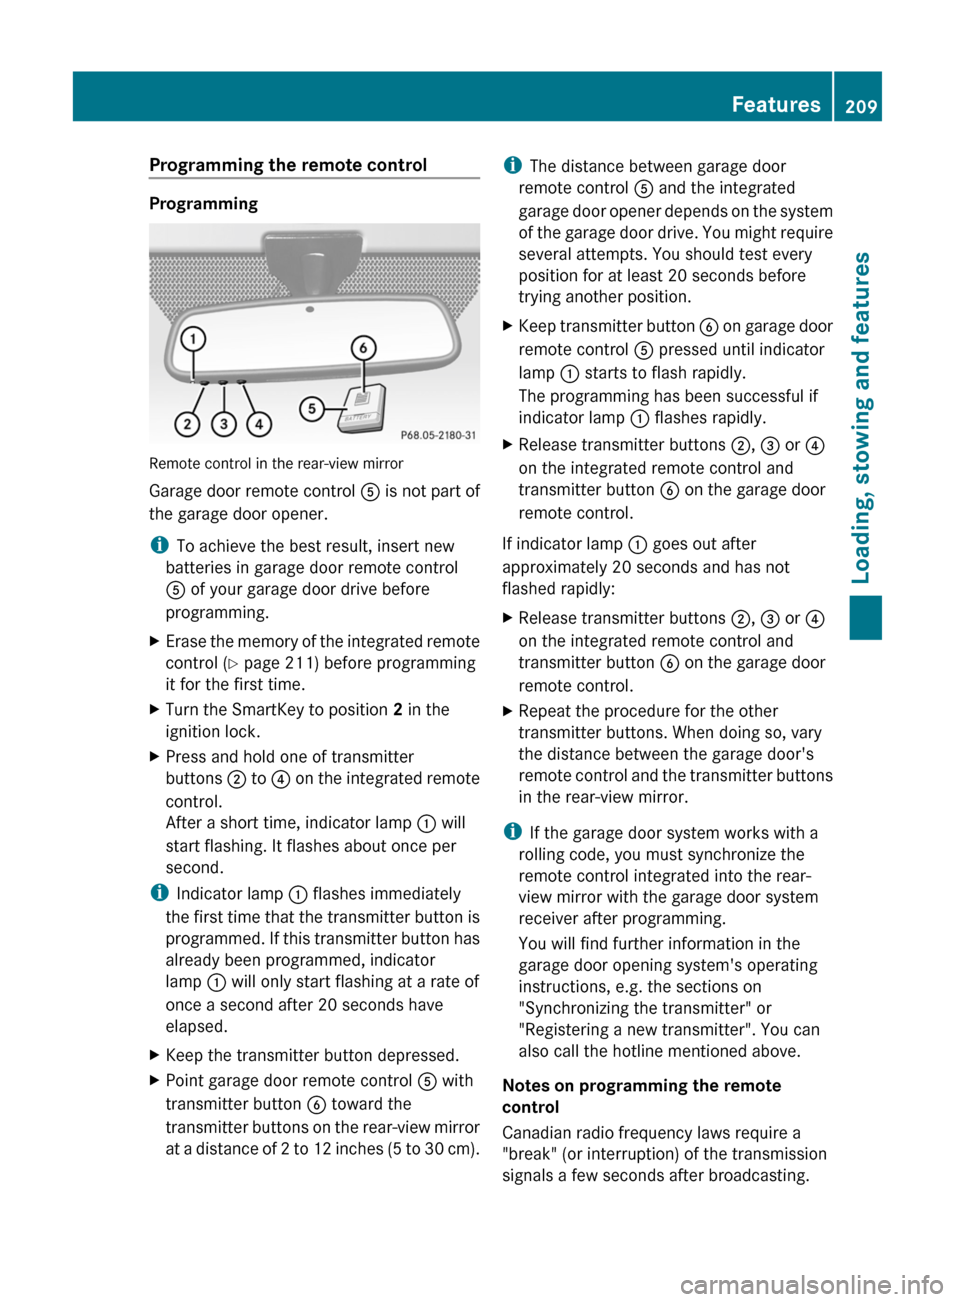
Remote control in the rear-view mirror
Garage door remote control A is not part of
the garage door opener.
i To achieve the best result, insert new
batteries in garage door remote control
A of your garage door drive before
programming.
XErase the memory of the integrated remote
control ( Y page 211) before programming
it for the first time.XTurn the SmartKey to position 2 in the
ignition lock.XPress and hold one of transmitter
buttons ; to ? on the integrated remote
control.
After a short time, indicator lamp : will
start flashing. It flashes about once per
second.
i Indicator lamp : flashes immediately
the first time that the transmitter button is
programmed. If this transmitter button has
already been programmed, indicator
lamp : will only start flashing at a rate of
once a second after 20 seconds have
elapsed.
XKeep the transmitter button depressed.XPoint garage door remote control A with
transmitter button B toward the
transmitter buttons on the rear-view mirror
at a distance of 2 to 12 inches (5 to 30 cm).i The distance between garage door
remote control A and the integrated
garage door opener depends on the system
of the garage door drive. You might require
several attempts. You should test every
position for at least 20 seconds before
trying another position.XKeep transmitter button B on garage door
remote control A pressed until indicator
lamp : starts to flash rapidly.
The programming has been successful if
indicator lamp : flashes rapidly.XRelease transmitter buttons ;, = or ?
on the integrated remote control and
transmitter button B on the garage door
remote control.
If indicator lamp : goes out after
approximately 20 seconds and has not
flashed rapidly:
XRelease transmitter buttons ;, = or ?
on the integrated remote control and
transmitter button B on the garage door
remote control.XRepeat the procedure for the other
transmitter buttons. When doing so, vary
the distance between the garage door's
remote control and the transmitter buttons
in the rear-view mirror.
i If the garage door system works with a
rolling code, you must synchronize the
remote control integrated into the rear-
view mirror with the garage door system
receiver after programming.
You will find further information in the
garage door opening system's operating
instructions, e.g. the sections on
"Synchronizing the transmitter" or
"Registering a new transmitter". You can
also call the hotline mentioned above.
Notes on programming the remote
control
Canadian radio frequency laws require a
"break" (or interruption) of the transmission
signals a few seconds after broadcasting.
Features209Loading, stowing and featuresZ
Page 212 of 288
Therefore, these signals may not last long
enough for the integrated remote control to
recognize the signal during programming.
Comparable with Canadian law, some U.S.
garage door openers also have a built-in
"interruption".
If you live in Canada or have difficulties
programming the garage door opener
(regardless of where you live) when using the
programming steps (see above), proceed as
follows:XPress transmitter button ( ;, = or ?) and
hold it down during the following steps until
the setup has been completed
successfully.XAt the same time, press transmitter button
B of the garage door remote control for
two seconds, then release it for two
seconds, then press it again for two
seconds.XRepeat this sequence on transmitter
button B of the garage door remote
control until the frequency signal has been
saved.XIf the setup procedure is successful,
indicator lamp : flashes once slowly and
goes out after a few seconds.XContinue with the other programming
steps (see above).
Problems when programming
If you have problems when programming the
integrated remote control, please note the
following:
R check the transmitter frequency of garage
door remote control A (which can usually
be found on the rear of the remote control).
The integrated remote control is
compatible with devices that operate at
frequencies between 280 and 390 MHz.
R replace the batteries in garage door remote
control A. This increases the likelihood of
garage door remote control A sending a
strong and precise signal to the integrated
remote control on the rear-view mirror.
R when programming, hold garage door
remote control A at varying distances and
angles from the transmitter button which
you are programming. Try different angles
at a distance between 2 and 12 inches (5
to 30 cm) or the same angle at varying
distances.
R if there is another garage door remote
control for the same device, perform the
programming steps again using that garage
door opener. Before performing these
steps, make sure that new batteries have
been installed in the garage door remote
control.
R align the antenna cable of the garage door
opener unit. This can improve signal
reception/transmission.
Opening/closing the garage door
Once programmed, the integrated remote
control will assume the function of the garage
door system's remote control. Please also
read the operating instructions for the garage
door system.
XTurn the SmartKey to position 2 in the
ignition lock.XPress transmitter button ;, = or ? on
the integrated remote control in the rear-
view mirror that is programmed to operate
the garage door.
Garage door system with fixed code:
indicator lamp : lights up continuously.
Garage door system with rolling code:
indicator lamp : flashes briefly and then
lights up for approximately two seconds.
This is repeated for up to 20 seconds.
i The transmitter will transmit a signal for
as long as the transmitter button is being
pressed. The transmission will be halted
after a maximum of 20 seconds and
indicator lamp : will flash. Press the
transmitter button again, if necessary.
210FeaturesLoading, stowing and features
Page 213 of 288
Clearing the remote control memoryXTurn the SmartKey to position 2 in the
ignition lock.XPress and hold transmitter buttons ;
and ? for approximately 20 seconds until
indicator lamp : flashes rapidly.
The memory is cleared.
i You should clear the remote control
memory before selling the vehicle.
Floormat on the driver's side
GWarning!
Whenever you are using a floormat, make sure
there is enough clearance and that the
floormat is securely fastened.
The floormat should always be securely
fastened using the fastening equipment.
Before driving off, check that the floormat is
securely in place and adjust it if necessary. A
loose floormat could slip and hinder proper
functioning of the pedals.
Do not place several floormats on top of each
other as this may impair pedal movement.
Features211Loading, stowing and featuresZ
Page 216 of 288
Vehicle equipment
i This manual describes all the standard
and optional equipment of your vehicle
which was available at the time of
purchase. Country-specific differences are
possible. Please note that your vehicle may
not be equipped with all features
described. This also applies to safety-
relevant systems and functions.
Engine compartment
Hood
Opening the hood
GWarning
Do not pull the release lever while the vehicle
is in motion. Otherwise, the hood could be
forced open by passing air flow.
This could cause the hood to come loose and
injure you and/or others.
GWarning!
Do not open the hood when the engine is
overheated. You could be seriously injured.
Observe the coolant temperature gauge to
determine whether the engine may be
overheated. If you see flames or smoke
coming from the engine compartment, move
away from the vehicle. Wait until the engine
has cooled. If necessary, call the fire
department.
GWarning!
You could be injured when the hood is open –
even when the engine is turned off.
Parts of the engine can become very hot. To
prevent burns, let the engine cool completely
before touching any components on the
vehicle. Comply with all relevant safety
precautions.
GWarning
To help prevent personal injury, stay clear of
moving parts when the hood is open and the
engine is running.
The radiator fan may continue to run for
approximately 30 seconds or may even
restart after the engine has been turned off.
Stay clear of fan blades.
GWarning
The engine is equipped with a transistorized
ignition system. Because of the high voltage,
it is dangerous to touch any components
(ignition coils, spark plug sockets, diagnostic
socket) of the ignition system:
R with the engine running
R while starting the engine
R when the ignition is switched on and the
engine is turned manually
XMake sure that the windshield wipers are
switched off.GWarning
The windshield wipers and wiper linkage
could be set in motion.
When the hood is open, you or others could
be injured by the wiper linkage.
Make sure that the windshield wipers are
switched off and that the SmartKey has been
pulled out of the ignition lock before opening
the hood.
The release lever on the hood is in the footwell
on the left-hand side of the vehicle when
viewed in the direction of travel.
214Engine compartmentMaintenance and care
Page 218 of 288
XSlowly insert oil dipstick : into the
dipstick guide tube to the stop, and take it
out again.
The oil level is correct if the level is between
MIN mark = and MAX mark ;.XAdd oil if necessary.
Checking the oil level using the on-
board computer
On the G 55 AMG, the oil level can be checked
using the on-board computer.
When checking the oil level:
R park the vehicle on a level surface.
R the engine should be switched off for
approximately five minutes if the engine is
at normal operating temperature.
Xmake sure that the SmartKey is in position
2 in the ignition lock.XPress the & or * button on the
steering wheel to select the following
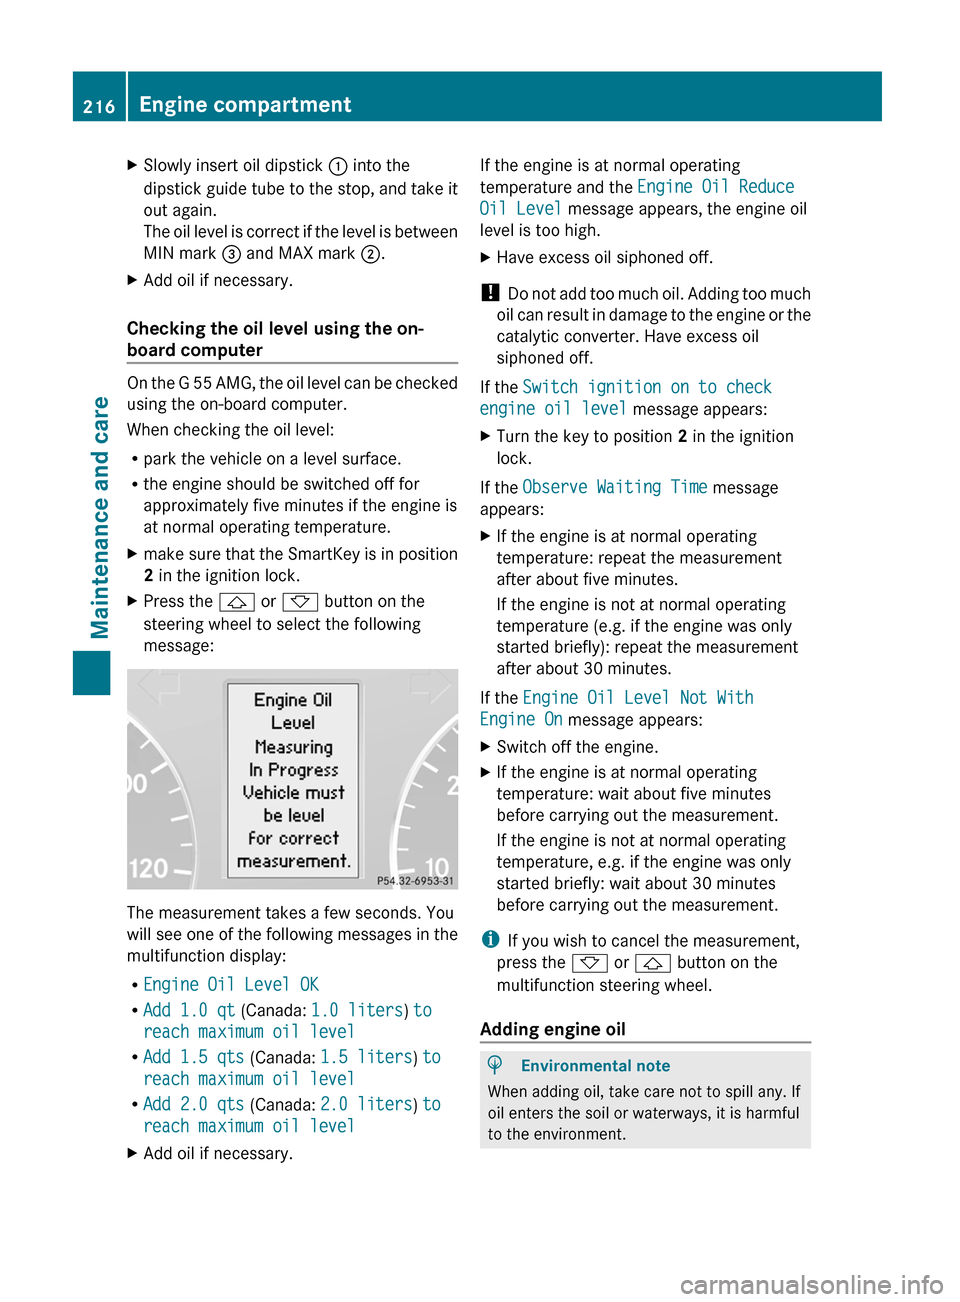
message:
The measurement takes a few seconds. You
will see one of the following messages in the
multifunction display:
R Engine Oil Level OK
R Add 1.0 qt (Canada: 1.0 liters ) to
reach maximum oil level
R Add 1.5 qts (Canada: 1.5 liters ) to
reach maximum oil level
R Add 2.0 qts (Canada: 2.0 liters ) to
reach maximum oil level
XAdd oil if necessary.If the engine is at normal operating
temperature and the Engine Oil Reduce
Oil Level message appears, the engine oil
level is too high.XHave excess oil siphoned off.
! Do not add too much oil. Adding too much
oil can result in damage to the engine or the
catalytic converter. Have excess oil
siphoned off.
If the Switch ignition on to check
engine oil level message appears:
XTurn the key to position 2 in the ignition
lock.
If the Observe Waiting Time message
appears:
XIf the engine is at normal operating
temperature: repeat the measurement
after about five minutes.
If the engine is not at normal operating
temperature (e.g. if the engine was only
started briefly): repeat the measurement
after about 30 minutes.
If the Engine Oil Level Not With
Engine On message appears:
XSwitch off the engine.XIf the engine is at normal operating
temperature: wait about five minutes
before carrying out the measurement.
If the engine is not at normal operating
temperature, e.g. if the engine was only
started briefly: wait about 30 minutes
before carrying out the measurement.
i If you wish to cancel the measurement,
press the * or & button on the
multifunction steering wheel.
Adding engine oil
HEnvironmental note
When adding oil, take care not to spill any. If
oil enters the soil or waterways, it is harmful
to the environment.
216Engine compartmentMaintenance and care
Page 219 of 288
! Only use engine oils and oil filters which
have been approved for vehicles with a
service system. A list of the engine oils and
oil filters that have been tested and
approved according to the Mercedes-Benz
specifications for service products can be
found on the Internet at http://
www.mbusa.com (USA only). Further
information on tested and approved engine
oils and oil filters can be obtained from any
authorized Mercedes-Benz Center.
The following causes engine failure or
damage to the exhaust system:
Rusing engine oils and oil filters that are
not specifically approved for the service
system
Rreplacing the engine oil and oil filter after
having exceeded the interval for
replacement prescribed by the
maintenance system
Rusing engine oil additives
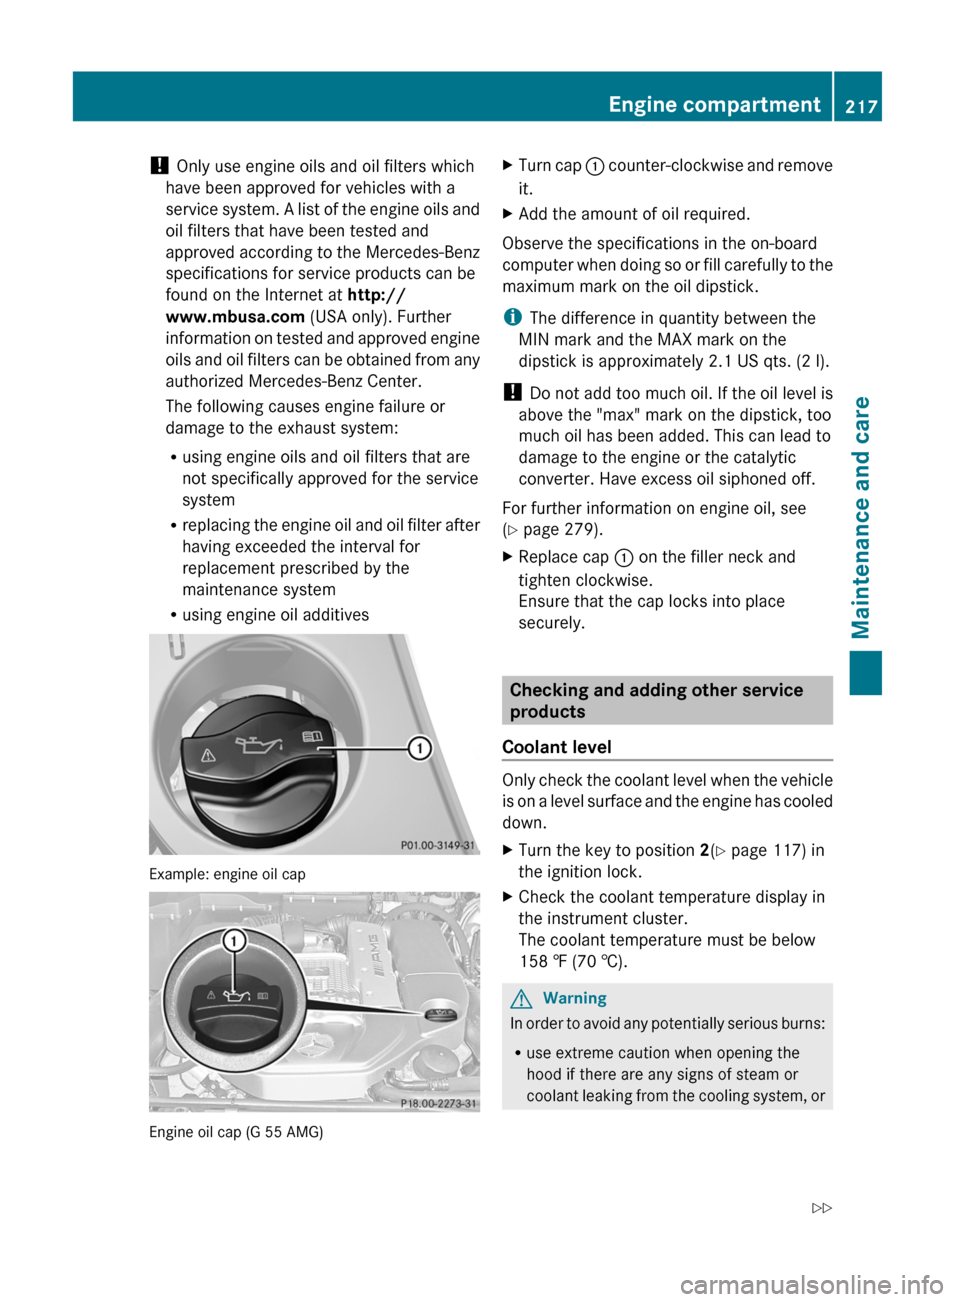
Example: engine oil cap
Engine oil cap (G 55 AMG)
XTurn cap : counter-clockwise and remove
it.
XAdd the amount of oil required.
Observe the specifications in the on-board
computer when doing so or fill carefully to the
maximum mark on the oil dipstick.
iThe difference in quantity between the
MIN mark and the MAX mark on the
dipstick is approximately 2.1 US qts. (2 l).
! Do not add too much oil. If the oil level is
above the "max" mark on the dipstick, too
much oil has been added. This can lead to
damage to the engine or the catalytic
converter. Have excess oil siphoned off.
For further information on engine oil, see
(Y page 279).
XReplace cap : on the filler neck and
tighten clockwise.
Ensure that the cap locks into place
securely.
Checking and adding other service
products
Coolant level
Only check the coolant level when the vehicle
is on a level surface and the engine has cooled
down.
XTurn the key to position 2(Y page 117) in
the ignition lock.
XCheck the coolant temperature display in
the instrument cluster.
The coolant temperature must be below
158 ‡ (70 †).
GWarning
In order to avoid any potentially serious burns:
Ruse extreme caution when opening the
hood if there are any signs of steam or
coolant leaking from the cooling system, or
Engine compartment217Maintenance and careZ