2011 MERCEDES-BENZ G550 warning light
[x] Cancel search: warning lightPage 152 of 288
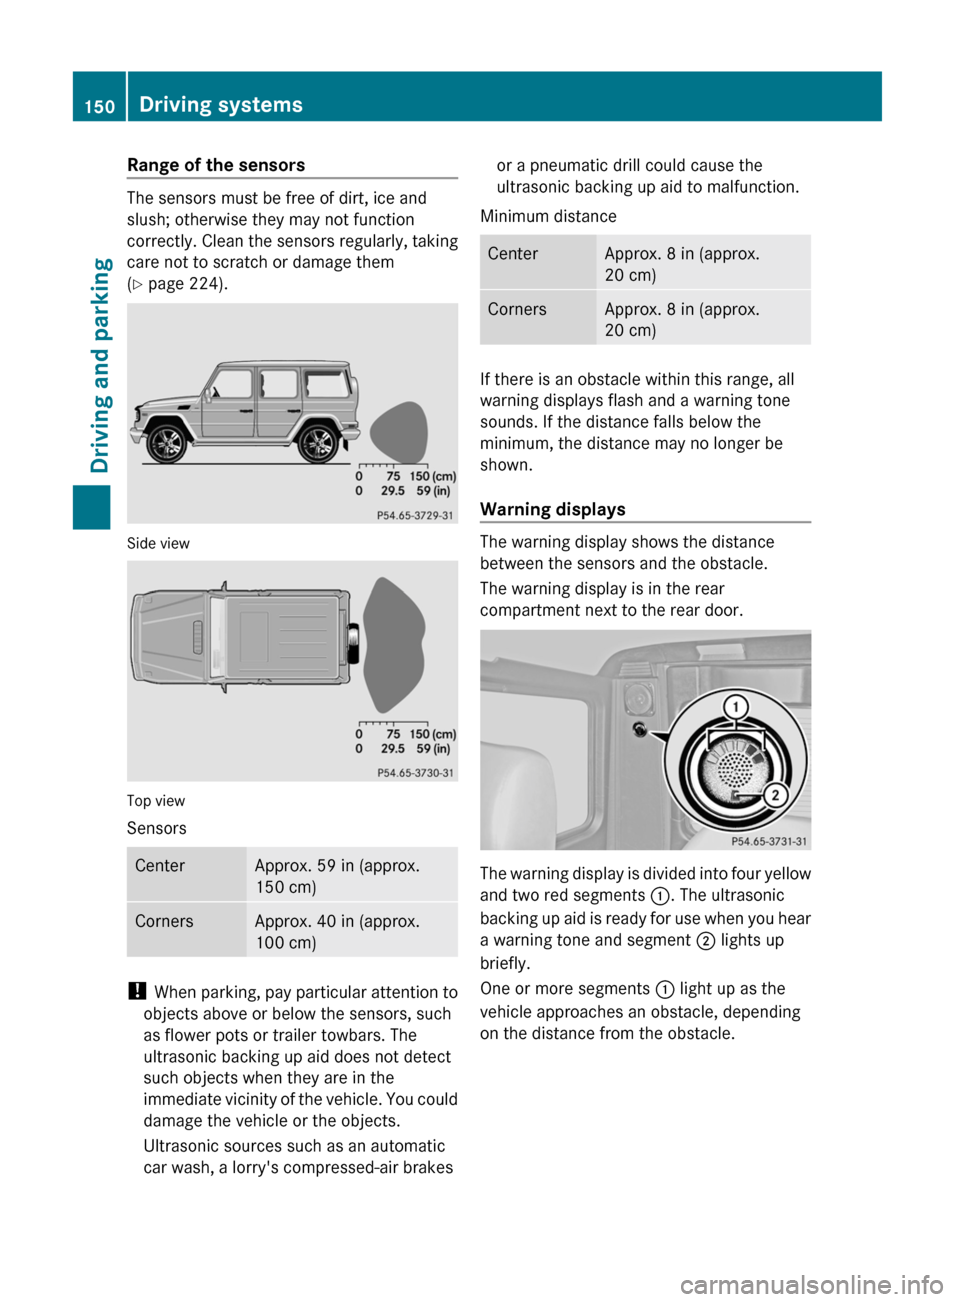
Range of the sensors
The sensors must be free of dirt, ice and
slush; otherwise they may not function
correctly. Clean the sensors regularly, taking
care not to scratch or damage them
( Y page 224).
Side view
Top view
Sensors
CenterApprox. 59 in (approx.
150 cm)CornersApprox. 40 in (approx.
100 cm)
! When parking, pay particular attention to
objects above or below the sensors, such
as flower pots or trailer towbars. The
ultrasonic backing up aid does not detect
such objects when they are in the
immediate vicinity of the vehicle. You could
damage the vehicle or the objects.
Ultrasonic sources such as an automatic
car wash, a lorry's compressed-air brakes
or a pneumatic drill could cause the
ultrasonic backing up aid to malfunction.
Minimum distanceCenterApprox. 8 in (approx.
20 cm)CornersApprox. 8 in (approx.
20 cm)
If there is an obstacle within this range, all
warning displays flash and a warning tone
sounds. If the distance falls below the
minimum, the distance may no longer be
shown.
Warning displays
The warning display shows the distance
between the sensors and the obstacle.
The warning display is in the rear
compartment next to the rear door.
The warning display is divided into four yellow
and two red segments :. The ultrasonic
backing up aid is ready for use when you hear
a warning tone and segment ; lights up
briefly.
One or more segments : light up as the
vehicle approaches an obstacle, depending
on the distance from the obstacle.
150Driving systemsDriving and parking
Page 154 of 288
Problems with ultrasonic reversing aidProblemPossible causes/consequences and M SolutionsYou hear a warning
signal when backing
up.The ultrasonic backing up aid sensors are dirty or there is
interference.XClean the ultrasonic backing up aid sensors ( Y page 224).XSwitch the ignition back on.The problem may be caused by an external source of radio or
ultrasound waves. The ultrasonic backing up aid has switched off
automatically.XSee if the ultrasonic backing up aid functions in a different
location.You hear a warning
tone when backing up
or you do not hear a
warning tone and none
of the segments light
up.The ultrasonic backing up aid is malfunctioning and has switched
itself off.XHave the ultrasonic backing up aid checked at a qualified
specialist workshop as soon as possible.Rear view camera
Important safety notes
The rear view camera is an optical parking aid.
It shows the area behind your vehicle in the
COMAND display.
GWarning!
Make sure no persons or animals are in or
near the area in which you are parking/
maneuvering. Otherwise, they could be
injured.
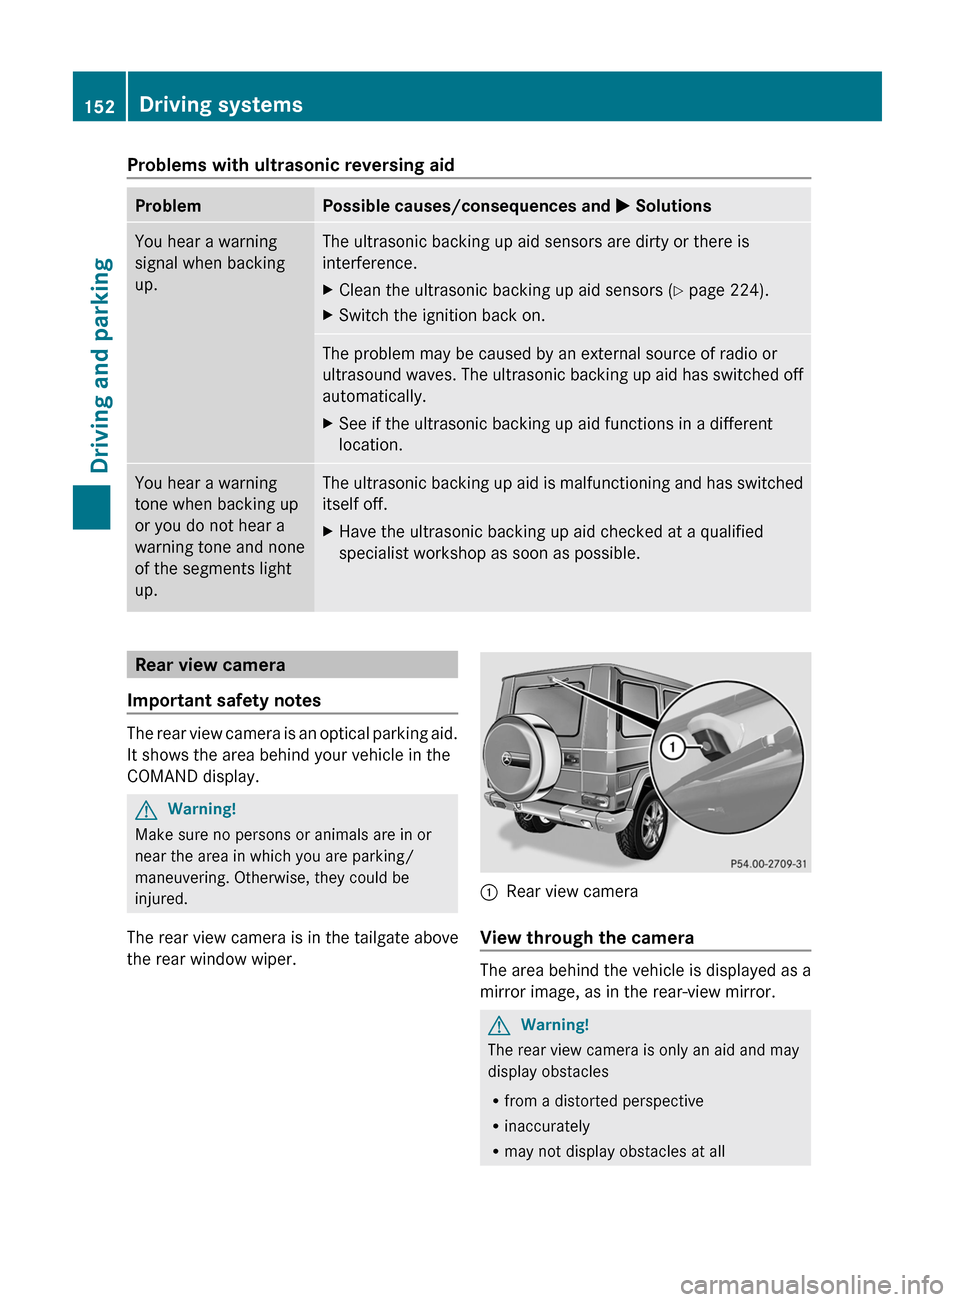
The rear view camera is in the tailgate above
the rear window wiper.
:Rear view camera
View through the camera
The area behind the vehicle is displayed as a
mirror image, as in the rear-view mirror.
GWarning!
The rear view camera is only an aid and may
display obstacles
R from a distorted perspective
R inaccurately
R may not display obstacles at all
152Driving systemsDriving and parking
Page 155 of 288
The rear view camera does not relieve you of
the responsibility to be cautious. Take care
and pay careful attention. The rear view
camera may not show objects which are
R very close to the rear bumper
R under the rear bumper
R under the spare wheel
R nearby behind the spare wheel
You are responsible for safety at all times and
must continue to pay attention to the
immediate surroundings when parking and
maneuvering. This includes the area behind,
in front of, and beside the vehicle. Otherwise
you could endanger yourself and/or others.GWarning!
The rear view camera either will not function
or will not function to its full capability if
R the tailgate is open
R it is raining very hard, snowing or foggy
R it is night or you are parking/maneuvering
your vehicle in an area where it is very dark
R the camera is exposed to a very bright white
light
R the immediate surroundings are
illuminated with fluorescent light (the
display may flicker)
R there is a sudden change in temperature,
e.g. if you drive into a heated garage from
the cold (lens condensation)
R the camera lens is dirty or covered
R the rear of your vehicle is damaged
In this case, have the position and setting
of the camera checked by a qualified
specialist workshop. Mercedes-Benz
recommends that you contact a Mercedes-
Benz Center for this purpose.
Do not use the rear view camera in these
situations. Otherwise you could injure
yourself or others and/or damage property
including your vehicle while parking/
maneuvering.
Activating the rear view cameraXMake sure that the SmartKey is in
position 2 in the ignition lock.XMake sure that the "rear view camera"
function is selected in COMAND (see the
separate operating instructions for
COMAND).XEngage reverse gear.
The area behind the vehicle is shown in the
COMAND display.Driving systems153Driving and parkingZ
Page 167 of 288
XPress the W or X button to activate
or deactivate the Headl. Delayed
Switch Off function.XBefore switching off the engine, turn the
light switch to position Ã.
The exterior lighting delayed switch-off is
activated.XPress the &, V or U button to
select a different display.
Deactivating the delayed switch-off
temporarily:
XBefore leaving the vehicle, turn the key to
position 0 in the ignition lock.XTurn the key to position 2 in the ignition
lock and back to position 0.
The delayed switch-off is deactivated.
Delayed switch-off is reactivated the next
time you start the engine.
Activating/deactivating the interior
lighting delayed switch-off
If the Interior Light. Delay. Sw. Off:
function is activated and you pull the key out
of the ignition lock, the interior lighting
remains on for around 10 seconds.
XPress the V or U button on the
steering wheel to select the Settings
menu.XPress the & button to select submenus.XPress the W or X button to select the
Lighting submenu.XPress the & button to select Interior
Light. Delay Sw. Off .XPress the W or X button to activate
or deactivate Interior Light. Delay.
Sw. Off .XPress the &, V or U button to
select a different display.Vehicle
Activating/deactivating the automatic
door locking feature
If you select the Automatic Locking
function, the vehicle is centrally locked above
a speed of around 9 mph (15 km/h).
i For more information on the automatic
locking feature, see ( Y page 68).
XPress the V or U button on the
steering wheel to select the Settings
menu.XPress the & button to select submenus.XPress the W or X button to select the
Vehicle submenu.XPress the & button to select
Automatic Door Lock .XPress the W or X button to switch
the Automatic Door Lock feature on or
off.XPress the &, V or U button to
select a different display.
Convenience
Activating/deactivating the EASY-
ENTRY/EXIT feature
You can use the Easy-entry Function to
activate or deactivate the EASY-ENTRY/EXIT
feature ( Y page 84).
GWarning!
You must make sure no one can become
trapped or injured by the moving steering
wheel when the easy-entry/exit feature is
activated.
To stop steering wheel movement do one of
the following:
R Move steering wheel adjustment stalk.
R Press one of the memory position buttons.
R Press the memory button.
Do not leave children unattended in the
vehicle, or with access to an unlocked vehicle.
Children could open the driver’s door and
Menus and submenus165On-board computer and displaysZ
Page 186 of 288
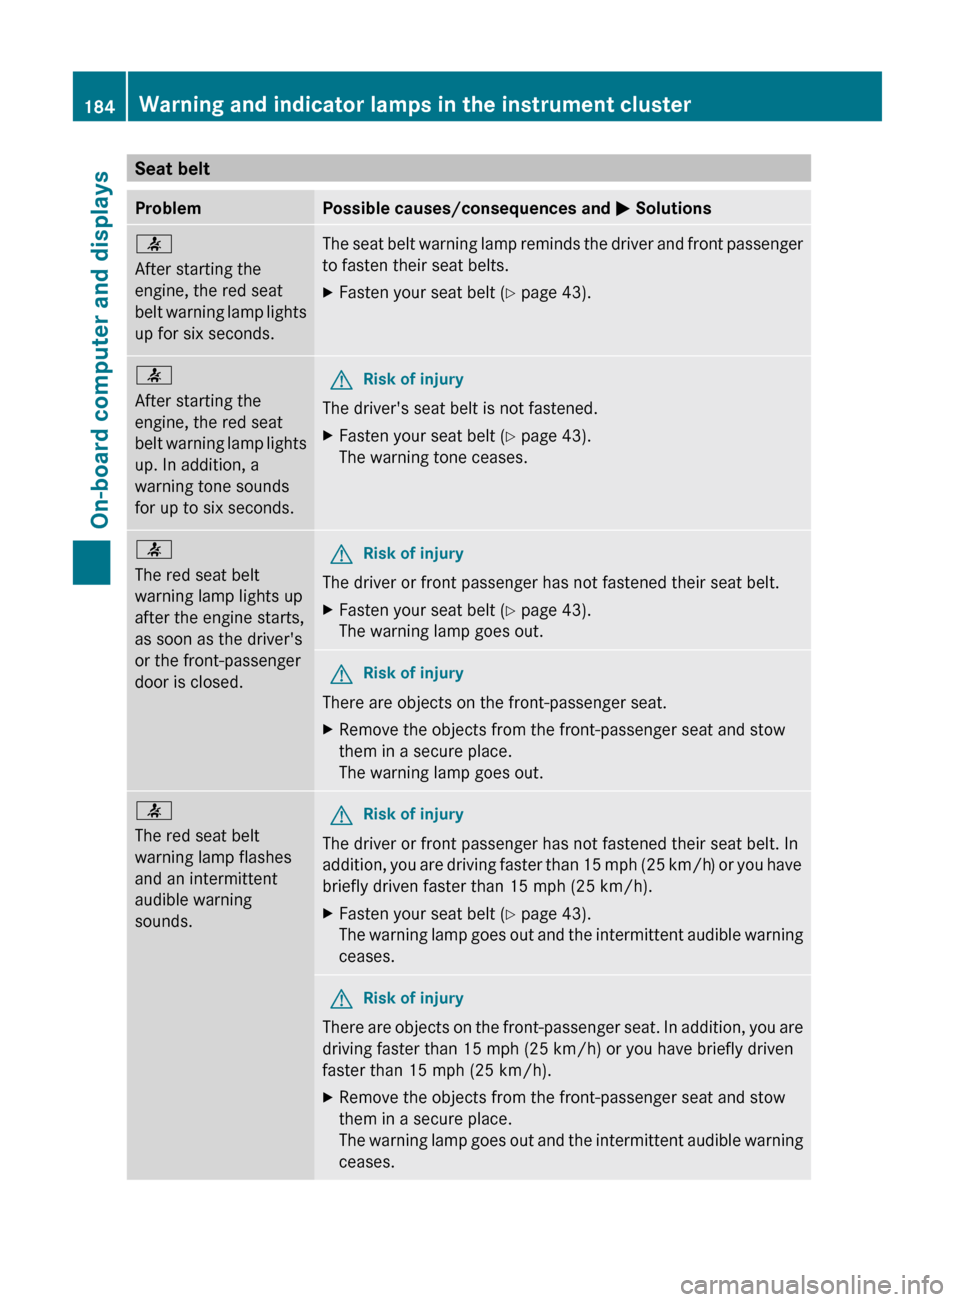
Seat beltProblemPossible causes/consequences and M Solutions7
After starting the
engine, the red seat
belt warning lamp lights
up for six seconds.The seat belt warning lamp reminds the driver and front passenger
to fasten their seat belts.XFasten your seat belt ( Y page 43).7
After starting the
engine, the red seat
belt warning lamp lights
up. In addition, a
warning tone sounds
for up to six seconds.GRisk of injury
The driver's seat belt is not fastened.
XFasten your seat belt ( Y page 43).
The warning tone ceases.7
The red seat belt
warning lamp lights up
after the engine starts,
as soon as the driver's
or the front-passenger
door is closed.GRisk of injury
The driver or front passenger has not fastened their seat belt.
XFasten your seat belt ( Y page 43).
The warning lamp goes out.GRisk of injury
There are objects on the front-passenger seat.
XRemove the objects from the front-passenger seat and stow
them in a secure place.
The warning lamp goes out.7
The red seat belt
warning lamp flashes
and an intermittent
audible warning
sounds.GRisk of injury
The driver or front passenger has not fastened their seat belt. In
addition, you are driving faster than 15 mph (25 km/h) or you have
briefly driven faster than 15 mph (25 km/h).
XFasten your seat belt ( Y page 43).
The warning lamp goes out and the intermittent audible warning
ceases.GRisk of injury
There are objects on the front-passenger seat. In addition, you are
driving faster than 15 mph (25 km/h) or you have briefly driven
faster than 15 mph (25 km/h).
XRemove the objects from the front-passenger seat and stow
them in a secure place.
The warning lamp goes out and the intermittent audible warning
ceases.184Warning and indicator lamps in the instrument clusterOn-board computer and displays
Page 187 of 288
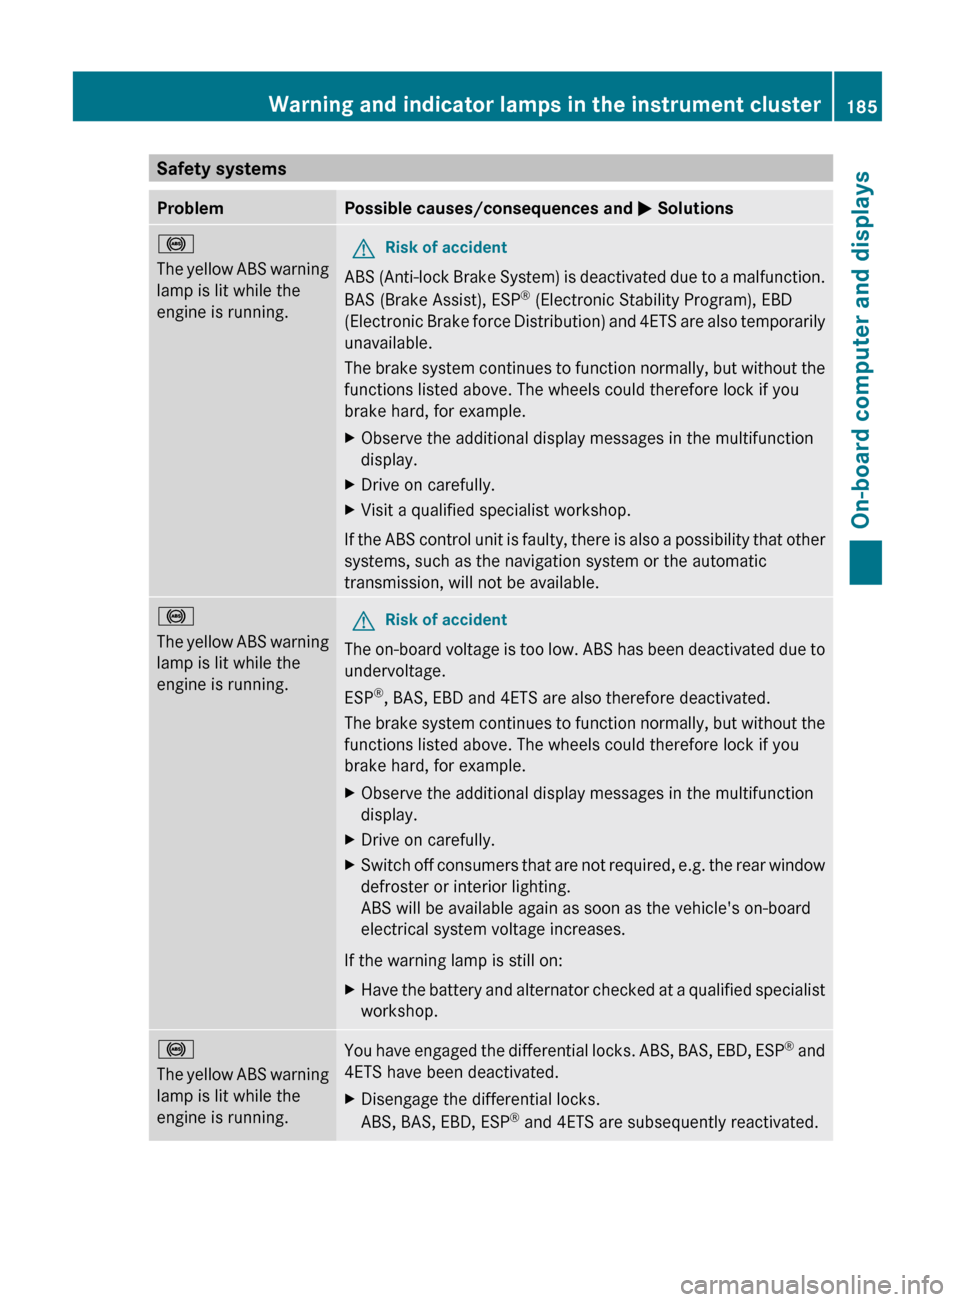
Safety systemsProblemPossible causes/consequences and M Solutions!
The yellow ABS warning
lamp is lit while the
engine is running.GRisk of accident
ABS (Anti-lock Brake System) is deactivated due to a malfunction.
BAS (Brake Assist), ESP ®
(Electronic Stability Program), EBD
(Electronic Brake force Distribution) and 4ETS are also temporarily
unavailable.
The brake system continues to function normally, but without the
functions listed above. The wheels could therefore lock if you
brake hard, for example.
XObserve the additional display messages in the multifunction
display.XDrive on carefully.XVisit a qualified specialist workshop.
If the ABS control unit is faulty, there is also a possibility that other
systems, such as the navigation system or the automatic
transmission, will not be available.
!
The yellow ABS warning
lamp is lit while the
engine is running.GRisk of accident
The on-board voltage is too low. ABS has been deactivated due to
undervoltage.
ESP ®
, BAS, EBD and 4ETS are also therefore deactivated.
The brake system continues to function normally, but without the
functions listed above. The wheels could therefore lock if you
brake hard, for example.
XObserve the additional display messages in the multifunction
display.XDrive on carefully.XSwitch off consumers that are not required, e.g. the rear window
defroster or interior lighting.
ABS will be available again as soon as the vehicle's on-board
electrical system voltage increases.
If the warning lamp is still on:
XHave the battery and alternator checked at a qualified specialist
workshop.!
The yellow ABS warning
lamp is lit while the
engine is running.You have engaged the differential locks. ABS, BAS, EBD, ESP ®
and
4ETS have been deactivated.XDisengage the differential locks.
ABS, BAS, EBD, ESP ®
and 4ETS are subsequently reactivated.Warning and indicator lamps in the instrument cluster185On-board computer and displaysZ
Page 190 of 288
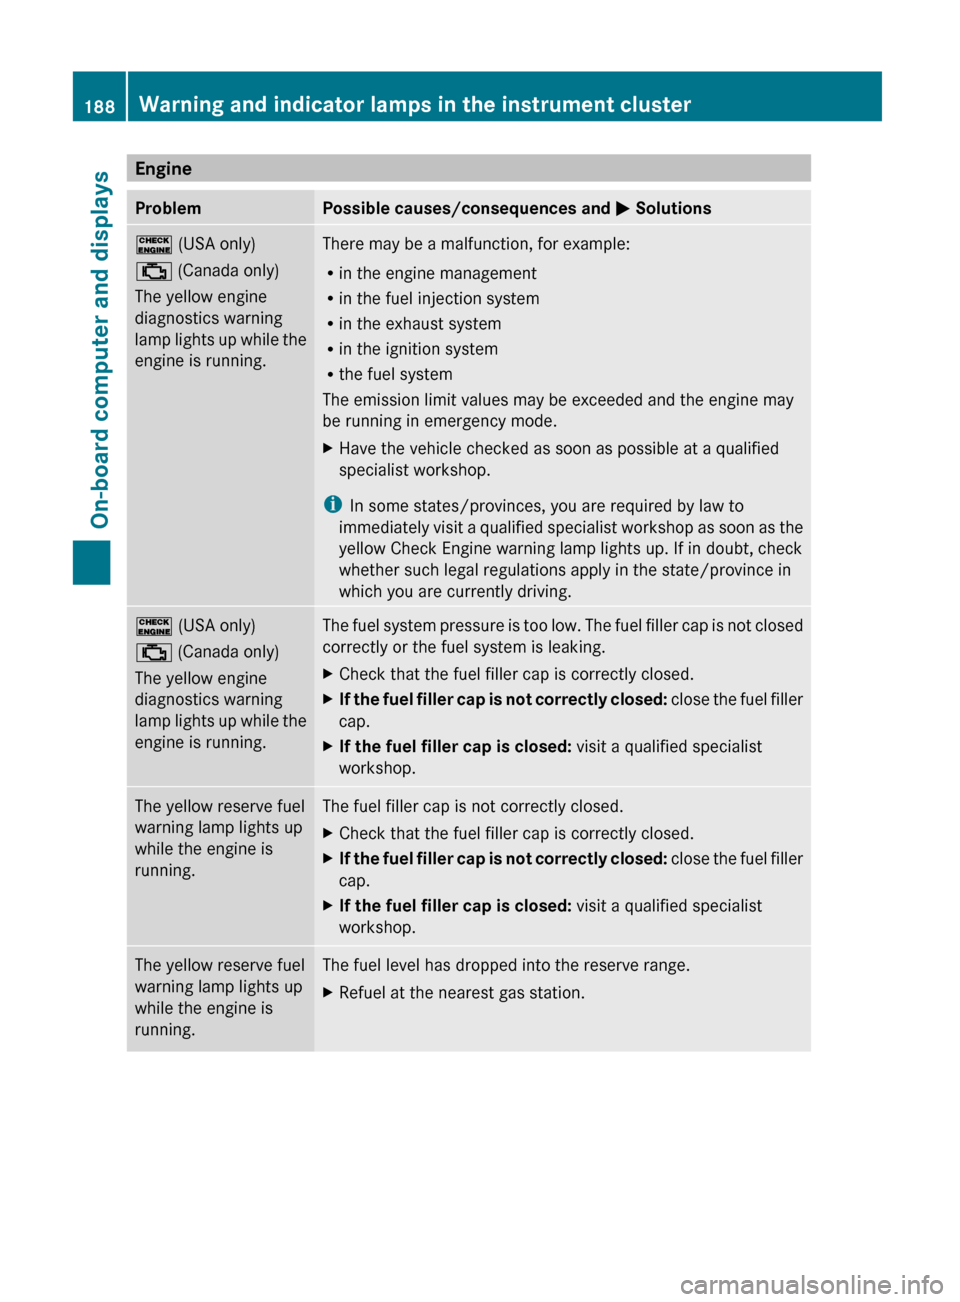
EngineProblemPossible causes/consequences and M Solutions! (USA only)
; (Canada only)
The yellow engine
diagnostics warning
lamp lights up while the
engine is running.There may be a malfunction, for example:
R in the engine management
R in the fuel injection system
R in the exhaust system
R in the ignition system
R the fuel system
The emission limit values may be exceeded and the engine may
be running in emergency mode.XHave the vehicle checked as soon as possible at a qualified
specialist workshop.
i In some states/provinces, you are required by law to
immediately visit a qualified specialist workshop as soon as the
yellow Check Engine warning lamp lights up. If in doubt, check
whether such legal regulations apply in the state/province in
which you are currently driving.
! (USA only)
; (Canada only)
The yellow engine
diagnostics warning
lamp lights up while the
engine is running.The fuel system pressure is too low. The fuel filler cap is not closed
correctly or the fuel system is leaking.XCheck that the fuel filler cap is correctly closed.XIf the fuel filler cap is not correctly closed: close the fuel filler
cap.XIf the fuel filler cap is closed: visit a qualified specialist
workshop.The yellow reserve fuel
warning lamp lights up
while the engine is
running.The fuel filler cap is not correctly closed.XCheck that the fuel filler cap is correctly closed.XIf the fuel filler cap is not correctly closed: close the fuel filler
cap.XIf the fuel filler cap is closed: visit a qualified specialist
workshop.The yellow reserve fuel
warning lamp lights up
while the engine is
running.The fuel level has dropped into the reserve range.XRefuel at the nearest gas station.188Warning and indicator lamps in the instrument clusterOn-board computer and displays
Page 191 of 288
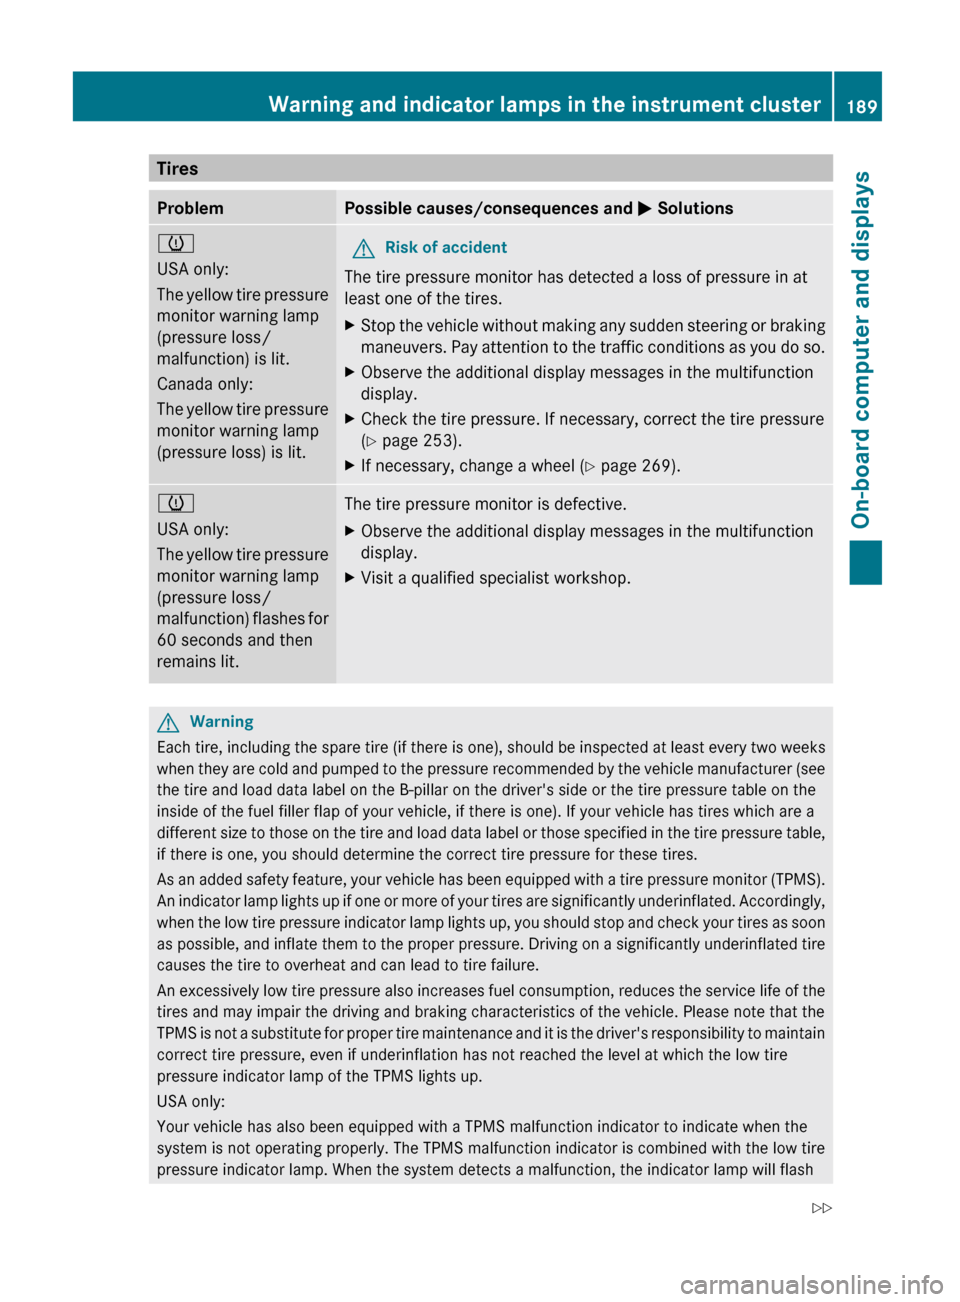
TiresProblemPossible causes/consequences and M Solutionsh
USA only:
The yellow tire pressure
monitor warning lamp
(pressure loss/
malfunction) is lit.
Canada only:
The yellow tire pressure
monitor warning lamp
(pressure loss) is lit.GRisk of accident
The tire pressure monitor has detected a loss of pressure in at
least one of the tires.
XStop the vehicle without making any sudden steering or braking
maneuvers. Pay attention to the traffic conditions as you do so.XObserve the additional display messages in the multifunction
display.XCheck the tire pressure. If necessary, correct the tire pressure
( Y page 253).XIf necessary, change a wheel ( Y page 269).h
USA only:
The yellow tire pressure
monitor warning lamp
(pressure loss/
malfunction) flashes for
60 seconds and then
remains lit.The tire pressure monitor is defective.XObserve the additional display messages in the multifunction
display.XVisit a qualified specialist workshop.GWarning
Each tire, including the spare tire (if there is one), should be inspected at least every two weeks
when they are cold and pumped to the pressure recommended by the vehicle manufacturer (see
the tire and load data label on the B-pillar on the driver's side or the tire pressure table on the
inside of the fuel filler flap of your vehicle, if there is one). If your vehicle has tires which are a
different size to those on the tire and load data label or those specified in the tire pressure table,
if there is one, you should determine the correct tire pressure for these tires.
As an added safety feature, your vehicle has been equipped with a tire pressure monitor (TPMS).
An indicator lamp lights up if one or more of your tires are significantly underinflated. Accordingly,
when the low tire pressure indicator lamp lights up, you should stop and check your tires as soon
as possible, and inflate them to the proper pressure. Driving on a significantly underinflated tire
causes the tire to overheat and can lead to tire failure.
An excessively low tire pressure also increases fuel consumption, reduces the service life of the
tires and may impair the driving and braking characteristics of the vehicle. Please note that the
TPMS is not a substitute for proper tire maintenance and it is the driver's responsibility to maintain
correct tire pressure, even if underinflation has not reached the level at which the low tire
pressure indicator lamp of the TPMS lights up.
USA only:
Your vehicle has also been equipped with a TPMS malfunction indicator to indicate when the
system is not operating properly. The TPMS malfunction indicator is combined with the low tire
pressure indicator lamp. When the system detects a malfunction, the indicator lamp will flash
Warning and indicator lamps in the instrument cluster189On-board computer and displaysZ