2011 MERCEDES-BENZ G550 phone
[x] Cancel search: phonePage 206 of 288
established, then the mbrace system could
not initiate an emergency call (e.g. the
relevant cellular phone network is not
available).
The message Call Failed appears in the
multifunction display for approximately
10 seconds.
Should this occur, assistance must be
summoned by other means.
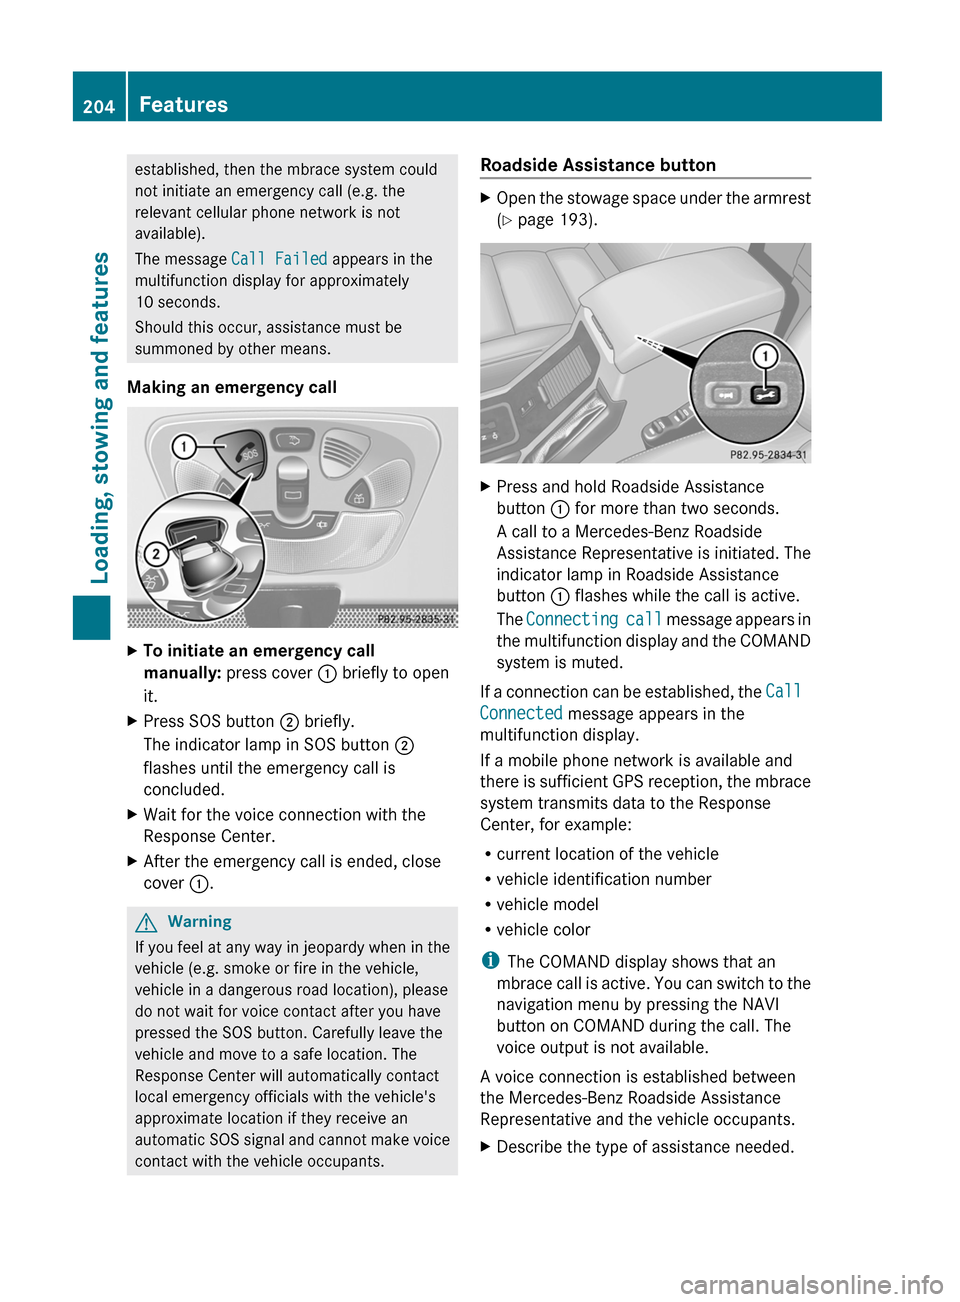
Making an emergency callXTo initiate an emergency call
manually: press cover : briefly to open
it.XPress SOS button ; briefly.
The indicator lamp in SOS button ;
flashes until the emergency call is
concluded.XWait for the voice connection with the
Response Center.XAfter the emergency call is ended, close
cover :.GWarning
If you feel at any way in jeopardy when in the
vehicle (e.g. smoke or fire in the vehicle,
vehicle in a dangerous road location), please
do not wait for voice contact after you have
pressed the SOS button. Carefully leave the
vehicle and move to a safe location. The
Response Center will automatically contact
local emergency officials with the vehicle's
approximate location if they receive an
automatic SOS signal and cannot make voice
contact with the vehicle occupants.
Roadside Assistance buttonXOpen the stowage space under the armrest
( Y page 193).XPress and hold Roadside Assistance
button : for more than two seconds.
A call to a Mercedes-Benz Roadside
Assistance Representative is initiated. The
indicator lamp in Roadside Assistance
button : flashes while the call is active.
The Connecting call message appears in
the multifunction display and the COMAND
system is muted.
If a connection can be established, the Call
Connected message appears in the
multifunction display.
If a mobile phone network is available and
there is sufficient GPS reception, the mbrace
system transmits data to the Response
Center, for example:
R current location of the vehicle
R vehicle identification number
R vehicle model
R vehicle color
i The COMAND display shows that an
mbrace call is active. You can switch to the
navigation menu by pressing the NAVI
button on COMAND during the call. The
voice output is not available.
A voice connection is established between
the Mercedes-Benz Roadside Assistance
Representative and the vehicle occupants.
XDescribe the type of assistance needed.204FeaturesLoading, stowing and features
Page 207 of 288
The Mercedes-Benz Roadside Assistance
Representative either sends a qualified
Mercedes-Benz technician or organizes for
your vehicle to be transported to the nearest
authorized Mercedes-Benz Center. You may
be charged for services such as repair work
and/or towing. Further details are available
in your mbrace manual.
i If the indicator lamp in Roadside
Assistance button : flashes continuously
and no voice connection to the Response
Center has been established, then the
mbrace system has failed to initiate a
Roadside Assistance call (e.g. the
corresponding mobile phone network is not
available). The Call Failed message
appears in the multifunction display.XTo end a call: press the ~ button on the
multifunction steering wheel.
or
XPress the corresponding button for ending
a phone call on COMAND.
i Sign and Drive services 18
: you are not
charged for services such as jump-starting,
providing a few gallons of fuel for a fuel tank
that has been run dry or changing a flat tire
with the vehicle's own spare wheel.
MB Info call button
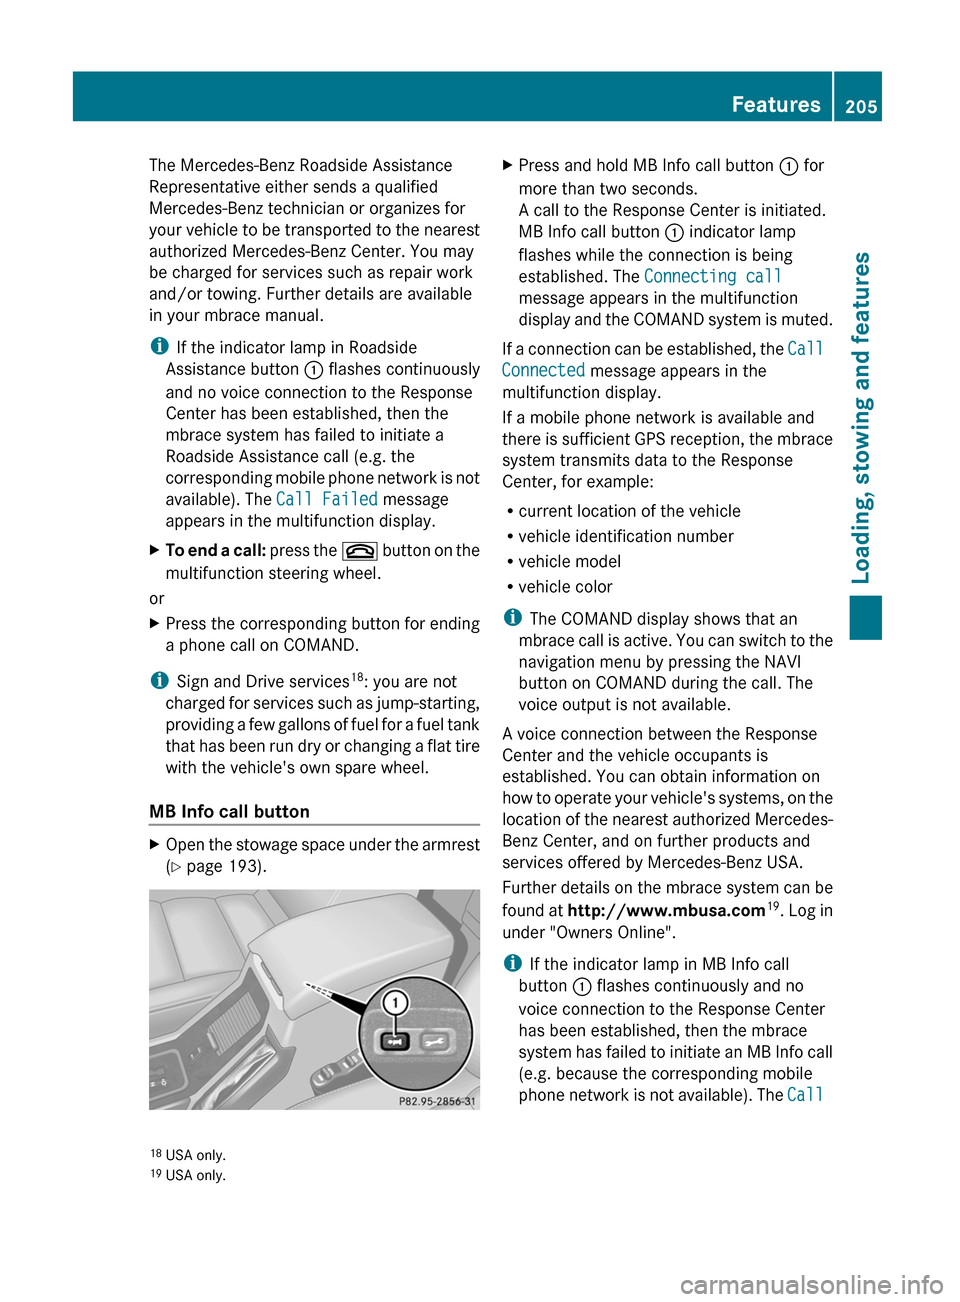
XOpen the stowage space under the armrest
( Y page 193).XPress and hold MB Info call button : for
more than two seconds.
A call to the Response Center is initiated.
MB Info call button : indicator lamp
flashes while the connection is being
established. The Connecting call
message appears in the multifunction
display and the COMAND system is muted.
If a connection can be established, the Call
Connected message appears in the
multifunction display.
If a mobile phone network is available and
there is sufficient GPS reception, the mbrace
system transmits data to the Response
Center, for example:
R current location of the vehicle
R vehicle identification number
R vehicle model
R vehicle color
i The COMAND display shows that an
mbrace call is active. You can switch to the
navigation menu by pressing the NAVI
button on COMAND during the call. The
voice output is not available.
A voice connection between the Response
Center and the vehicle occupants is
established. You can obtain information on
how to operate your vehicle's systems, on the
location of the nearest authorized Mercedes-
Benz Center, and on further products and
services offered by Mercedes-Benz USA.
Further details on the mbrace system can be
found at http://www.mbusa.com 19
. Log in
under "Owners Online".
i If the indicator lamp in MB Info call
button : flashes continuously and no
voice connection to the Response Center
has been established, then the mbrace
system has failed to initiate an MB Info call
(e.g. because the corresponding mobile
phone network is not available). The Call
18
USA only.
19 USA only.Features205Loading, stowing and featuresZ
Page 208 of 288
Failed message appears in the
multifunction display.XTo end a call: press the ~ button on the
multifunction steering wheel.
or
XPress the corresponding button for ending
a phone call on COMAND.
Call priority
When service calls are active, e.g. Roadside
Assistance or MB Info calls, an emergency
call can still be initiated. In this case, an
emergency call has the highest priority and
takes precedence over all other active calls.
The indicator lamp of the respective button
flashes until the call is ended. An emergency
call can only be terminated by the Response
Center. All other calls can be ended by
pressing the ~ button on the
multifunction steering wheel or the
corresponding button for ending a telephone
call on COMAND.
i When an mbrace call has been initiated,
COMAND is muted. The mobile phone is no
longer connected to COMAND. However, if
you want to use your mobile phone, we
recommend that you do this only when the
vehicle is stationary and in a safe location.
Downloading destinations in COMAND
i Information on the components and
operating principles of the COMAND
system can be found in the separate
COMAND operating instructions.
Destination Download gives you access to a
database with over ten million points of
interest (POIs) which can be downloaded onto
the navigation system of your vehicle. If you
know the destination, you can download the
address or obtain the location of points of
interest (POIs) or important destinations in
the surrounding area.
You are prompted to confirm route guidance
to the address entered.XSelect Yes using the = or ; button
on COMAND.XPress 9 on COMAND to confirm.
The system calculates the route and
subsequently starts the route guidance with
the address entered.
i If you select No, the address can be stored
in the address book.
i The Destination Download function is
available if the corresponding mobile
phone network is available and data
transfer is possible.
Search & Send
"Search & Send" is a destination entry
service. You can find further information on
"Search & Send" in the separate COMAND
operating instructions.
Vehicle remote unlocking
If you have unintentionally locked your
vehicle (e.g. the SmartKey is inside the
vehicle) and a replacement key is not
available:
XContact the following service hotlines:
R USA: Response Center at
1-888-990-9007
R Canada: Customer Service at
1-888-923-8367
You will be asked for your password.XReturn to your vehicle at the time arranged
with the Response Center.XPress and hold the release button on the
rear door handle for at least 20 seconds
until the indicator lamp in the SOS button
( Y page 203) begins flashing.
The Connecting Call message appears
on the multifunction display.
Alternatively, the vehicle can also be opened
via the Internet in the "Owners Online"
206FeaturesLoading, stowing and features
Page 209 of 288
section using your ID number and
password 20
.
i Vehicle remote unlocking is only possible
if the corresponding mobile phone network
is accessible.
The SOS button flashes and the
Connecting Call message appears in the
multifunction display to confirm that the
command for vehicle remote unlocking has
been received.
If you press the rear door's locking cylinder
for more than 20 seconds before receiving
authorization for remote unlocking, you
must wait 15 minutes before you can press
the rear door's locking cylinder again.
Service for recovering stolen vehicles
If your vehicle has been stolen:
XContact the police.
The police will issue an incident report. This
report has a number.XForward this number to the Response
Center together with your PIN.
The Response Center will then attempt to
covertly contact the mbrace system. The
Response Center contacts you and the
local law enforcement authority if the
vehicle is located. However, only the law
enforcement is informed of the location of
the vehicle.
i If the anti-theft alarm system remains
activated for longer than thirty seconds,
mbrace is automatically connected to the
Response Center.
Brush guard (USA only)
GWarning
The brush guard is designed solely to enhance
the appearance of the vehicle and help
protect grille and headlamps from minor
mishaps, either on or off road.
Since the safety characteristics are limited in
the event of an accident, brush guard are not
intended to prevent injury or damage in the
event of an accident. Also observe state and
local regulations on installation and use.
Raise and lower the brush guard in an open
space with plenty of room.
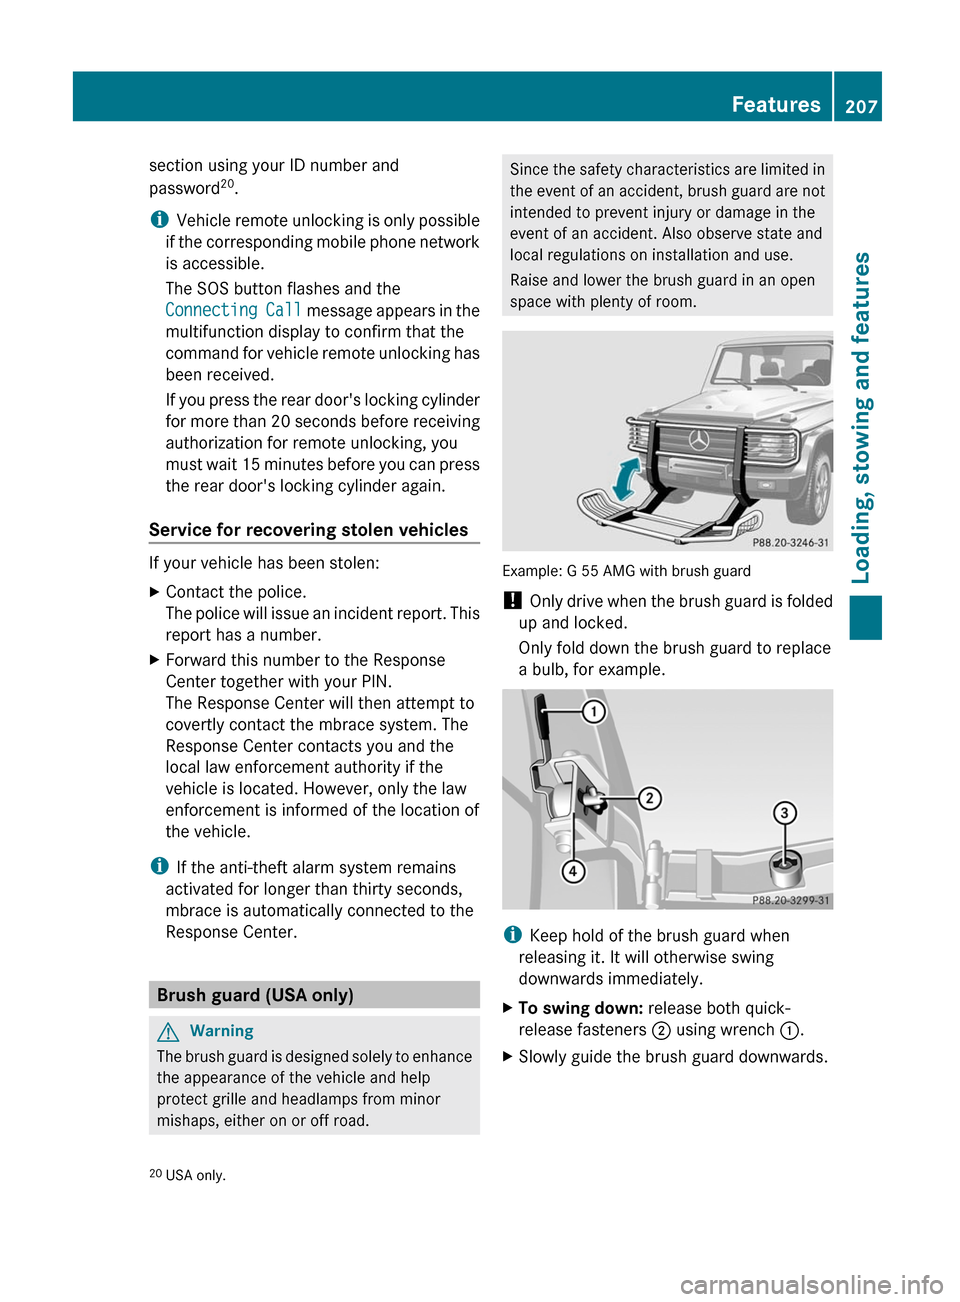
Example: G 55 AMG with brush guard
! Only drive when the brush guard is folded
up and locked.
Only fold down the brush guard to replace
a bulb, for example.
i Keep hold of the brush guard when
releasing it. It will otherwise swing
downwards immediately.
XTo swing down: release both quick-
release fasteners ; using wrench :.XSlowly guide the brush guard downwards.20
USA only.Features207Loading, stowing and featuresZ
Page 218 of 288
XSlowly insert oil dipstick : into the
dipstick guide tube to the stop, and take it
out again.
The oil level is correct if the level is between
MIN mark = and MAX mark ;.XAdd oil if necessary.
Checking the oil level using the on-
board computer
On the G 55 AMG, the oil level can be checked
using the on-board computer.
When checking the oil level:
R park the vehicle on a level surface.
R the engine should be switched off for
approximately five minutes if the engine is
at normal operating temperature.
Xmake sure that the SmartKey is in position
2 in the ignition lock.XPress the & or * button on the
steering wheel to select the following
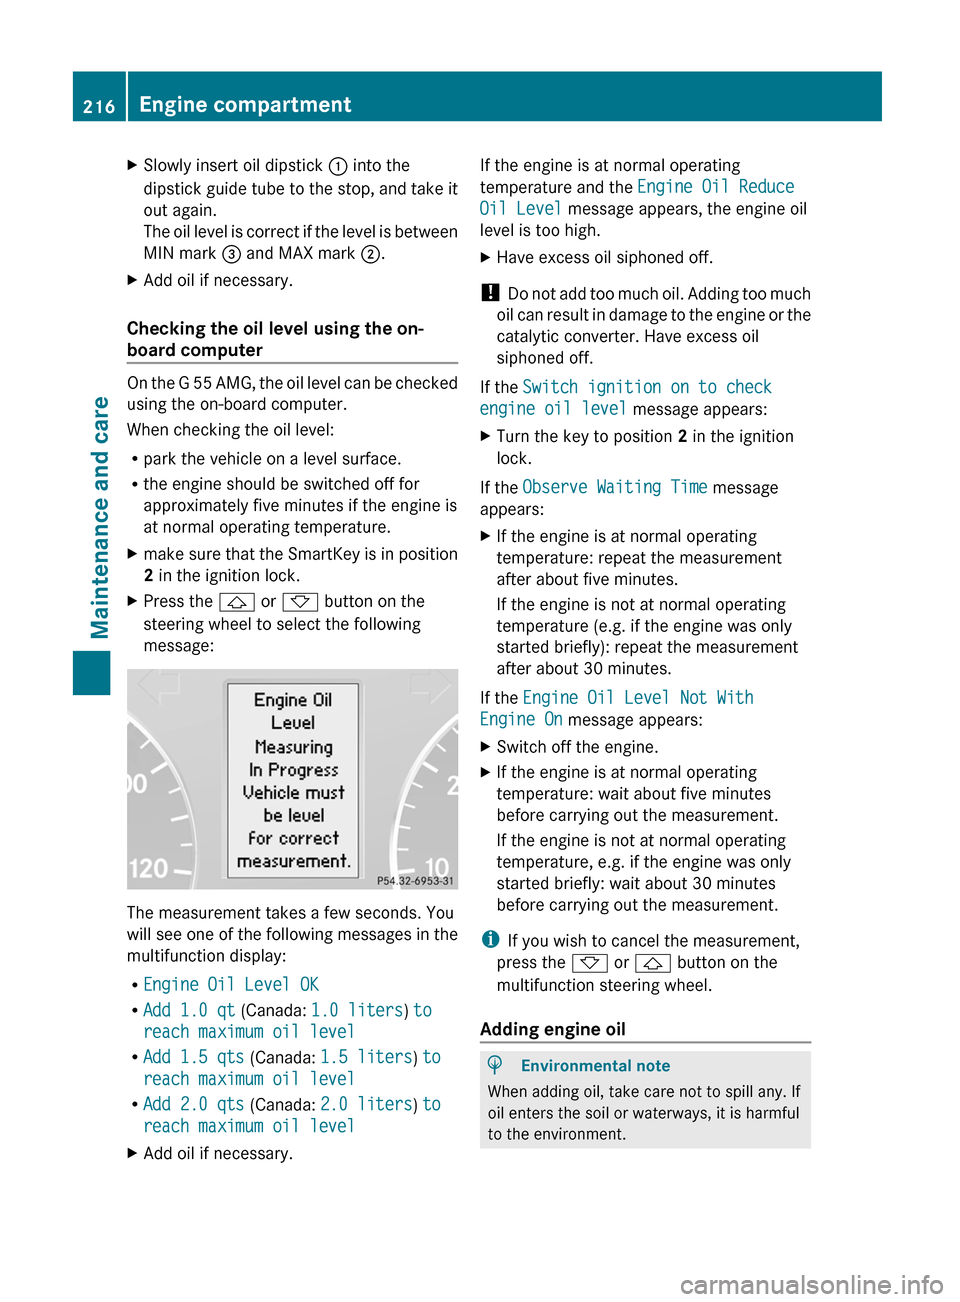
message:
The measurement takes a few seconds. You
will see one of the following messages in the
multifunction display:
R Engine Oil Level OK
R Add 1.0 qt (Canada: 1.0 liters ) to
reach maximum oil level
R Add 1.5 qts (Canada: 1.5 liters ) to
reach maximum oil level
R Add 2.0 qts (Canada: 2.0 liters ) to
reach maximum oil level
XAdd oil if necessary.If the engine is at normal operating
temperature and the Engine Oil Reduce
Oil Level message appears, the engine oil
level is too high.XHave excess oil siphoned off.
! Do not add too much oil. Adding too much
oil can result in damage to the engine or the
catalytic converter. Have excess oil
siphoned off.
If the Switch ignition on to check
engine oil level message appears:
XTurn the key to position 2 in the ignition
lock.
If the Observe Waiting Time message
appears:
XIf the engine is at normal operating
temperature: repeat the measurement
after about five minutes.
If the engine is not at normal operating
temperature (e.g. if the engine was only
started briefly): repeat the measurement
after about 30 minutes.
If the Engine Oil Level Not With
Engine On message appears:
XSwitch off the engine.XIf the engine is at normal operating
temperature: wait about five minutes
before carrying out the measurement.
If the engine is not at normal operating
temperature, e.g. if the engine was only
started briefly: wait about 30 minutes
before carrying out the measurement.
i If you wish to cancel the measurement,
press the * or & button on the
multifunction steering wheel.
Adding engine oil
HEnvironmental note
When adding oil, take care not to spill any. If
oil enters the soil or waterways, it is harmful
to the environment.
216Engine compartmentMaintenance and care
Page 219 of 288
! Only use engine oils and oil filters which
have been approved for vehicles with a
service system. A list of the engine oils and
oil filters that have been tested and
approved according to the Mercedes-Benz
specifications for service products can be
found on the Internet at http://
www.mbusa.com (USA only). Further
information on tested and approved engine
oils and oil filters can be obtained from any
authorized Mercedes-Benz Center.
The following causes engine failure or
damage to the exhaust system:
Rusing engine oils and oil filters that are
not specifically approved for the service
system
Rreplacing the engine oil and oil filter after
having exceeded the interval for
replacement prescribed by the
maintenance system
Rusing engine oil additives
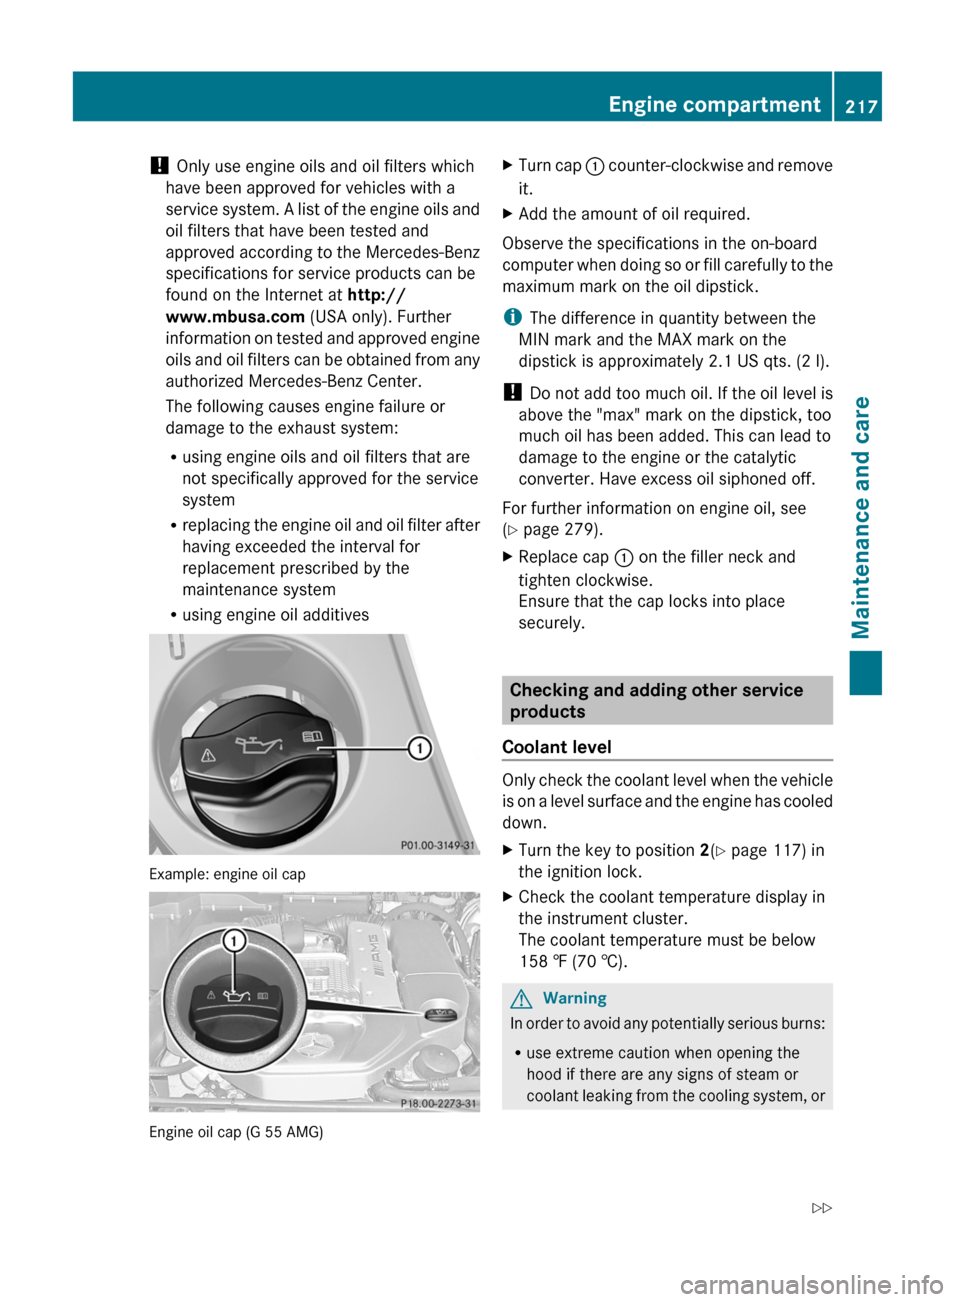
Example: engine oil cap
Engine oil cap (G 55 AMG)
XTurn cap : counter-clockwise and remove
it.
XAdd the amount of oil required.
Observe the specifications in the on-board
computer when doing so or fill carefully to the
maximum mark on the oil dipstick.
iThe difference in quantity between the
MIN mark and the MAX mark on the
dipstick is approximately 2.1 US qts. (2 l).
! Do not add too much oil. If the oil level is
above the "max" mark on the dipstick, too
much oil has been added. This can lead to
damage to the engine or the catalytic
converter. Have excess oil siphoned off.
For further information on engine oil, see
(Y page 279).
XReplace cap : on the filler neck and
tighten clockwise.
Ensure that the cap locks into place
securely.
Checking and adding other service
products
Coolant level
Only check the coolant level when the vehicle
is on a level surface and the engine has cooled
down.
XTurn the key to position 2(Y page 117) in
the ignition lock.
XCheck the coolant temperature display in
the instrument cluster.
The coolant temperature must be below
158 ‡ (70 †).
GWarning
In order to avoid any potentially serious burns:
Ruse extreme caution when opening the
hood if there are any signs of steam or
coolant leaking from the cooling system, or
Engine compartment217Maintenance and careZ
Page 256 of 288
pressure telltale when one or more of your
tires are significantly underinflated.
Accordingly, when the low tire pressure
telltale illuminates, you should stop and check
your tires as soon as possible, and inflate
them to the proper pressure. Driving on a
significantly underinflated tire causes the tire
to overheat and can lead to tire failure.
Underinflation also reduces fuel efficiency
and tire tread life, and may affect the vehicle's
handling and stopping ability. Please note that
the TPMS is not a substitute for proper tire
maintenance, and it is the driver's
responsibility to maintain correct tire
pressure, even if underinflation has not
reached the level to trigger illumination of the
TPMS low tire pressure telltale.
USA only:
Your vehicle has also been equipped with a
TPMS malfunction indicator to indicate when
the tire pressure monitoring system is not
operating properly. The TPMS malfunction
indicator is combined with the low tire
pressure telltale. When the system detects a
malfunction, the telltale will flash for
approximately one minute and then remain
continuously illuminated. This sequence will
continue upon subsequent vehicle start-ups
as long as the malfunction exists. When the
malfunction indicator is lit, the system may
not be able to detect or signal low tire
pressure as intended.
TPMS malfunctions may occur for a variety of
reasons, including the installation of
incompatible replacement or alternate tires
or wheels on the vehicle that prevent the
TPMS from functioning properly. Always
check the TPMS malfunction telltale after
replacing one or more tires or wheels on your
vehicle to ensure that the replacement or
alternate tires and wheels allow the TPMS to
continue to function properly.
i USA only:
If the tire pressure monitor is
malfunctioning, it may take more than
10 minutes for the tire pressure warninglamp to inform you of the malfunction by
flashing for 60 seconds and then remaining
lit.
When the malfunction has been rectified,
the tire pressure warning lamp goes out
after driving for a few minutes.
Information on tire pressures is displayed in
the multifunction display. After a few minutes
of driving, the current tire pressure of each
tire is shown in the multifunction display.
i The tire pressure values indicated by the
on-board computer may differ from those
measured at a gas station with a pressure
gauge. The tire pressures shown by the on-
board computer refer to those measured at
sea level. At high altitudes, the tire pressure
values indicated by a pressure gauge are
higher than those shown by the on-board
computer. In this case, do not reduce the
tire pressures.
i The operation of the tire pressure monitor
can be affected by interference from radio
transmitting equipment (e.g. radio
headphones, two-way radios) that may be
being operated in or near the vehicle.
i USA only:
This device complies with Part 15 of the
FCC Rules. Operation is subject to the
following two conditions:
1. This device may not cause harmful
interference, and
2. This device must withstand any
interference received, including
interference that may cause undesired
operation.
Unauthorized modifications to the device
can lead to the invalidation of the operating
agreement of the device.
i Canada only:
This device complies with the RSS-210
Rules from Industry Canada. Operation is
subject to the following two conditions:
1. This device may not cause harmful
interference, and254Tire pressureWheels and tires