2011 MERCEDES-BENZ G-CLASS rear view mirror
[x] Cancel search: rear view mirrorPage 96 of 288
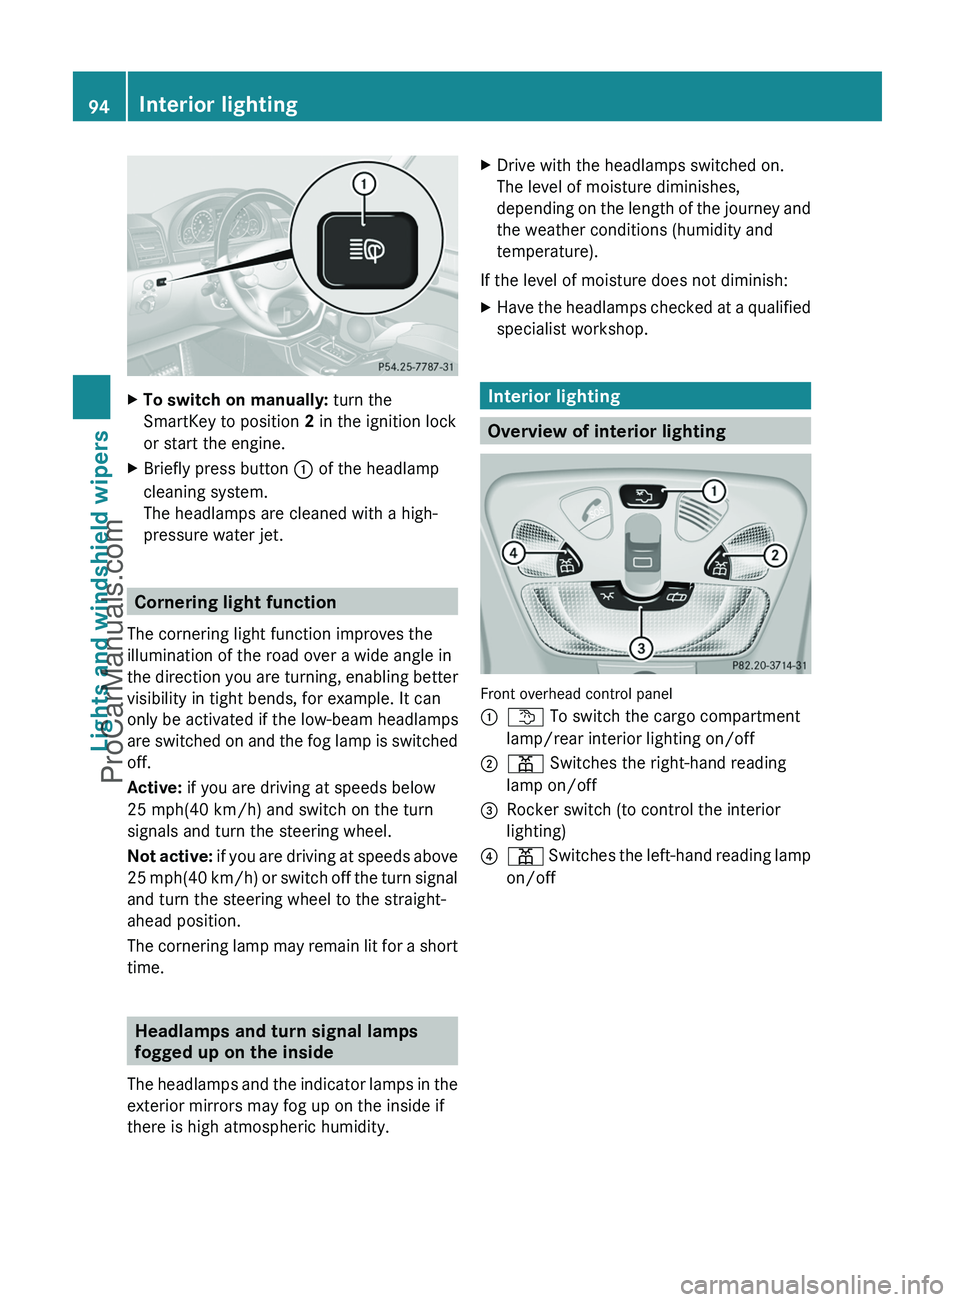
XTo switch on manually: turn the
SmartKey to position 2 in the ignition lock
or start the engine.XBriefly press button : of the headlamp
cleaning system.
The headlamps are cleaned with a high-
pressure water jet.
Cornering light function
The cornering light function improves the
illumination of the road over a wide angle in
the direction you are turning, enabling better
visibility in tight bends, for example. It can
only be activated if the low-beam headlamps
are switched on and the fog lamp is switched
off.
Active: if you are driving at speeds below
25 mph(40 km/h) and switch on the turn
signals and turn the steering wheel.
Not active: if you are driving at speeds above
25 mph (40 km/h) or switch off the turn signal
and turn the steering wheel to the straight-
ahead position.
The cornering lamp may remain lit for a short
time.
Headlamps and turn signal lamps
fogged up on the inside
The headlamps and the indicator lamps in the
exterior mirrors may fog up on the inside if
there is high atmospheric humidity.
XDrive with the headlamps switched on.
The level of moisture diminishes,
depending on the length of the journey and
the weather conditions (humidity and
temperature).
If the level of moisture does not diminish:
XHave the headlamps checked at a qualified
specialist workshop.
Interior lighting
Overview of interior lighting
Front overhead control panel
:t To switch the cargo compartment
lamp/rear interior lighting on/off;p Switches the right-hand reading
lamp on/off=Rocker switch (to control the interior
lighting)?p Switches the left-hand reading lamp
on/off94Interior lightingLights and windshield wipers
ProCarManuals.com
Page 99 of 288
Halogen bulbs are pressurized and could
explode when you change them, particularly
if they are very hot. You should therefore wear
eye protection and gloves when you are
changing them.
There are bulbs other than the Xenon bulbs
that you cannot replace. Replace only the
bulbs listed ( Y page 97). Have the bulbs that
you cannot replace yourself changed at a
qualified specialist workshop.
Mercedes-Benz recommends that you use an
authorized Mercedes-Benz Center for this
purpose. In particular, work relevant to safety
or on safety-related systems must be carried
out at a qualified specialist workshop.
If you require assistance changing bulbs,
consult a qualified specialist workshop.
Do not touch the glass tube of new bulbs with
your bare hands. Even minor contamination
can burn into the glass surface and reduce
the service life of the bulbs. Always use a lint-
free cloth or only touch the base of the bulb
when installing.
Only use bulbs of the correct type.
If the new bulb still does not light up, consult
a qualified specialist workshop.
Bulbs and lamps are an important aspect of
vehicle safety. You must therefore make sure
that these function correctly at all times.
Have the headlamp setting checked regularly.
Before changing bulbs
Have the following bulbs changed at a
qualified specialist workshop, e.g. an
authorized Mercedes-Benz Center:
R additional turn signals in the exterior
mirrors
R high-mounted brake lamp
R high-beam/low-beam headlamps (Xenon
bulbs)
R parking lamp/standing lamp
R license plate lamp
i Individual segments of the license plate
lamp LEDs may fail without a display
message appearing in the multifunction
display. Check the license plate lamp
regularly. Consult a qualified specialist
workshop if necessary.
You can replace the following bulbs:
R fog lamp/cornering light with fog lamp
function
R turn signal lamp (front)
R brake/tail lamp
R turn signal lamp (rear)
R tail lamp/standing lamp
R backup lamp
R rear fog lamp
R side marker lamp
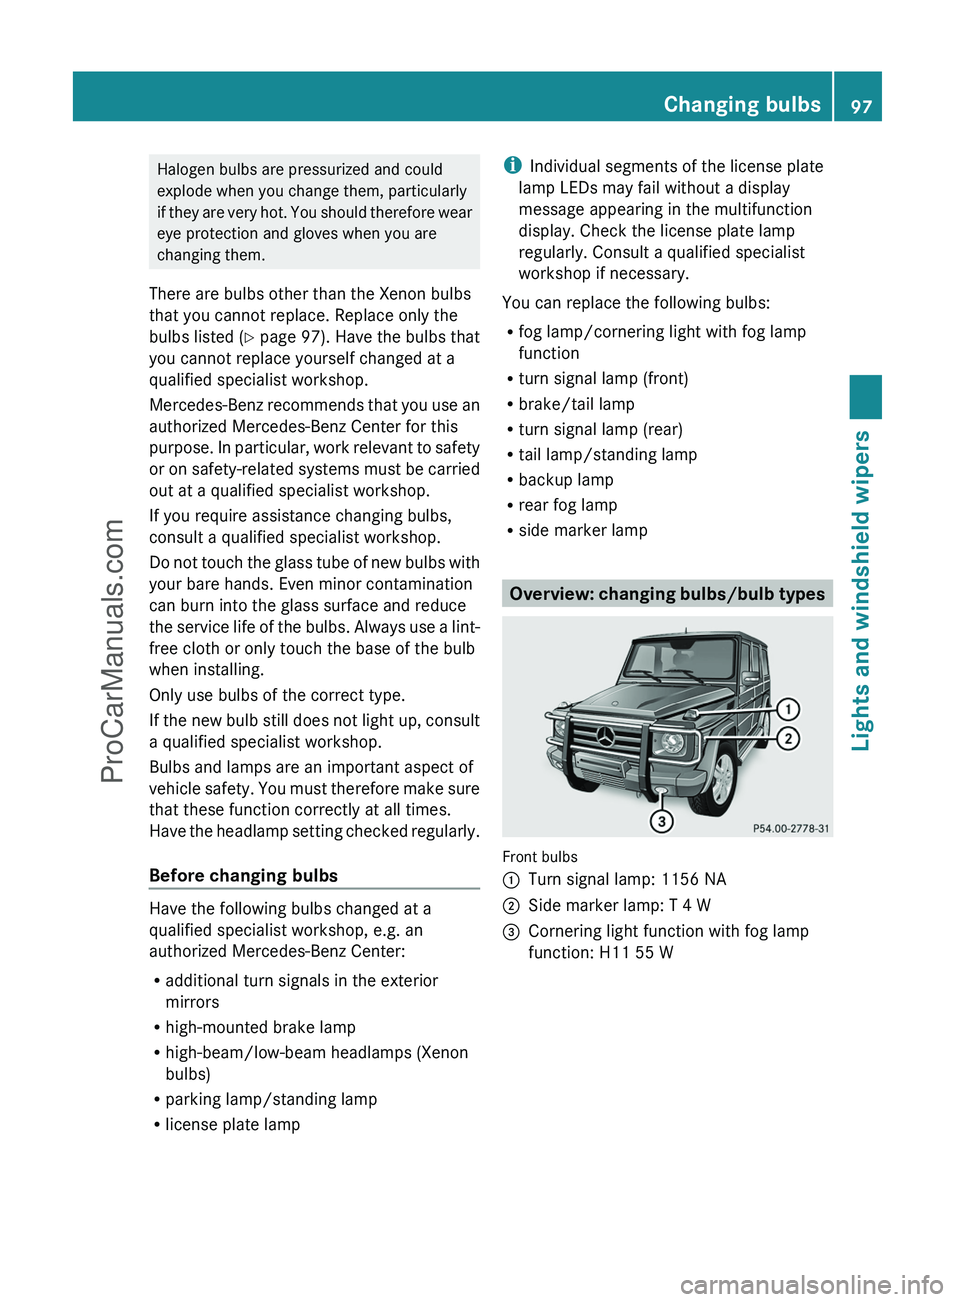
Overview: changing bulbs/bulb types
Front bulbs
:Turn signal lamp: 1156 NA;Side marker lamp: T 4 W=Cornering light function with fog lamp
function: H11 55 WChanging bulbs97Lights and windshield wipersZProCarManuals.com
Page 154 of 288

Problems with ultrasonic reversing aidProblemPossible causes/consequences and M SolutionsYou hear a warning
signal when backing
up.The ultrasonic backing up aid sensors are dirty or there is
interference.XClean the ultrasonic backing up aid sensors ( Y page 224).XSwitch the ignition back on.The problem may be caused by an external source of radio or
ultrasound waves. The ultrasonic backing up aid has switched off
automatically.XSee if the ultrasonic backing up aid functions in a different
location.You hear a warning
tone when backing up
or you do not hear a
warning tone and none
of the segments light
up.The ultrasonic backing up aid is malfunctioning and has switched
itself off.XHave the ultrasonic backing up aid checked at a qualified
specialist workshop as soon as possible.Rear view camera
Important safety notes
The rear view camera is an optical parking aid.
It shows the area behind your vehicle in the
COMAND display.
GWarning!
Make sure no persons or animals are in or
near the area in which you are parking/
maneuvering. Otherwise, they could be
injured.
The rear view camera is in the tailgate above
the rear window wiper.
:Rear view camera
View through the camera
The area behind the vehicle is displayed as a
mirror image, as in the rear-view mirror.
GWarning!
The rear view camera is only an aid and may
display obstacles
R from a distorted perspective
R inaccurately
R may not display obstacles at all
152Driving systemsDriving and parking
ProCarManuals.com
Page 200 of 288
If you do not require the cup holder, it can be
stored in the glove box or in the stowage
compartment in the center console, for
example.
Cup holders in the rear compartment
! Ensure that you remove all containers
from the cup holder in the rear before
folding the seat backrest and the seat
cushion of the rear bench seat forwards.
Sun visors
Overview of sun visors
GWarning
Do not use the vanity mirror while driving.
Keep the vanity mirrors in the sun visors
closed while the vehicle is in motion.
Reflected glare can endanger you and others.
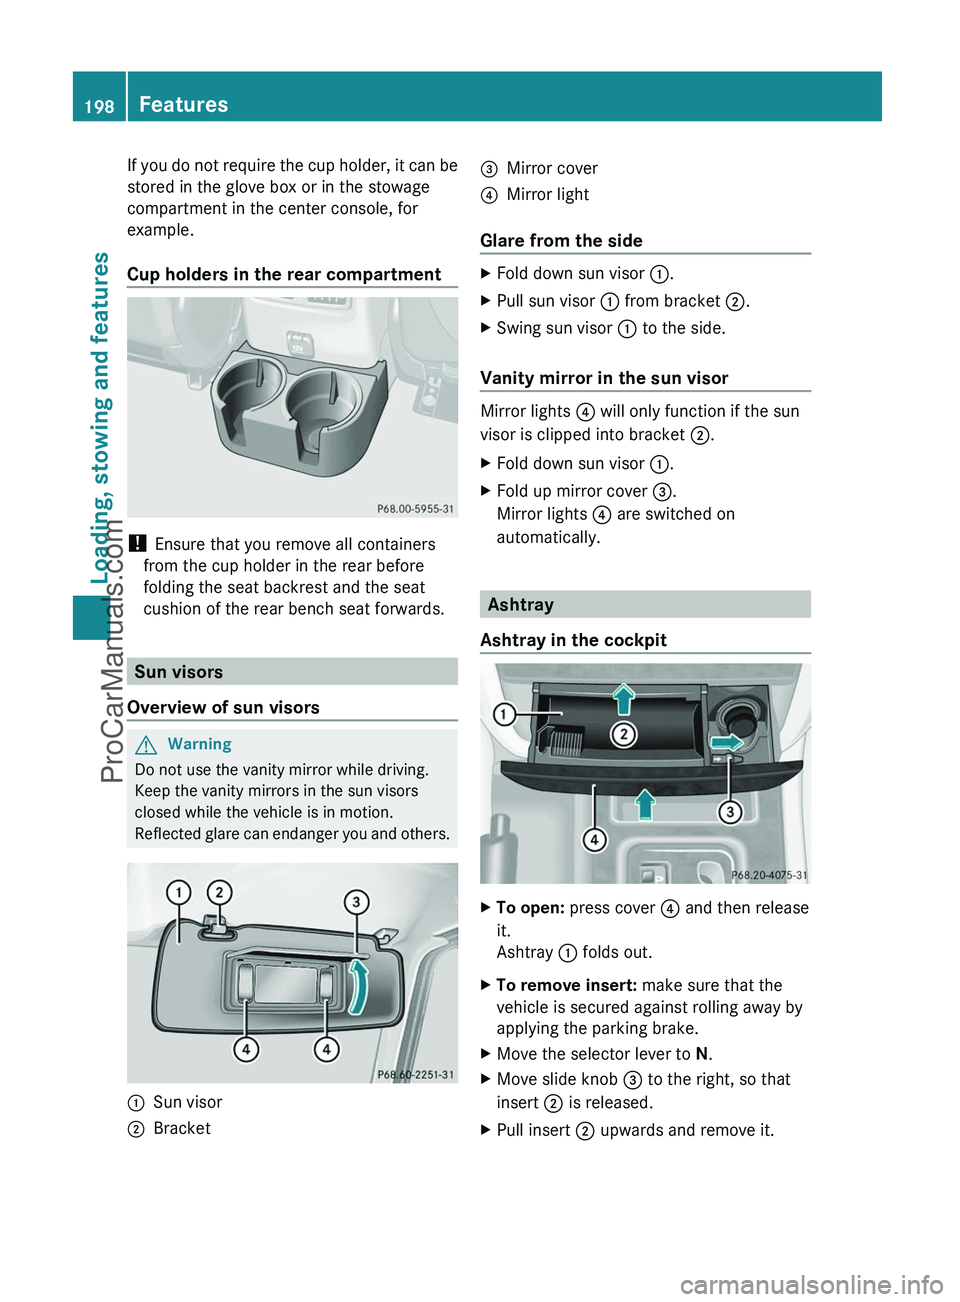
:Sun visor;Bracket=Mirror cover?Mirror light
Glare from the side
XFold down sun visor :.XPull sun visor : from bracket ;.XSwing sun visor : to the side.
Vanity mirror in the sun visor
Mirror lights ? will only function if the sun
visor is clipped into bracket ;.
XFold down sun visor :.XFold up mirror cover =.
Mirror lights ? are switched on
automatically.
Ashtray
Ashtray in the cockpit
XTo open: press cover ? and then release
it.
Ashtray : folds out.XTo remove insert: make sure that the
vehicle is secured against rolling away by
applying the parking brake.XMove the selector lever to N.XMove slide knob = to the right, so that
insert ; is released.XPull insert ; upwards and remove it.198FeaturesLoading, stowing and features
ProCarManuals.com
Page 210 of 288
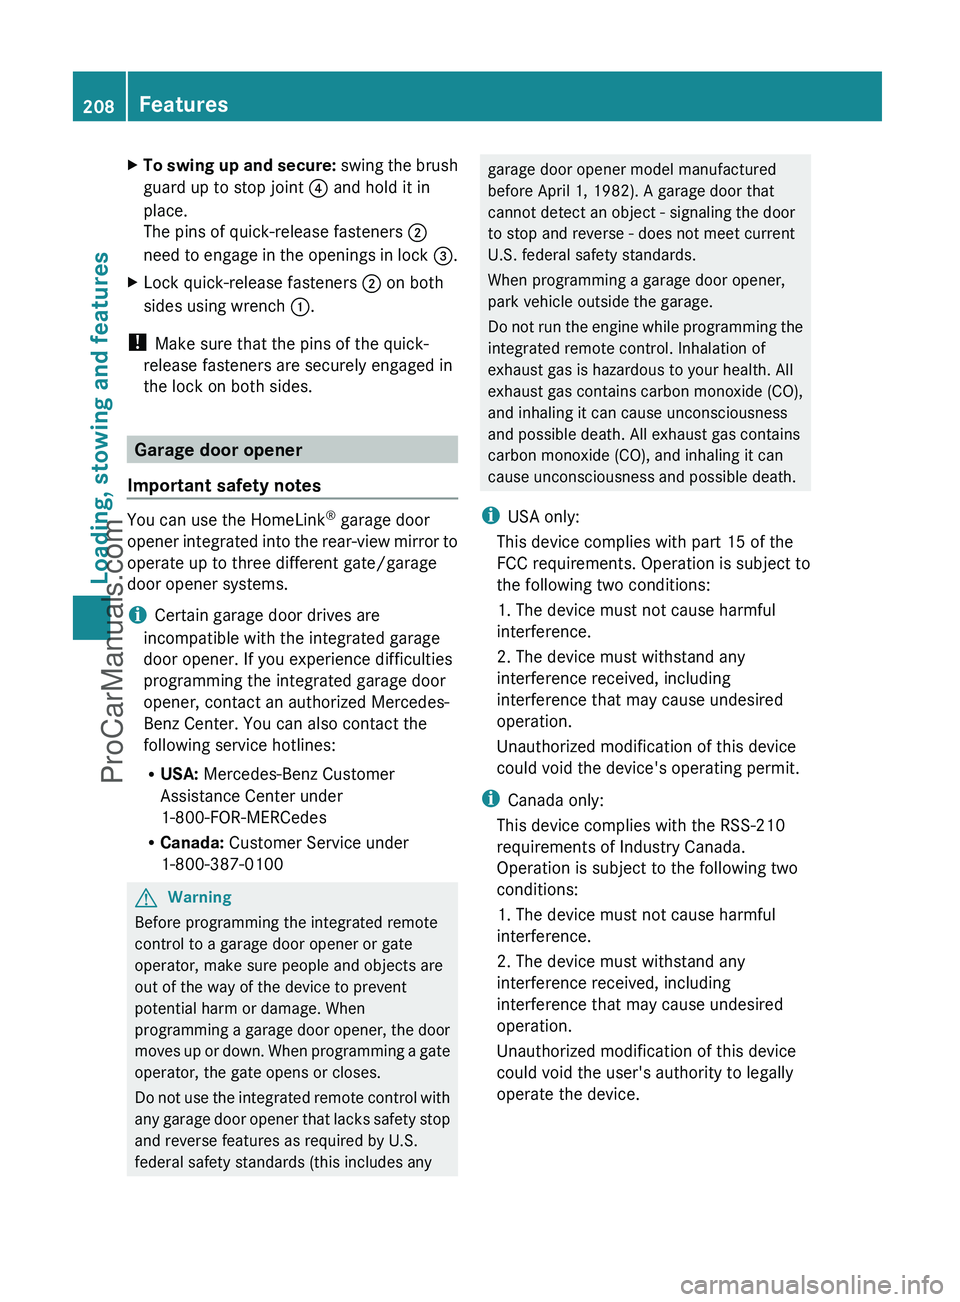
XTo swing up and secure: swing the brush
guard up to stop joint ? and hold it in
place.
The pins of quick-release fasteners ;
need to engage in the openings in lock =.XLock quick-release fasteners ; on both
sides using wrench :.
!
Make sure that the pins of the quick-
release fasteners are securely engaged in
the lock on both sides.
Garage door opener
Important safety notes
You can use the HomeLink ®
garage door
opener integrated into the rear-view mirror to
operate up to three different gate/garage
door opener systems.
i Certain garage door drives are
incompatible with the integrated garage
door opener. If you experience difficulties
programming the integrated garage door
opener, contact an authorized Mercedes-
Benz Center. You can also contact the
following service hotlines:
R USA: Mercedes-Benz Customer
Assistance Center under
1-800-FOR-MERCedes
R Canada: Customer Service under
1-800-387-0100
GWarning
Before programming the integrated remote
control to a garage door opener or gate
operator, make sure people and objects are
out of the way of the device to prevent
potential harm or damage. When
programming a garage door opener, the door
moves up or down. When programming a gate
operator, the gate opens or closes.
Do not use the integrated remote control with
any garage door opener that lacks safety stop
and reverse features as required by U.S.
federal safety standards (this includes any
garage door opener model manufactured
before April 1, 1982). A garage door that
cannot detect an object - signaling the door
to stop and reverse - does not meet current
U.S. federal safety standards.
When programming a garage door opener,
park vehicle outside the garage.
Do not run the engine while programming the
integrated remote control. Inhalation of
exhaust gas is hazardous to your health. All
exhaust gas contains carbon monoxide (CO),
and inhaling it can cause unconsciousness
and possible death. All exhaust gas contains
carbon monoxide (CO), and inhaling it can
cause unconsciousness and possible death.
i USA only:
This device complies with part 15 of the
FCC requirements. Operation is subject to
the following two conditions:
1. The device must not cause harmful
interference.
2. The device must withstand any
interference received, including
interference that may cause undesired
operation.
Unauthorized modification of this device
could void the device's operating permit.
i Canada only:
This device complies with the RSS-210
requirements of Industry Canada.
Operation is subject to the following two
conditions:
1. The device must not cause harmful
interference.
2. The device must withstand any
interference received, including
interference that may cause undesired
operation.
Unauthorized modification of this device
could void the user's authority to legally
operate the device.208FeaturesLoading, stowing and features
ProCarManuals.com
Page 211 of 288
Programming the remote control
Programming
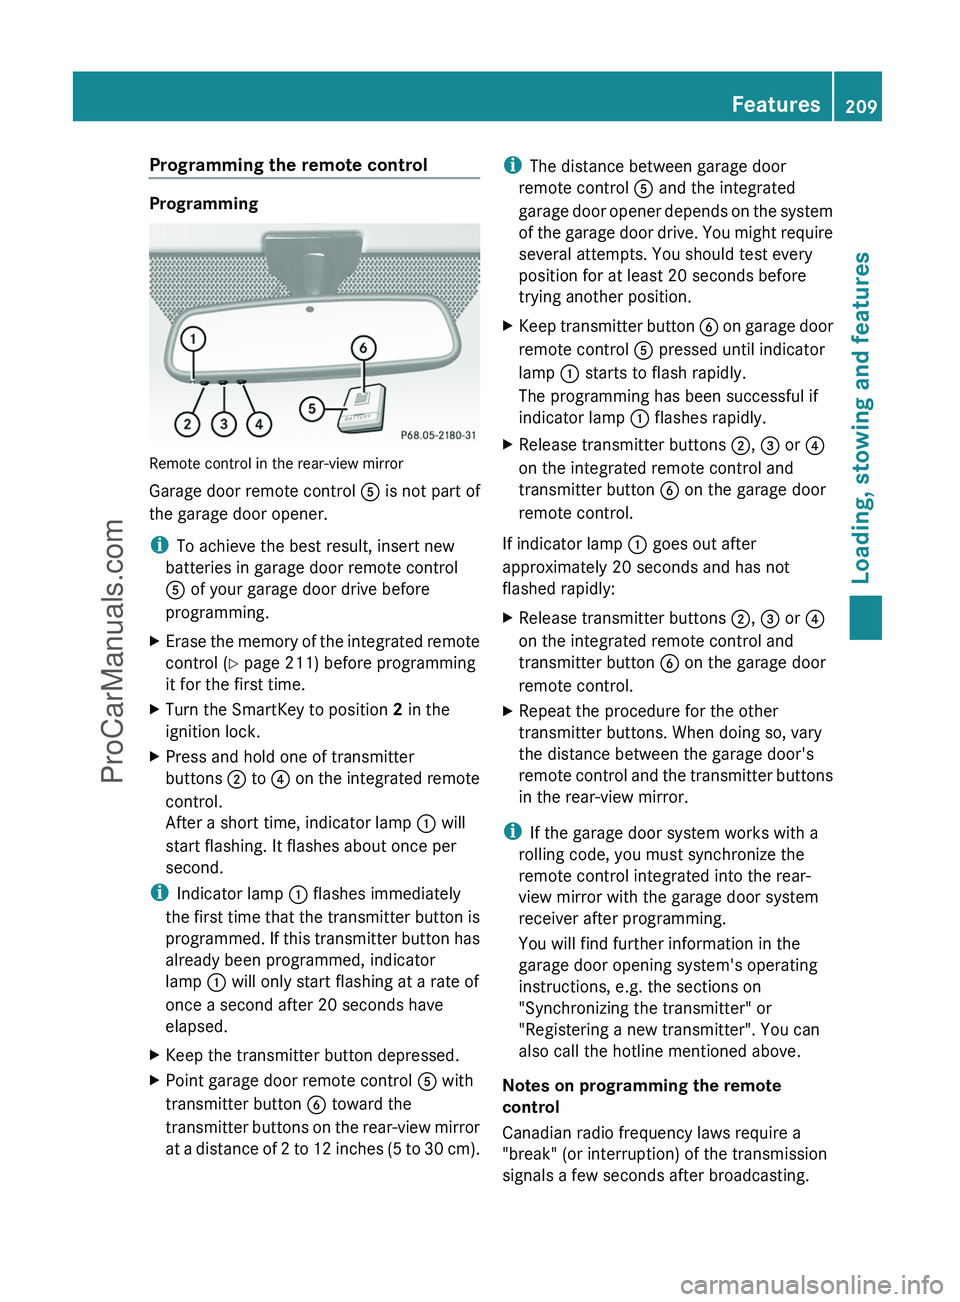
Remote control in the rear-view mirror
Garage door remote control A is not part of
the garage door opener.
i To achieve the best result, insert new
batteries in garage door remote control
A of your garage door drive before
programming.
XErase the memory of the integrated remote
control ( Y page 211) before programming
it for the first time.XTurn the SmartKey to position 2 in the
ignition lock.XPress and hold one of transmitter
buttons ; to ? on the integrated remote
control.
After a short time, indicator lamp : will
start flashing. It flashes about once per
second.
i Indicator lamp : flashes immediately
the first time that the transmitter button is
programmed. If this transmitter button has
already been programmed, indicator
lamp : will only start flashing at a rate of
once a second after 20 seconds have
elapsed.
XKeep the transmitter button depressed.XPoint garage door remote control A with
transmitter button B toward the
transmitter buttons on the rear-view mirror
at a distance of 2 to 12 inches (5 to 30 cm).i The distance between garage door
remote control A and the integrated
garage door opener depends on the system
of the garage door drive. You might require
several attempts. You should test every
position for at least 20 seconds before
trying another position.XKeep transmitter button B on garage door
remote control A pressed until indicator
lamp : starts to flash rapidly.
The programming has been successful if
indicator lamp : flashes rapidly.XRelease transmitter buttons ;, = or ?
on the integrated remote control and
transmitter button B on the garage door
remote control.
If indicator lamp : goes out after
approximately 20 seconds and has not
flashed rapidly:
XRelease transmitter buttons ;, = or ?
on the integrated remote control and
transmitter button B on the garage door
remote control.XRepeat the procedure for the other
transmitter buttons. When doing so, vary
the distance between the garage door's
remote control and the transmitter buttons
in the rear-view mirror.
i If the garage door system works with a
rolling code, you must synchronize the
remote control integrated into the rear-
view mirror with the garage door system
receiver after programming.
You will find further information in the
garage door opening system's operating
instructions, e.g. the sections on
"Synchronizing the transmitter" or
"Registering a new transmitter". You can
also call the hotline mentioned above.
Notes on programming the remote
control
Canadian radio frequency laws require a
"break" (or interruption) of the transmission
signals a few seconds after broadcasting.
Features209Loading, stowing and featuresZProCarManuals.com
Page 212 of 288
Therefore, these signals may not last long
enough for the integrated remote control to
recognize the signal during programming.
Comparable with Canadian law, some U.S.
garage door openers also have a built-in
"interruption".
If you live in Canada or have difficulties
programming the garage door opener
(regardless of where you live) when using the
programming steps (see above), proceed as
follows:XPress transmitter button ( ;, = or ?) and
hold it down during the following steps until
the setup has been completed
successfully.XAt the same time, press transmitter button
B of the garage door remote control for
two seconds, then release it for two
seconds, then press it again for two
seconds.XRepeat this sequence on transmitter
button B of the garage door remote
control until the frequency signal has been
saved.XIf the setup procedure is successful,
indicator lamp : flashes once slowly and
goes out after a few seconds.XContinue with the other programming
steps (see above).
Problems when programming
If you have problems when programming the
integrated remote control, please note the
following:
R check the transmitter frequency of garage
door remote control A (which can usually
be found on the rear of the remote control).
The integrated remote control is
compatible with devices that operate at
frequencies between 280 and 390 MHz.
R replace the batteries in garage door remote
control A. This increases the likelihood of
garage door remote control A sending a
strong and precise signal to the integrated
remote control on the rear-view mirror.
R when programming, hold garage door
remote control A at varying distances and
angles from the transmitter button which
you are programming. Try different angles
at a distance between 2 and 12 inches (5
to 30 cm) or the same angle at varying
distances.
R if there is another garage door remote
control for the same device, perform the
programming steps again using that garage
door opener. Before performing these
steps, make sure that new batteries have
been installed in the garage door remote
control.
R align the antenna cable of the garage door
opener unit. This can improve signal
reception/transmission.
Opening/closing the garage door
Once programmed, the integrated remote
control will assume the function of the garage
door system's remote control. Please also
read the operating instructions for the garage
door system.
XTurn the SmartKey to position 2 in the
ignition lock.XPress transmitter button ;, = or ? on
the integrated remote control in the rear-
view mirror that is programmed to operate
the garage door.
Garage door system with fixed code:
indicator lamp : lights up continuously.
Garage door system with rolling code:
indicator lamp : flashes briefly and then
lights up for approximately two seconds.
This is repeated for up to 20 seconds.
i The transmitter will transmit a signal for
as long as the transmitter button is being
pressed. The transmission will be halted
after a maximum of 20 seconds and
indicator lamp : will flash. Press the
transmitter button again, if necessary.
210FeaturesLoading, stowing and features
ProCarManuals.com