2011 MERCEDES-BENZ G-CLASS lock
[x] Cancel search: lockPage 216 of 288
Vehicle equipment
i This manual describes all the standard
and optional equipment of your vehicle
which was available at the time of
purchase. Country-specific differences are
possible. Please note that your vehicle may
not be equipped with all features
described. This also applies to safety-
relevant systems and functions.
Engine compartment
Hood
Opening the hood
GWarning
Do not pull the release lever while the vehicle
is in motion. Otherwise, the hood could be
forced open by passing air flow.
This could cause the hood to come loose and
injure you and/or others.
GWarning!
Do not open the hood when the engine is
overheated. You could be seriously injured.
Observe the coolant temperature gauge to
determine whether the engine may be
overheated. If you see flames or smoke
coming from the engine compartment, move
away from the vehicle. Wait until the engine
has cooled. If necessary, call the fire
department.
GWarning!
You could be injured when the hood is open –
even when the engine is turned off.
Parts of the engine can become very hot. To
prevent burns, let the engine cool completely
before touching any components on the
vehicle. Comply with all relevant safety
precautions.
GWarning
To help prevent personal injury, stay clear of
moving parts when the hood is open and the
engine is running.
The radiator fan may continue to run for
approximately 30 seconds or may even
restart after the engine has been turned off.
Stay clear of fan blades.
GWarning
The engine is equipped with a transistorized
ignition system. Because of the high voltage,
it is dangerous to touch any components
(ignition coils, spark plug sockets, diagnostic
socket) of the ignition system:
R with the engine running
R while starting the engine
R when the ignition is switched on and the
engine is turned manually
XMake sure that the windshield wipers are
switched off.GWarning
The windshield wipers and wiper linkage
could be set in motion.
When the hood is open, you or others could
be injured by the wiper linkage.
Make sure that the windshield wipers are
switched off and that the SmartKey has been
pulled out of the ignition lock before opening
the hood.
The release lever on the hood is in the footwell
on the left-hand side of the vehicle when
viewed in the direction of travel.
214Engine compartmentMaintenance and care
ProCarManuals.com
Page 218 of 288
XSlowly insert oil dipstick : into the
dipstick guide tube to the stop, and take it
out again.
The oil level is correct if the level is between
MIN mark = and MAX mark ;.XAdd oil if necessary.
Checking the oil level using the on-
board computer
On the G 55 AMG, the oil level can be checked
using the on-board computer.
When checking the oil level:
R park the vehicle on a level surface.
R the engine should be switched off for
approximately five minutes if the engine is
at normal operating temperature.
Xmake sure that the SmartKey is in position
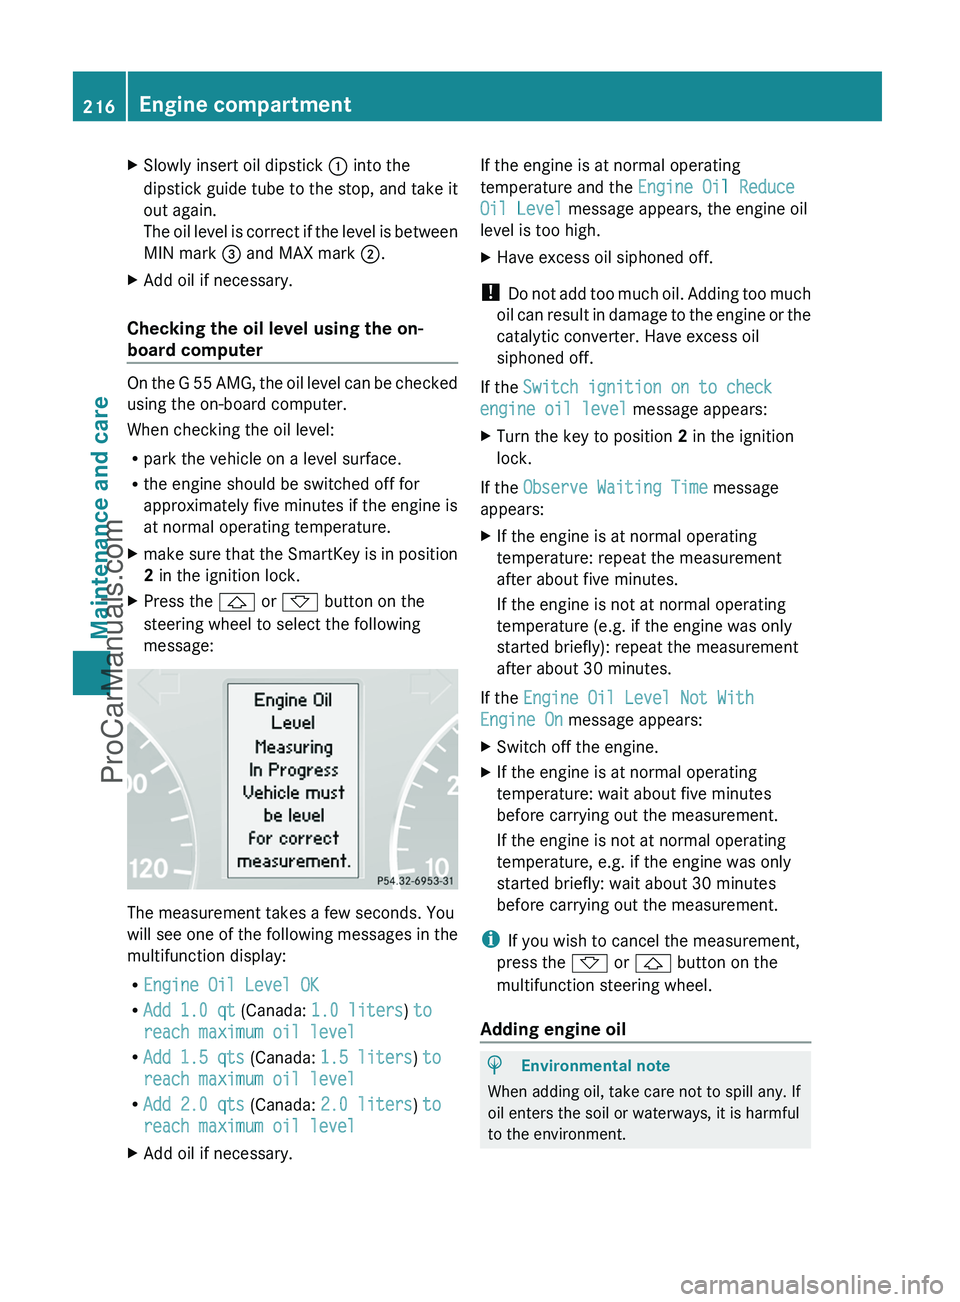
2 in the ignition lock.XPress the & or * button on the
steering wheel to select the following
message:
The measurement takes a few seconds. You
will see one of the following messages in the
multifunction display:
R Engine Oil Level OK
R Add 1.0 qt (Canada: 1.0 liters ) to
reach maximum oil level
R Add 1.5 qts (Canada: 1.5 liters ) to
reach maximum oil level
R Add 2.0 qts (Canada: 2.0 liters ) to
reach maximum oil level
XAdd oil if necessary.If the engine is at normal operating
temperature and the Engine Oil Reduce
Oil Level message appears, the engine oil
level is too high.XHave excess oil siphoned off.
! Do not add too much oil. Adding too much
oil can result in damage to the engine or the
catalytic converter. Have excess oil
siphoned off.
If the Switch ignition on to check
engine oil level message appears:
XTurn the key to position 2 in the ignition
lock.
If the Observe Waiting Time message
appears:
XIf the engine is at normal operating
temperature: repeat the measurement
after about five minutes.
If the engine is not at normal operating
temperature (e.g. if the engine was only
started briefly): repeat the measurement
after about 30 minutes.
If the Engine Oil Level Not With
Engine On message appears:
XSwitch off the engine.XIf the engine is at normal operating
temperature: wait about five minutes
before carrying out the measurement.
If the engine is not at normal operating
temperature, e.g. if the engine was only
started briefly: wait about 30 minutes
before carrying out the measurement.
i If you wish to cancel the measurement,
press the * or & button on the
multifunction steering wheel.
Adding engine oil
HEnvironmental note
When adding oil, take care not to spill any. If
oil enters the soil or waterways, it is harmful
to the environment.
216Engine compartmentMaintenance and care
ProCarManuals.com
Page 219 of 288
! Only use engine oils and oil filters which
have been approved for vehicles with a
service system. A list of the engine oils and
oil filters that have been tested and
approved according to the Mercedes-Benz
specifications for service products can be
found on the Internet at http://
www.mbusa.com (USA only). Further
information on tested and approved engine
oils and oil filters can be obtained from any
authorized Mercedes-Benz Center.
The following causes engine failure or
damage to the exhaust system:
Rusing engine oils and oil filters that are
not specifically approved for the service
system
Rreplacing the engine oil and oil filter after
having exceeded the interval for
replacement prescribed by the
maintenance system
Rusing engine oil additives
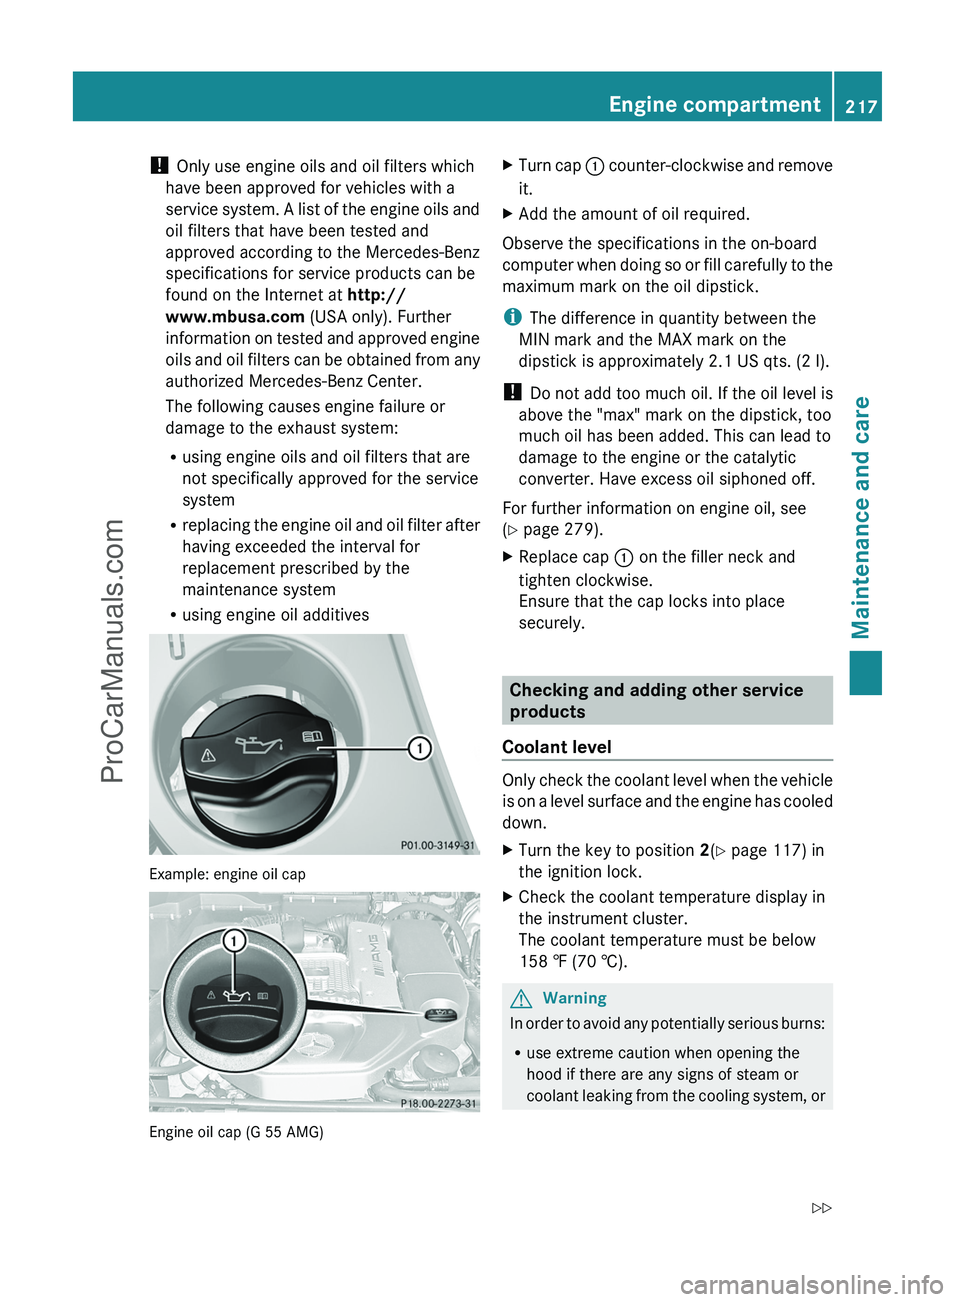
Example: engine oil cap
Engine oil cap (G 55 AMG)
XTurn cap : counter-clockwise and remove
it.
XAdd the amount of oil required.
Observe the specifications in the on-board
computer when doing so or fill carefully to the
maximum mark on the oil dipstick.
iThe difference in quantity between the
MIN mark and the MAX mark on the
dipstick is approximately 2.1 US qts. (2 l).
! Do not add too much oil. If the oil level is
above the "max" mark on the dipstick, too
much oil has been added. This can lead to
damage to the engine or the catalytic
converter. Have excess oil siphoned off.
For further information on engine oil, see
(Y page 279).
XReplace cap : on the filler neck and
tighten clockwise.
Ensure that the cap locks into place
securely.
Checking and adding other service
products
Coolant level
Only check the coolant level when the vehicle
is on a level surface and the engine has cooled
down.
XTurn the key to position 2(Y page 117) in
the ignition lock.
XCheck the coolant temperature display in
the instrument cluster.
The coolant temperature must be below
158 ‡ (70 †).
GWarning
In order to avoid any potentially serious burns:
Ruse extreme caution when opening the
hood if there are any signs of steam or
coolant leaking from the cooling system, or
Engine compartment217Maintenance and careZProCarManuals.com
Page 220 of 288

if the coolant temperature display indicates
that the coolant is overheated.
R do not remove the pressure cap on the
coolant reservoir if the coolant temperature
is above 158 ‡ (70 †). Allow the engine to
cool down before removing the cap. The
coolant reservoir contains hot fluid and is
under pressure.
R using a rag, slowly turn the cap
approximately 1
/ 2 turn to relieve excess
pressure. If opened immediately, scalding
hot fluid and steam will be blown out under
pressure.
R do not spill antifreeze on hot engine parts.
Antifreeze contains ethylene glycol which
may burn if it comes into contact with hot
engine parts.
The coolant expansion tank is located in the
engine compartment on the right when
viewed in the direction of travel.XSlowly turn cap : half a turn counter-
clockwise and allow excess pressure to
escape.XTurn cap : further counter-clockwise and
remove it.
If the coolant is at the level of marker bar
= in the filler neck when cold, there is
enough coolant in coolant expansion
tank ;.
If the coolant is approximately 0.6 in
(1.5 cm) above marker bar = in the filler
neck when warm, there is enough coolant
in coolant expansion tank ;.XIf necessary, add coolant that has been
tested and approved by Mercedes-Benz.XReplace cap : and turn it clockwise as far
as it will go.
For further information on coolant, see
( Y page 280).
Windshield washer system and
headlamp cleaning system
The washer fluid reservoir is used for both the
windshield washer system and the headlamp
cleaning system.
GWarning
Washer solvent/antifreeze is highly
flammable. Do not spill washer solvent/
antifreeze on hot engine parts, because it may
ignite and burn. You could be seriously
burned.
! At temperatures below freezing, always
fill the washer fluid container with a mix of
windshield washer concentrate and
antifreeze additive. There is otherwise a
risk of damaging the windshield washer
system/headlamp cleaning system.
! Only use washer fluid concentrate which
is suitable for plastic lenses. Unsuitable
washer fluid concentrate could damage the
plastic lenses of the headlamps.
! Do not add distilled or de-ionized water to
the washer fluid container. Otherwise, the
level sensor may be damaged.
i Add windshield washer concentrate, e.g.
MB SummerFit, to the washer fluid all year
round.
218Engine compartmentMaintenance and care
ProCarManuals.com
Page 223 of 288
GWarning
Many cleaning products can be hazardous.
Some are poisonous, others are flammable.
Always follow the instructions on the
particular container. Always open your
vehicle's doors or windows when cleaning the
inside.
Never use fluids or solvents that are not
designed for cleaning your vehicle.
Always lock away cleaning products and keep
them out of reach of children.
! For cleaning your vehicle, do not use any
of the following:
R dry, rough or hard cloths
R abrasive cleaning agents
R solvents
R cleaning agents containing solvents
Do not scrub.
Do not touch the surfaces or protective
films with hard objects, e.g. a ring or ice
scraper. You could otherwise scratch or
damage the surfaces and protective film.
HEnvironmental note
Dispose of empty packaging and cleaning
cloths in an environmentally responsible
manner.
! Do not park up the vehicle for an extended
period straight after cleaning it, particularly
after having cleaned the wheels with wheel
cleaner. Wheel cleaners could cause
increased corrosion of the brake discs and
brake pads/linings. For this reason, you
should drive for a few minutes after
cleaning. Braking heats the brake discs and
the brake pads/linings, thus drying them.
The vehicle can then be parked up.
Care of the exterior
Automatic car washGWarning
Braking efficiency is reduced after washing
the vehicle. This could cause an accident. For
this reason, you must drive particularly
carefully after washing the vehicle until the
brakes have dried.
You can wash the vehicle in an automatic car
wash from the very start.
! Never clean your vehicle in a Touchless
Automatic Car Wash as these use special
cleaning agents. These cleaning agents can
damage the paintwork or plastic parts.
If the vehicle is very dirty, pre-wash it before
cleaning it in an automatic car wash.
! Make sure that the automatic car wash is
suitable for the size of the vehicle. Fold in
the exterior mirrors before the vehicle is
washed. The exterior mirrors could
otherwise be damaged.
! In car washes with a towing mechanism,
make sure that AUTOTRONIC is in
transmission position N, otherwise the
vehicle could be damaged.
! Make sure that:
R the side windows and sliding sunroof are
closed completely.
R the blower for the ventilation/heating is
switched off (airflow control is turned to
position 0/the à and Á buttons
are switched off).
R the windshield wiper switch is at position
0 .
The vehicle could otherwise be damaged.
After using an automatic car wash, wipe off
wax from the windshield and the wiper
blades. This will prevent smears and reduce
wiping noises caused by residue on the
windshield.
Care221Maintenance and careZProCarManuals.com
Page 225 of 288
! Do not affix:
R stickers
R films
R magnetic plates or similar items
to painted surfaces. You could otherwise
damage the paintwork.
If water no longer forms "beads" on the paint
surface, use the paint care products
recommended and approved by Mercedes-
Benz. This is the case approximately every
three to five months, depending on the
climate conditions and the care product used.
If dirt has penetrated the paint surface or the
paint has become dull, the paint cleaner
recommended and approved by Mercedes-
Benz should be used.
Do not use these care products in the sun or
on the hood while the hood is hot.XUse a suitable touch-up stick, e.g. MB
Touch-Up Stick, to correct smaller areas of
paint damage quickly and provisionally.
Care and treatment of matte paintwork
If your vehicle has a clear matte finish,
observe the following instructions in order to
avoid damage to the paintwork due to
incorrect care.
These notes also apply to light alloy wheels
with a clear matte finish.
! Never polish the vehicle or the light alloy
wheels. Polishing causes the finish to
shine.
! Never use paint cleaner, buffing or
polishing products, or gloss preserver, e.g.
wax. These products are only suitable for
high-gloss surfaces. Their use on vehicles
with matte finish leads to considerable
surface damage (shiny, spotted areas).
Always have paintwork repairs performed
at a qualified specialist workshop, e.g. an
authorized Mercedes-Benz Center.
! Do not use wash programs with a hot wax
treatment under any circumstances.
i Use only insect remover and car shampoo
from the range of recommended and
approved Mercedes-Benz care products.
Cleaning the windowsGWarning
Switch off the windshield wipers and remove
the SmartKey from the ignition lock before
cleaning the windshield or the wiper blades.
The windshield wipers could otherwise move
and injure you.
XClean the inside and outside of the
windows with a damp cloth and a cleaning
agent that is recommended and approved
by Mercedes-Benz.
! Do not use dry cloths, abrasive products,
solvents or cleaning agents containing
solvents to clean the inside of the windows.
Do not touch the insides of the windows
with hard objects, e.g. an ice scraper or
ring. There is otherwise a risk of damaging
the windows.
! Clean the water drainage channels of the
windshield and the rear window at regular
intervals. Deposits such as leaves, petals
and pollen may under certain
circumstances prevent water from draining
away. This can lead to corrosion damage
and damage to electronic components.
Cleaning the wiper blades
GWarning
Switch off the windshield wipers and remove
the SmartKey from the ignition lock before
cleaning the windshield or the wiper blades.
The windshield wipers could otherwise move
and injure you.
! Do not pull the wiper blade. Otherwise,
the wiper blade could be damaged.
! Do not clean wiper blades too often and
do not rub them too hard. Otherwise, the
Care223Maintenance and careZProCarManuals.com
Page 231 of 288
After an accidentProblemPossible causes/consequences and M SolutionsFuel is leaking from the
vehicle.GRisk of explosion or fire
The fuel line or the fuel tank is faulty.
XImmediately turn the SmartKey to position 0 ( Y page 117) in the
ignition lock and remove it.XDo not restart the engine under any circumstances.XConsult a qualified specialist workshop.You are unable to
determine the extent of
the damage.XConsult a qualified specialist workshop.You cannot detect any
damage.XStart the engine as normal.The NECK-PRO head
restraints on the
driver's and front-
passenger seats have
been triggered.Your vehicle has been involved in a rear-end collision.XReset the NECK-PRO head restraints ( Y page 43).Where will I find...?
First-aid kit
i Check the expiration date on the first-aid
kit at least once a year. Replace the
contents if necessary, and replace missing
contents.
The first-aid kit is located in the stowage
compartment in the front-passenger door.
XRemove first-aid kit : from the stowage
space.
Vehicle tool kit
General notes
i Vehicles are not equipped with the tools
needed to change a wheel when they leave
the factory, e.g. jack or lug wrench. Some
tools for changing a wheel are specific to
the vehicle. To obtain tools approved for
your vehicle, visit a qualified specialist
workshop, e.g. an authorized Mercedes-
Benz Center.
Where will I find...?229Roadside AssistanceZProCarManuals.com
Page 233 of 288
Removing the cover
Stainless-steel spare hub cap
XRemove the screwdriver from the vehicle
tool kit ( Y page 229).XOpen the lock on cover ring : with
screwdriver = or a similar tool.XFold tab ; down.XPull cover ring : apart and remove it.XPull off cover panel ?.
i
When refitting cover panel ?, make sure
that retainer B engages in recess A.
Removing the spare wheelGWarning!
Make sure no one is injured when removing
the spare wheel.
Grip wheel from the sides.
Keep hands from beneath the wheel.
XRemove wheel nuts :.XRemove the spare wheel.
Mounting the wheel
After changing a wheel:
XRepair or replace the damaged wheel as
soon as possible and secure the spare
wheel in place again.XSecure the damaged wheel on the spare
wheel bracket with wheel nuts :. When
doing so, make sure that the wheel cannot
come loose.XWhen refitting cover panel ?, make sure
that retainer B engages in recess A.XMake sure that tab ; is below when
refitting cover ring :.XFor safety reasons, regularly check to
ensure that the wheel is securely fastened.Where will I find...?231Roadside AssistanceZProCarManuals.com